Recovery Partition After Upgrading to Windows 10 [2026]
After upgrading Windows 7 or 8 to Windows 10, you find an extra recovery partition in Disk Management. What's it for? Can you delete it? This article will tell you all about recovery partition.
By Irene / Updated on December 29, 2025
What Is Recovery Partition?
Recovery partition is a small partition on your hard drive that can help you restore your Windows or troubleshoot system issues. There are two kinds of recovery partitions you may see in Windows 10/8/7.
Windows recovery partition
When installing a Windows operating system (OS) on a hard drive, and if you use Windows Setup to create new partition on an MBR disk, Windows will create a system reserved partition, and if it is a GPT disk, then Windows will create a recovery partition and an EFI system partition without drive letter. The recovery partition on Windows 10 consumes about 450MB, Windows 8/8.1 200MB, and Windows 7 100MB.
This recovery partition is to hold the Windows Recovery Environment (WinRE), which can be explored if you manually assign a drive letter to it. If you delete this partition, you won’t be able to use Windows Recovery options. If you create Windows 10 recovery disk, Windows will give you an option to remove the recovery partition. With the recovery drive, you can still use Windows recovery options. Otherwise, if you install Windows on a hard drive containing multiple partitions, Windows will save the WinRE in a folder named Recovery in the root directory of your system drive (C: drive) without leaving a recovery partition.
OEM recovery partition
Apart from the recovery partition of Windows, there may be another recovery partition created by the computer manufacturer like Lenovo and Dell that has made their computer comes with an OEM recovery partition consuming about 7 to 20 GB, which contains the WinRE and their factory installation files.
On some computers, the WinRE and the factory installation are separately stored on two partitions, so you may see two OEM partitions on your computer. This OEM partition allows you to press a specified key to boot into Recovery Environment, so you can recover your OS to factory setting without a Windows installation disc. If you have a copy of Windows installation, you can delete this OEM partition to free up more disk space.
Why An Extra Recovery Partition Created DuringWindows Upgrade?
Every time when you upgrade Windows to the next version, the upgrade program will create a recovery partition if it detects that there is no sufficient space on your recovery partition (GPT disk) or system reserved partition (MBR disk). There is no wonder that you have many recovery partitions after upgrading to Windows 10. If you don’t want Windows to create another recovery partition, you can increase the size of recovery partition or system reserved partition before upgrading to Windows 10.
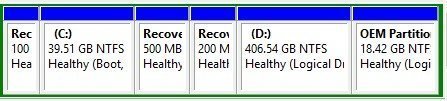
According to Microsoft, the previous Windows version recovery partition will be nonfunctional, so you can delete the previous recovery partition to free up some disk space. As you may know that Windows can only shrink a partition from its right side, so you can tell which recovery partition was newly created by upgrading to Windows 10. For example, as the screenshot below, the 100MB recovery partition was created when installing Windows 7, the 200MB recovery partition was created when upgrading Windows 7 to Windows 8, the 500MB recovery partition was created when upgrading Windows 8 to Windows 10, and the OEM recovery partition created by PC manufacturer before shipping.
As you see the new created Windows recovery partition stands in the way of extending the system partition. If you do not want to delete the recovery partition, you can move Windows 10 recovery partition without data loss.
Can I Delete Recovery Partition in Windows 10?
Can I delete recovery partition when installing Windows 10? In fact, You cannot delete a recovery partition with Windows 10 Disk Management for it has crucial files, but you can use diskpart.exe to delete recovery partition. However, you still cannot extend the remaining partition with the newly created unallocated space if the recovery partition appears before the C: drive. Hence, you need third-party partition software to do this job - AOMEI Partition Assistant, a free partition software.
This tool can break the limitations of Windows built-in tool and it can delete the recovery partition and extend a partition as long as there is unallocated space on the disk. With a simple interface, even if you are a newcomer, you can easily manage and delete your recovery partition.
Tips: If it is a recovery partition created during Windows upgrade or installation, create a bootable AOMEI Partition Assistant USB drive.
Step 1. Install and launch it.
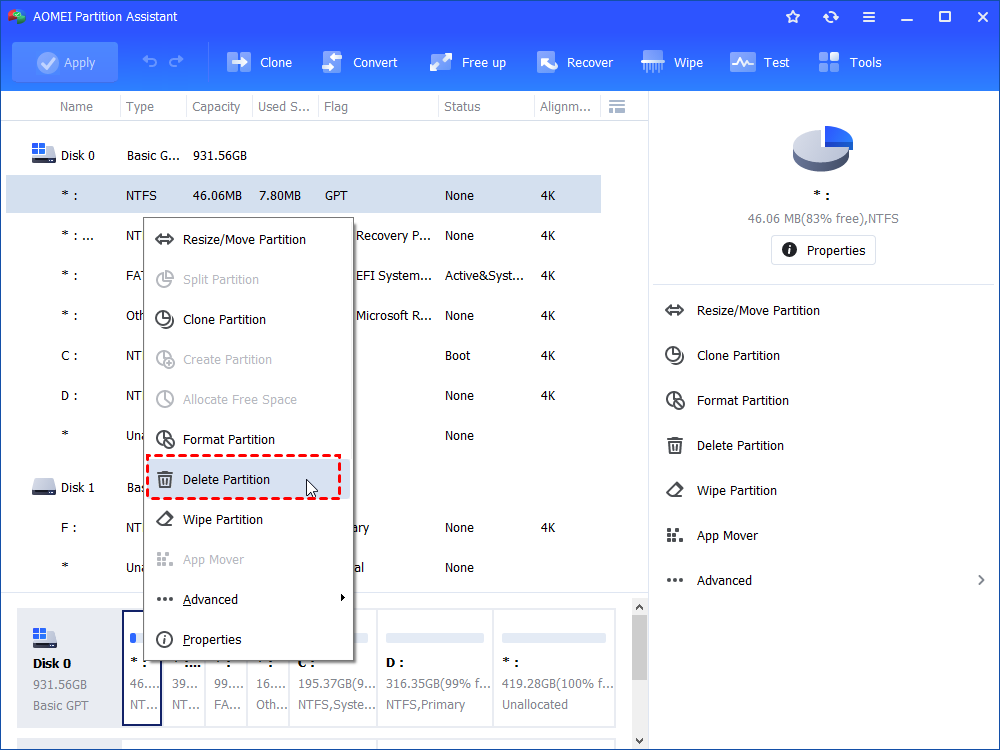
Step 2. Right-click the recovery partition you want to delete and select "Delete Partition". Then you can see the recovery partition becomes an unallocated space. Actually, no changes will be made until you confirm and click Apply.
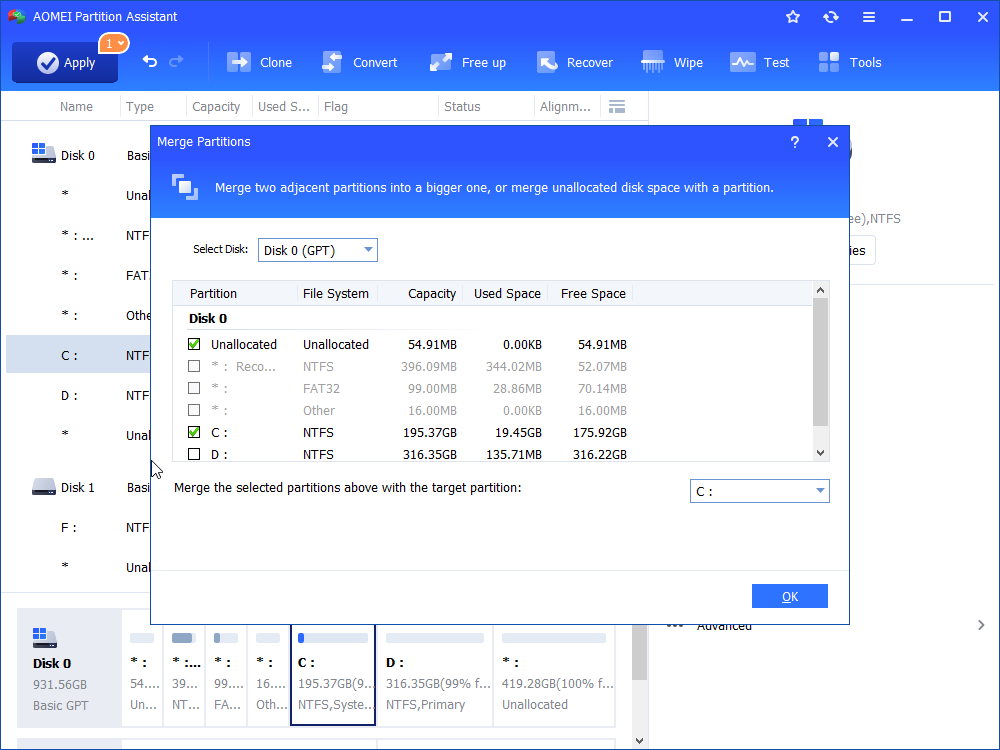
Step 3. Click "Advanced" > "Merge Partitions". In the pop-out window, check the unallocated space and the partition you want to extend.
Step 4. Check the pending operations and click "Apply" and "Proceed" to save the changes.
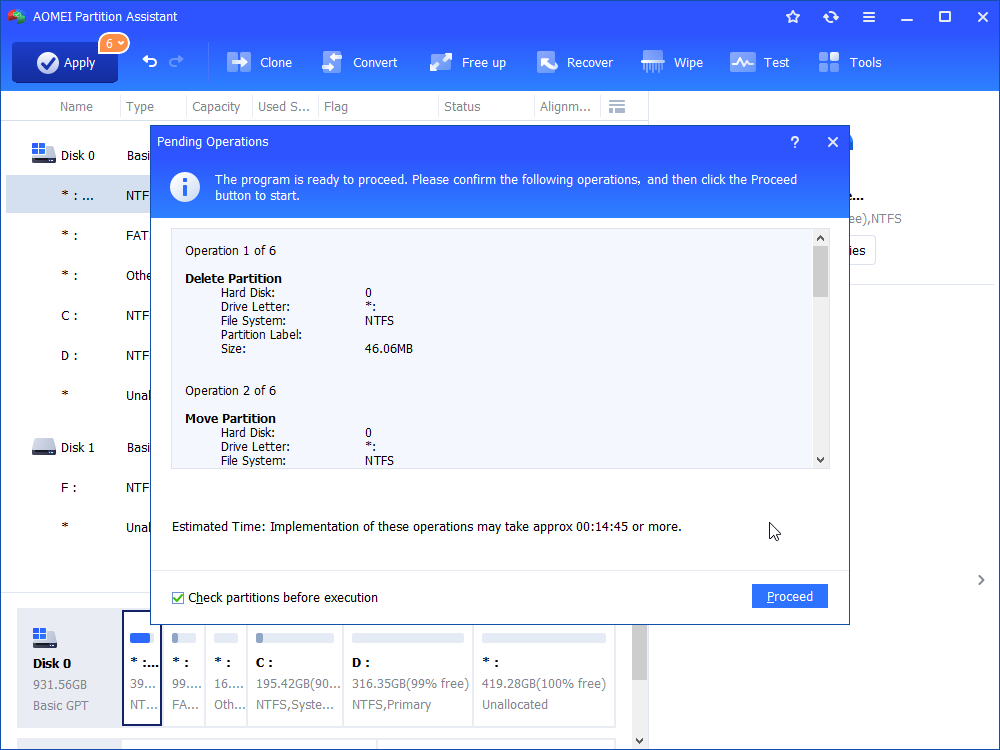
This operation will complete under AOMEI PreOS mode, so do not panic when your computer reboot.
Bonus Tips to Manage Recovery Partition Better
In this part, we will continue to provide more information and guidelines about recovery partition, including how to restore the Windows recovery partition after delele it, how to create recovery partition, and how to Restore Windows from Recovery Partition. After that, you will get a more comprehensive understanding of recovery partition on Windows and you will also know how to use it.
Guide 1. How to Restore Windows Recovery Partition
When you need to restore Windows to factory settings, you may regret deleting the recovery partition. How do I restore a recovery partition? Don't worry! AOMEI Partition Assistant provides a Partition Recovery function.
As a good disk solution, it can guide users to easily recover partitions lost due to wrong deletion or disk cleanup. With AOMEI Partition Pro, you can protect your data better:
Step 1. Find the lost partition in Disk Management. Install and open AOMEI Partition Assistant Professional.
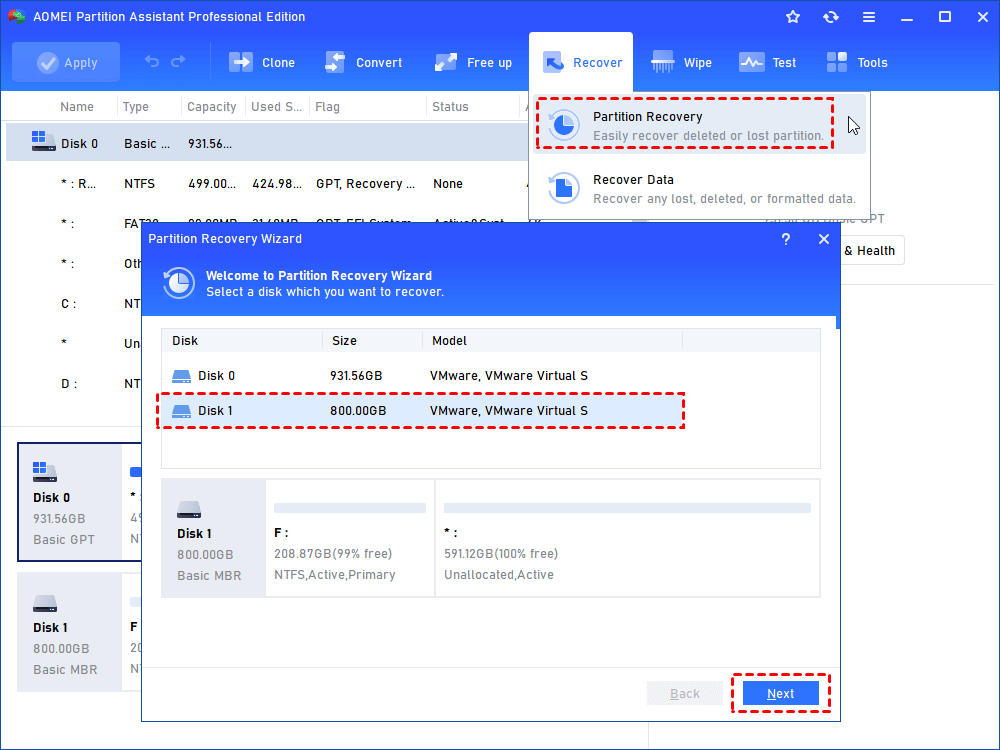
Step 2. Go to Recover > Partition Recovery on the main interface. When you get into the partition recovery wizard, select a disk that you want to recover. Click Next.
Step 3. Select Fast Search. It is recommended that you select this option the first time as it is faster than Full Search. If you are unable to recover the lost partition using Fast Search then I recommend you try the Full Search option.

Step 4. Select the lost partition and click Proceed.

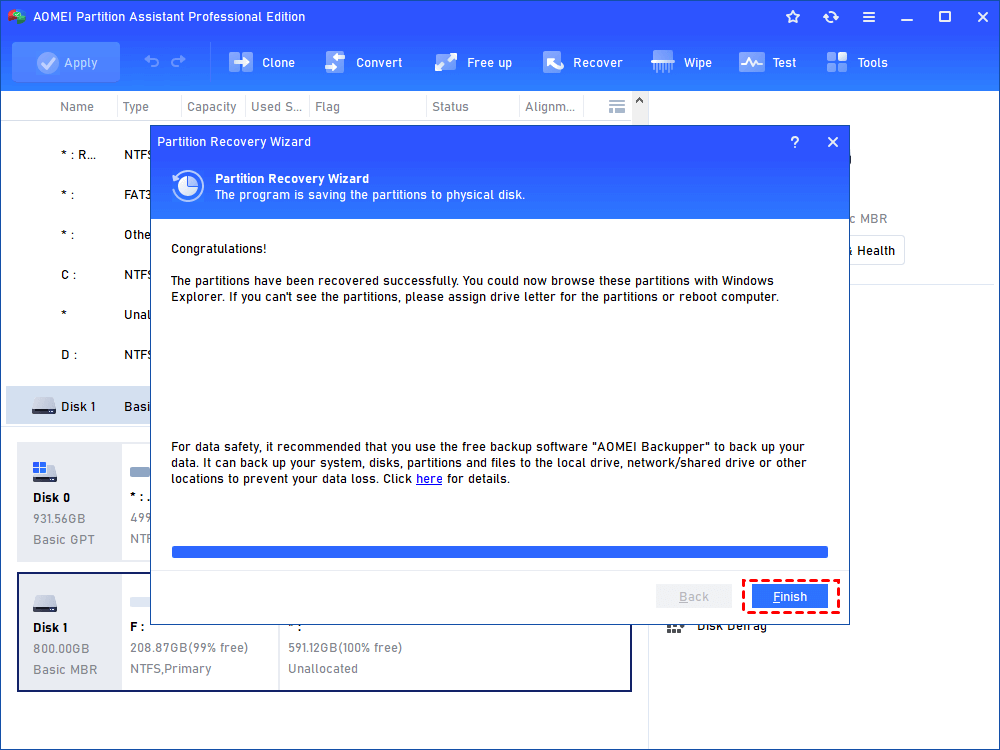
Step 5. Click Finish to exit this window after you see the congratulations message.
Guide 2. How to Create A Recovery Partition?
Many users have met the problem that OEM partition won’t work after upgrading to Windows 10. What to do when you want to use recovery options only to find you have mistakenly deleted the recovery partition? You can use AOMEI OneKey Recovery to create a recovery partition on Windows 10 to backup and restore your current system including all the programs installed on C: drive. It also allows you to press a specified key “F1” or “A” to boot into AOMEI OneKey Recovery environment when your computer starts.
After creating the recovery partition, you can also keep the system backup image files in other locations besides the recovery partition, which means you can keep many system backups at the same time. When system fails to work, you can just press the Specified key to boot into AOMEI OneKey Recovery and select the system backup to restore system.
The recovery partition after upgrading to Windows 10 won’t consume much space on your hard drive, so it is recommended to leave it be. If you really want to get rid of recovery partition, backup essential files before deleting.
Guide 3. Restore Windows from Recovery Partition
Do I really need a recovery partition? It depends on the state of your computer and your needs. If your computer is not running properly and keeps issuing error messages, or you just want to reset it to the default state, you can recover Windows 10 from a recovery partition.
Step 1. To begin, navigate to the Windows 10 Start menu and select "Settings." In the subsequent pop-up window, enter "reset" to select "Reset this PC."
Step 2. The second step is to navigate to the UPDATE & SECURITY section and select the RECOVERY option. From there, click on the "Get Started" button.
Step 3. This step allows you to select the desired recovery method: to keep your files or to remove everything. The choice of method is at your discretion, based on your specific requirements. Once the decision is made, the reset process will commence.

