How to Access GPT Protective Partition without Losing Data
When a GPT Protective Partition appears in Disk Management, the drive becomes inaccessible, and its data cannot be opened or read. This article explains the underlying causes of the issue and provides effective solutions to help you restore access to the disk.
By Hedy / Updated on January 16, 2026
Seeing your hard drive suddenly marked as a GPT Protective Partition can feel like hitting a locked door with no key. The disk shows up. The capacity looks wrong. And Windows refuses to let you open it. Panic kicks in fast. The good news? In most cases, your data is still right where it belongs. You just need the right approach to access it safely.
Let’s break this down step by step and walk through how to access a GPT protective partition without losing data—no guesswork, no unnecessary formatting, and no heart-stopping mistakes.
What is a GPT protective partition?
A GPT protective partition is a disk or partition safeguarded by the GUID Partition Table (GPT). When this status appears, the partition becomes locked in Windows Disk Management, preventing normal operations. The disk may display as Healthy (GPT Protective Partition), yet it cannot be opened or managed.
In this state, common actions such as creating partitions, formatting, deleting volumes, or accessing stored files are all restricted. The issue may affect a single partition or the entire disk.
Several factors can trigger this condition. One or more of the following is usually responsible:
◉ Unsupported Windows version: Some older Windows systems, such as Windows XP, do not support GPT disks. When a GPT drive is connected, Windows marks it as a protective partition to prevent misoperation.
◉ GPT disk structure errors: Corrupted partition tables or disk errors can force Windows to apply protective status to avoid further damage.
◉ Manually created protective partitions: GPT protective partitions are sometimes intentionally created, especially on servers. They help prevent unauthorized access, protect sensitive data, or provide redundancy. Some personal users also apply this setup to overcome partition size limits or bypass traditional disk restrictions.
How to access GPT protective partition and restore data
When a GPT disk switches to a protective state, the partition becomes locked down. Files are inaccessible. Deleting or formatting the partition is no longer an option.
Before attempting any removal or repair, data protection should come first. Recovering existing files in advance helps prevent permanent loss during the process.
PartitionAssistant Recovery offers a practical solution. If the disk is visible in Windows Disk Management, the software can detect the GPT protective partition, perform a deep scan, and retrieve recoverable data efficiently.
Use the steps below to access and restore files from the GPT protective partition safely.
Step 1. Install PartitionAssistant Recovery and launch it; then choose the partition or disk where your files were saved.

Step 2. Scan your disk for the lost files. It has two modes, Quick Scan and Deep Scan, that allow you to search for lost data thoroughly.
Step 3. Once the scan is complete, all missing files will be displayed. Select the files you want to retrieve and click the Recover option.
Step 4. Choose a location to save the recovered files and wait for the process to finish.
How to remove and clear the "GPT protective partition" error
This method works across multiple Windows versions, including Windows 11, 10, 8, 7 and Windows Server editions such as Windows Server 2003.
Industry professionals and technical communities widely recognize the DiskPart command-line tool as the fastest and most effective way to remove a GPT protective partition. It directly cleans the disk structure, eliminating the protection status.
Step 1. Type cmd in the search box, press Enter, and run Command Prompt as administrator.
Step 2. In the Command Prompt window, enter diskpart.
Step 3. Type list disk to display all available disks.
Step 4. Enter select disk x, replacing x with the number of the disk showing the GPT protective partition.
Step 5. Type clean all to erase the partition information.
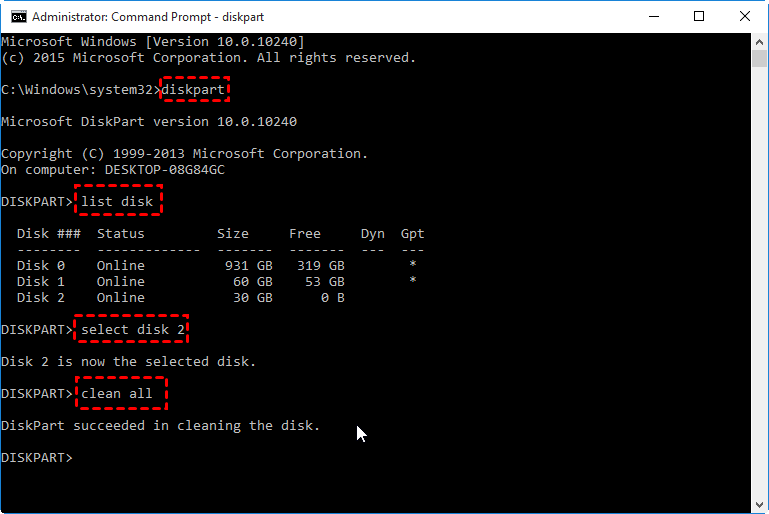
Step 6. Enter exit to close DiskPart and Command Prompt.
After completing these steps, the GPT protective partition will be successfully removed. You can then proceed to convert the disk to MBR or create new partitions as needed.
How to convert GPT to MBR after removing GPT protective partition error
Once the GPT protective partition is removed, the disk typically appears as Unknown, Not Initialized, and Unallocated. At this stage, Windows cannot recognize or use the drive. Initializing the disk or converting it to MBR will restore normal access.
Below are three proven solutions. They are listed from simplest to more advanced, allowing you to choose the option that best fits your comfort level.
Method 1. Convert GPT to MBR using AOMEI Partition Assistant
A third-party partition manager is often the easiest choice, especially for users who prefer a guided interface. AOMEI Partition Assistant streamlines the entire process and minimizes the risk of operational errors.
The tool offers a secure way to resolve GPT protective partition issues on supported Windows systems. It also allows conversion from GPT to MBR on healthy disks with just a few clicks, without affecting existing data. Follow the on-screen instructions to complete the conversion smoothly.
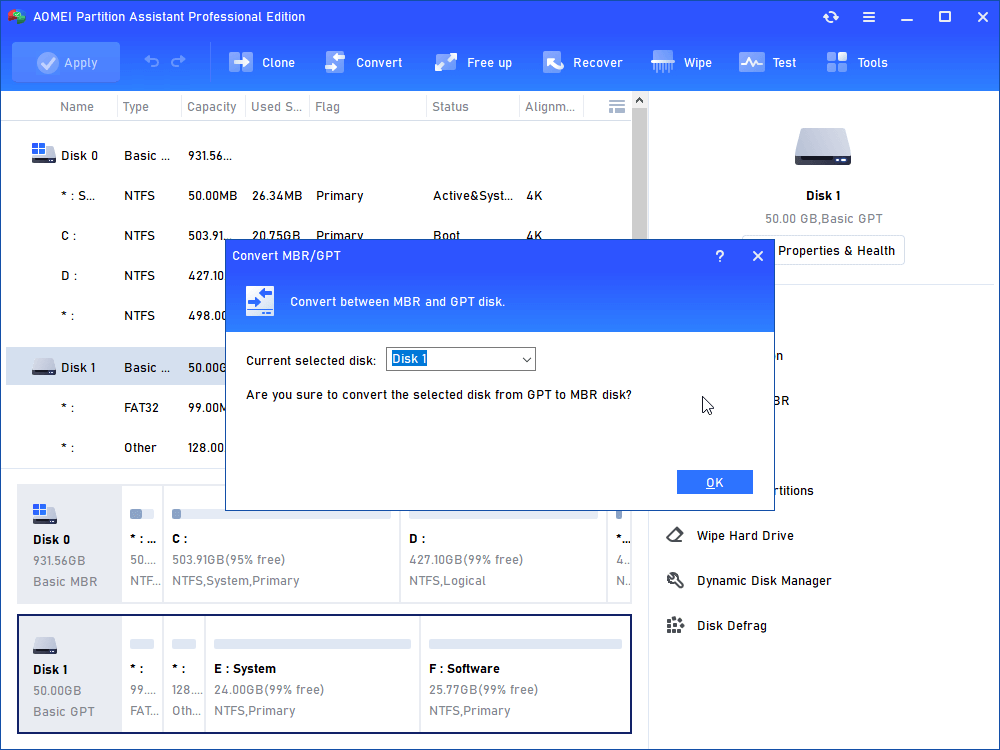
Step 1. Install and launch AOMEI Partition Assistant. Click the disk you want to convert, and select Convert to MBR from the right column.

Step 2. Confirm that you want to proceed by clicking OK.
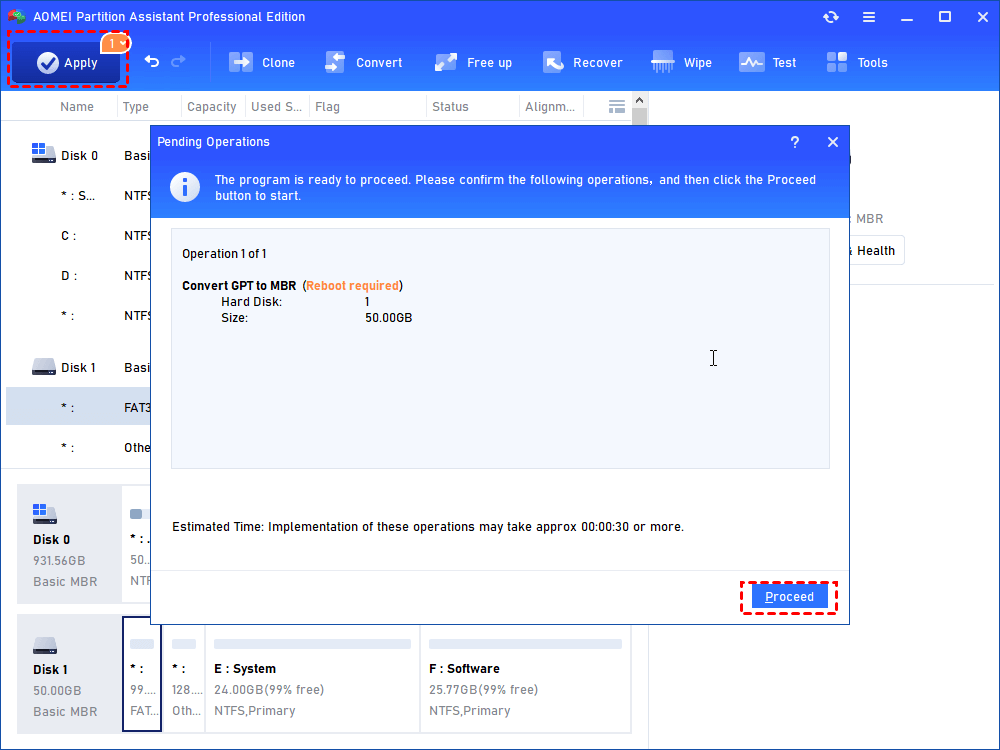
Step 3. Preview the pending operation under ‘Pending Operations’, if you want to proceed, click Apply.
Method 2. Initialize and convert GPT to MBR using Disk Management
Disk Managementis a built-in Windows utility that provides a free and reliable way to initialize and convert disks.
Step 1. Right-click This PC or My Computer, select Manage, then open Disk Management.
Step 2. Locate the unallocated disk, right-click it, and choose Initialize Disk.
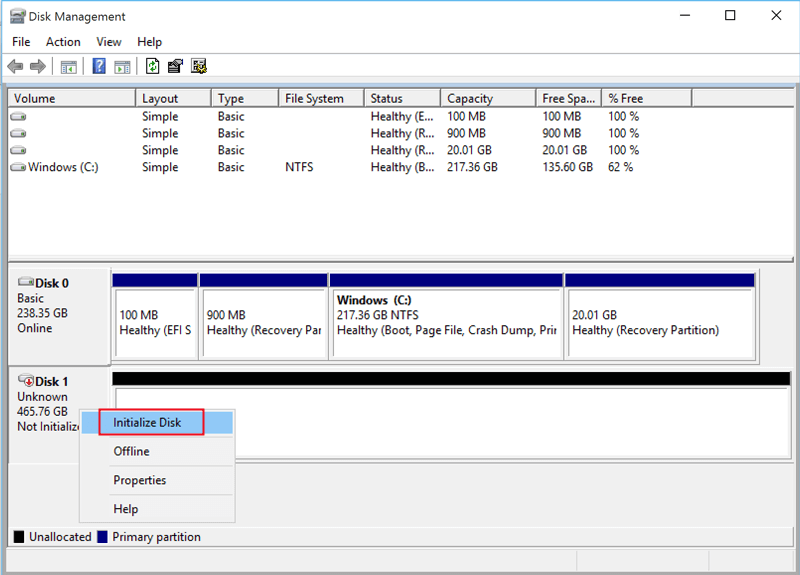
Step 3. In the dialog box, select the target disk and choose MBR as the partition style.
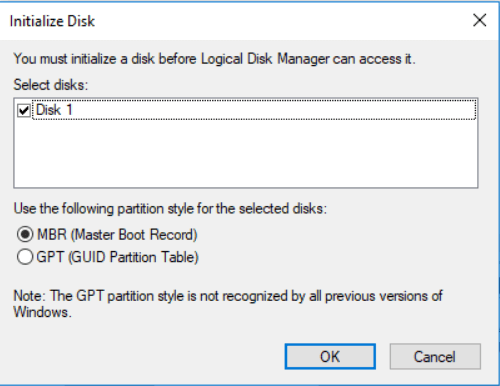
Step 4. Confirm to complete the initialization.
Step 5. Once finished, the disk will be ready for partition creation and use.
Method 3. Convert GPT to MBR using DiskPart command
DiskPart is a powerful command-line tool and should be used with caution. This method removes all partitions and data on the disk.
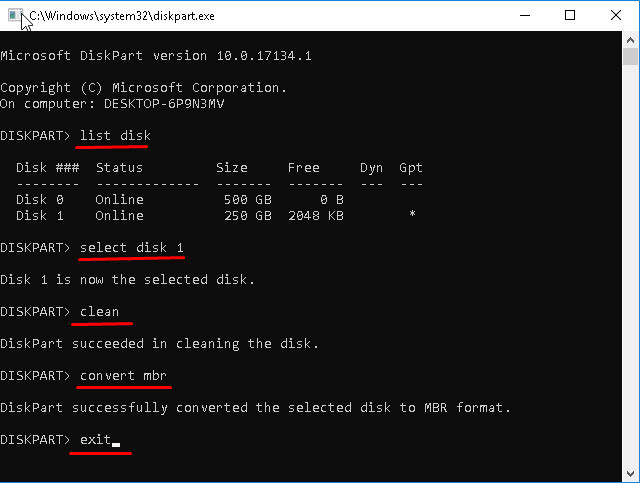
Step 1. Open Command Prompt as administrator and type diskpart, then press Enter.
Step 2. Enter the following commands one by one, pressing Enter after each line:
list disk
select disk 1(Replace 1 with the correct disk number)
clean
convert mbr
Type exit once the conversion is complete.
After the process finishes, the disk will be converted to MBR and ready for reconfiguration.
Conclusion
This page outlines what a GPT protective partition is and explains the common causes behind this problem on Windows systems.
After securing your data, remove the protective status by running the DiskPart clean command. For a complete and lasting fix, continue by converting the GPT disk to MBR using AOMEI Partition Assistant, Windows Disk Management, or DiskPart.

