[Fixed] ASUS Selected File Is Not a UEFI BIOS Error on Windows PCs
This article will help to solve the ASUS Selected File Is Not a UEFI BIOS error. You can format the incompatible device or change some settings to fix it. Here are the specific steps.
By Irene / Updated on May 16, 2025
Why does the ASUS Selected File Is Not a UEFI BIOS error occur?
Before trying to fix the problem, it’s helpful to understand why this error happens in the first place. The error message Selected File Is Not a UEFI BIOS usually appears when the BIOS file you’re trying to use doesn’t meet the requirements of your ASUS motherboard. This could be due to mistakes in the update process, incorrect file formats, or system settings that interfere with the update. Here’s a clear breakdown of the most common reasons for this error:
| Reason | What It Means |
|---|---|
| USB drive format is not supported | Your USB should be formatted as FAT32. Other formats like NTFS might not work. |
| BIOS file doesn’t match your model | You need to use a BIOS file made exactly for your motherboard model. |
| BIOS file name was changed | Renaming the BIOS file can cause issues—it's best to keep the original name. |
| BIOS file wasn’t extracted properly | If the BIOS file is still zipped or not fully unpacked, it won’t be recognized. |
| Fast Boot or Secure Boot is on | These settings can sometimes block BIOS updates from working correctly. |
Knowing these causes can save you time and help you avoid running into the same error again. Now, let’s go over some easy ways to fix the problem and get your BIOS update working properly.
How to fix the ASUS Selected File Is Not a UEFI BIOS error in Windows?
To fix the ASUS BIOS Update: Selected File Is Not a UEFI BIOS error, there are 3 possible solutions. You can choose the one that best fits your situation. Before starting, it's a good idea to remove all unnecessary external devices, as they can sometimes interfere with the system and cause boot option issues. If the problem persists, reconnect your USB drive and follow the steps in the guide.
Fix 1. Fully format the incompatible USB
Many users have reported that the “ASUS Selected File Is Not a UEFI BIOS” error often comes from using a USB flash drive with the wrong format. One of the most effective ways to fix this issue is to completely reformat the USB drive using a file system that works with the BIOS update tool. If you need to format a large USB drive—like 64GB or 128GB—into FAT32, or if you want to format a second partition on one of these devices, you can use AOMEI Partition Assistant. This is a powerful tool made for Windows that makes the process fast and easy.
For example, if your USB drive is larger than 32GB and Windows won’t let you format it to FAT32, this tool can help. It supports multiple file systems like FAT16, FAT32, exFAT, NTFS, and Ext, and works well with all kinds of storage devices.
The Best Windows Disk Partition Manager and PC Optimizer
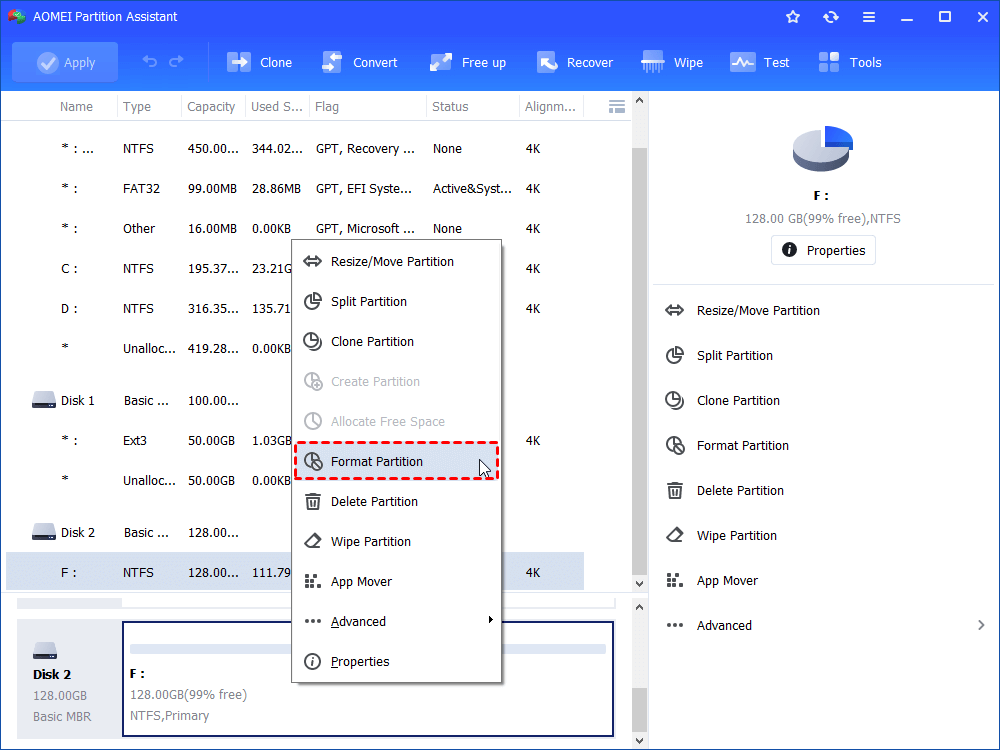
Step 1. Install and run it. Right-click the partition that needs to be formatted to FAT32 and choose “Format Partition”.
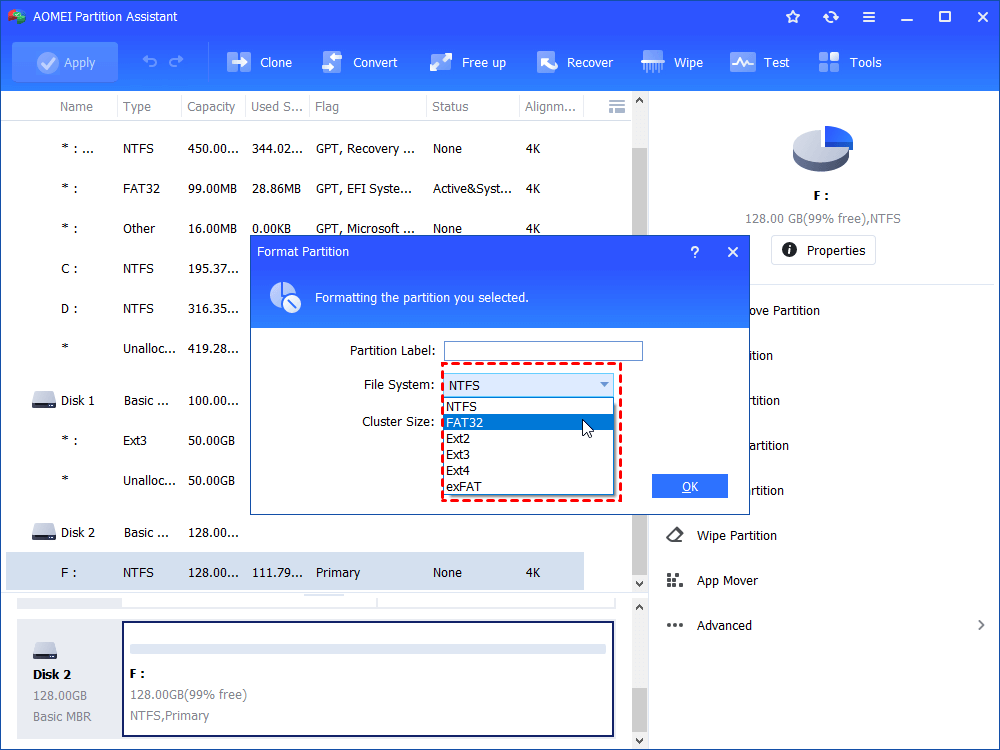
Step 2. It will pop up a small window, choose FAT32 among displayed file systems and click “OK”. You are allowed to change cluster size of this partition and add a partition label to it as well.
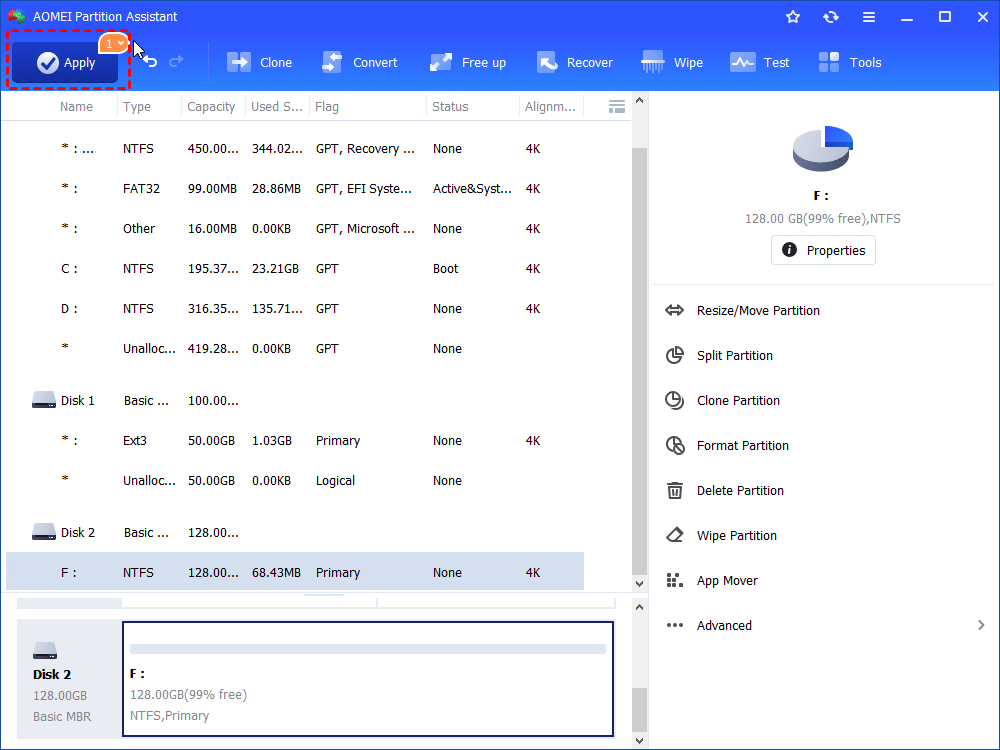
Step 3. Return to the main console and you can review the operation. Please click “Apply” > “Proceed” after confirmation.
Note: If the USB drive is less than 32GB, you can also use the Windows built-in tool like Disk Management to format. Below are common problems and fixes about using this utility.
Fix 2. Change boot order in BIOS
If you encounter the issue Selected file is not a UEFI BIOS, you can also change the boot order. It ensures the system reads the USB drive first, which helps the BIOS update tool detect the correct file. If the wrong device is prioritized, the system may skip the update file and show the UEFI BIOS error.
Different computers may have slightly different BIOS menus, but most of them have similar boot settings. To change the boot order, you’ll need to enter the BIOS. You can usually do this by pressing the F2 or Delete key right after turning on your computer.
Once you're in the BIOS, go to the Boot or Boot Order section. Here, you’ll see a list of devices your computer can start from—like your hard drive, USB flash drive, or CD/DVD.
If you're trying to boot from a USB drive, make sure to move it to the top of the list so the computer checks it first. After changing the order, save the settings and restart your computer. This should help your system recognize the correct boot device and may fix the UEFI BIOS error you're seeing.

Fix 3. Properly unzip the BIOS file using a file extraction tool
Some users have reported that the "Selected File Is Not a UEFI BIOS" error may appear after extracting the BIOS file using the built-in Windows zip tool. This can sometimes cause issues with how the file is unpacked. To avoid this, it's recommended to use a trusted file extraction program like 7-Zip or WinRAR. These tools tend to extract files more reliably.
To do it correctly:
Step 1. Right-click the downloaded BIOS zip file.
Step 2. Choose "Extract to" (or a similar option depending on the tool you're using).
Step 3. Select your USB flash drive as the destination.
Step 4. Make sure the BIOS file is placed directly in the root directory of the USB drive—not inside a folder.
Using a proper extraction tool and placing the file in the right location can help ensure the BIOS update is recognized correctly and prevent this error from happening.
Conclusion
The ASUS Selected File Is Not a UEFI BIOS error often happens due to simple but important issues—like an incorrectly formatted USB drive, mismatched or poorly extracted BIOS files, or boot settings that block the update. By understanding the causes and following the step-by-step fixes—such as formatting the USB drive to FAT32, adjusting the boot order, and extracting the BIOS file properly—you can avoid the error and complete the update smoothly. Taking these precautions helps ensure a safe and successful BIOS upgrade.

