How to Use Disk Management in Windows 11 to Format HDD & SSD?
How to use Disk Management in Windows 11 to format your HDD or SSD if the format option is greyed out? This post will show you how to fix this issue with simple methods.
By Lucas / Updated on May 12, 2023
When you get a new HDD or SSD, after initializing the disk, the first thing is to format it. Formatting is choosing a file system for your disk to store your files. In modern systems, we usually suggest you select NTFS as the file system because it allows users to use large-capacity devices and it can store large files and programs.
You can choose to format your disk, when you need to:
• Change a file system.
• Delete partitions
• Fix disk glitches and bugs
• Improve computer performance
• Simply clear disk data
• Recycle the disk
…
Since there are many changes in Windows 11, some users might not know the exact steps of how to use Disk Management in Windows 11 to format their disks. Here, we’ll show you detailed steps to do it.
Detailed steps: Disk Management Windows 11 format disk
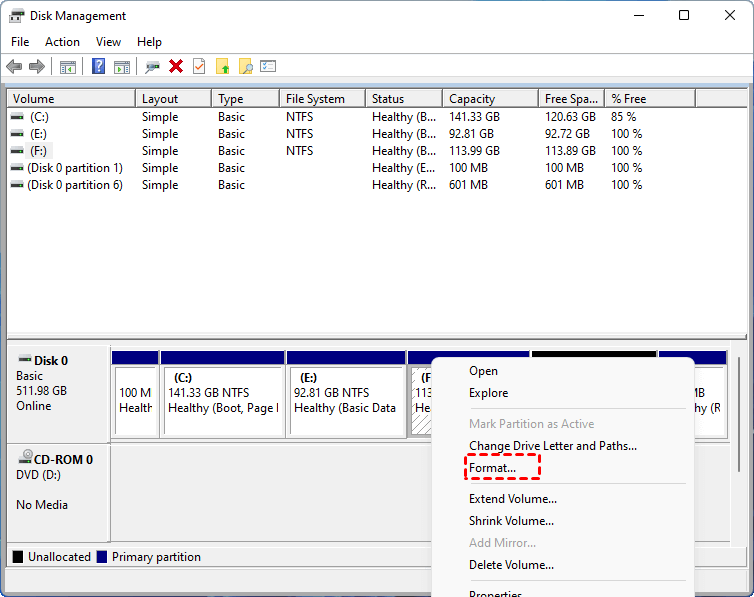
Step 1. Open Start to search for Disk Management and click the top result to open the tool.
Step 2. Right-click the drive or disk and select the “Format” option.
Step 3. In the “Volume label” setting, confirm the name of the drive.
Step 4. In the “File System” setting, select the NTFS option.
Step 5. Check the Perform a quick format option. And if you need, you can check the Enable file and folder compression option if you want to save space when storing files.
Step 6. Click the OK button.
When you finish the instructions, the existing partition will be re-formatted, wiping out any primary data.
What if the Disk Management format greyed out in Windows 11?
Like Windows 10, sometimes users may find that the “Format” option is greyed out in Windows 11 Disk Management, and some users may even confront all options are greyed out in Disk Management.
If this happens on your Windows 11 PC, don’t worry, you have other methods to format your disk/drive.
Way 1. Use Windows 11 Storage Settings to format
Step 1. Click on the Start icon in Windows 11 taskbar or press Start on the keyboard.
Step 2. Select Settings from the Start menu.
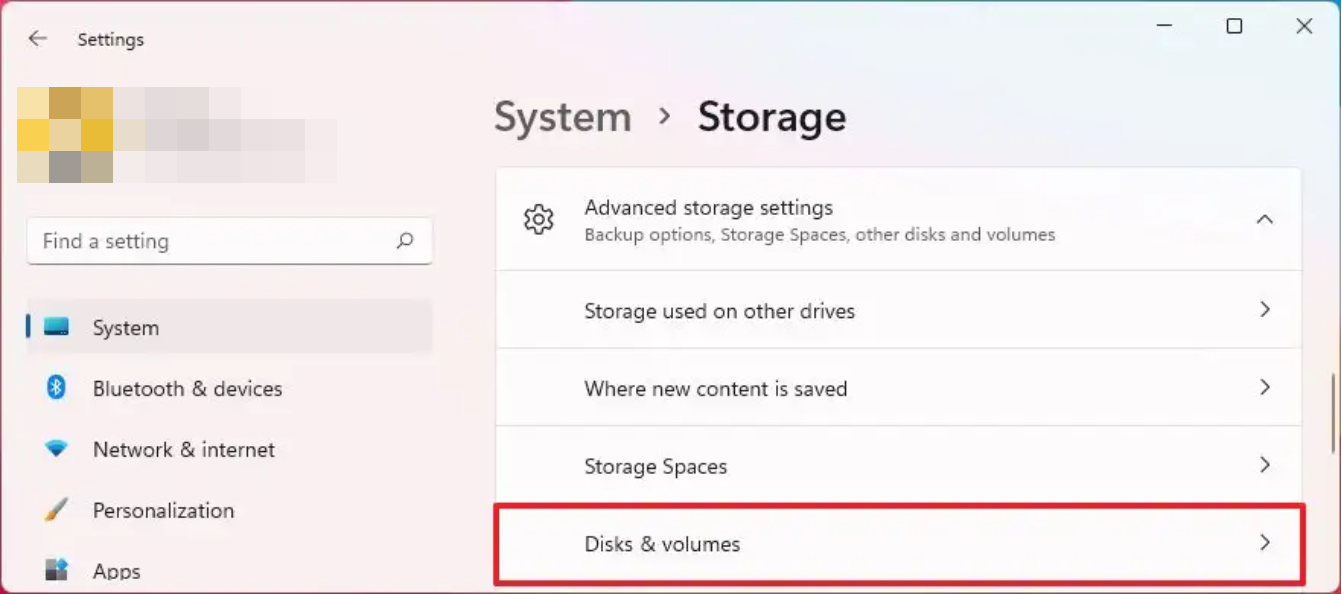
Step 3. Select the System option in the left panel.
Step 4. Scroll down in the right panel to find Storage from the list. Then, click it.
Step 5. Select the target hard drive, and click the Properties button.
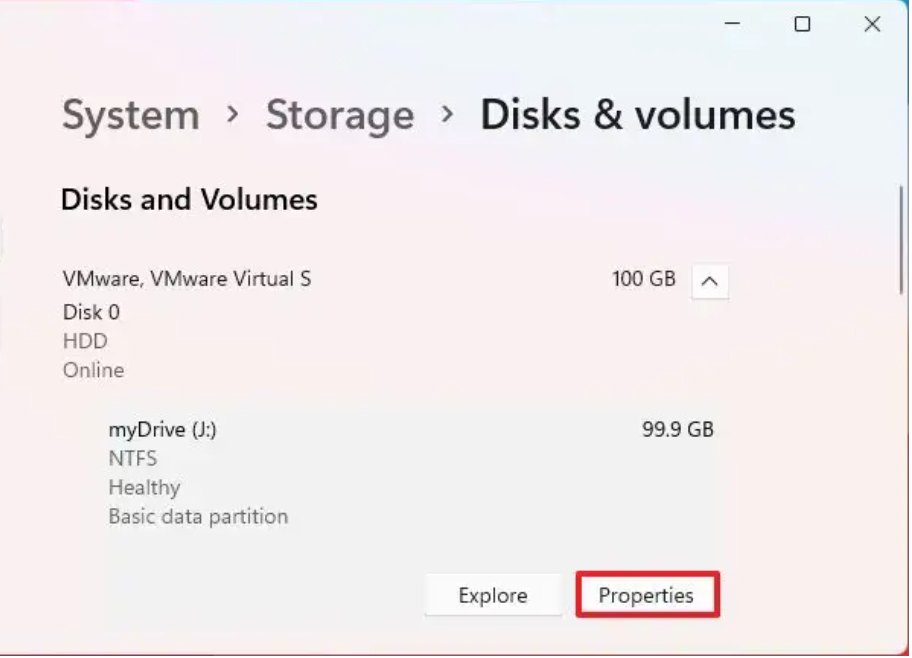
Step 6. Click the Format button. Confirm a label for the drive and use the “File System” setting then select the NTFS option, and click “Format”.

Way 2. Use File Explorer to format
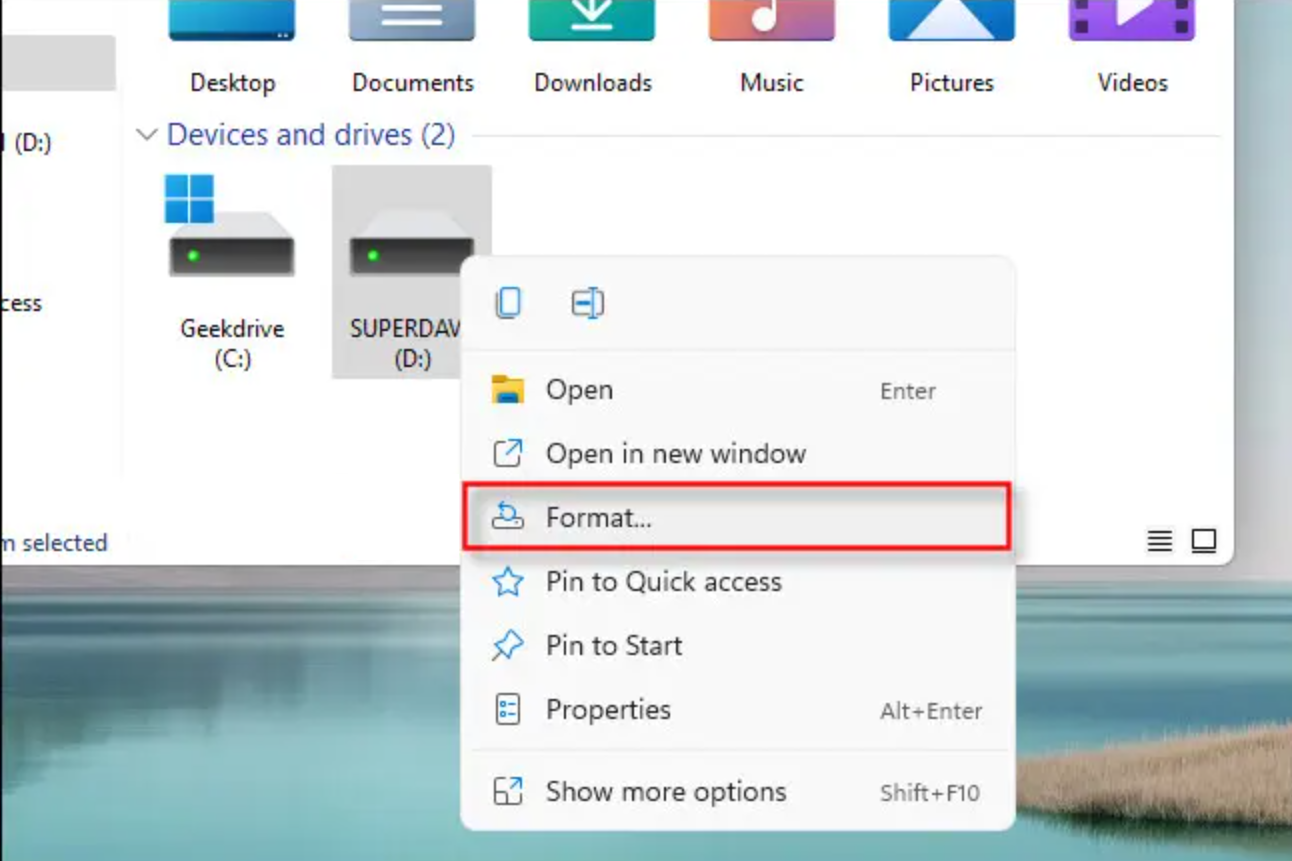
Step 1. Open File Explorer, click “This PC” right-click the drive you’d like to format, and select “Format” in the menu that appears.
Step 2. You should select a File system, change the Allocation unit size, and give a Volume label according to needs. The Quick Format option will be checked by default.
Step 3. Click on the Start button at the bottom to start formatting the disk or drive. Select OK in the prompt window to confirm formatting and then wait.

Another window will pop up to tell you Format Complete. Please click OK to close it.
Way 3. Use CMD to format
You can also use Command Prompt to format your disk.
Step 1. Press Windows + S to open the Windows search feature. Type “cmd” in the context box.
Step 2. Right-click on Command Prompt and select “Run as administrator”.
Step 3. In the CMD, please type the following commands and press "Enter" after each:
• diskpart
• list disk
• select disk x (x is the number of the target disk); If you want to format a disk partition, you also need to type list partition and select partition x.
• clean
Wait for a while until you see “DiskPart succeed in cleaning the disk”.
Way 4. Employ third-party disk formatter
However, if you are not familiar with CMD or you want to format a disk over 32GB into FAT32 for your other devices, or if the target drive becomes RAW/write-protected/corrupted, the above 3 methods may not help you perfectly.
In these situations, a reliable third-party formatter will be better. Here, you can turn to AOMEI Partition Assistant Standard, a free disk and partition manager for Windows 11/10/8/8.1/7/XP users.
In only a few clicks, you may format any type of disk into whatever file system you choose (supporting NTFS/FAT32/exFAT/ext2/3/4). Aside from disk formatting, this application allows you to do operations such as disk cleaning and hard drive wiping.
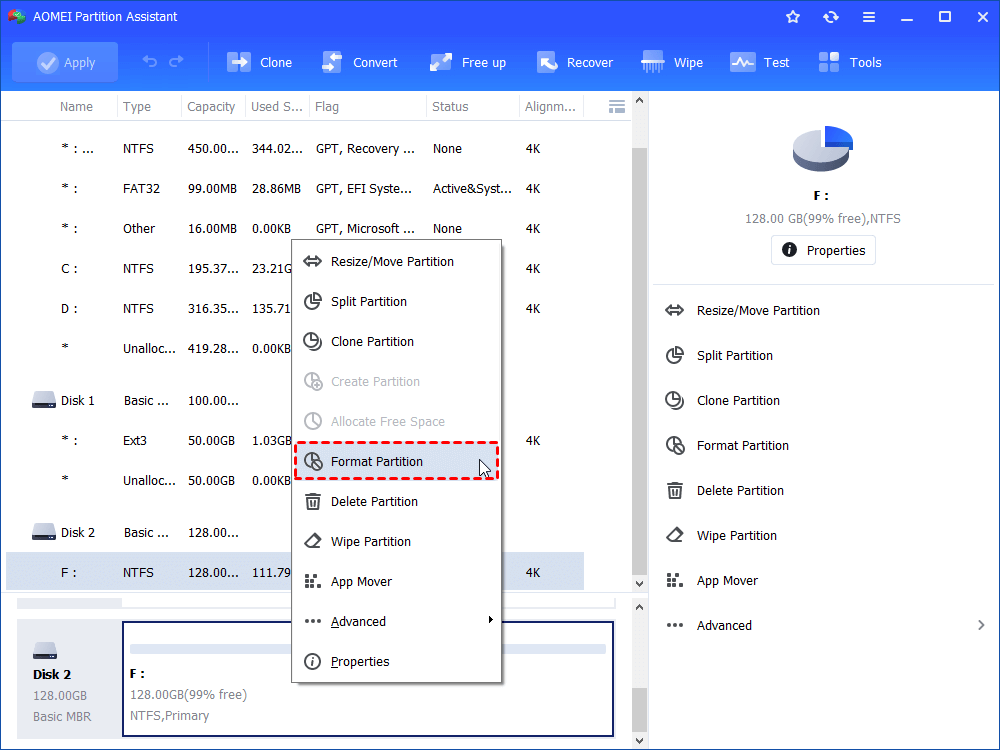
Step 1. Install and run AOMEI Partition Assistant Standard. Right-click on the partition/hard drive you want to format and select “Format Partition”.
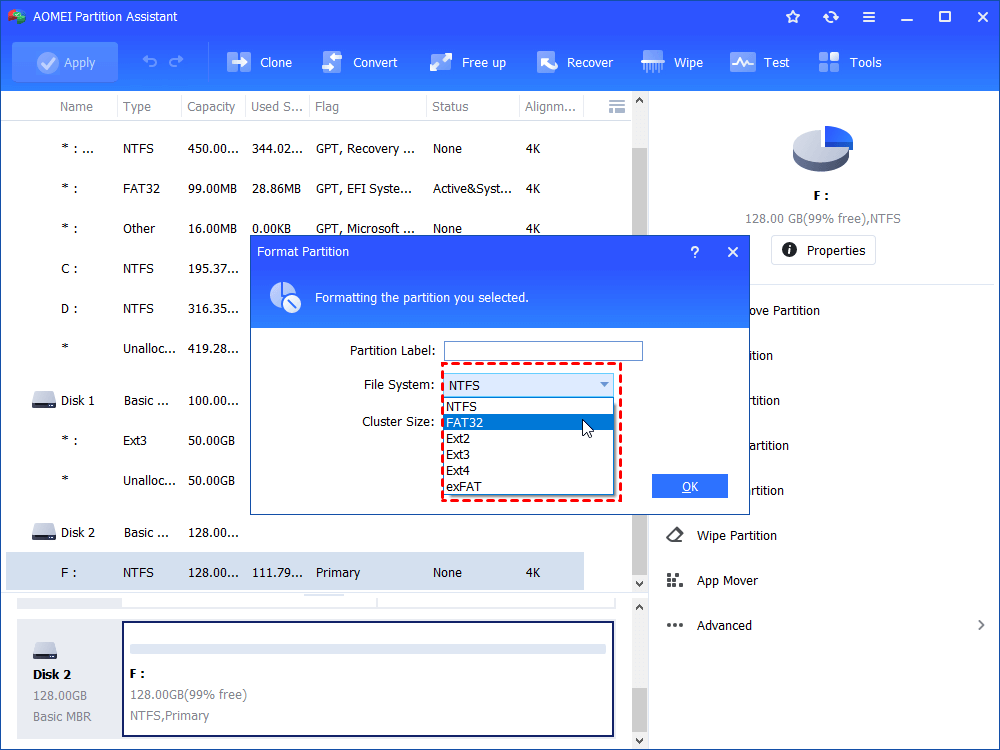
Step 2. Select a file system. Here, we take NTFS as an example. Then, hit “OK”
Step 3. Hit “Apply” on the upper left of the main interface to start the disk formatting process.
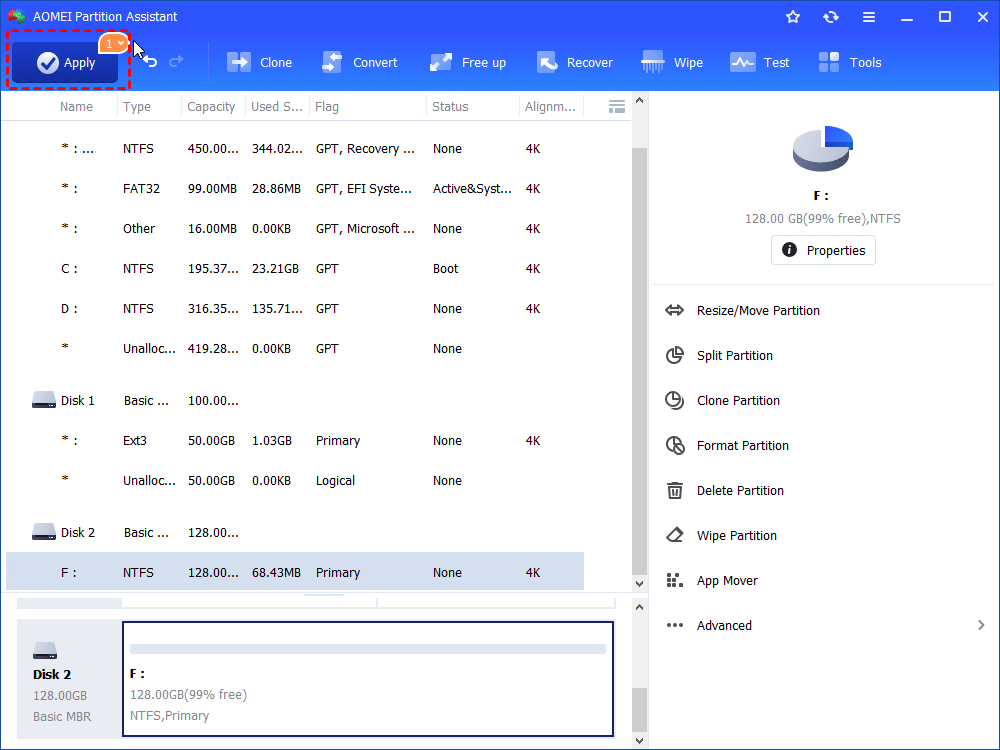
Then the selected drive/disk will be formatted into the target file system.
Further reading: Format FAT32 into NTFS without data loss in Windows 11
If you just want to format a FAT32 disk into NTFS, you can upgrade to AOMEI Partition Assistant Professional. It’s the advanced edition of the Standard Edition. Users can do more to manage their Windows PC.
• Safely convert NTFS to FAT32 and convert FAT/FAT32 to NTFS without losing data.
• The format or Reformat NTFS to FAT32 partition while ensuring data security.
• Support the size of partition with NTFS larger than 32GB for converting to FAT32.
• Support NTFS partition with a maximum capacity of 2TB.
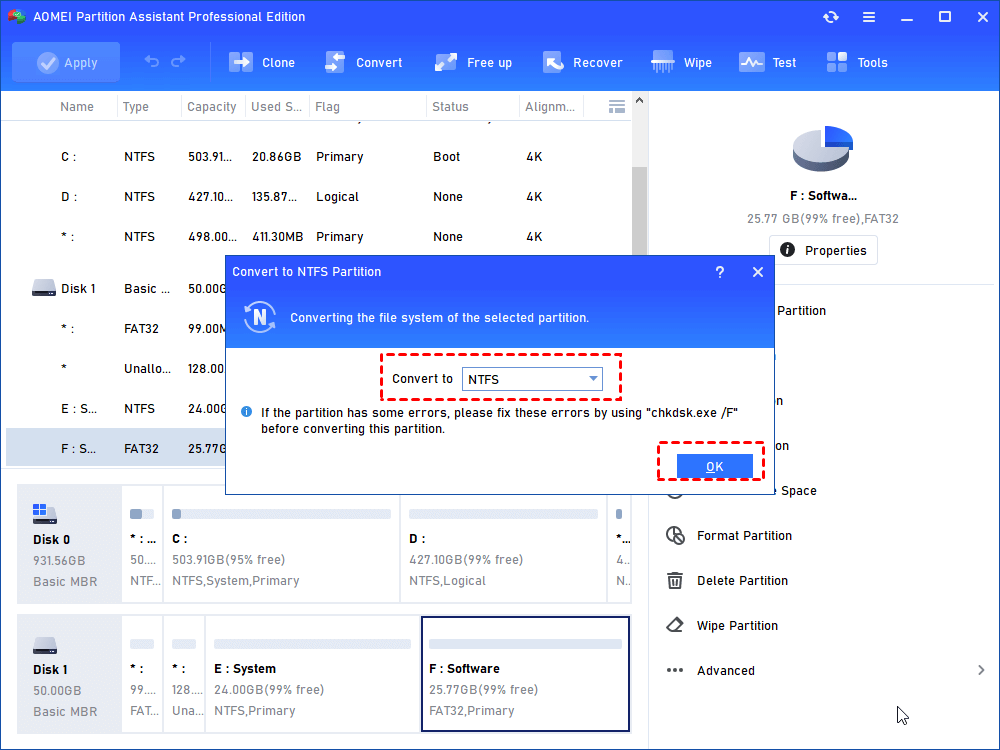
Step 1. Install and launch the AOMEI Partition Assistant Professional. Click the partition you want to convert, choose “Convert”> “Convert to NTFS/FAT32”.
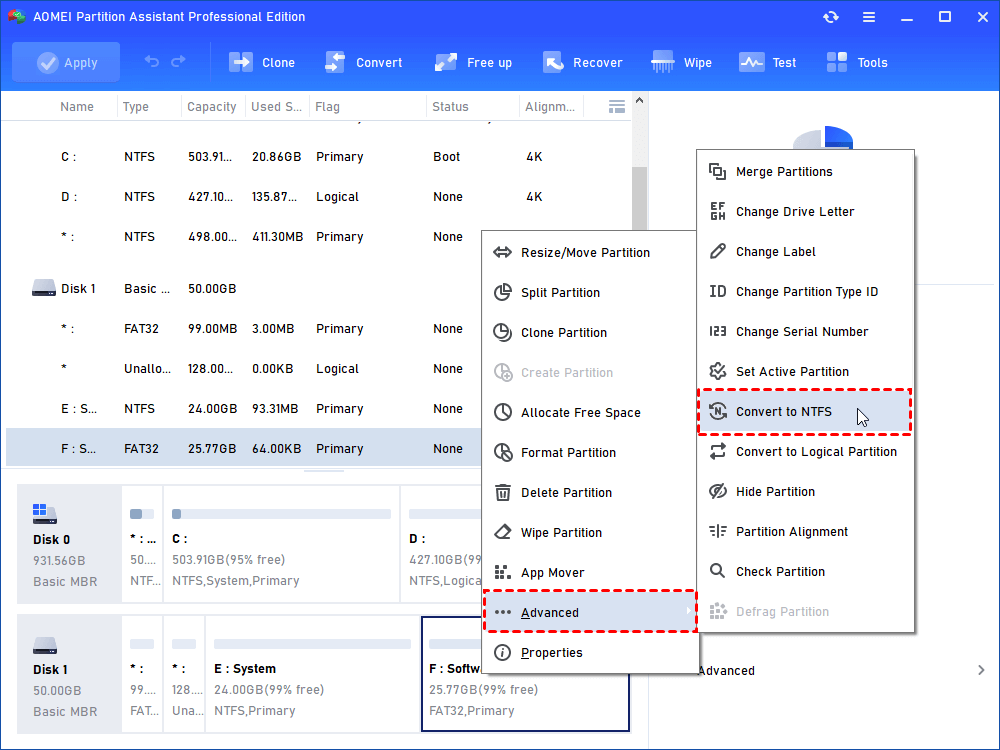
Step 2. Click "OK" in the mini window.
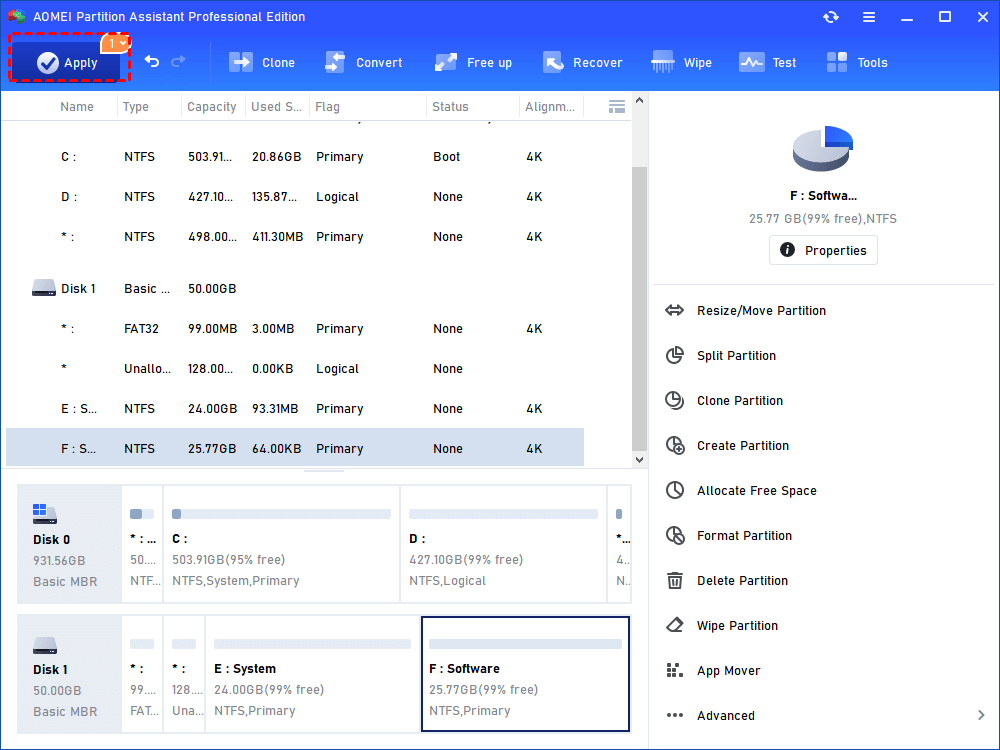
Step 3. Click “Apply” to start performing the conversion.
To sum up
Normally, users can use Disk Management in Windows 11 to format a hard drive or SSD. However, if Disk Management “Format” greyed out in Windows 11, you can turn to other tools to format hard drive and SSD in Windows 11. AOMEI Partition Assistant is a very convenient tool for all users, if you choose the Professional Edition, you can not only convert FAT32/NTFS without data loss but also convert to MBR/GPT without deleting data, clone disk, migrate OS without reinstalling, move folders and installed apps, extend drive…
What’s more, there is the Server Edition for Windows Server 2025/2022/2019/2016/2012(R2)/2008(R2)/2003 users to quickly and efficiently manage their devices.

