[New Guide] 3 Ways for ASUS to Wipe Hard Drive
If you’re searching for ways for ASUS to wipe hard drive, you can find a proper solution in this post.
By Lucas / Updated on January 6, 2025
No matter which brand of computer you're using, people need to erase a hard disk for various reasons. If you want to give the hard drive away but don't want to reveal the info on it, wiping it should be the best option to wipe all data from the hard drive.
To wipe a hard drive means to remove all data on the hard drive including operating system, programs, and files. If you need to clean a data hard drive (without OS installed), wiping all data by formatting hard drive partitions is enough. But if you are trying to wipe a system drive, you need to wipe it from the BIOS, because you cannot format the hard drive on which Windows 11/10/8/7 is running.
For users who are working with ASUS devices, you have at least 2 options to wipe your internal disk on an ASUS laptop: using ASUS BIOS, using Windows installation media, or choosing a third-party tool that supports wiping system disk.
2 ways for ASUS to wipe hard drive
In this part, you’ll learn how to erase your disk in ASUS BIOS and how to erase hard drive on ASUS laptop and desktop.
Way 1. Use ASUS BIOS to wipe hard drive
ASUS BIOS offers its users the feature to secure erase SSD. If your ASUS computer is using an SSD as a system disk, you can follow the following steps to erase it.
Note: You might need a bootable USB if you’re going to wipe your system disk.
Step 1. Plug your bootable USB and boot into ASUS BIOS by pressing the F2 key.
Step 2. Select the “Tool” tab in the toolbar.
Step 3. Though the interface might be different on different computers, please find the “SSD Secure Erase” or “SSD Secure Erase Tool” selection in “Advanced mode”.
Step 4. Then, you can see a disk list. Choose the target disk and erase it.

Since you’ve wiped your system disk, you’ll need to boot your PC from your bootable USB to reinstall Windows.
Way 2. Use Windows installation media
If you’re using an HDD and you have Windows installation media, you can format your hard drive with it.
Step 1. Connect installation media and set the boot priority for it in BIOS.
Step 2. Restart your computer and go to the Windows installation screen. Keep the default settings and click “Next”.
Step 3. Click “Install Now”.
Step 4. Type the product key of your operating system or skip it. If you install the same version of Windows, it will be activated automatically when your computer connects to network.
Step 5. Select Custom: Install Windows only (advanced) installation.
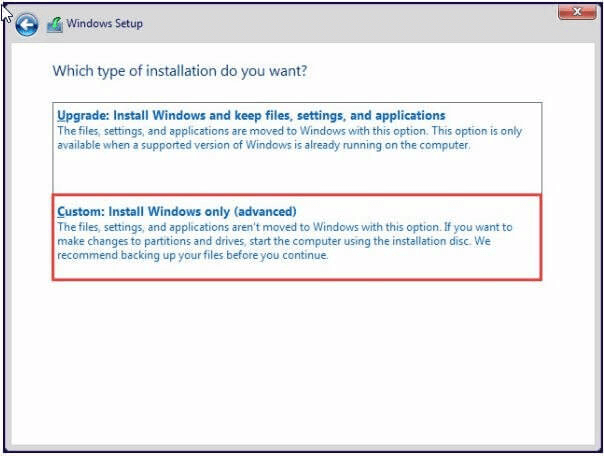
Step 6. Then, you will see several options including Format, just select the system partition and click Format.
Step 7. Click OK to confirm you want to wipe the system partition and wait for the final result.
Way 3. Use a professional disk wipe tool
As you see in Way 1, if you’re using an HDD or an incompatible SSD for ASUS devices, the ASUS BIOS won’t work on disk cleaning. In Way 2, you’ll need Windows installation media. If you’re using an HDD but don’t have Windows installation media, a professional disk wipe tool will be a nice choice.
Here, we recommend you freeware AOMEI Partition Assistant Standard. It’s a Windows disk and partition manager for Windows 11/10/8/7/XP. This tool can help you make a bootable repair tool, you can boot into this tool, and wipe your hard drive.
First, let’s make a bootable repair USB.
Note: The USB will be formatted. And the needed size is at least 13GB.
Step 1. Install and launch AOMEI Partition Assistant. Click "Tools"> "Make Bootable Wizard" in the top panel, confirm the operation you are going to do, and then click "Next" to continue.

Step 3. There are three ways to create bootable media based on Windows PE. Choose one of them according to your needs and click "Proceed". Here we take a USB flash drive for example.
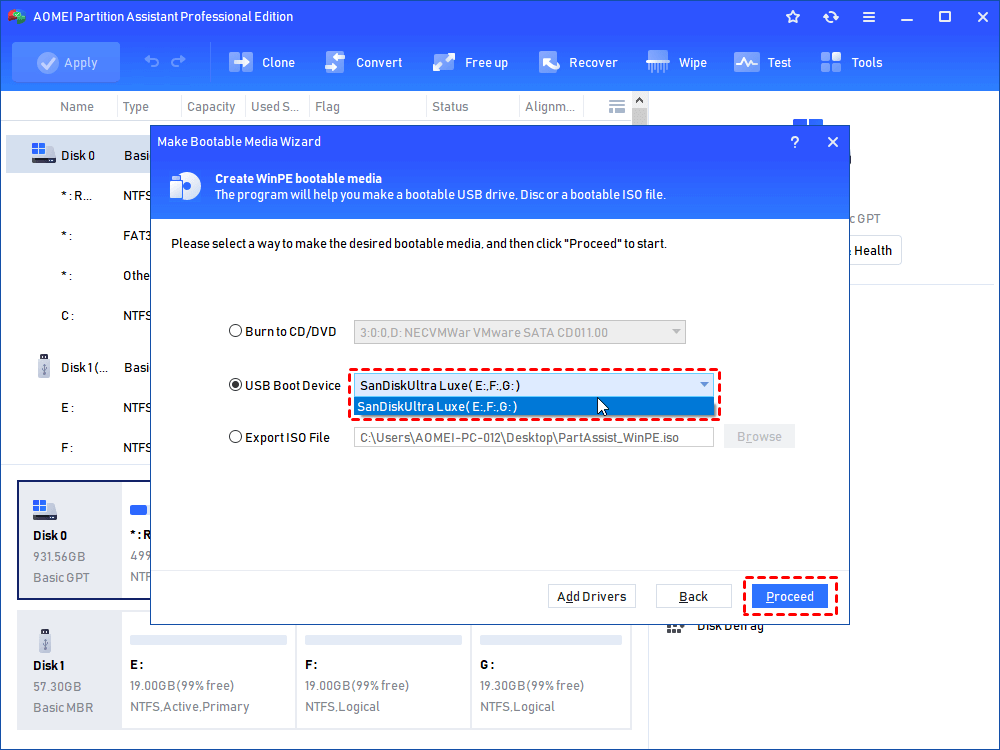
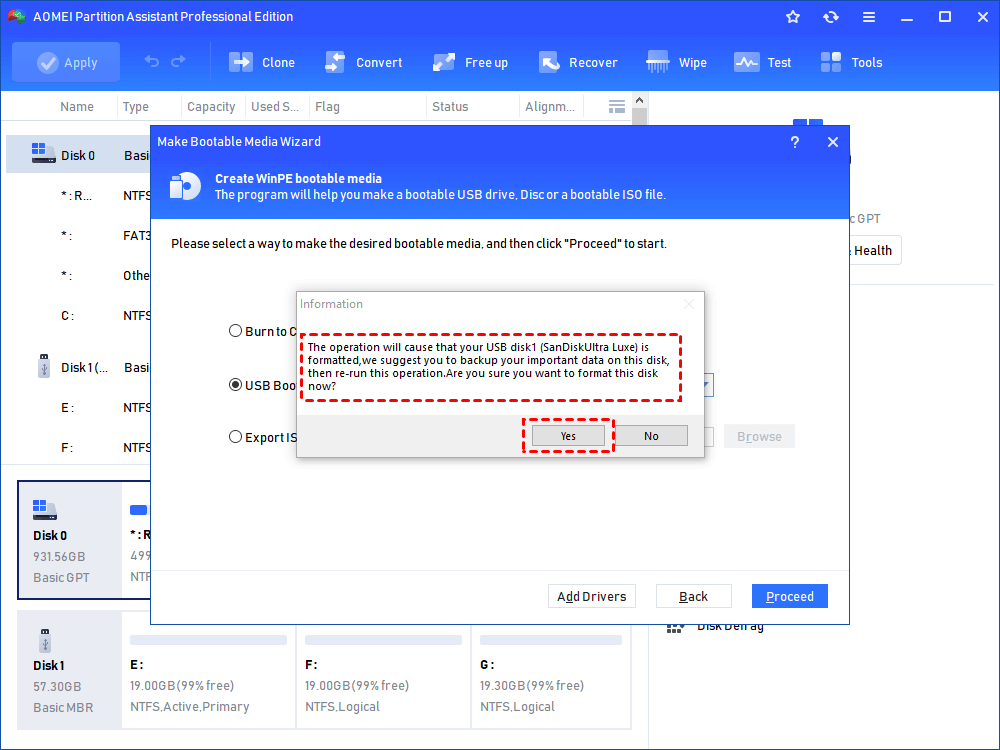
Step 4. The USB flash drive needs to be formatted and all the data on it will lose. If there is important data on it, please make a backup and redo it.
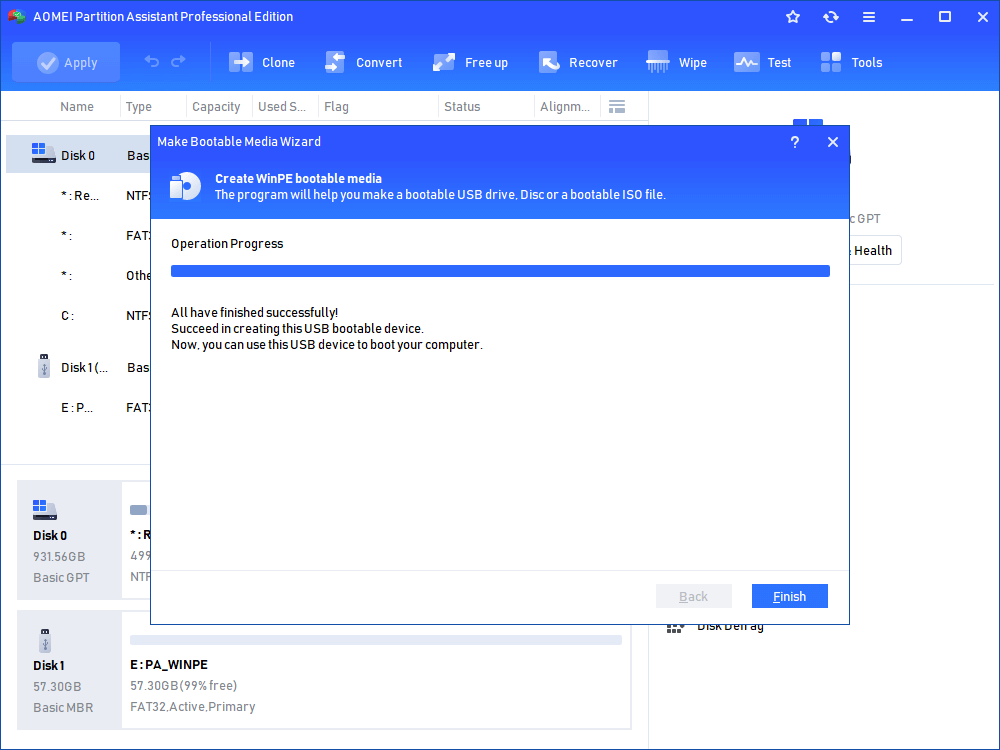
Step 5. The progress of creating a WinPE bootable USB drive will take a few minutes.
Now, we can wipe our system hard drive.
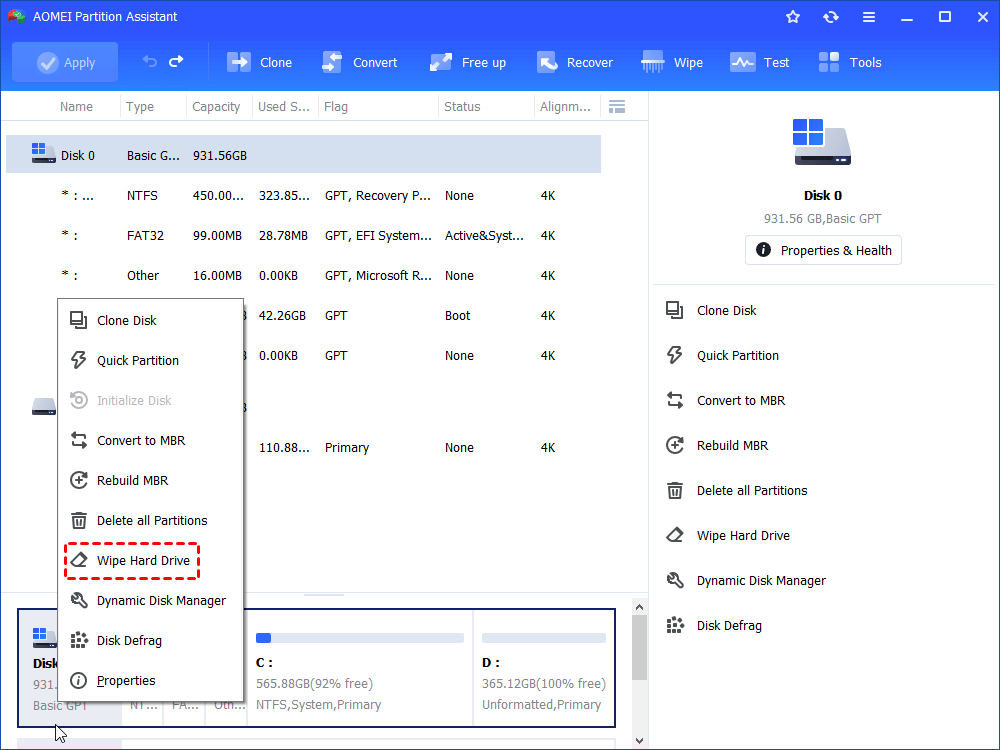
Step 1. Boot your computer with the bootable USB you created. You will get into the main interface of AOMEI Partition Assistant. Right-click the hard drive you want to wipe. Select Wipe Hard Drive.
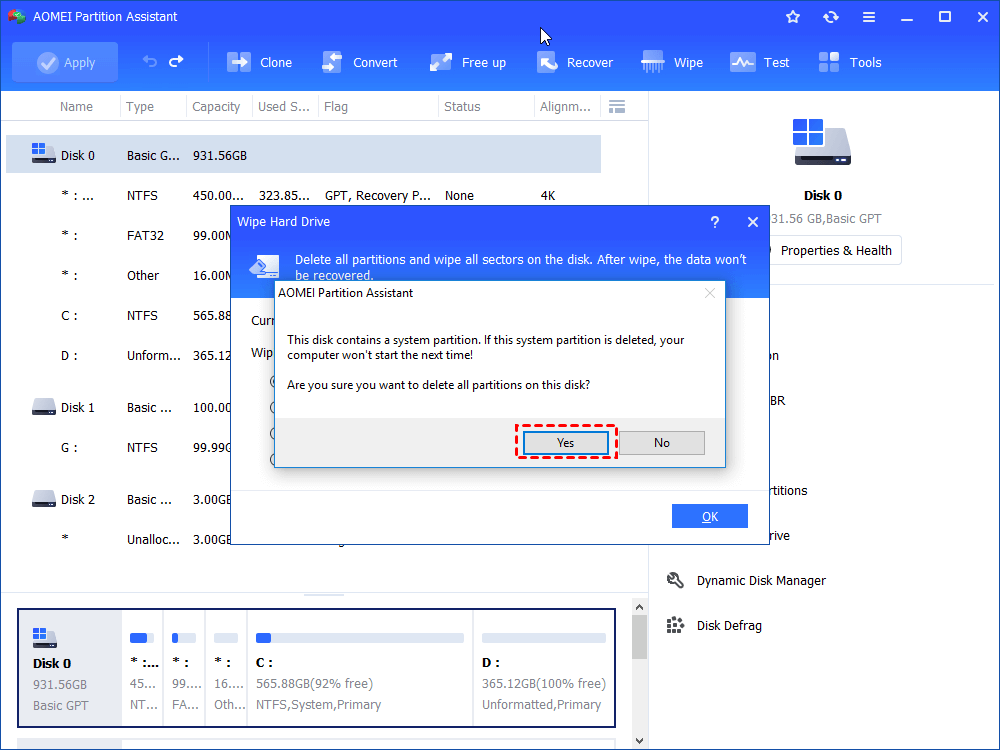
Step 2.Select the disk you want to wipe and click "OK" to continue.

In this stage, you can also select a wiping method to wipe the selected hard drive according to your requirements and click "OK". (By default, the wiping method is Fill in 0.) To use more advanced options, please upgrade to the Professional edition.
Notes:
Fill in 0: Overwrite all sectors with zeros. It is common to wipe a personal hard drive. It is safe and fast.
Fill in random information: It overwrites the hard drive with random data. It is more secure than the first one.
DoD 5220.22-M: It will overwrite addressable locations on the hard disk with binary 0's, binary 1's, and a random bit pattern from once to seven times. The more times you choose to overwrite, the longer the process will take. Three times to five times are recommended. It is more secure than "zero-filling" and "random data filling" and faster than the Guttman. Thus it is often adopted by companies and organizations.
Gutmann: It overwrites a hard drive with 35 passes. It is the safest way here, but it also takes the longest time.
Step 3.You can preview the shrink operation by viewing the "Pending Operations". To commit the "Pending Operations", please click "Apply" and "Proceed".

Then, your system hard drive is cleaned. This tool also supports “Secure Erase SSD”.
Ending
These are solutions for ASUS to wipe hard drive, you can pick up a suitable one to wipe your hard drive. We suggest wiping or erasing your HDD and SSD, not just formatting it if you’ll sell your computer because the formatting is not enough for privacy info protection.
AOMEI Partition Assistant can help you securely clean both HDD and SSD. And it has various features for you to manage your computer, such as clone disk, migrate OS, convert to GPT/MBR without data loss, move installed programs, etc. What’s more, it has the Server Edition for Windows Server 2025/2022/2019/2016/2012(R2)/2008(R2) users.

