Can You Partition An Active Drive without Data Loss?
Can you partition an active drive without data loss? If you have the same question, you come to the right place. In this article, you will learn three effective methods to partition an active drive without losing data.
By Hedy / Updated on August 8, 2025
Can you partition an active drive without data loss?
Yes, it is possible to partition an active drive without data loss, but it requires careful handling and the right tools. Modern operating systems and disk management software can resize existing partitions and create new ones without erasing the data stored on them.
However, there is always some level of risk involved, such as accidental power loss, software errors, or hardware failures during the process, which could lead to data corruption or loss. The likelihood of success depends on factors like the drive’s health, the amount of free space available, and whether the file system is in good condition.
To minimize risks, it’s important to ensure the drive is error-free and has enough unallocated or free space before making changes. Although the process can often be done safely, backing up important files beforehand is highly recommended as a precaution.
3 methods to partition an active drive without data loss
Partitioning an active drive without losing data can be tricky, but it’s definitely possible if you follow the right process carefully. Below are three practical methods you can use, explained in clear steps to ensure you keep your files safe while reorganizing your disk space.
Method 1. Using Windows Disk Management
Windows includes a built-in tool called Disk Management that allows you to shrink, create, and manage partitions without the need for extra software. This method works well for most basic partitioning needs, and it’s easy to follow for users of all levels.
Step 1. Press Windows + X and choose Disk Management from the menu that appears.
Step 2. Locate the active drive you want to partition in the list of available disks.
Step 3. Right-click the drive and select Shrink Volume to reduce the size and create unallocated space.
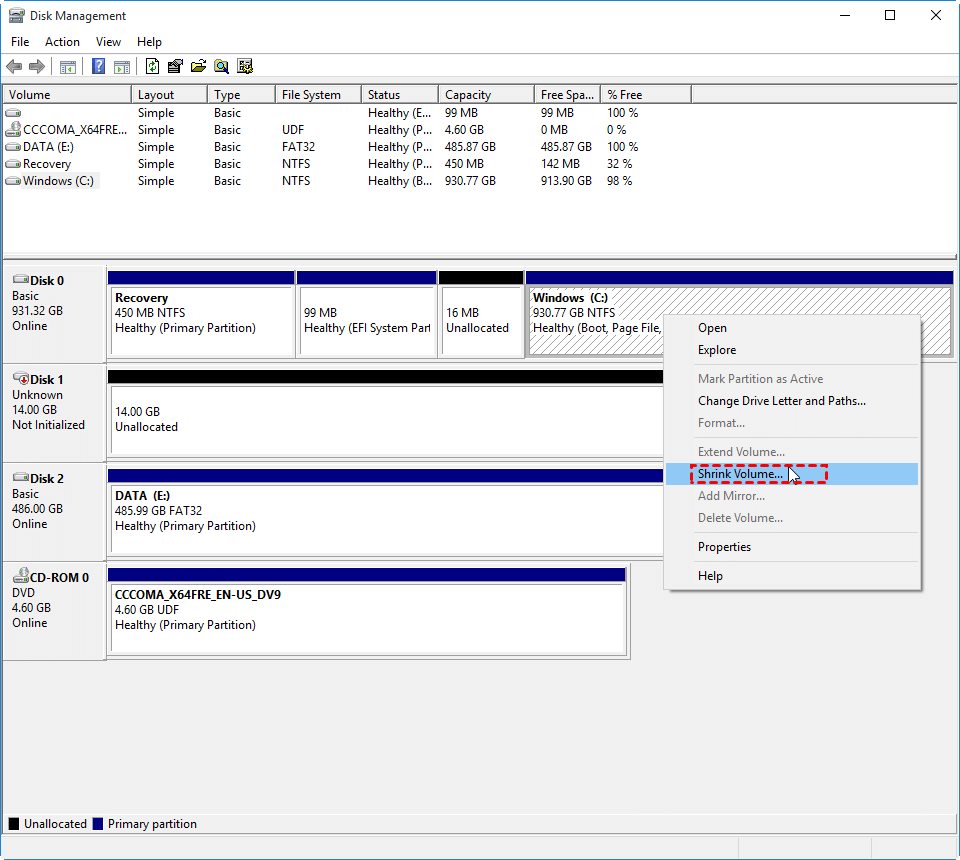
Step 4. Enter the amount of space to shrink, then click Shrink to confirm the changes.
Step 5. Right-click the unallocated space and select New Simple Volume to start creating the new partition.
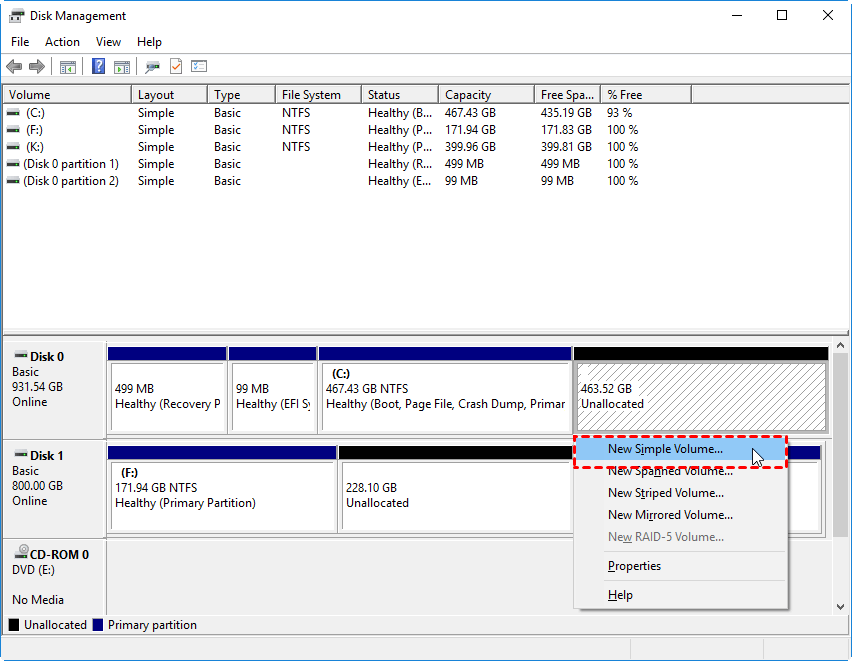
Step 6. Follow the wizard to assign a drive letter, choose a file system, and complete the process.
This approach is straightforward and uses only built-in Windows features, which means no extra downloads are required. However, it has limited advanced features compared to third-party tools.
Method 2. Using Command Prompt (Diskpart)
If you prefer a more technical approach, Windows also includes the Diskpart command-line tool. This method can be more precise than using the graphical interface, making it ideal for users who want full control over the process.
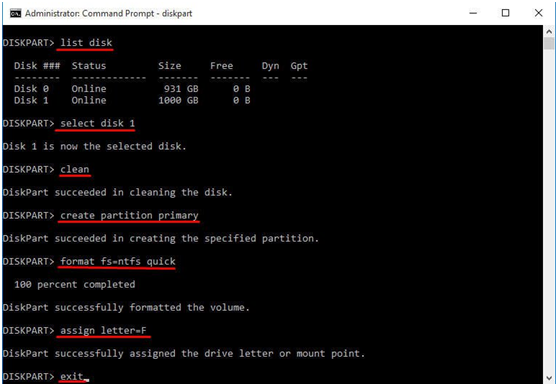
Step 1. Press Windows + S, type cmd, then right-click Command Prompt and choose Run as administrator.
Step 2. Type the following command one by one and press Enter:
list disk
select disk 1 (replace 1 with the number of your active drive)
clean
create partition primary
format fs=ntfs quick
assign letter =F (replace F with your chosen letter)
exit
While this method requires typing commands correctly, it offers powerful control and can sometimes handle cases that Disk Management cannot.
Method 3. Using third-party partition software
If you want the most flexibility, advanced features, and a user-friendly experience, third-party partition managers are the best choice. AOMEI Partition Assistant is a powerful and user-friendly disk management tool designed to help both beginners and advanced users manage their storage devices with ease.
One of its standout capabilities is the ability to partition an active drive without losing data, which is especially useful when you need to resize or split your system drive or other active partitions. With AOMEI Partition Assistant, you can safely create, resize, merge, split, or format partitions, even if the drive is currently in use by the operating system.
The software also supports a wide range of file systems, including NTFS, FAT32, exFAT, and EXT, and works seamlessly on both HDDs and SSDs. Its “Split Partition” and “Resize/Move Partition” features make it easy to allocate free space or reorganize storage without formatting.
Step 1. Install and run AOMEI Partition Assistant Professional. Right-click the C partition and select “Split Partition”.
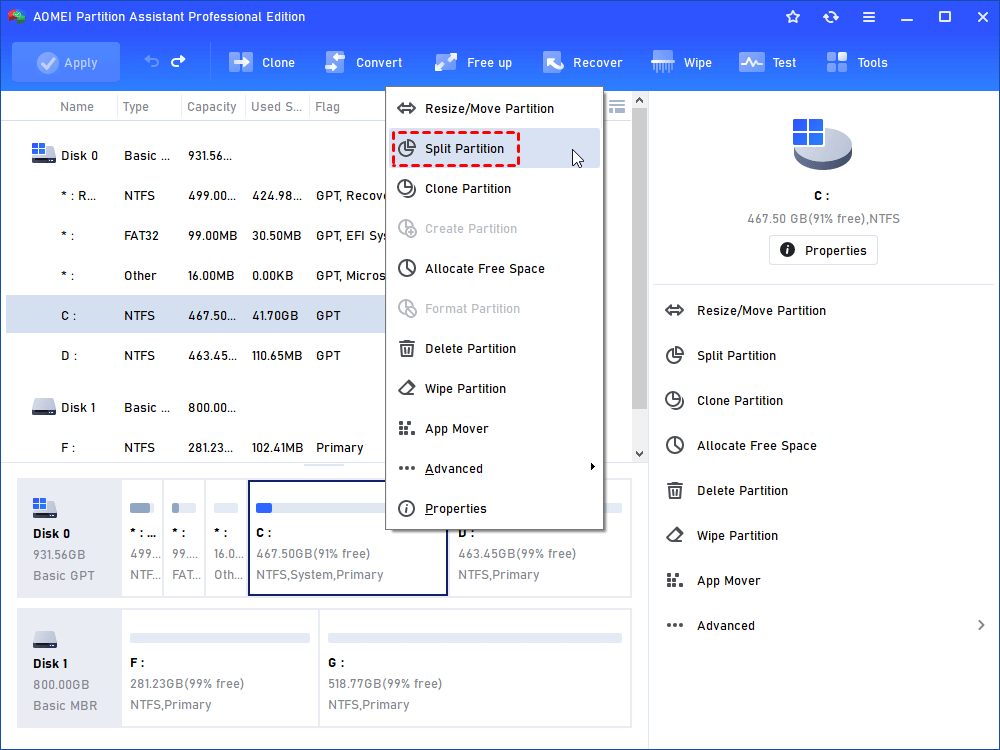
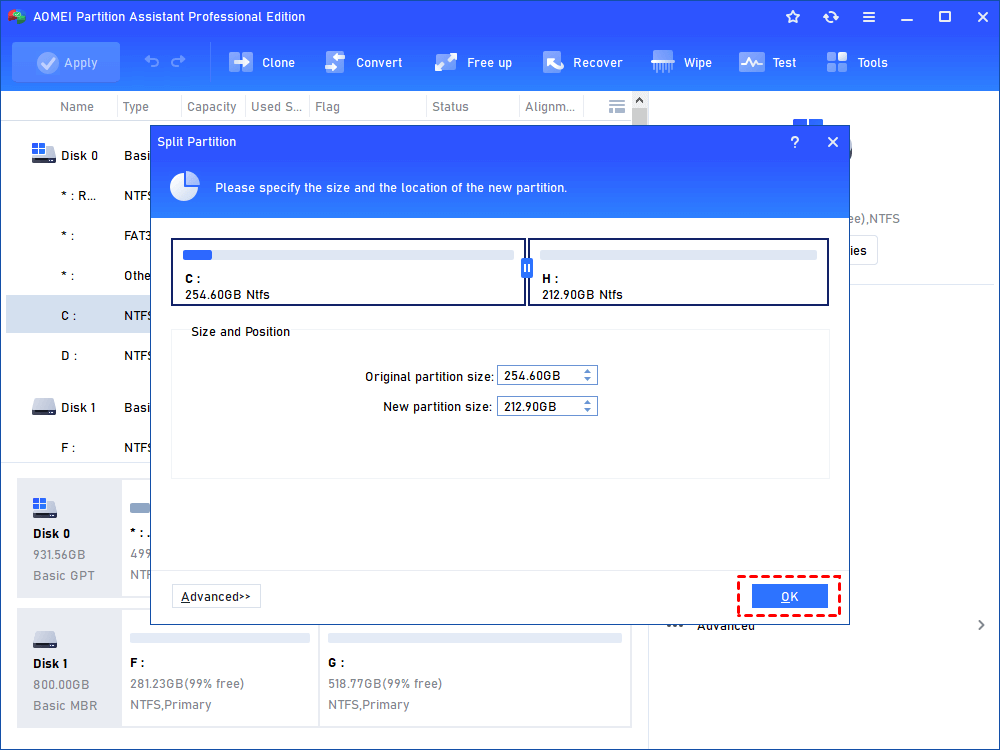
Step 2. In this window, you can specify the size and location of the new partition, and click “OK”.
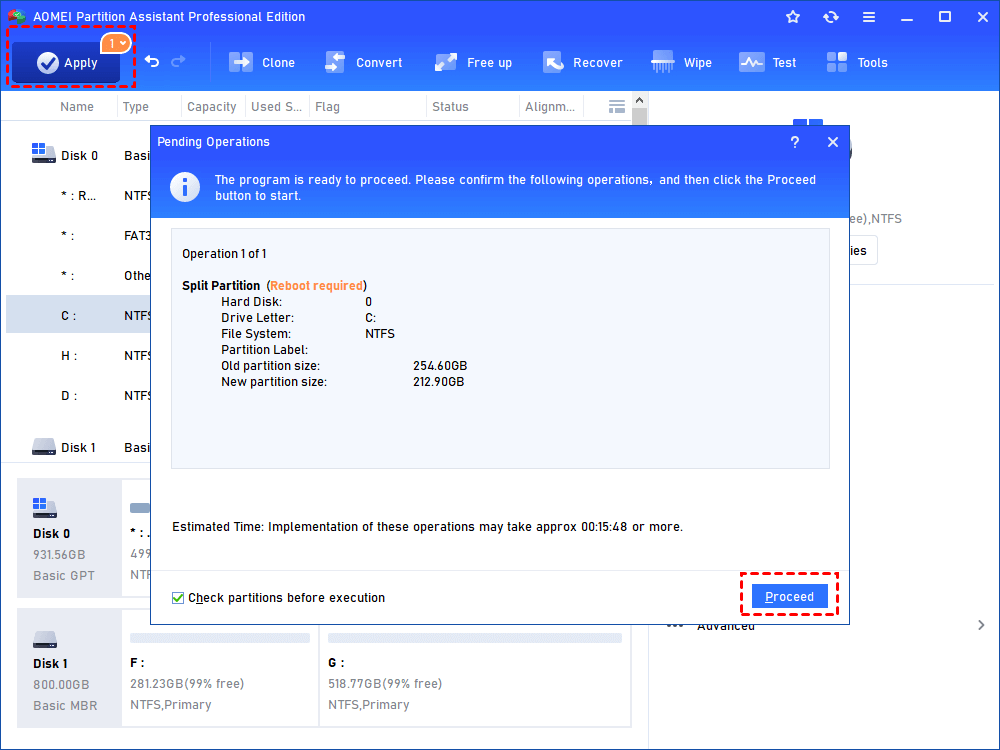
Step 3. Back to the main interface, click “Apply” and “Proceed” to commit the pending operation.
This method is ideal for beginners and advanced users alike, as it combines ease of use with powerful customization options that go beyond Windows’ default tools.
Conclusion
Can you partition an active drive without data loss? Whether you choose the built-in Disk Management tool, the powerful Diskpart command-line method, or the convenience of third-party software like AOMEI Partition Assistant, the key is to proceed carefully and double-check each step before applying changes.
By selecting the method that best matches your skill level and requirements, you can reorganize your drive’s storage efficiently while keeping your files safe.

