Fixed: Disk Management Unable to Connect to Virtual Disk Service
How can users fix Disk Management unable to connect to virtual disk service? This article will give you some inspirational ideas to solve this problem.
By Lucas / Updated on May 12, 2023
Disk Management is a Microsoft Windows program that was initially included in Windows XP. It allows users to examine and control the disk drives installed on their computer, as well as the partitions that are linked with those drives. The layout, type, file system, status, capacity, free space, and fault tolerance of each drive are presented in the interface of Disk Management.
Although Disk Management is a helpful tool for Windows users, sometimes it might fail because of some glitches or errors.
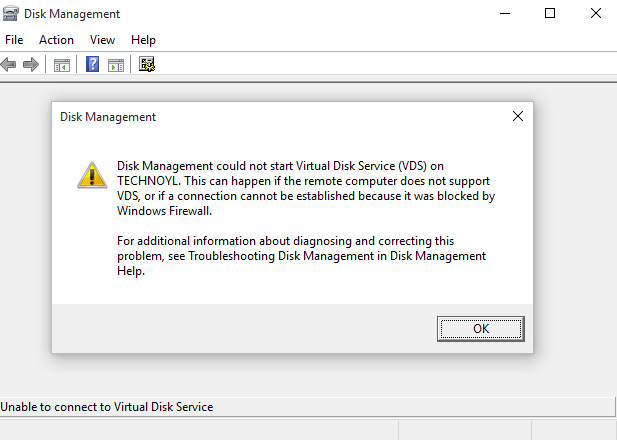
No matter Windows PC or Windows Server, when the error “Disk Management could not start Virtual Sisk Service (VDS) on TECHNOYL…” as the following picture shows occurs, users can’t use or even see the main page of Disk Management. Then, the only words they can see on the Disk Management page is a note in the lower-left corner: Unable to connect to Virtual Disk Service.
How to fix [Disk Management unable to connect to virtual disk service]
If you read the message carefully, you might find two possible reasons: “Remote computer does not support VDS”, “The connection is blocked by Windows Firewall”. But, fault devices, malware might also cause “Disk Management could not start virtual disk service”. So to help you find the suitable methods to fix this issue, we list some solutions not only for correcting the two reasons mentioned in the message.
Way 1. Check all external storage devices
As we said that some fault devices might also trigger this problem, the first thing you need to do is to disconnect all external storage devices each by each to check which device might be responsible for the issue.
Way 2. Use SFC or DISM to fix the error
SFC and DISM are two Windows built-in check tools to help users check disks and partitions and find errors, some errors can be fixed by commands.
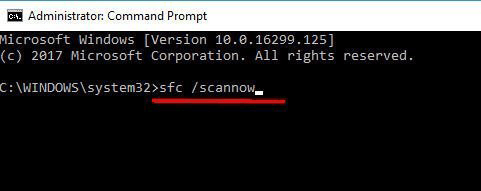
▶ SFC:
Step 1. Enter "command prompt" in the Windows search box.
Step 2. Right-click the Command Prompt icon and select Run as administrator.
Step 3. Type "sfc /scannow" and press the “Enter” key to wait for the procedure. When it finishes, you can try to open Disk Management to see whether it can be loaded as usual.
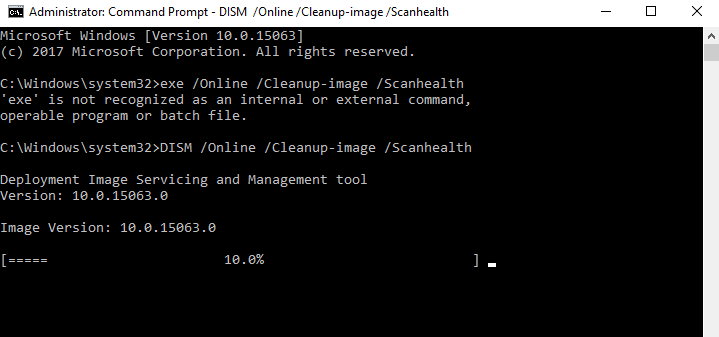
▶ DISM:
Step 1. Open “Command Prompt” and run it as administrator.
Step 2. Type each line and press “Enter”:
◤ DISM /Online /Cleanup-image /Scanhealth
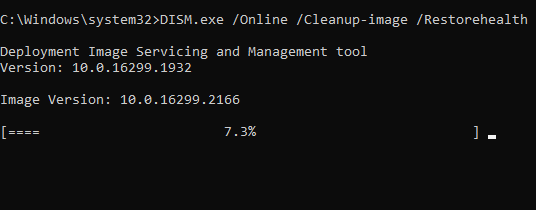
◤ DISM /Online /Cleanup-image /Restorehealth
Way 3. Enable Virtual Disk Service
Step 1. Press "Windows” + “R" keys simultaneously to open the Run box.
Step 2. Type "services.msc" in the Run box and press the "Enter" key to open "Windows Services Manager".

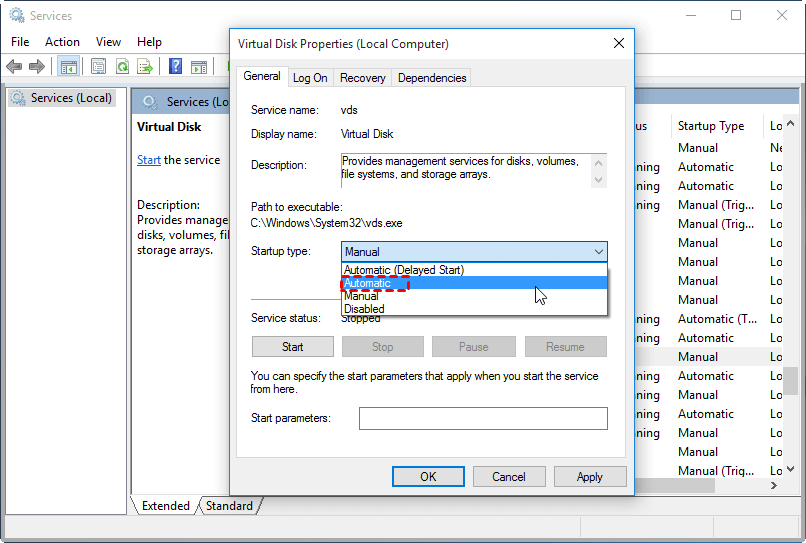
Step 3. Find Virtual Disk service. Double-click this service to open it.
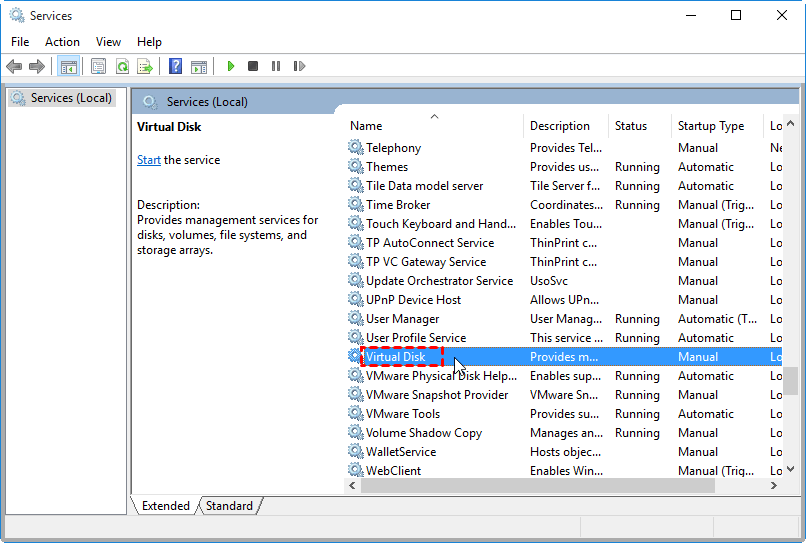
Step 4. Choose Automatic or Manual for the Startup type. Then, click “OK” to save changes.
Way 4. Unblock Windows Firewall
Configure Windows Defender Firewall to allow VDS connections on both the remote computer and local computer.
Step 1. Click the “Start” button and click “Settings”, choose “Update & Security”.
Step 2. Select “Windows Defender” and click “Open Windows Defender Security Center”.

Step 3. Click “Firewall & network protection” and click “Allow an app through firewall”.
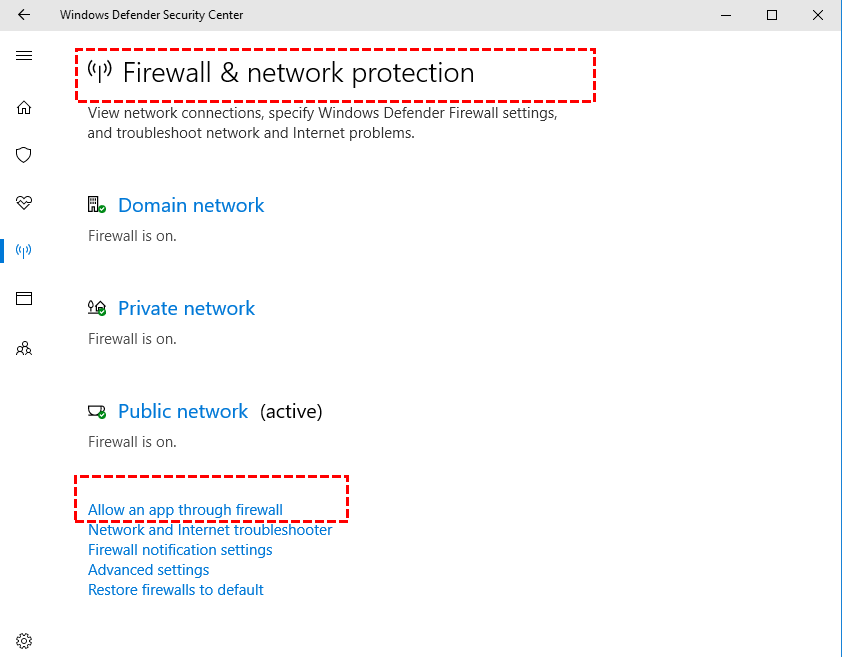
Step 4. In the new window, click “Change settings”.
Step 5. Find “Remote Volume Management” and tick both squares, then click the “OK” button to save changes.
Way 5. Disable Windows Defender
Step 1. Press "Windows + R" keys and type "gpedit.msc" to open Local Group Policy Editor.
Step 2. Navigate to Computer Configuration > Administrative Templates > Windows Components > Windows Defender Antivirus.
Step 3. Choose “Windows Defender Antivirus” and double click “Turn off Windows Defender Antivirus”.
Step 4. Tick “Enabled” and then click “Apply” and “OK” to save changes.

Step 5. Reboot your PC to make the changes go into effect.
Way 6. Employ alternative to manage your disk
Disk Management is not the only tool that can help you manage your disks and drive on the Windows PC. The third-party program AOMEI Partition Assistant Professional can also offer you a hand when errors happen. If you need a disk manager eagerly, it can completely replace Disk Management, and some functions even break the limitation of Disk Management.
For instance, in Disk Management, if you wish to extend the volume of the C drive, the C drive must have an adjacent unallocated space right behind it, otherwise, users are not allowed to do it. And if your disk doesn’t have unallocated space, it will ask you to delete the partition behind the C drive to create unallocated space.
But AOMEI Partition Assistant allows users to share free space from another drive to the drive without sufficient space, and all data on both drives is safe.
Another example is the conversion between MBR and GPT. The versions after Windows 10 1703 can use MBR2GPT to convert system disk without losing data. But, this tool is only available for Windows 10 1703 and later versions and only system disk. AOMEI Partition Assistant supports the conversion of system disk and data disk, also won’t hurt data.
What’s more, it has various features like “Disk Clone Wizard”, “Migrate OS to SSD”, “Convert to FAT32/NTFS”, “Convert to Primary/Logical”… You can safely and efficiently organize the devices.
If you’re interested, let’s see more details. We’ll show you how to extend C drive and how to convert MBR to GPT as examples.
1. Extend drive
To extend drive space, here we’ll use the “Allocate Free Space” feature.
Step 1. Download and launch AOMEI Partition Assistant, right-click the partition from which you want to allocate free space, and select "Allocate Free Space".

Step 2. Type in the size of the free space which you want to cut from the D partition and this free space will be directly added to the C partition.

Step 3. Click "Apply" to execute this operation.

Then you can reboot your computer and finish the task.
2. Convert to GPT
Step 1. Launch the software, right-click the MBR disk you want to change, and then choose Convert to GPT.
Step 2. In the pop-up windows, click “OK” to continue.
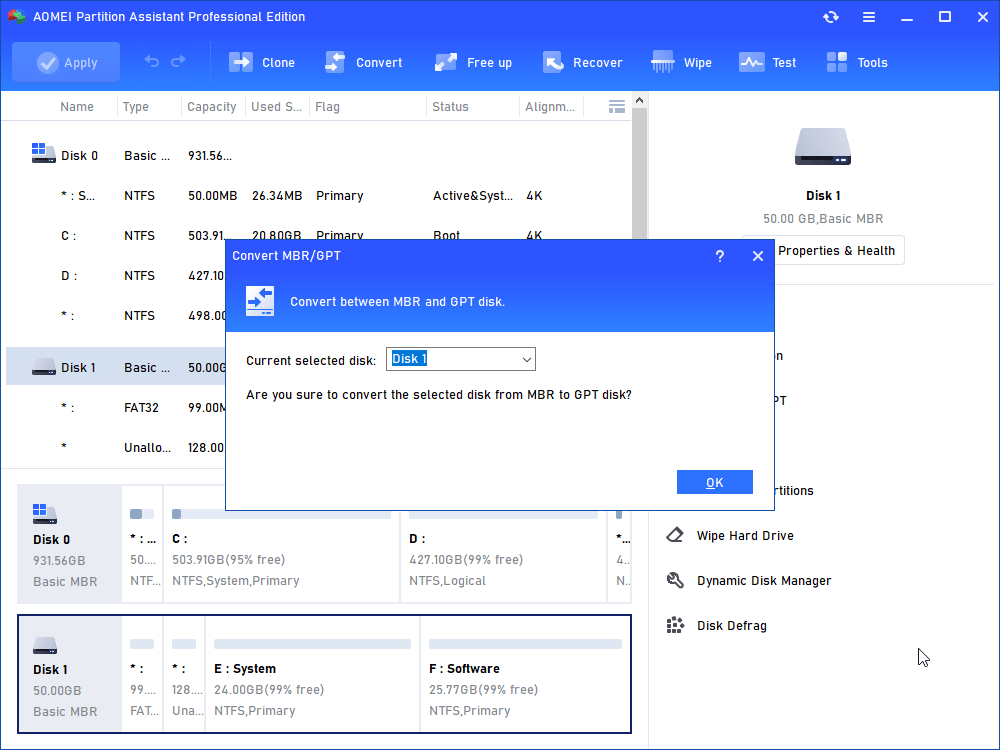
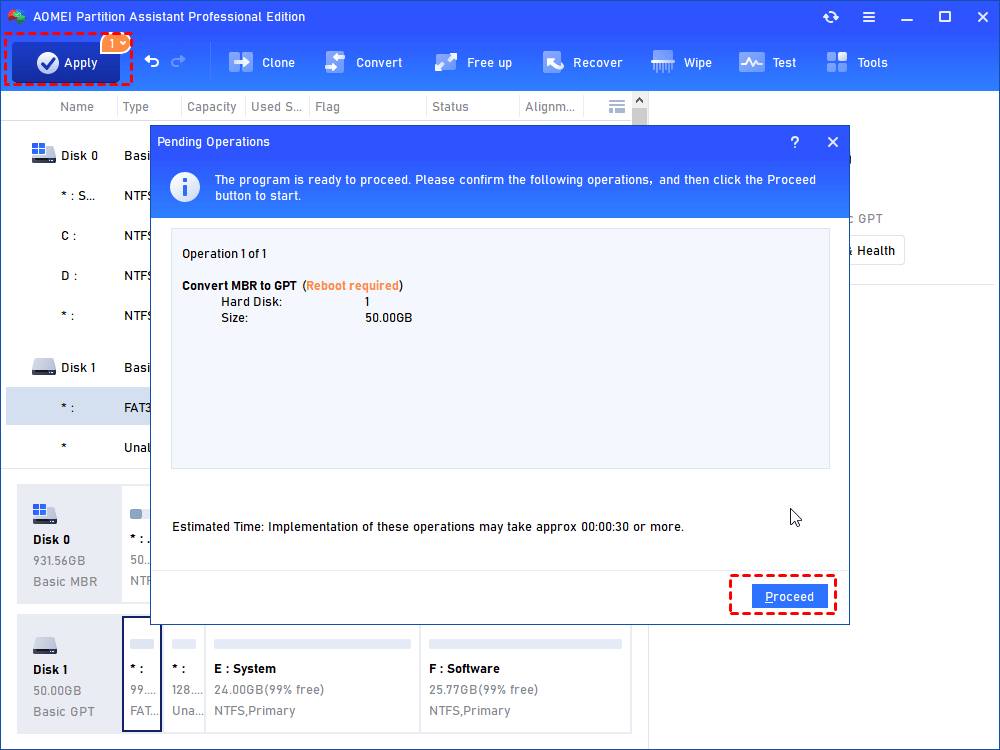
Step 3. Click “Apply” to operate and then your disk will be changed into GPT disk style.
Note: In the example, the MBR disk is a data disk, if you need details on how to convert the system disk to GPT you can click the link.
Ending lines
If you confront “Disk Management unable to connect to virtual disk service”, don’t be anxious, you can try all methods we showed. AOMEI Partition Assistant is an all-around disk manager, if you’re a company user, you can try the Server Edition and the Unlimited Edition.

