How to Use Disk Management on Windows 11 to Create Partitions
If you want to use Disk Management on Windows 11 to create partitions, please read this article. Here you can learn how to create a partition with Windows 11 Disk Management and a third-party freeware.
By AOMEI / Updated on May 12, 2023
Why use Windows 11 Disk Management to create partitions?
Windows 11 is the Windows operating system launched by Microsoft in 2021, also the successor to Windows 10. Compared with Windows 10, Windows 11 only supports UEFI boot mode and Trusted Platform Module (TPM) 2.0. Windows 11 has received mixed reviews since its release: Windows 11 has received positive reviews for its improved visual design, window management, and greater focus on security, but has been criticized for its UI regressions and revisions.
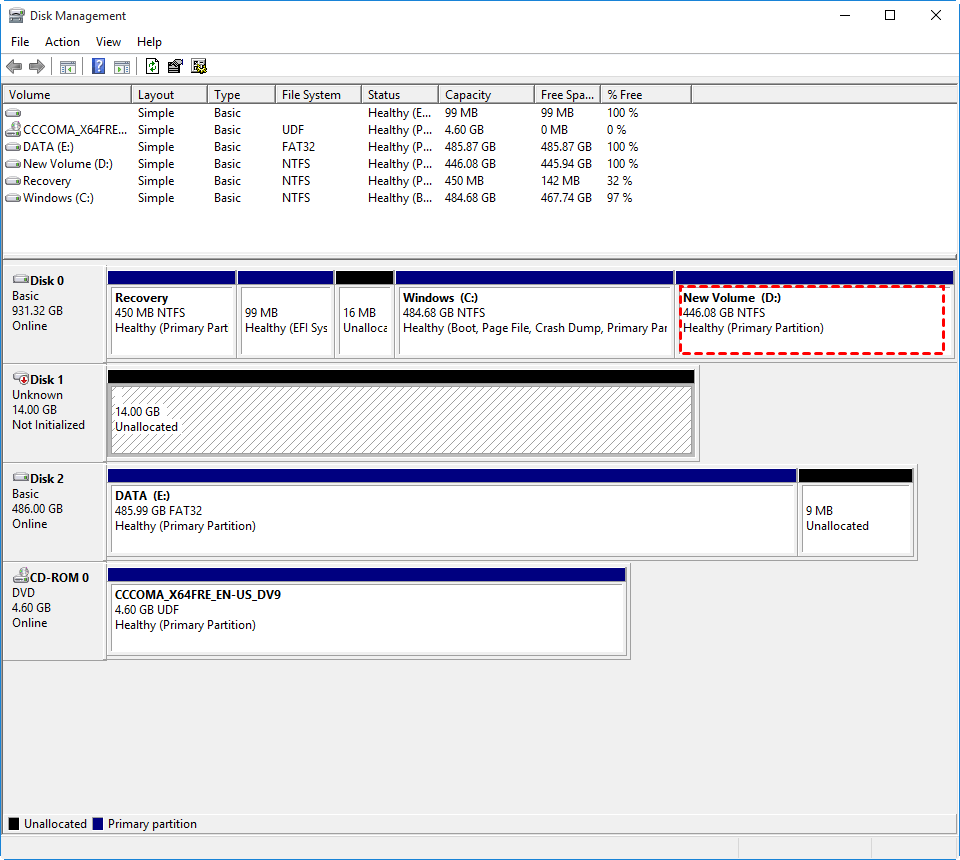
When we use a new computer or a new hard drive, there is usually only one partition. With all personal data and Windows 11 system data stored in this partition, if you encounter a Windows 11 system crash, other personal data in this partition may also be damaged. Or if you need to reinstall Windows 11 due to other errors, you have to format the entire system drive. Therefore, it is necessary to create partitions on Windows 11 for data security.
How to use Disk Management on Windows 11 to create partitions
Disk Management is a common Windows system task located in the Computer Management console. It supports you to delete/shrink/extend/create volumes, initialize disks, format volumes to FAT32 or NTFS file systems, etc. Wondering how to use Disk Management on Windows 11 to create partitions on a hard drive? Please follow the steps below.
Case 1. If the hard drive has only one partition, you need to shrink the partition to generate unallocated space, and then create a new partition.
Tip: Disk Management only supports shrinking volumes with NTFS file format. If it is FAT32, please convert FAT 32 to NTFS in advance.
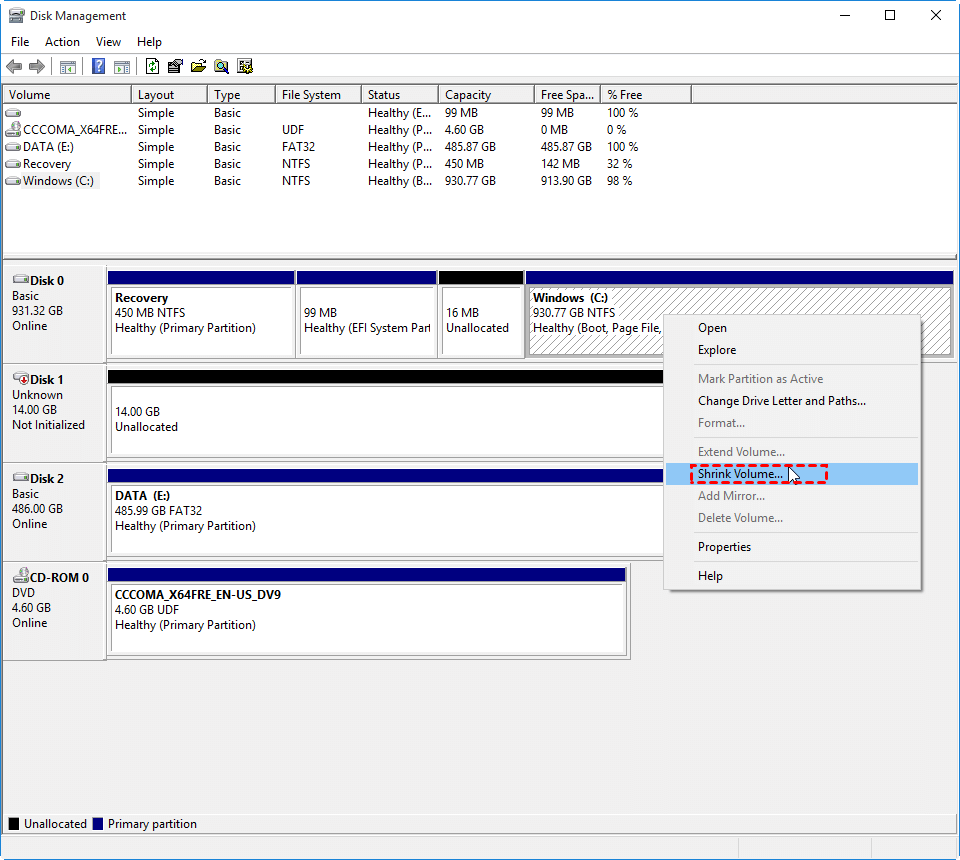
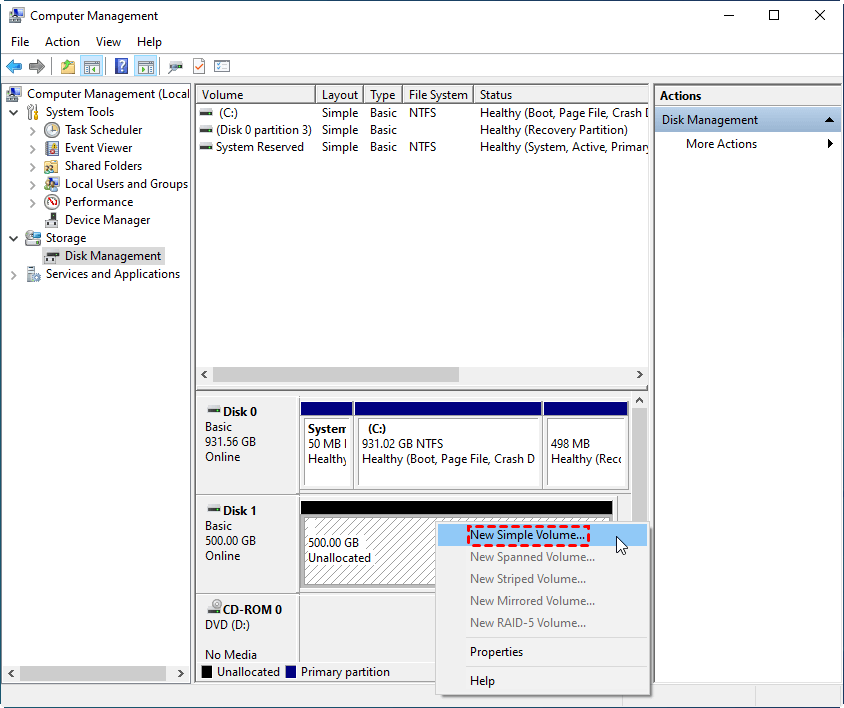
Step 1. Press "Windows +R" and input "diskmgmt.msc", then right click on the C drive and select "Shrink Volume".
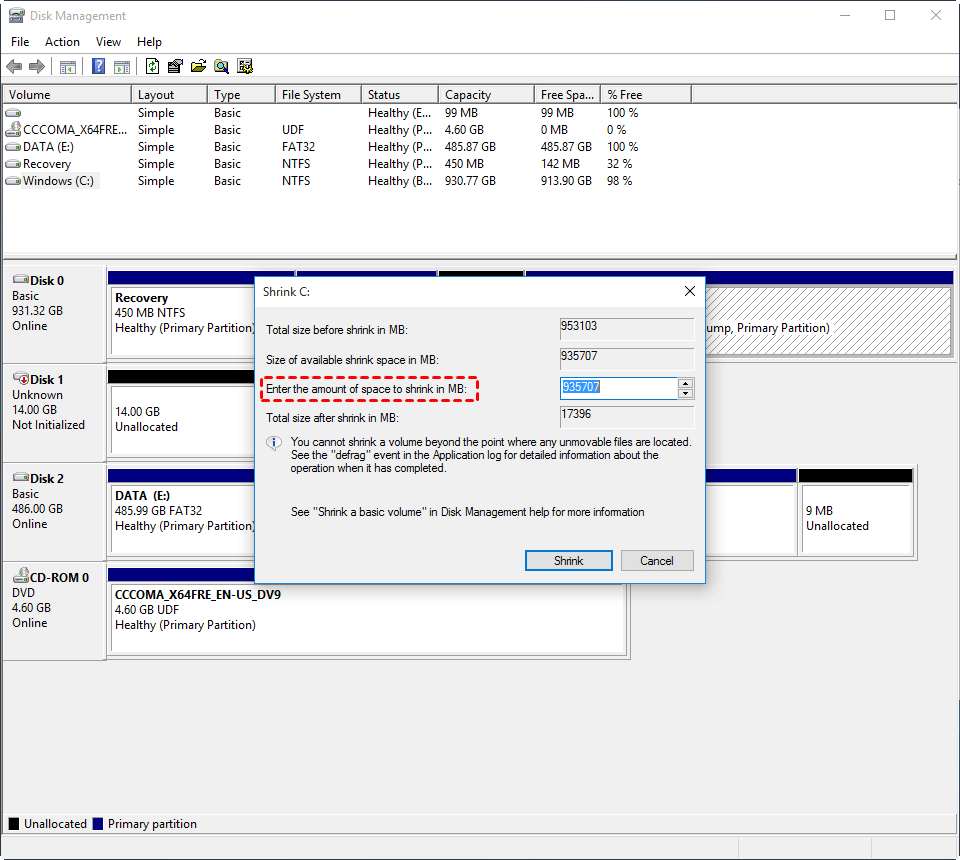
Step 2. Enter the amount of space you want to shrink and click "Shrink Volume".
Step 3. After shrinking the C drive, you can see that there is an unallocated space next to it, right-click on the unallocated space and select "New Simple Volume".
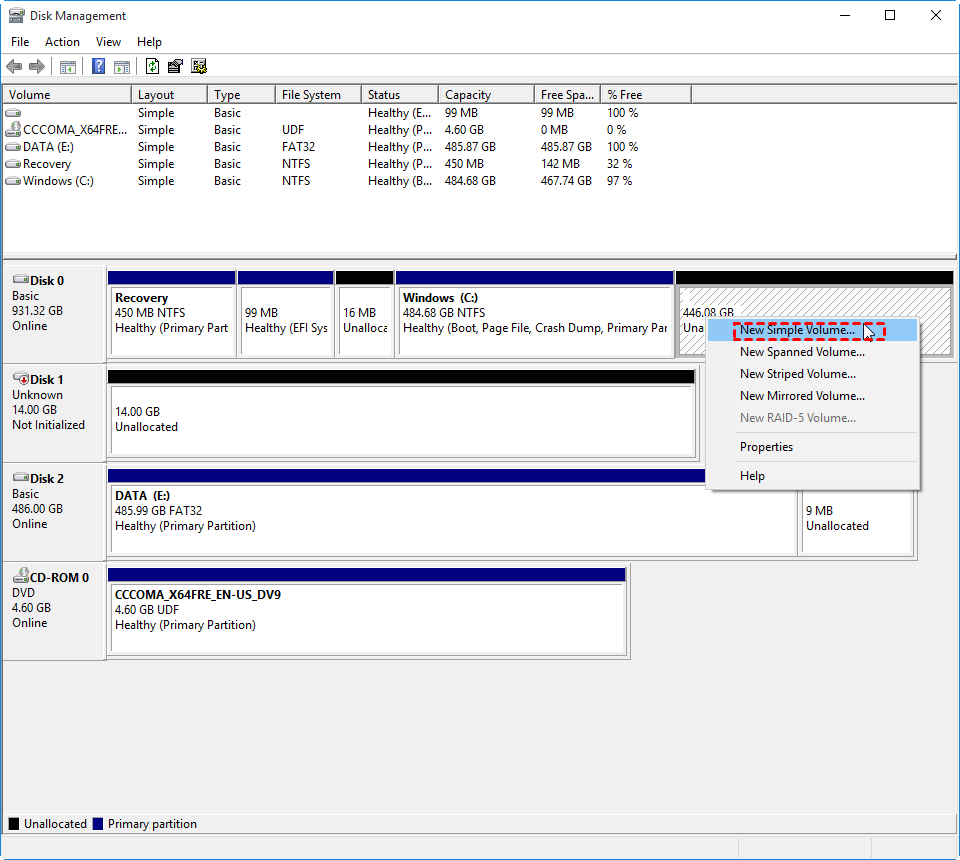
Step 4. In the new pop-up window, you will see the New Simple Volume wizard which will guide you to set the partition size, assign a drive letter, etc. Then you can create a new partition successfully.
Case 2. If the hard drive has allocated space, you can create it directly.
Using a strong alternative to create new partitions easier (free)
As you can see from the above, although Disk Management is a good choice for creating new partitions, there's something limited, which will have a bad impact on your experience to a certain extent. In fact, there is a freeware specially designed for managing disks - AOMEI Partition Assistant Standard.
Regardless of whether there is unallocated space on the hard drive, you can create partitions and specify information about the new partitions, including partition size, drive letter, partition type (logical or primary), and more. For example, you can specify the size of the new partitions by dragging the edge circle to the right or left.
Surprisingly, this multi-functional tool can not only create partitions, but also help you solve many other common disk management problems, such as resize partition, change drive letter, merge partitions, and wipe partition.
Let's see how it can replace Disk Management on Windows 11 to create partitions.
Situation 1. Create partition with no unallocated space
If there is no unallocated space in the system disk, you can choose a partition with free space, but the consequence of this operation is that the space of the target partition will be reduced.
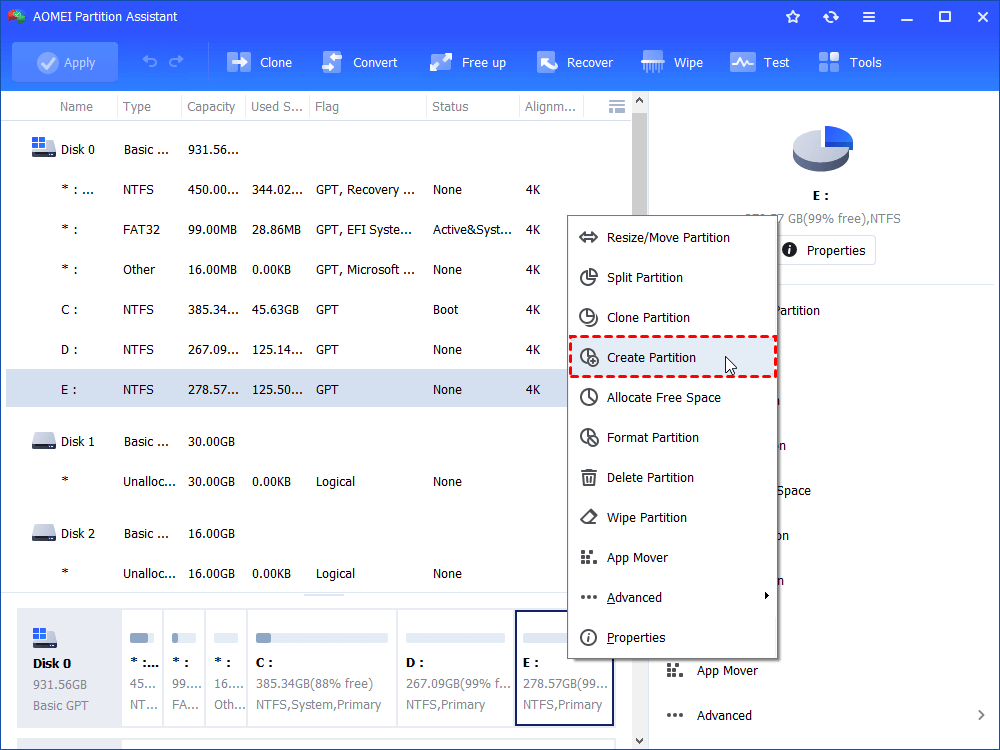
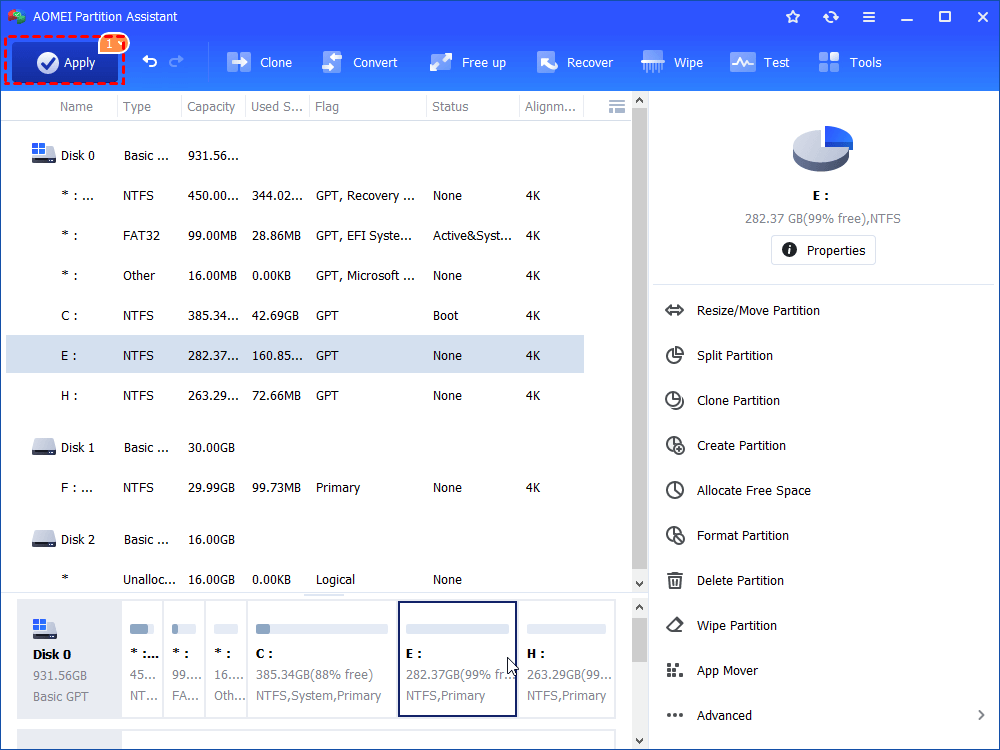
Step 1. Download and open AOMEI Partition Assistant Standard. Right click the E drive, then click "Create Partition".
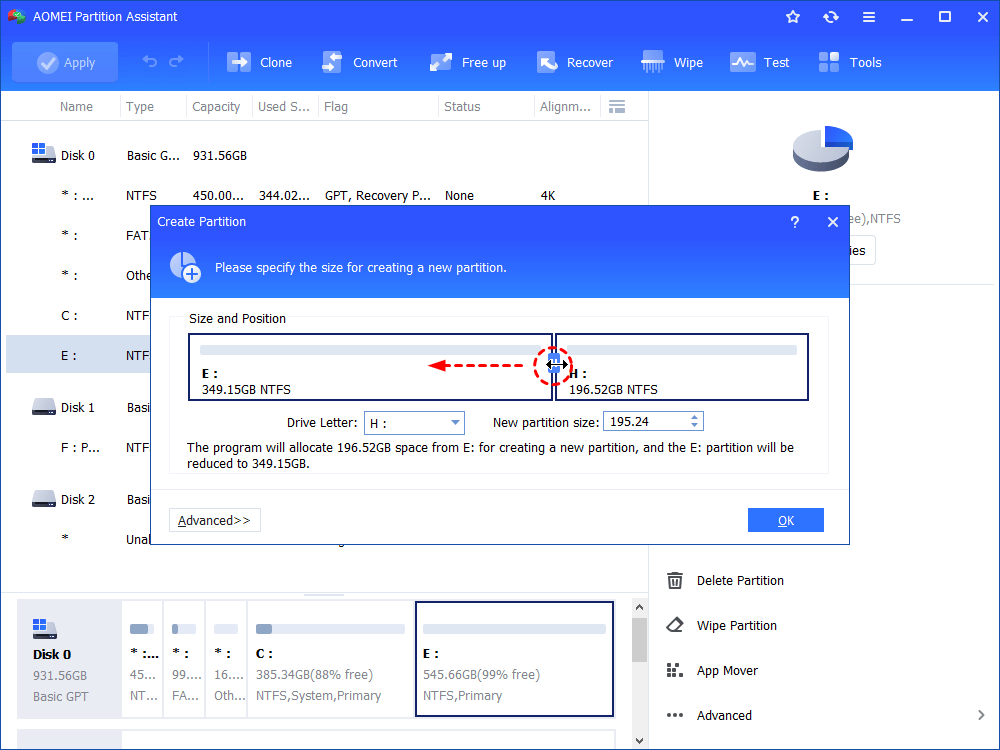
Step 2. In the small window popped, you can drag the double arrow or input the amount of the new partition's size, then click "OK".
Step 3. After setting all, click "Apply" to perform these operations
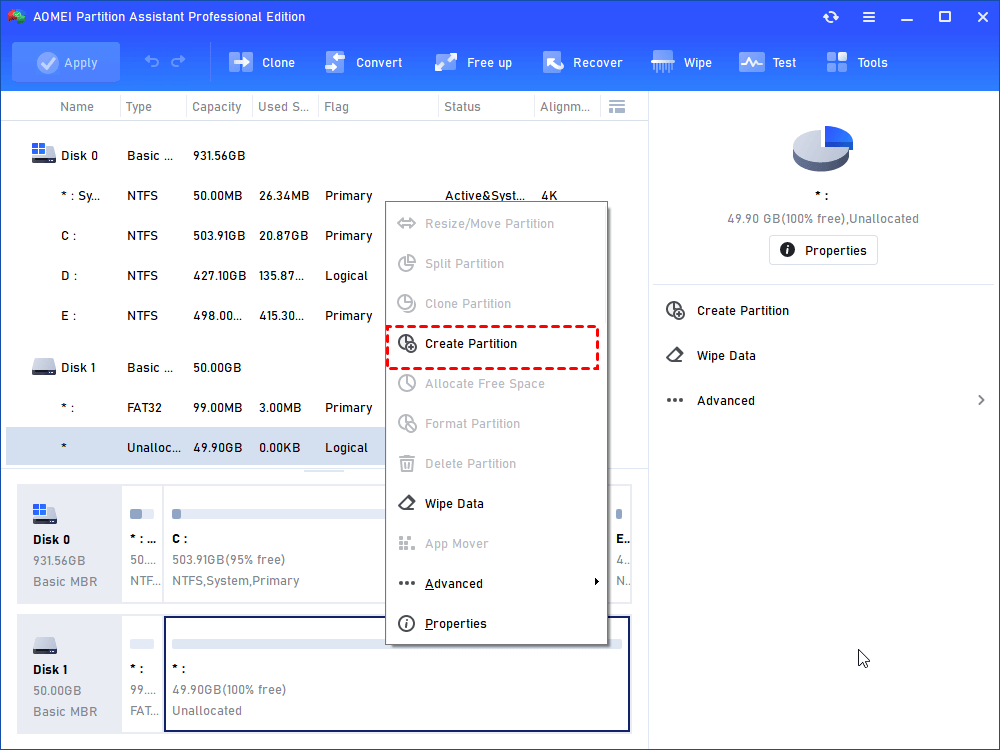
Situation 2. Create partition with an unallocated space
If there is unallocated space in the target drive, you can do the following:
Note:
After upgrading to Pro Edition, you can get new partitions directly by split partition, avoiding the steps of shrinking and creating partitions. In addition, you can try more advanced features, such as allocate free space, move applications from one partition to another, delete large files and more.
Verdict
How to use Disk Management on Windows 11 to create partitions? In this article, we detailed the proper operation of creating partitions with Disk Management and another perfect alternative AOMEI Partition Assistant Standard. In addition to the features mentioned above, it can also guide you when you have low disk space.
If you want to use this software on the server, please don't miss the Server Version.

