Does Initializing a Disk Erase Data? What You Need to Know
When initializing a disk, many users wonder “does initializing a disk erase data?” This article explores the relationship between disk initialization and data erasure. Additionally, it shows you how to initialize a disk without losing data.
By Gia / Updated on March 7, 2025
Does initializing a disk erase data?
Initializing a disk is the process of preparing it for use by creating a partition table. This partition table acts as a roadmap for the operating system, allowing it to recognize the disk and manage its data. In other words, a disk cannot be used to store or access files without initialization.
Typically, disk initialization is performed when using a disk for the first time. However, there are instances where a disk that was previously functioning may suddenly show as “uninitialized” in your system. Additionally, you might need to initialize a disk if you want to change its partition table type.
So, does initializing a disk erase data? Initializing a disk does not directly erase data, but it can make existing data inaccessible. When you initialize a disk, you’re creating a new partition table, which overwrites the old one. Besides that, if you create new partitions or format the disk after initialization, the data will be overwritten and lost permanently.
Can you initialize a disk without losing data?
If your disk shows as “uninitialized” or “unknown” in Disk Management, or if you want to change the partition table type (e.g., from MBR to GPT), initializing the disk without losing data is likely your primary concern. Below, we’ll explore a step-by-step guide on how to initialize a disk without losing data.
Stage 1. Ensure your data remains safe
Before initializing a disk, it’s essential to ensure your data remains safe in case of unexpected errors. Here are two ways you can choose.
✔ Recover Data: If your disk is already uninitialized, use reliable data recovery software to scan the disk and recover lost files. Save the recovered data to another storage device.
✔ Backup Data: If the disk is still accessible, back up all important files to an external drive or cloud storage.
Stage 2. Initialize a disk using professional software
AOMEI Partition Assistant is a powerful and user-friendly disk management tool designed to simplify the process of managing your hard drives, SSDs, and other storage devices. With its intuitive interface, you can effortlessly initialize your disk into MBR or GPT mode on Windows 11, 10, 8/8.1, or 7. Additionally, AOMEI Partition Assistant also includes rich features, making it a versatile all-in-one solution for maintaining your storage devices.
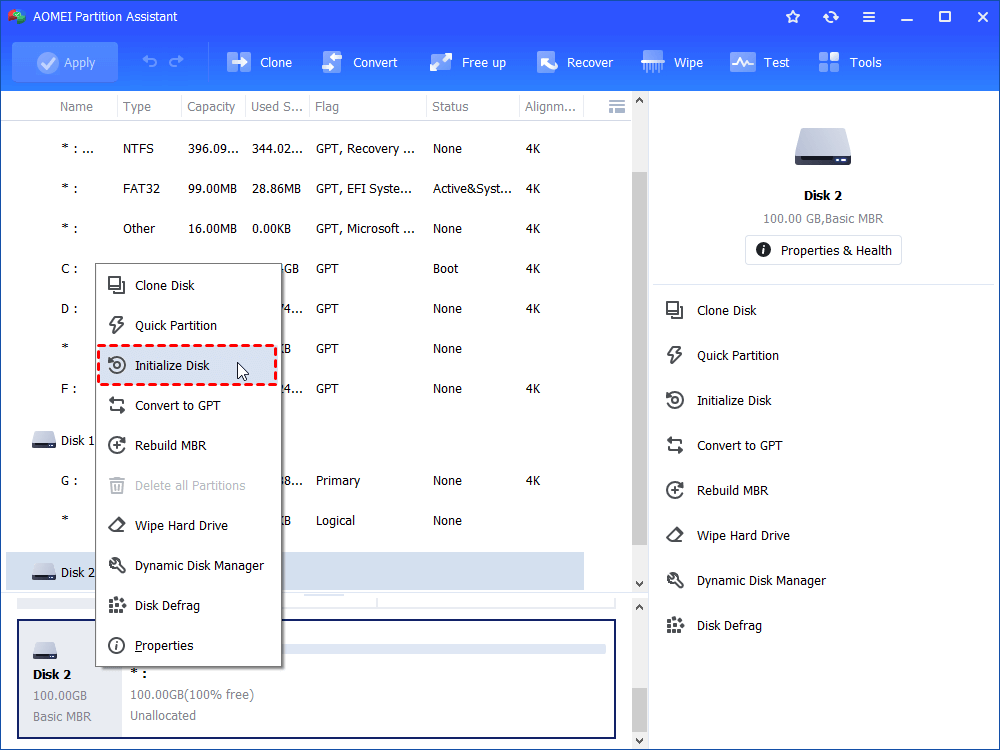
Step 1: Launch AOMEI Partition Assistant; right click on the disk which you want to initialize, and choose "Initialize Disk".
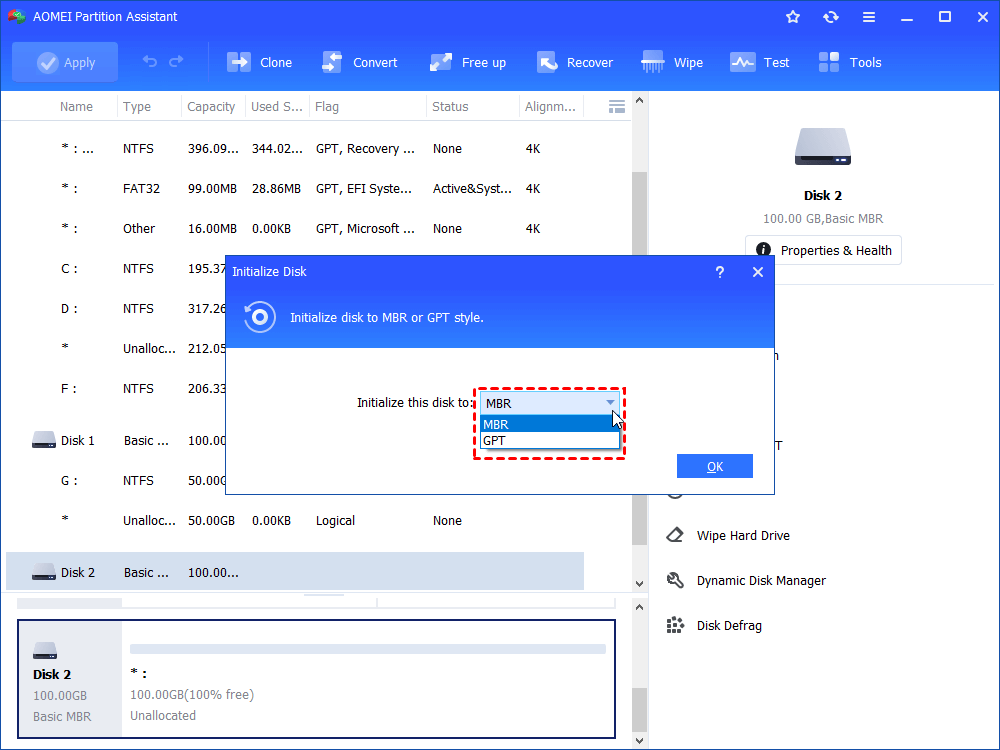
Step 2: In the pop-up window, there will be two options for you to choose. Select the one according to your needs and click "OK" to continue.
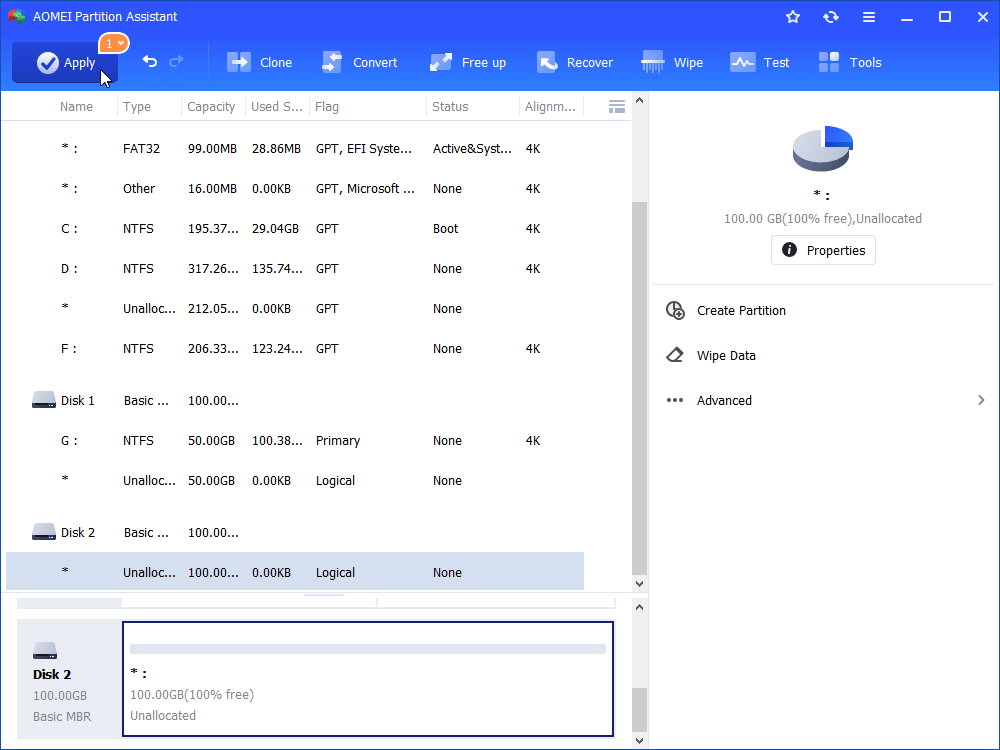
Step 3: Click "Apply" to wait for process to complete.
Stage 3. Further operations after initializing
After initializing the disk, you may need to create new partitions or format partitions to organize your data effectively. AOMEI Partition Assistant can meet all your needs:
✔ Create a New Partition: Right-click the unallocated space and select Create Partition. Then, follow the instructions to create it.

✔ Format a Partition: If the new partition doesn’t work properly, right-click the created partition and select the Format Partition option. Follow the instructions to format it.
Pro Tips. Convert between GPT and MBR
If you only want to change the partition table type, AOMEI Partition Assistant provides a straightforward feature to convert between GPT and MBR. Here’s a step-by-step guide:
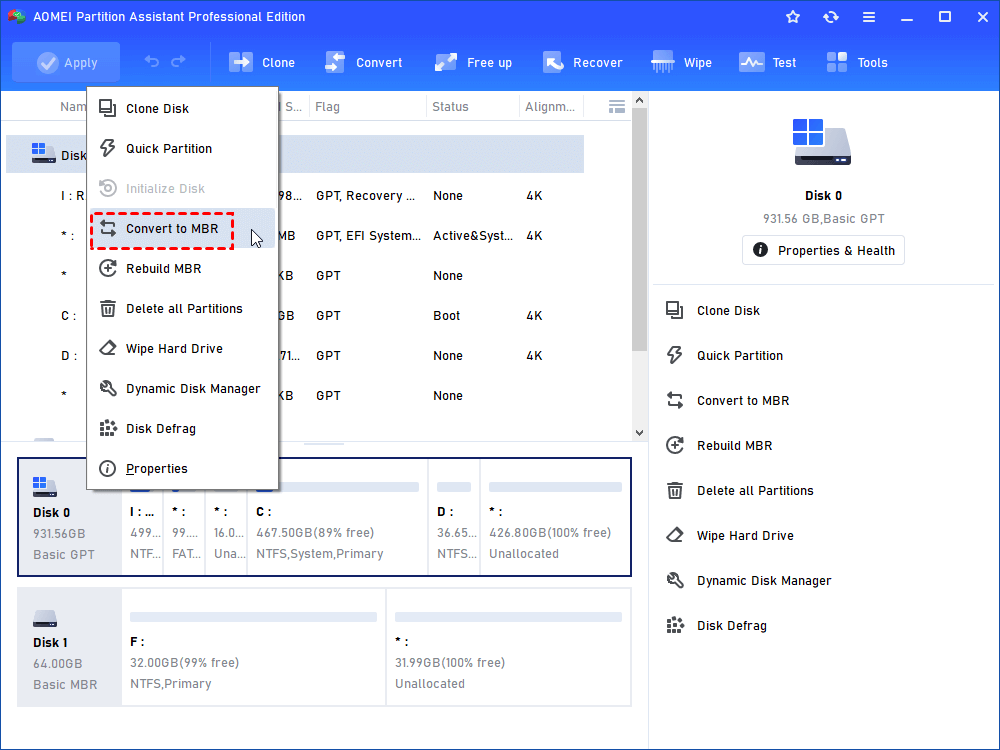
Step 1. Right-click the disk you want to convert and select "Convert to MBR/GPT".
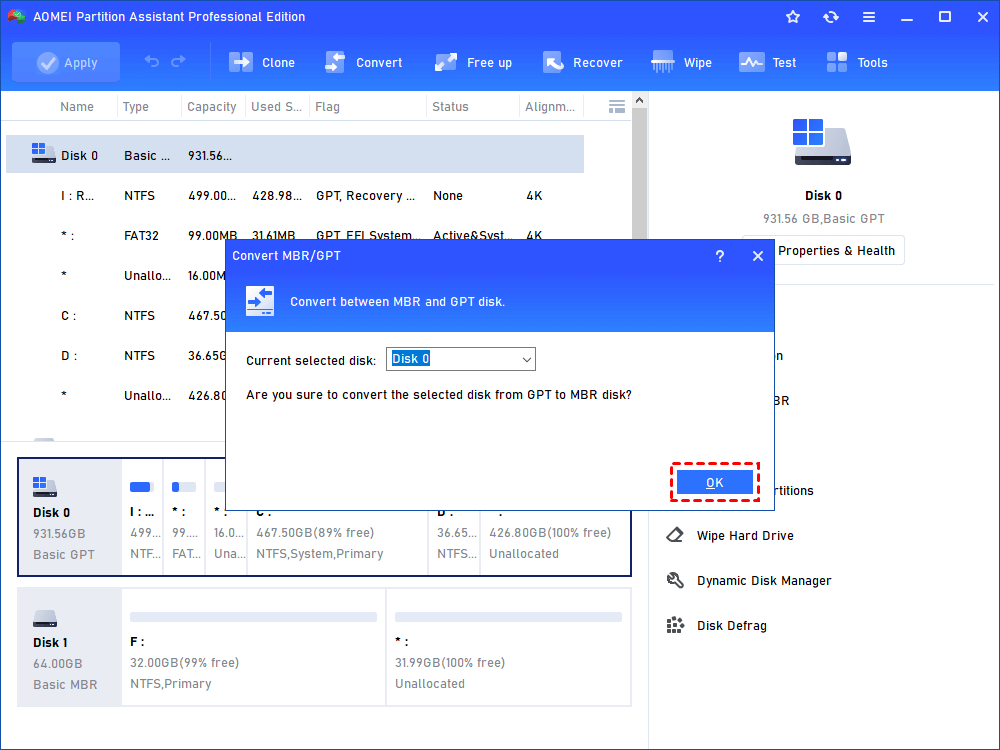
Step 2. Select the drive you want to convert and click "OK" after confirming the operation.
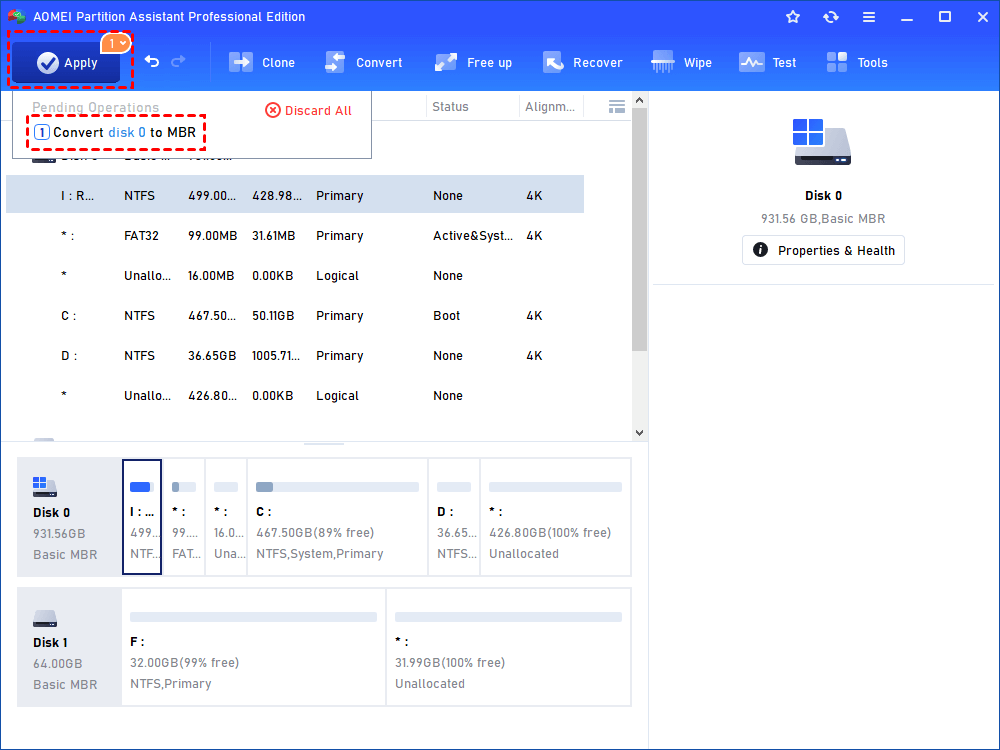
Step 3. You can preview the conversion under "Pending Operations". Then, click “Apply” and “Proceed” to start the process.
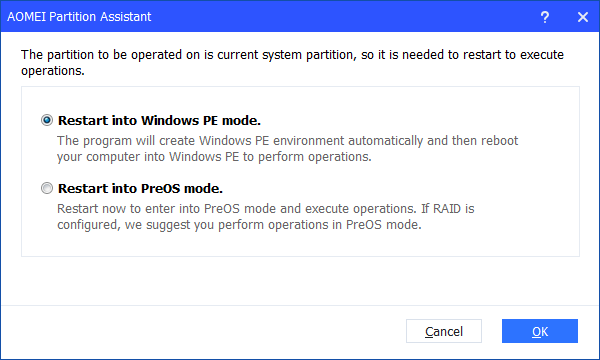
Step 4. In the pop-up window, select one mode you prefer to execute the conversion operation.
Step 5. Wait for the conversion to be finished. Once it is converted successfully, the PC will be restarted automatically, and the drive will be converted to MBR/GPT.
Final Words
So, does initializing a disk erase data? Not necessarily, but it can make your data inaccessible, especially if you proceed to partition or format the disk afterward. By following the steps outlined in this guide, you can initialize a disk without losing data and ensure your files remain safe.
AOMEI Partition Assistant not only supports initializing disks but also allows you to convert disks between GPT and MBR directly. Always remember to back up your data before performing any disk operations and use reliable software to recover files if needed.
FAQs
Q1: Does initializing a disk erase data?
A: Initializing a disk will not directly erase data, but it can make existing data inaccessible by overwriting the partition table.
Q2: Why does my disk show as “uninitialized”?
A: A disk may show as “uninitialized” due to corruption, improper ejection, or a missing or damaged partition table. It can also happen if the disk is new and has never been used before.
Q3: What’s the difference between initializing and formatting a disk?
A: Initializing prepares a new or unrecognized disk for use by defining its partition style (MBR or GPT), while formatting prepares a partition for data storage by setting up a file system (NTFS, FAT32, exFAT, etc.).

