3 Easy Ways to Edit Local Users and Groups
Sometimes, it’s necessary to edit Local Users and Groups in Windows 10/11. In this article, you will learn three different ways to edit them quickly.
By Hedy / Updated on October 11, 2025
Why is it necessary to edit Local Users and Groups?
Editing Local Users and Groups in Windows is essential for managing how people access and use your computer or network. It allows administrators to control user permissions, improve security, and maintain system organization. Here’s why it’s necessary:
⚡ Enhance security: By assigning specific roles and permissions, you can prevent unauthorized users from accessing sensitive files or making system changes.
⚡ Simplify management: Instead of setting permissions for each individual, you can manage access by grouping users with similar roles.
⚡ Control access: You can enable, disable, or delete user accounts to control who can log in to the system.
⚡ Customize privileges: Editing groups allows you to define what each user or group can do—like installing software or accessing certain folders.
⚡ Maintain system stability: Proper user and group management prevents accidental changes or security breaches that could disrupt the system.
In short, editing Local Users and Groups helps keep your Windows environment secure, organized, and efficient.
How to edit Local Users and Groups in Windows 11
Windows 11 includes a feature called Local Users and Groups (lusrmgr.msc) that allows administrators to manage user accounts and groups on the system. Editing these settings is useful when you want to change account permissions, reset passwords, or add/remove users.
Method 1: Using Local Users and Groups (lusrmgr.msc)
This is the most direct way to manage local users and groups, but it’s only available in Windows 11 Pro, Enterprise, or Education editions.
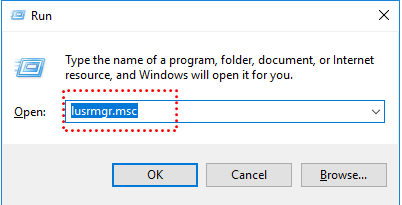
Step 1. Press Windows + R to open the Run dialog box.
Step 2. Type lusrmgr.msc and press Enter.
Step 3. The Local Users and Groups window will open. Here, you’ll see two folders: Users and Groups.
Step 4. To edit a user, double-click the desired account. You can then rename it, set a new password, or change group membership.
Step 5. To modify a group, select the Groups folder, double-click the group name, and add or remove users as needed.
This method provides the most detailed and flexible user management interface. However, if your system doesn’t support lusrmgr.msc, you can use an alternative method.
Method 2: Using Computer Management
If lusrmgr.msc is unavailable, the Computer Management console offers a similar way to edit local users and groups.
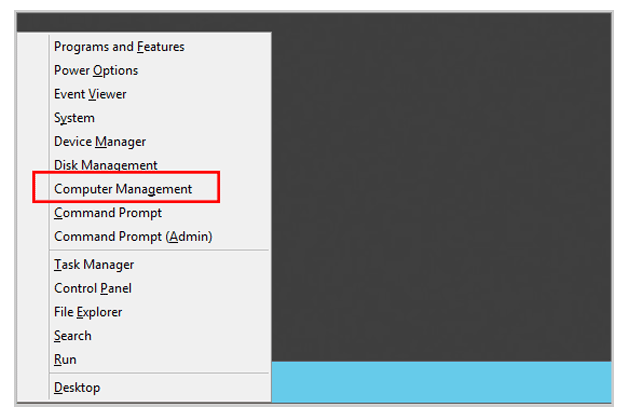
Step 1. Right-click the Start button and choose Computer Management.
Step 2. In the left-hand pane, expand System Tools, then click Local Users and Groups.
Step 4. Just like in the previous method, you can open the Users or Groups folder to make edits.
Step 5. Double-click any user or group to modify account properties, reset passwords, or manage membership.
This approach is especially convenient since it’s built into Windows and doesn’t require any extra tools. Moreover, it provides access to other administrative functions like task scheduling and event logs in one place.
Method 3: For Windows 11 Home (Alternative)
If you’re using Windows 11 Home, you might have noticed that the Local Users and Groups (lusrmgr.msc) tool isn’t available by default. This limitation can make it tricky to manage local accounts, adjust permissions, or modify group memberships. Fortunately, AOMEI Partition Assistant offers an effective alternative through its “Account Management” feature.
With AOMEI Partition Assistant, you can easily add, delete, or rename user accounts, reset forgotten passwords, and change account types — all without needing the built-in Local Users and Groups console. Its intuitive interface makes managing accounts simple even for non-technical users.
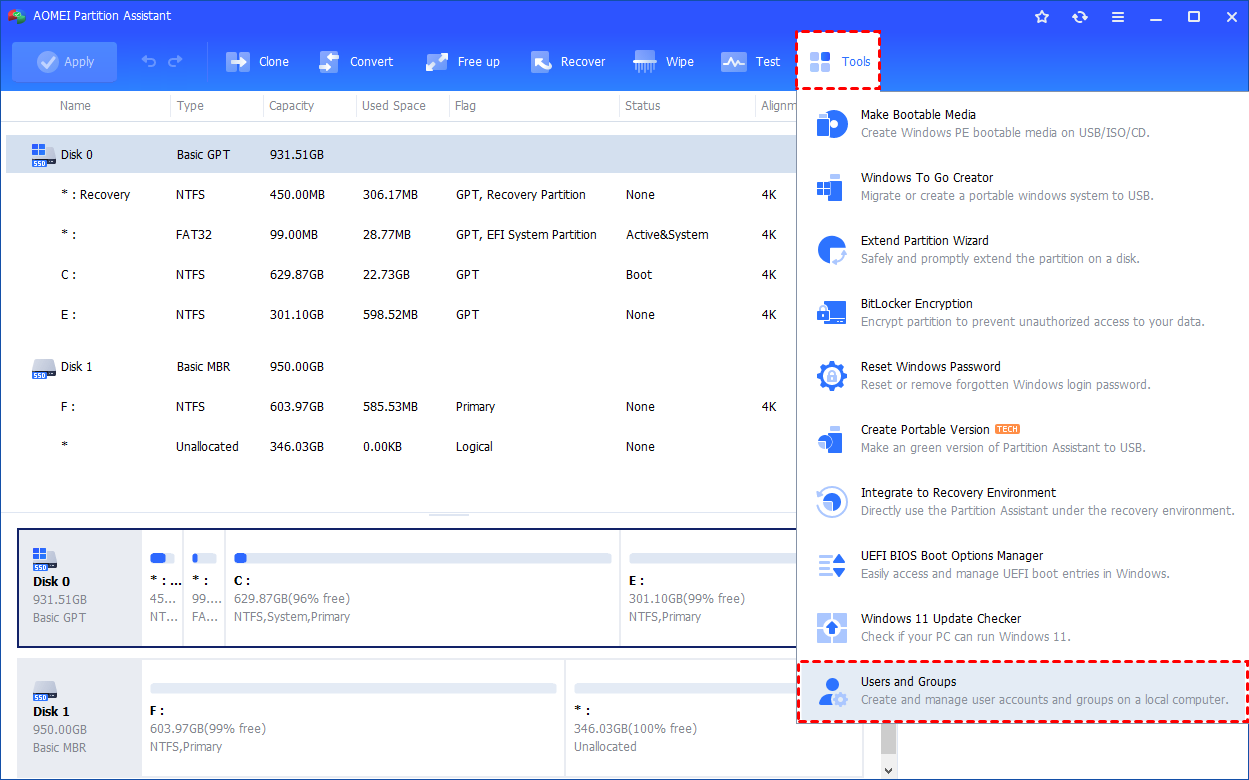
Step 1. Install and launch AOMEI Partition Assistant. Click the "Tools" main tab and select "Users and Groups".
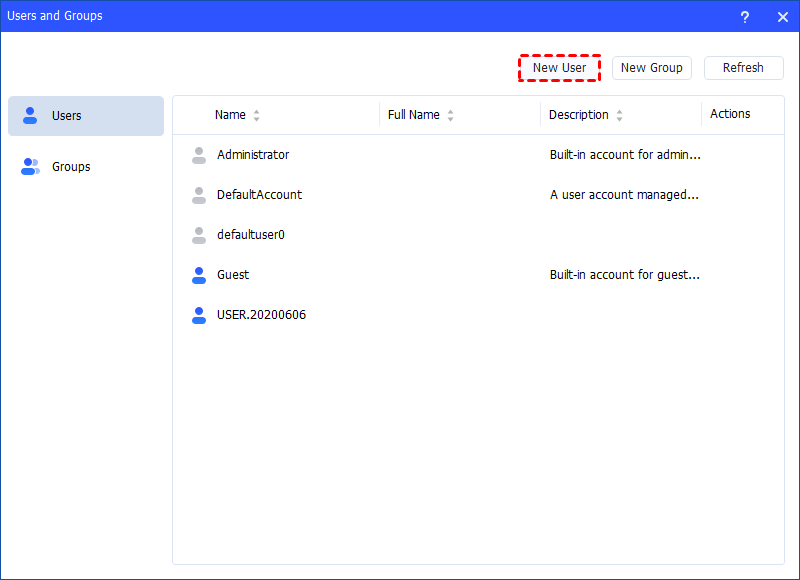
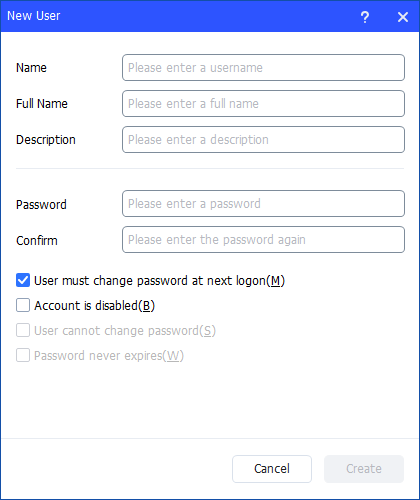
Step 2. Click the "Users" tab and then click the "New User" button to create a new user account. You can also click the "Refresh" button to refresh the user list.
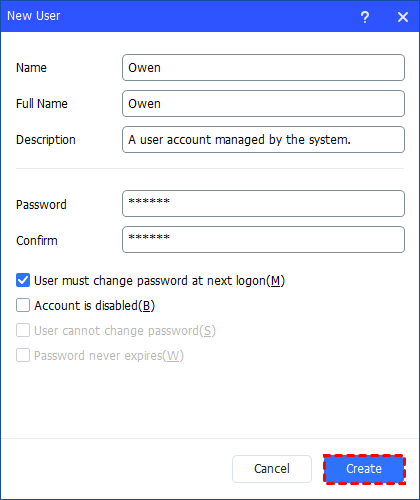
Step 3. Then, type the appropriate information in the dialog box. You can enter the name and description and set a password for the new user. And, you can select or clear the check boxes for: User must change password at next logon, Account is disabled, User cannot change password, Password never expires.
Step 4. After all is set, click "Create" to create the new user.
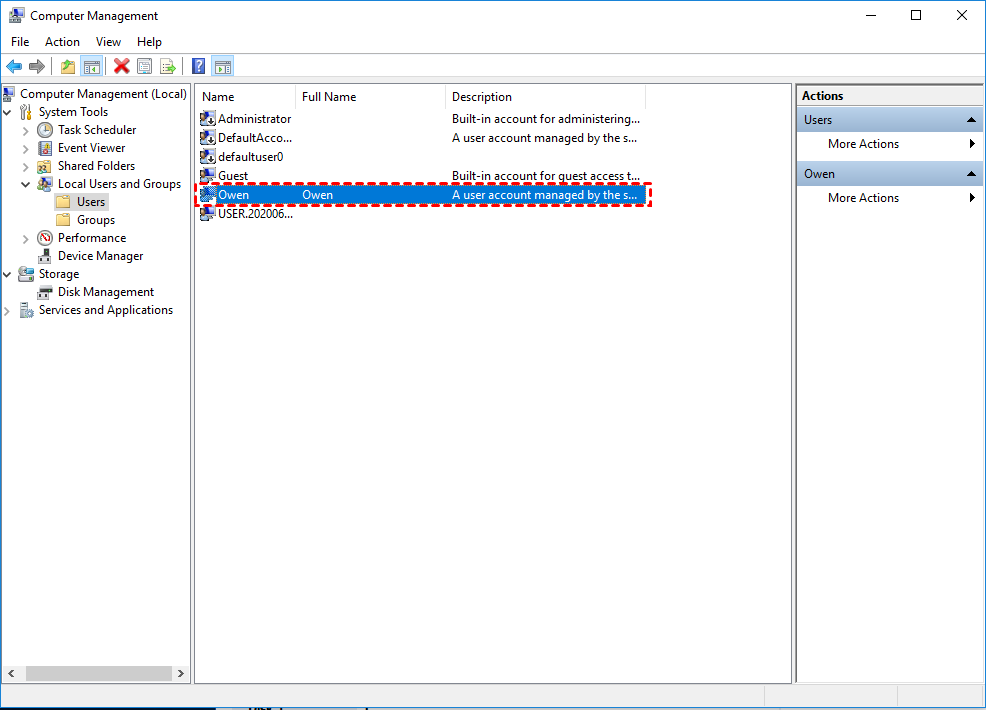
Step 5. Finally, you can see the user is created successfully in Windows Local Users and Groups. And, you can also easily manage the new user account.
Conclusion
In conclusion, editing Local Users and Groups in Windows 11 is vital for maintaining system security, organization, and control. It enables administrators to manage user permissions, customize access, and simplify account management. While Pro and Enterprise users can use lusrmgr.msc or Computer Management, Windows 11 Home users can rely on AOMEI Partition Assistant’s Account Management feature to efficiently handle user accounts without complex system tools.

