How to Format Old Hard Drive After Installing a New SSD
If you want to know how to format old hard drive after installing a new SSD, you come to the right place. In this guide, you will learn three different methods to get it done.
By Hedy / Updated on September 17, 2025
Why need to format old hard drive after installing a new SSD?
You don’t always have to format your old hard drive after installing a new SSD, but many people do it for practical reasons. Here’s why:
1. Avoid boot conflicts: If your old hard drive still has Windows or another OS installed, your computer might get confused about which drive to boot from. This can lead to startup errors or the system booting from the wrong drive.
2. Free up space: Once your SSD has the operating system and main programs, the old HDD is usually used for storage. Formatting wipes everything so you can use the full capacity for files, games, videos, or backups.
3. Remove redundant system files: System partitions, recovery partitions, or leftover boot records on the old drive can cause clutter or conflicts. A clean format ensures only data you want remains.
4. Better performance management: A formatted HDD runs smoother because it removes fragmented system files and hidden junk left over from the old OS.
5. Security reasons: If you’re selling, giving away, or repurposing the drive, formatting ensures old personal data or sensitive information isn’t easily accessible.
How to format old hard drive after installing a new SSD
Way 1. Using File Explorer
The simplest way to format an old hard drive is through File Explorer, which most Windows users are already familiar with. It offers a user-friendly interface and allows you to quickly erase data without requiring advanced knowledge.
Step 1. Press Win + E to open File Explorer.
Step 2. Locate the old hard drive under This PC.
Step 3. Right-click on the drive and select Format.
Step 4. Choose the file system (NTFS, FAT32, or exFAT).
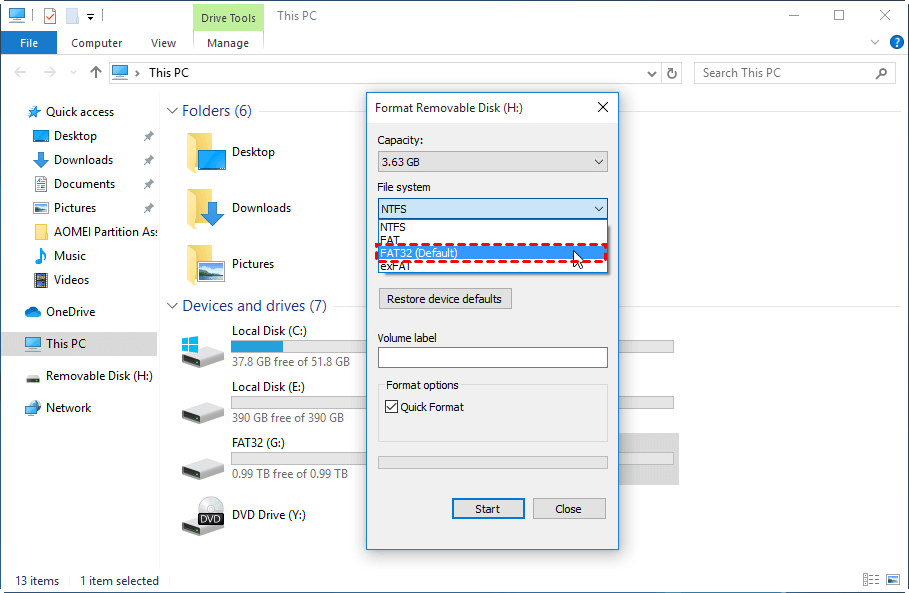
Step 5. Click Start to begin formatting.
Way 2. Using Disk Management tool
Disk Management provides more control than File Explorer, allowing you to manage partitions, assign drive letters, and format drives efficiently. It is especially useful when the drive is not showing up in File Explorer.
Step 1. Right-click the Start button and choose Disk Management.
Step 2. Locate the old hard drive in the disk list.
Step 3. Right-click the partition and select Format.
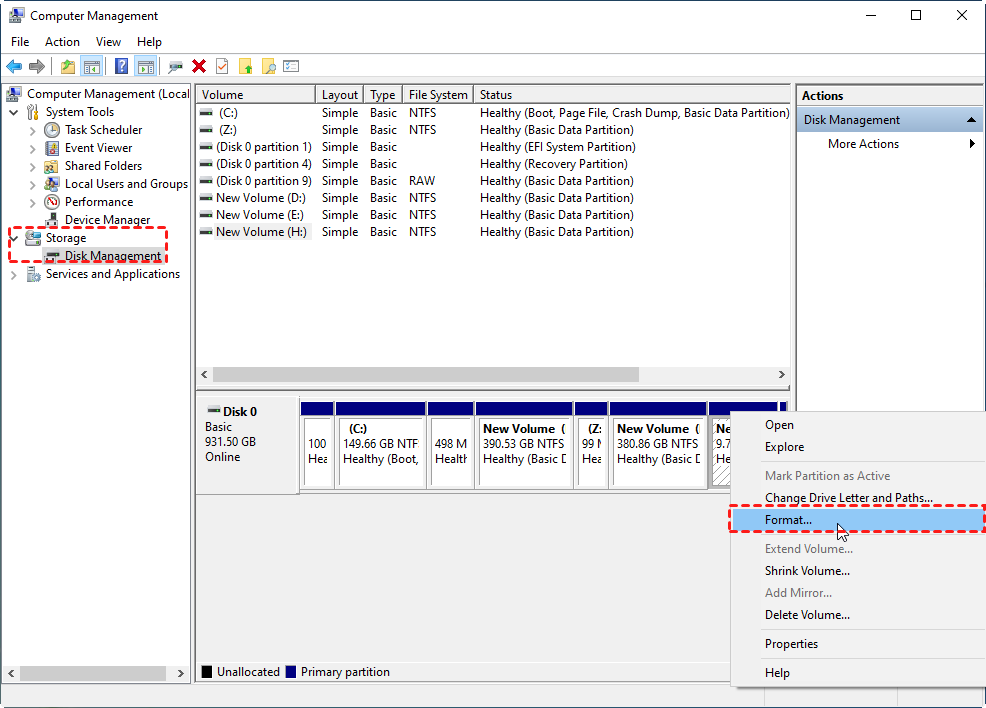
Step 4. Enter a volume label and select the desired file system.
Step 5. Click OK to confirm and format the drive.
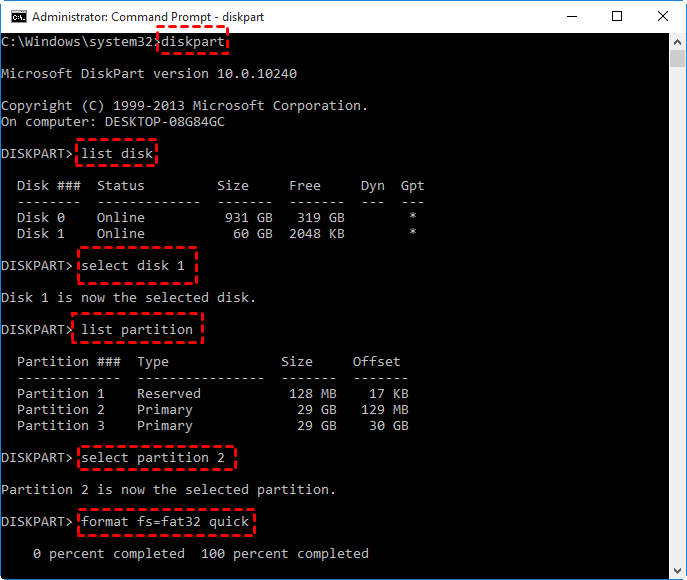
Way 3. Using Command Prompt (Diskpart)
For advanced users, Diskpart is a powerful command-line utility that can fully wipe and reformat drives. It is especially handy if the drive has stubborn partitions or errors preventing normal formatting.
Step 1. Press Win + R, type cmd, and run as Administrator.
Step 2. Type the following command one by one and press Enter:
diskpart
list disk
select disk 1
list partition
select partition 2
format fs=fat32 quick
Way 4. Using professional disk formatter
If the built-in tools fail, a professional disk formatter offers advanced options for secure erasing, fixing corrupted drives, or managing partitions more flexibly. Tools like AOMEI Partition Assistant make the process much simpler with a clear interface and powerful features.
This tool offers far greater power and flexibility than the default Windows formatting utilities. For instance:
✔ Format drives to FAT32 even when they exceed 32GB.
✔ Effortlessly convert internal or external drives to the exFAT file system.
✔ Create Ext4, Ext3, or Ext2 Linux file systems directly within Windows.
✔ Force format RAW or read-only volumes with ease.
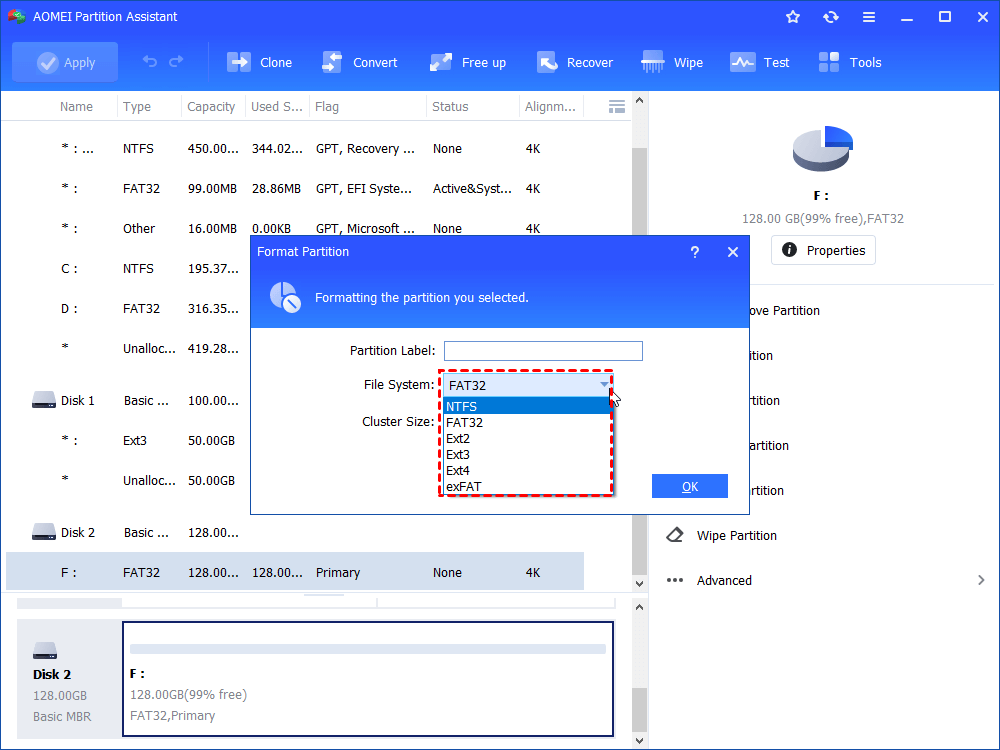
Step 1. Download AOMEI Partition Assistant, install and run it. In the main interface, right-click the target drive and select “Format Partition”.
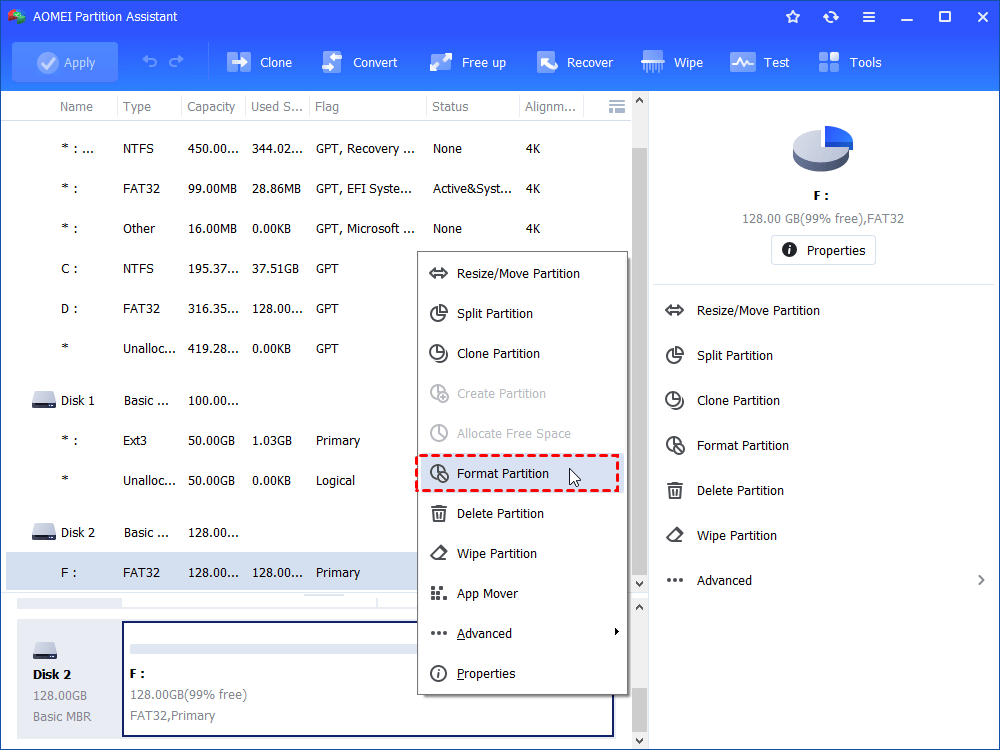
Step 2. In this small window, specify the file system of the drive based on your own demand and click “OK”.
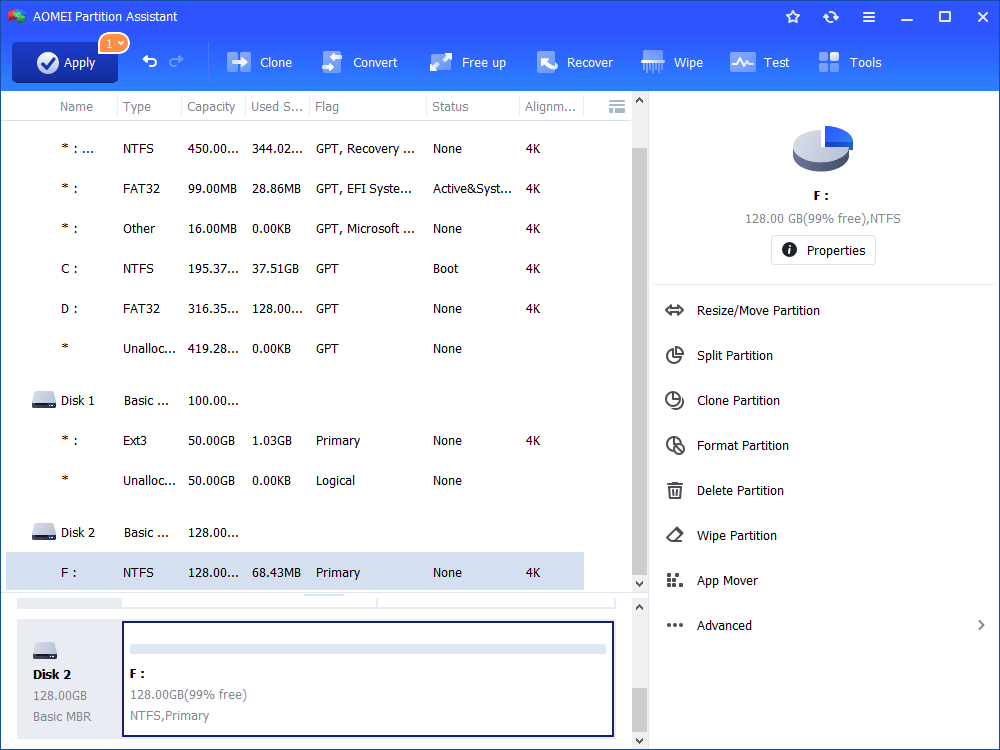
Step 3. Preview the operation. Then, click “Apply” and “Proceed” to perform it.
Conclusion
Formatting your old hard drive after installing a new SSD isn’t always required, but it helps avoid boot conflicts, clear redundant system files, free up storage, and improve performance. It also secures personal data if you’re repurposing or selling the drive. Tools like File Explorer, Disk Management, Diskpart, or professional formatters make the process simple.

