[Windows] What to Do After Installing New SSD: Things You Have To Do
What to do after installing new SSD? Do you have to install anything for your new SSD? If you are not sure about that, you can read this post for reference when installing a new SSD drive.
By Irene / Updated on October 16, 2024
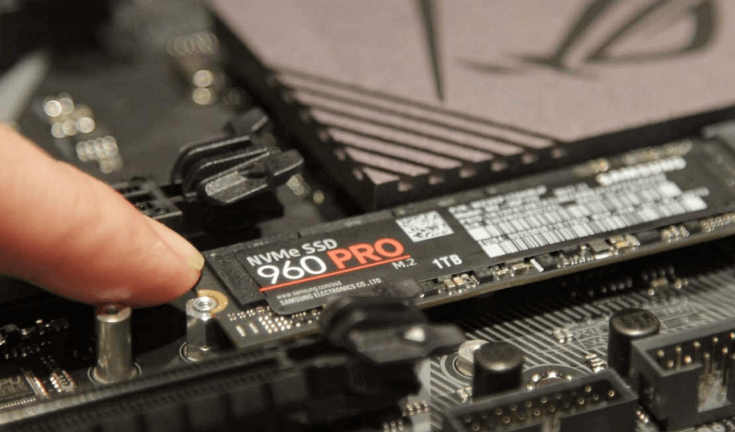
Since the introduction of the fast SSD, especially NVMe M.2, many people have chosen to upgrade their computer's storage from a regular hard drive (HDD) to a faster disk. But about the upgrade, a hot post titled "I installed a new SSD now, what should I do after installing NVMe SSD? I’ve heard that you should do some optimizations after installing SSD to make sure not to reduce its lifespan" from Reddit gained much attention.
This indicates users' concern about the importance of not only ensuring a smooth transition but also setting things up correctly to keep their SSDs working well and avoid problems that could reduce lifespan. Do you know what to do after installing a new SSD and configuring it correctly? If not, here's a comprehensive guide on what you may consider doing.
Generally, after installing a second disk or replacing a new SSD, there are several simple steps to follow to make sure it works well and lasts long. First, check if the computer detects the SSD. Then, move your Windows operating system to the SSD and set it as the main drive for booting. You can also delete old hard drive partitions if you want. Next, install the latest drivers, back up important data, and update your antivirus and software. Finally, check that all your files and programs are working correctly. These steps help keep your SSD running smoothly and prevent problems.
What to do after installing new SSD?
The above part simply introduce what to do after installing a new SSD. If you want to know more details about the steps, you can follow these 8 stages to ensure a smooth transition and set up configurations that protect your new SSD and help it perform at its best.
Stage 1: Confirming SSD detection
Generally, when it comes to what to do after installing new SSD in laptop, it is firstly advisable to check whether your computer recognizes the new SSD. You can do this by accessing your computer's settings and verifying that the SSD appears as a recognized device.
Stage 2: Transferring your Windows OS to the SSD
A large and excellent new SSD can significantly improve your computer's speed and performance. If you intend to use it for running your Windows operating system, you may consider transferring your existing Windows installation from the old hard drive after installing a new SSD drive.
A multifunctional software, AOMEI Partition Assistant offers this powerful feature. One of its practical functions called Migrate OS allows users to quickly move any system-related data to the new disk. This means you don't have to reinstall the whole operating system and set it up again from scratch, no matter you want to transfer the data from old SSD to a new one or from HDD to a SSD. By the way, its advanced hot clone technique that lets you keep using your computer while moving things around, which brings convenience compared to other software.
The Best Windows Disk Partition Manager and PC Optimizer
Step 1. Launch the installed AOMEI Partition Assistant Professional. Click Clone> Migrate OS from the top pane and read the preface in the next window.

Step 2. Select the SSD here as the target disk. Check the option "I want to delete all partitions on this disk 2 to migrate system to the disk" if there is (are) partition(s).

Step 3. Resize the system partition on the target disk if you need.

Step 4. Here is a Note that may be useful later. Kindly please keep it in mind.
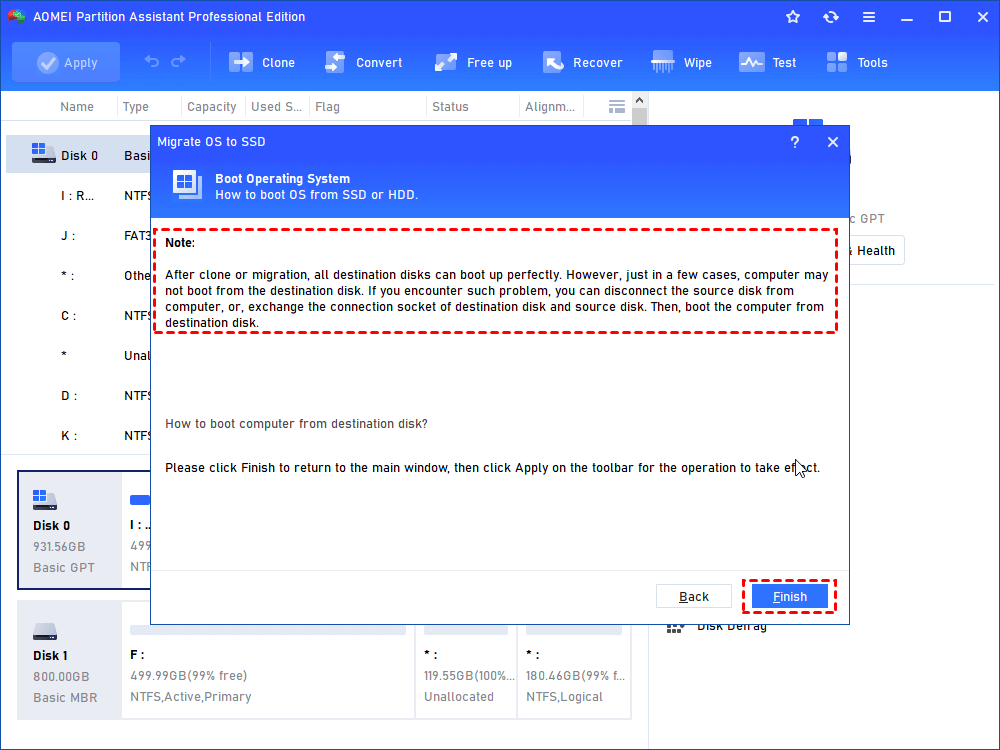
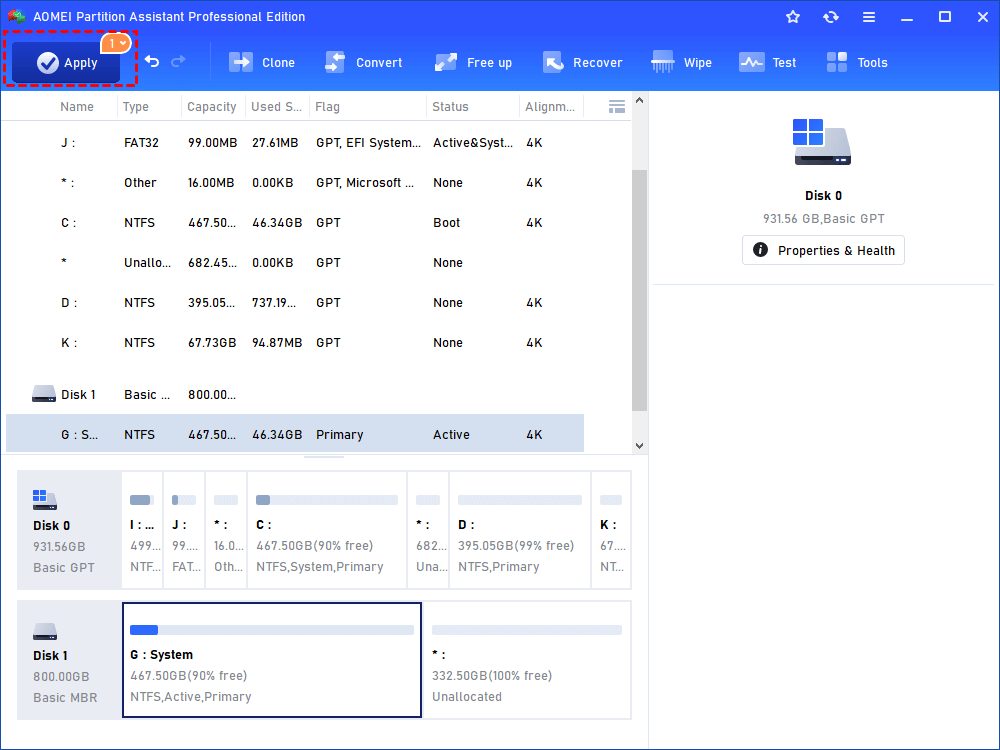
Step 5. Back to the main interface. Then click Apply to execute the pending operations.
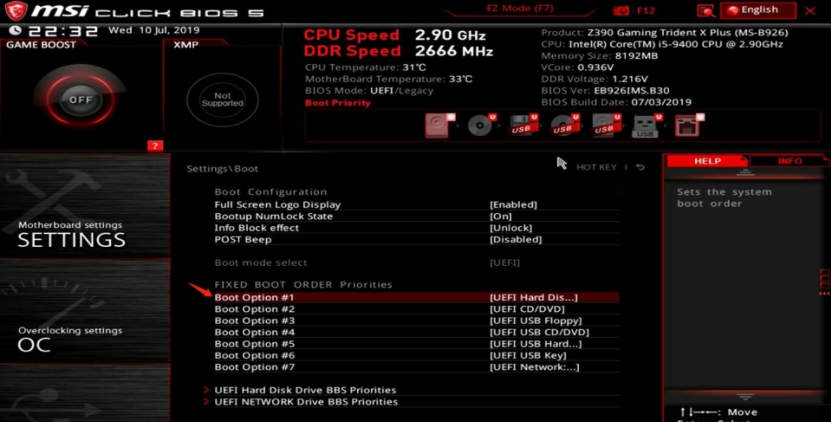
Stage 3: Setting the SSD as the primary boot device
What to do after installing new M.2 SSD? To ensure faster boot times and quicker access to your operating system, it's recommended to set the SSD as the primary boot device in your computer's BIOS/UEFI settings to enjoy lightning-fast speed. If you don't know how to enter BIOS, AOMEI Partition Assistant offers you the UEFI BIOS Boot Options Manager function.
Stage 4: Deleting the old hard drive partitions (Optionally)
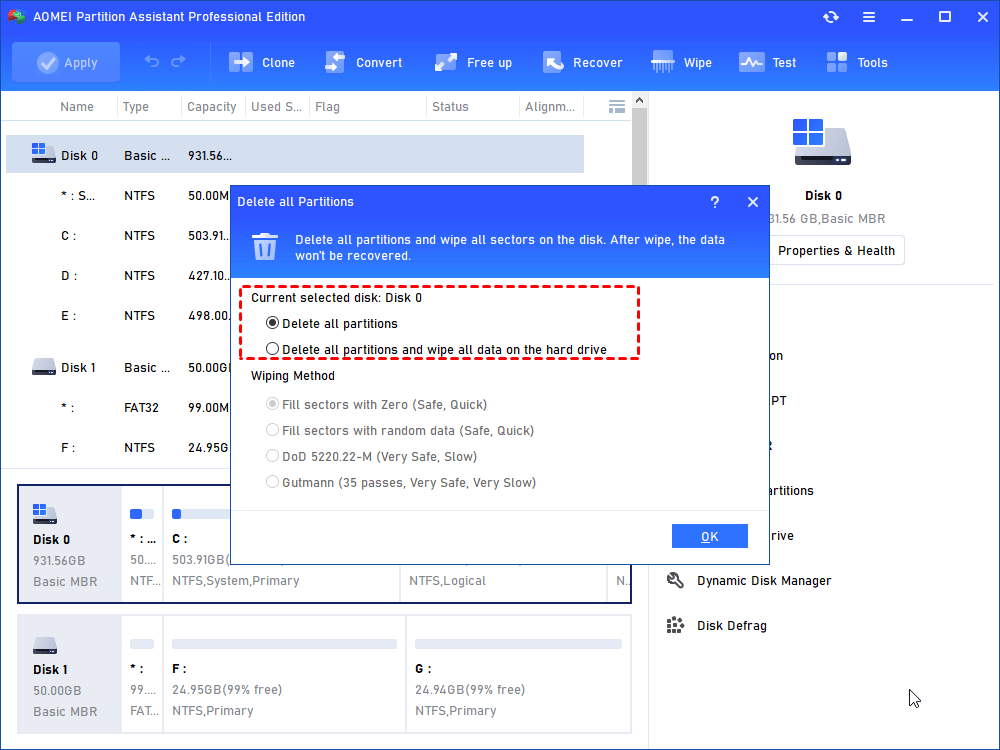
If you still want to make full use of your old hard drive, you have the option to delete or format it, which will remove the old operating system and unnecessary files. These operations can free up storage space and potentially improve your overall system performance. AOMEI Partition Assistant can share a hand for you to easily clear your drive.
Step 1. Right-click your old hard drive and choose the “Delete all partitions” option.
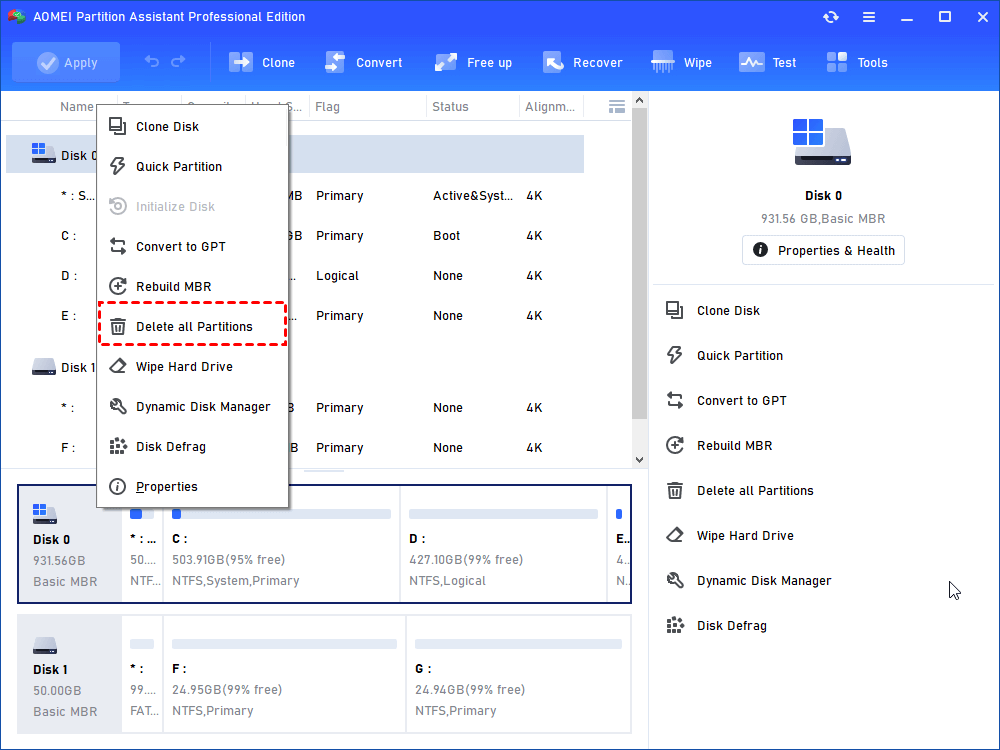
Step 2. Select the deleting method. Then back to the interface and click “Apply” and "Proceed” in turn to commit the operations.
Stage 5: Installing the latest drivers and software
If you don't know what to do after installing a new M.2 SSD. It is a good idea to consider having the most up-to-date drivers and software for your computer's hardware components. You can visit the manufacturer's website to download and install the correct drivers for your specific model.

Stage 6: Backing up your important data
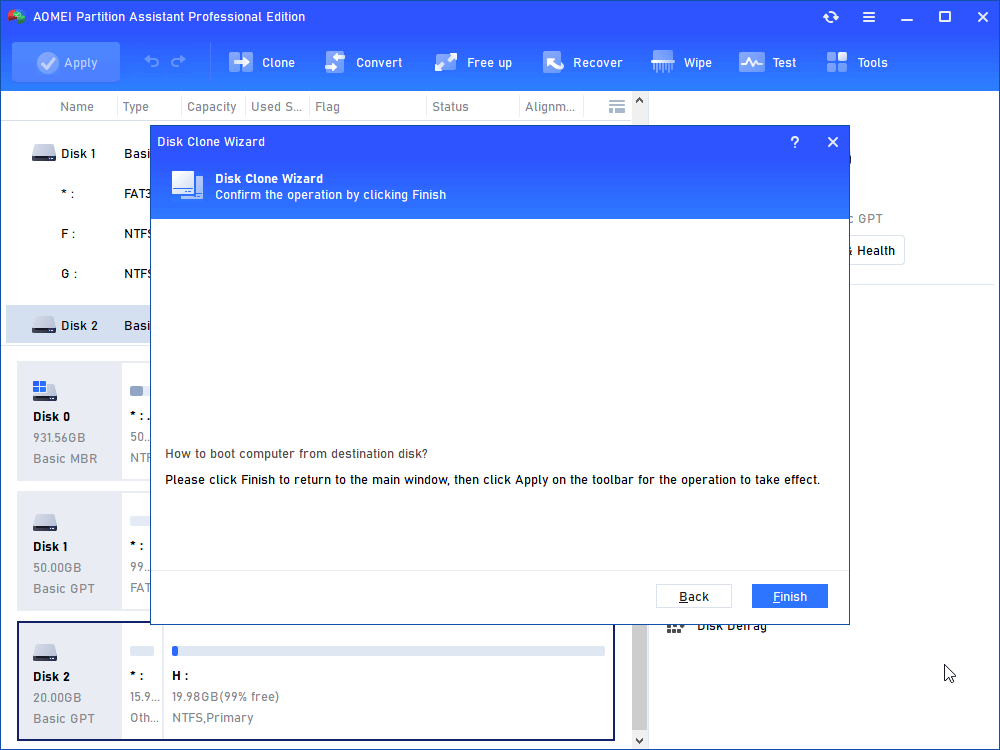
After installing a new SSD in a laptop, it's highly advisable to ensure that you have a backup of all your important data. This step is essential to prevent any potential data loss if you want to make important changes to your computer. Here, you can try the Clone Disk wizard provided by AOMEI Partition Assistant as well. It even allows you to back up the operating system to an external hard drive. By the way, if you want to move everything from the old disk to the new one, it is more recommended to use this Clone Disk feature rather than Migrate OS aforementioned.
The Best Windows Disk Partition Manager and PC Optimizer
Step 1. On the top pane, select "Clone” and click "Clone Disk".
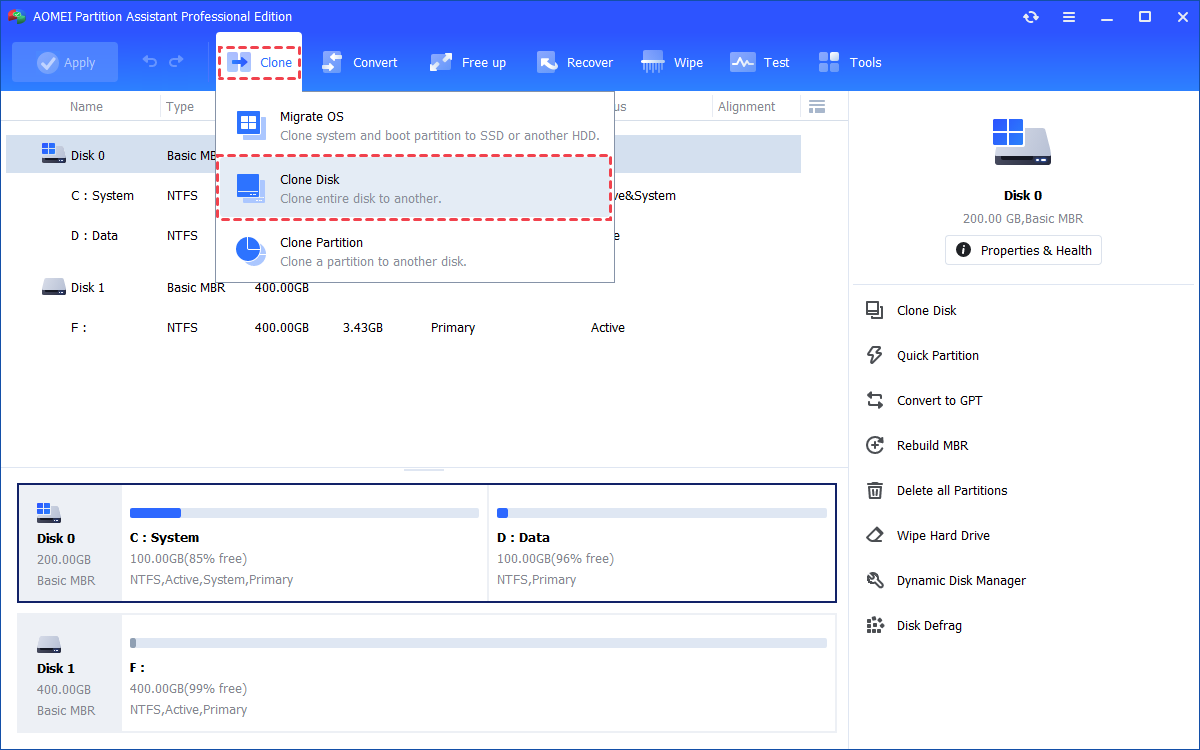
Step 2. Then choose the preferred method to clone the disk.
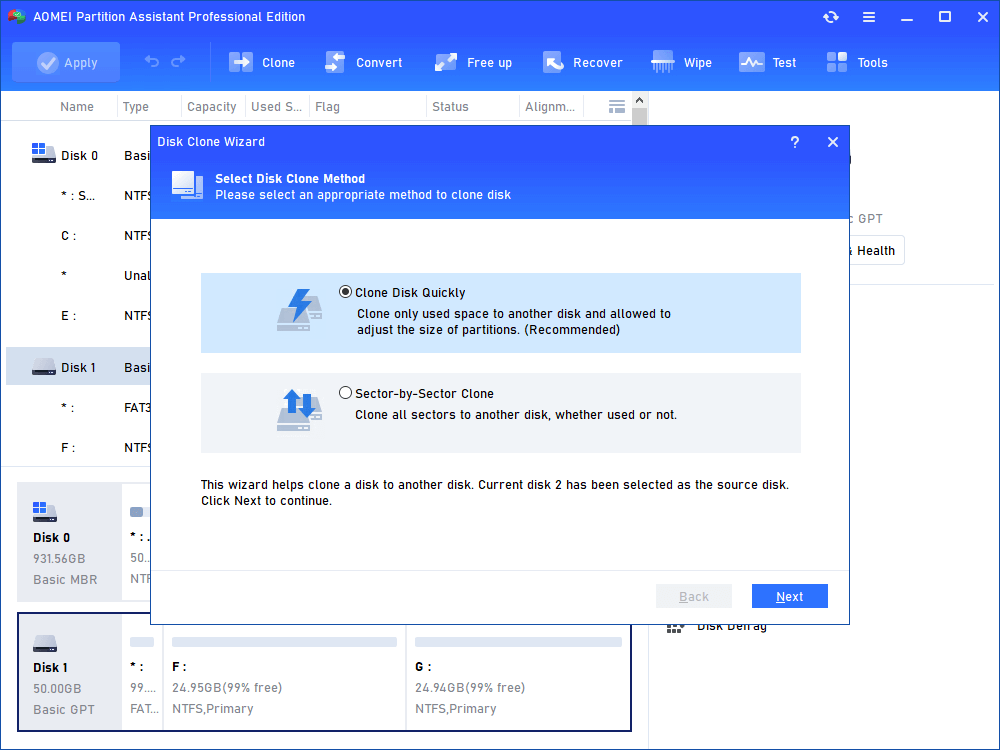
Step 3. Follow the instructions and read the pop-up notice. Afterward, you can back to the interface and click “Apply” to execute the operations.
Stage 7: Antivirus and software considerations
It is typically enabled by default on Windows computers, but it may also depend on the specific settings and configuration of your computer. To know what to do after installing a new SSD, you may consider temporarily disabling your antivirus software to prevent any conflicts during the cloning process. Don't forget to re-enable it after completing the upgrade for better protection.

Stage 8: Verifying data integrity
How to add a SSD to laptop or desktop? Following the completion of these operations, please remember to take the time to verify that all data and software are functioning correctly on the new SSD to ensure a seamless transition. If you find something gets lost during any configuration steps, you can try to use Recover Data feature to retrieve them back.

By following these stages, you can successfully upgrade to an SSD and enjoy improved performance on your computer.
Tip: do you have to install anything for your new SSD?
After installing new SSD, you can feel free to enjoy the new disk. However, there are some users also wonder "Do I have to install anything for my new SSD?" Yes, but it is not necessary. In general, after installing a new solid state drive, you should install a few things to ensure it works properly.
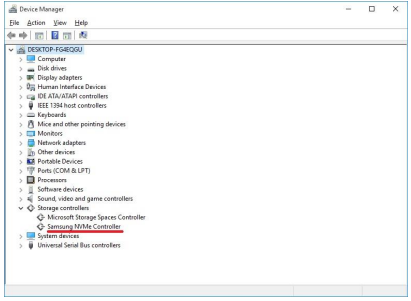
First, don't forget to install any necessary drivers for the SSD, like we mentioned before, which you can usually find on the manufacturer’s website, like the Samsung NVMe driver.
You should also check for any firmware updates to improve performance and fix bugs. Finally, make sure to install your operating system on the SSD or transfer your existing one to it for the best speed. These steps will help your SSD run efficiently.
To sum up
Here are 8 stages about what to do after installing new SSD. By following these steps, you can easily enjoy smooth computer use. As we can see, the versatile tool AOMEI Partition Assistant plays a big part in answering what do I do after I install a new SSD. You can still rely on it for daily computer management and fix computer issues.
For example, it is worth trying App Mover and Allocate Free Space to extend drive space, or using Rebuild MBR to troubleshoot boot issues. For Windows Server users, kindly please choose the Server Edition to enjoy its functions.

