How to Create Users and Groups in Windows Server 2019
Sometimes, it’s necessary to create Users and Groups. In this post, you will learn how to create Users and Groups in Windows Server 2019 in two different ways.
By Hedy / Updated on October 11, 2025
Why needs to create Users and Groups?
Creating Users and Groups in Windows is essential for managing access, security, and system organization efficiently. Here are the main reasons:
📍 Improved security: By assigning individual user accounts, you can control who accesses the system and what actions they can perform. This helps prevent unauthorized access or accidental changes.
📍 Simplified management: Groups allow administrators to manage permissions for multiple users at once instead of configuring each account individually.
📍 Customized access control: Different users may need different privileges. For example, administrators can install software, while standard users can only use approved applications.
📍 Better accountability: Separate user accounts make it easier to track system changes or identify who performed certain actions.
📍 Organized environment: Creating groups for departments or roles (like HR, IT, or Sales) helps organize users systematically and maintain clear permission boundaries.
In short, creating Users and Groups ensures a secure, well-structured, and manageable computing environment.
How to create Users and Groups in Windows Server 2019
Creating users and groups in Windows Server 2019 is an essential administrative task that helps you manage permissions, security, and access control efficiently. Below is a step-by-step guide on how to create both users and groups using built-in tools.
Part 1. Open Server Manager
Step 1. Click Start andselect Server Manager.
Step 2. In the Server Manager Dashboard, click Tools on the top-right corner.
Step 3. Choose Active Directory Users and Computers (for domain environment) or Computer Management (for local management).
Part 2. Create a New User (Domain or Local)
1. For Domain Users (using Active Directory Users and Computers)
Step 1. In the Active Directory Users and Computers window, expand your domain name.
Step 2. Right-click the Users folder (or any custom Organizational Unit), then choose New → User.
Step 3. Enter user details:
First name, Last name, and User logon name (e.g., jdoe).
Step 4. Click Next.
Step 5. Set a password and configure options such as:
>> User must change password at next logon
>> Password never expires
>> Account is disabled (if needed)
Step 6. Click Next >Finish to create the user.
2. For Local Users (using Computer Management)
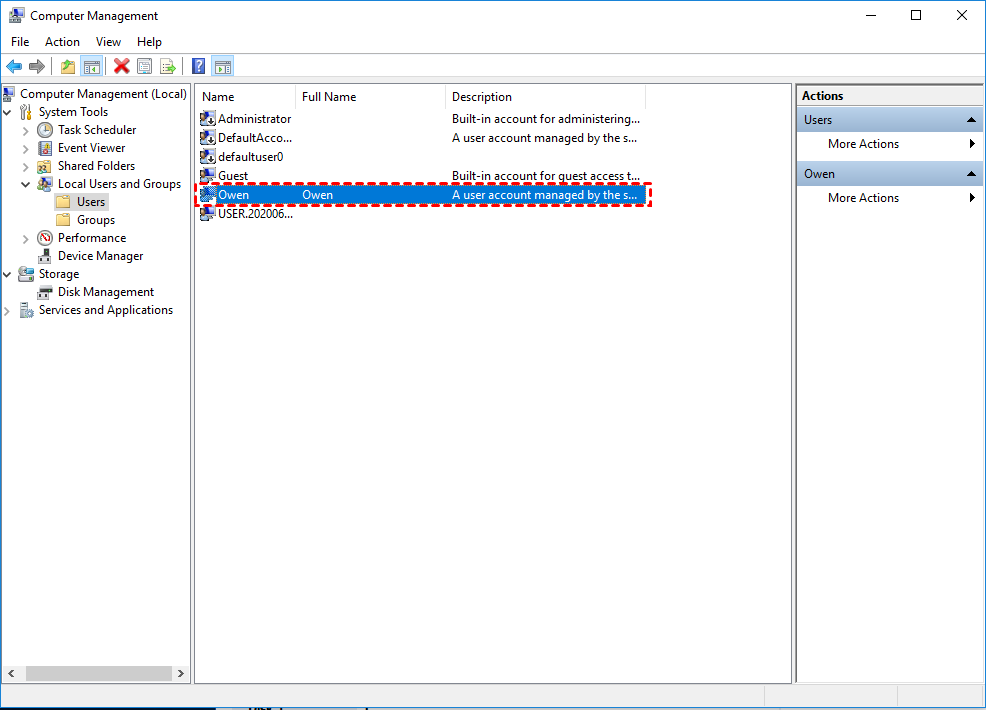
Step 1. Press Windows + X, then select Computer Management.
Step 2. Expand Local Users and Groups → Users.
Step 3. Right-click Users, then select New User.
Step 4. Enter:
Username (e.g., LocalAdmin)
Full Name and Description (optional)
Password
Step 5. Configure password options and click Create, then Close.
Part 3. Create a New Group
1. For Domain Groups (Active Directory)
Step 1. In Active Directory Users and Computers, right-click the Users container (or an OU).
Step 2. Choose New → Group.
Step 3. Provide a Group name (e.g., HR_Team).
Step 4. Select Group scope (usually Global or Domain Local) and Group type (Security or Distribution).
Step 5. Security groups are used for assigning permissions.
Step 6. Distribution groups are used for email lists.
Step 7. Click OK to create the group.
2. For Local Groups (Computer Management)
Step 1. In Computer Management, expand Local Users and Groups → Groups.
Step 2. Right-click Groups, then select New Group.
Step 3. Enter a Group name and Description.
Step 4. Click Add to include users in the group.
Step 5. Click Create >Close when finished.
Part 4. Add Users to Groups
Step 1. Double-click a group in Active Directory or Local Users and Groups.
Step 2. Click Add, then type the username.
Step 3. Click Check Names to verify, and then OK to confirm.
Step 4. The selected user will now have the permissions of that group.
Part 5. Verify and Manage User or Group Settings
You can right-click any user or group to:
>> Reset passwords
>> Rename or delete accounts
>> Set properties such as group membership, logon hours, or account expiration
For easier and more flexible user/group management — especially on large or multiple servers — consider using AOMEI Partition Assistant Server. It not only helps manage storage but also includes system optimization and repair tools useful for administrators handling server environments.
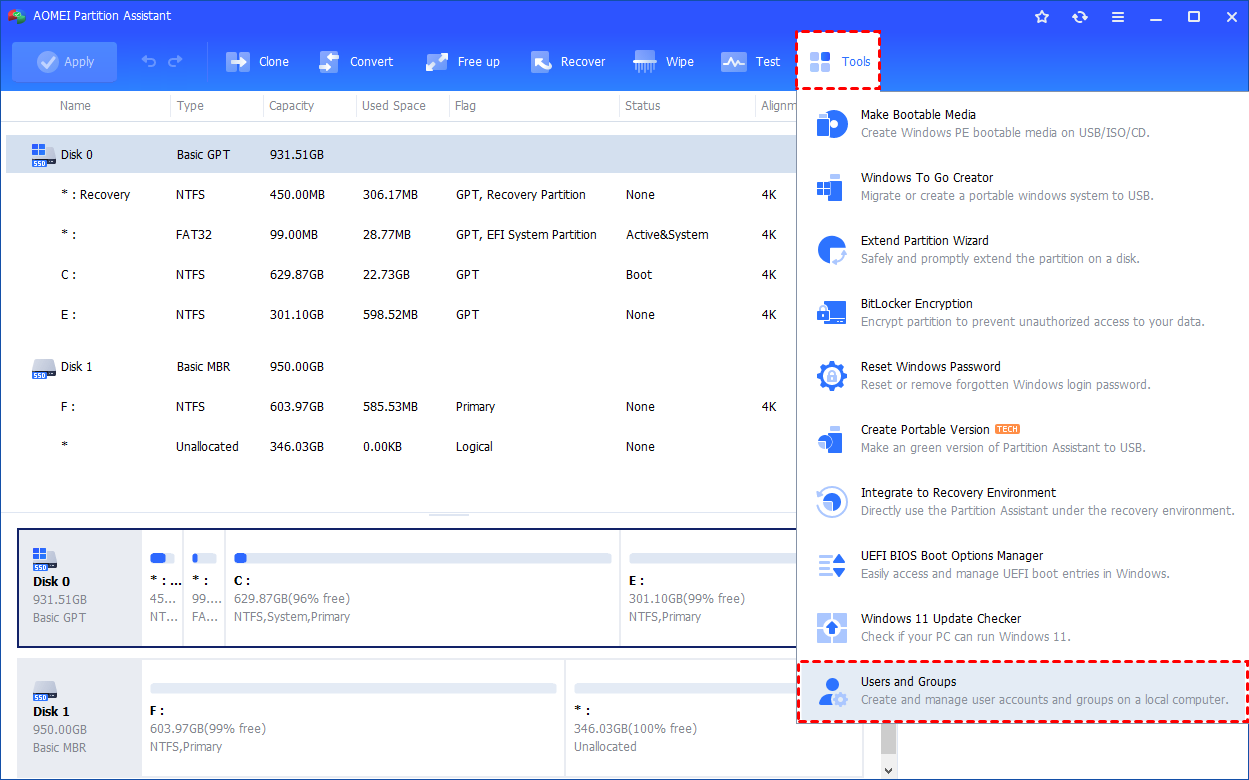
Step 1. Install and launch AOMEI Partition Assistant. Click the "Tools" main tab and select "Users and Groups".
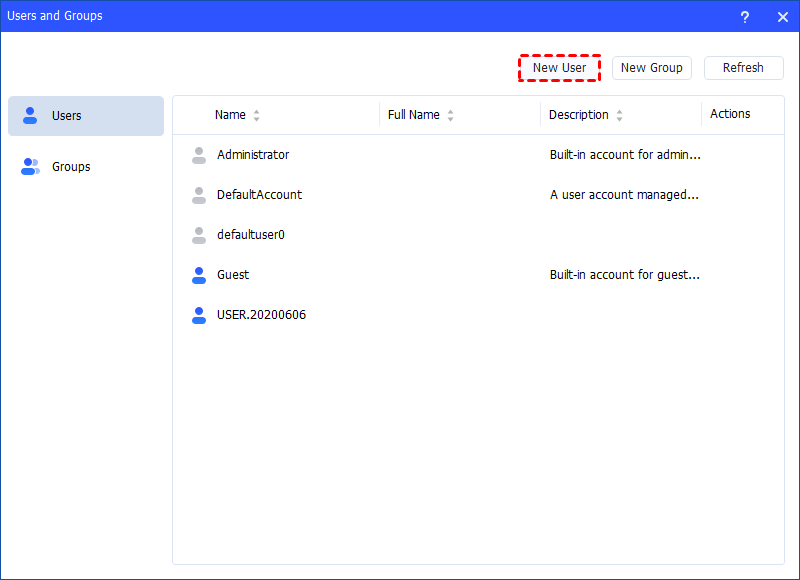
Step 2. Click the "Users" tab and then click the "New User" button to create a new user account. You can also click the "Refresh" button to refresh the user list.
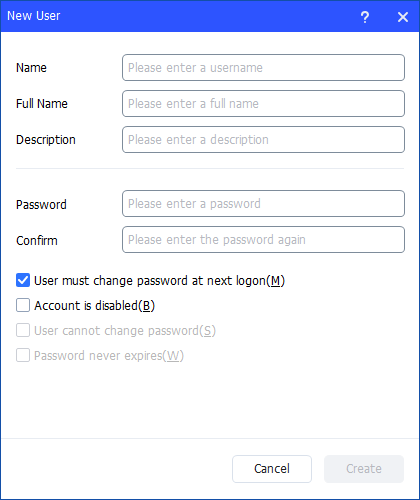
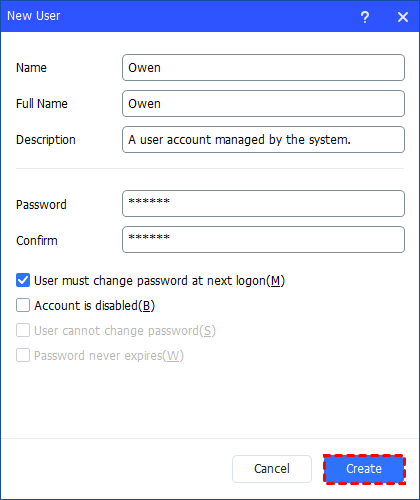
Step 3. Then, type the appropriate information in the dialog box. You can enter the name and description and set a password for the new user. And, you can select or clear the check boxes for: User must change password at next logon, Account is disabled, User cannot change password, Password never expires.
Step 4. After all is set, click "Create" to create the new user.
Step 5. Finally, you can see the user is created successfully in Windows Local Users and Groups. And, you can also easily manage the new user account.
Conclusion
Creating Users and Groups in Windows Server 2019 is crucial for managing security, permissions, and organization. It allows administrators to control access, assign roles, and streamline management across users and departments. By defining clear privileges and grouping similar accounts, system maintenance becomes more efficient and secure. Tools like AOMEI Partition Assistant Server further simplify user, group, and system management, ensuring smooth server performance and administrative control.

