How to Install Windows after Replacing Hard Drive [Guide with Pictures]
Replacing an old hard drive is a great way to speed up the computer but reinstalling Windows is such a terrible thing. This post will show you how to install Windows after replacing hard drive step by step. Most importantly, you can choose to changing the disk without OS reinstallation by following the guide below.
By Hedy / Updated on May 12, 2023
Do you need to reinstall Windows after replacing hard drive?
These days, replacing the hard drive is becoming more and more popular for its convenience and efficiency in solving disk problems, for example:
❈ When you are running out of disk space, you may want to upgrade to a larger hard drive.
❈ When your PC gets slower and slower, replacing the old HDD with SSD is one of the best ways to get faster write-read speed.
❈ When your hard drive is suffering some failure, it’s available to fix it by replacing the disk with a new drive.
No matter what induces you to perform the hard drive replacement, one common thing you must care about is how to install Windows after replacing hard drive. You can only use your computer normally after reinstalling the system, so learn how to install Windows 10 after hard drive replacement by following the below stepwise.
How to install Windows after replacing hard drive?
There are dozens of ways to perform OS reinstallation after replacing the disk. The simplest and most popular way is to use a USB flash drive.
How to install Windows 10 after hard drive replacement with USB?
In this part, you will gonna see after replacing hard drive how to install Windows with a USB flash drive. Please prepare a USB that is larger than 8GB beforehand, follow the instructions below, and then begin to reinstall windows on new hard drive.
Stage 1. Create a Windows 10 installation USB
Tip: It's better to complete this stage before you replace your hard drive.
Step 1. Connect the prepared USB to a normal PC. Go to the official Microsoft website and download the Windows 10 installation media on the computer.
Step 2. When the download is completed, launch it, and choose "Create installation media (USB flash drive, DVD, or ISO file)" in the "Windows 10 Setup".

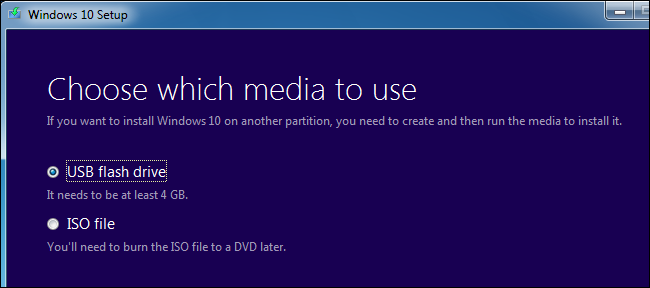
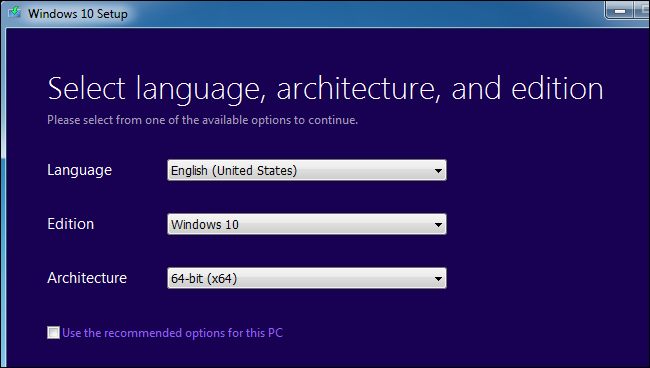
Step 3. Select language, architecture, and edition and click on "Next".
Step 4. Choose "USB flash drive" and finish the remaining settings according to the prompts.
Step 5. Choose your prepared USB flash drive from "Removable drives" and then, hit "Next".
Step 6. Once completed, Windows 10 will be installed on the USB device, that is to say, the Windows 10 installation media is created successfully. Unplug it from the computer.
Stage 2. Boot from Windows 10 installation media
Step 1. Plug the bootable Windows 10 USB flash drive into your PC that has already installed a new hard drive.
Step 2. Boot the computer, and press and hold the BIOS key right away (F2, Del, F10, or F12, depending on the manufacturer) until the BIOS screen is displayed.
Step 3. In the BIOS setting, navigate to Boot Manager and set the installation USB to be the first boot device.
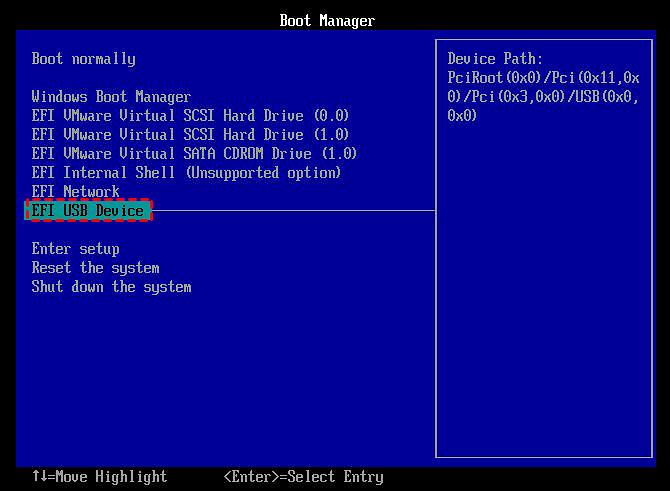
Step 4. Save the settings and exit from BIOS. Then, your PC will boot from the Windows 10 installation media.
Stage 3. Reinstall Windows on new hard drive
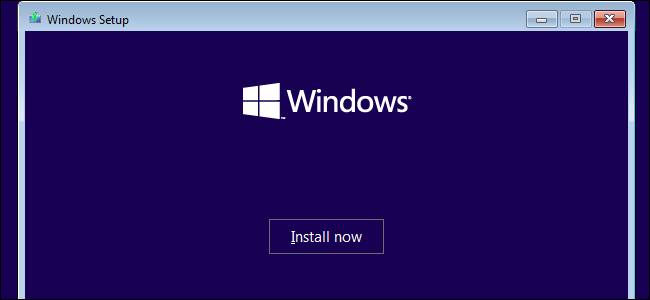
Step 1. When the computer boots again, you will enter Windows Setup automatically. There, enter your language and other preferences and click on "Next" to proceed.
Step 2. Then, click "Install now".
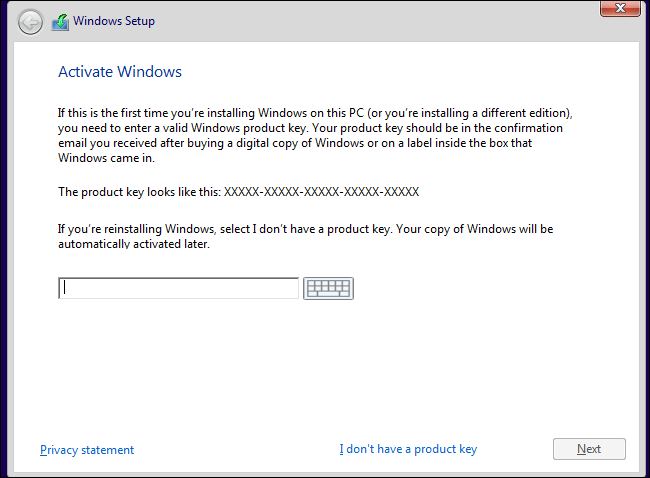
Step 3. In the "Activate Windows", enter your key or skip it by clicking "I don't have a product key".
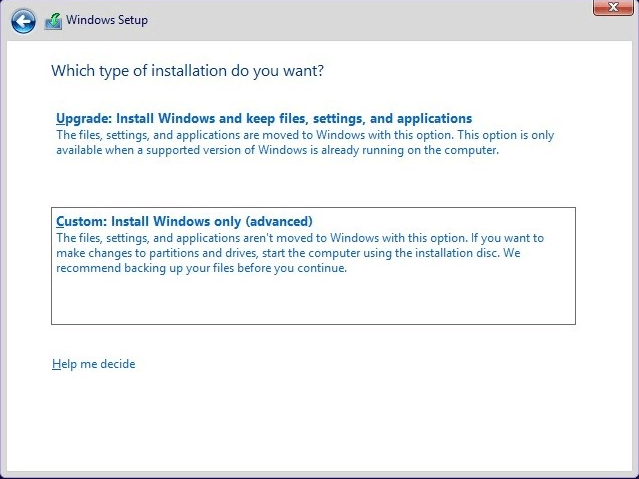
Step 4. In the new window, select "Custom: Install Windows only(advanced)".
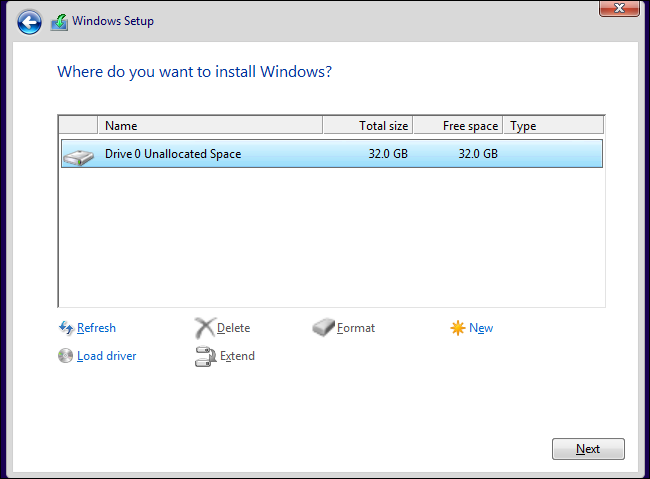
Step 5. Select the drive you want to install Windows on, click "New" and then click "Next".
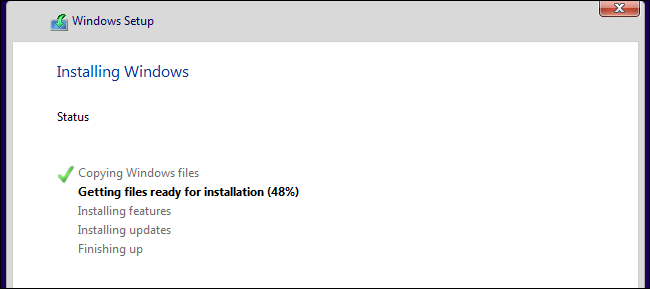
Step 6. Wait for the installation to be completed patiently.
That's all steps about how to install Windows after replacing hard drive. After reinstalling OS, you can also choose to reinstall your apps and restore your personal files from the backup on the new hard drive. Sounds troublesome, right? And it’s time-consuming and laborious as well.
So, how can you avoid this complicated process and replace your hard drive without reinstalling Windows? The solution is to perform an OS migration. Scroll down to find the detailed tutorial.
An Easier Way: Replacing hard drive without reinstalling Windows
AOMEI Partition Assistant Professional, the best Windows migration tool, can help you transfer OS from the original hard drive to the new one without reinstalling it. If you are willing to copy everything from your old drive to a new hard drive, the "Disk Clone" feature is designed for this task.
When it comes to OS migration, AOMEI software is an expert of the fantastic merits:
▷ High compatibility. It supports all Windows PC operating systems like Windows 11/10/8.1/8/7/Vista/XP, and all disk disk brands like Samsung, Intel, Sandisk, and so on. Besides, it can migrate OS between MBR and GPT disk.
▷ Easy to use. With the clear GUI interface, you can get started quickly even if you are a computer novice.
▷ Intelligent clone method. Its "hot clone" feature enables you to keep the system running during the whole migration.
▷ No boot failure. The whole process is well-protected and won't generate any virus, guaranteeing you will never meet the cloned hard drive won't boot issue after transferring.
Download the demo version and have a try how to replace hard drive without reinstalling.
Step 1. Install the new hard drive on your computer or connect it via a USB port and make it detected successfully.
Step 2. Install and run AOMEI Partition Assistant Professional on your PC. Next, click on the "Migrate OS" option and read the introduction.

Step 2. Select your new hard drive as the destination for the OS transfer. If there are partitions on the SSD you need to check "I want to delete all partitions on the disk 2 to migrate system to the disk". Once checked, the "Next" button will activate, you should now click on it.

Step 3. You now have the option to resize the system partition and change the drive letter on the new SSD. Then click "Next" to move on.

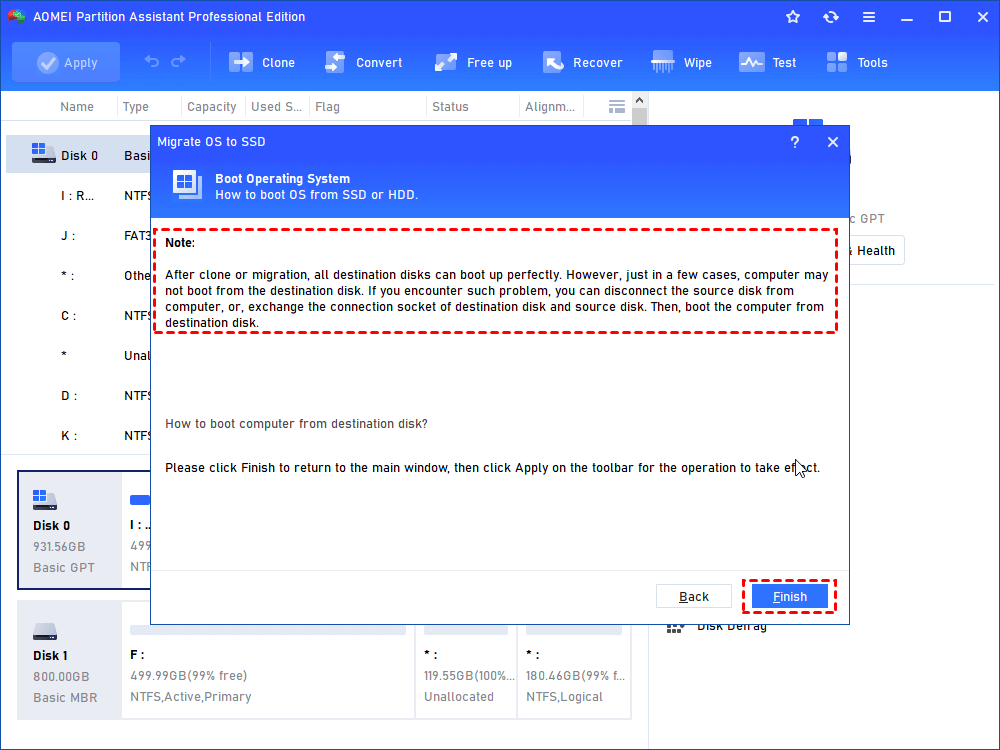
Step 4. Read the troubleshooting guide and click "Finish" to go on.
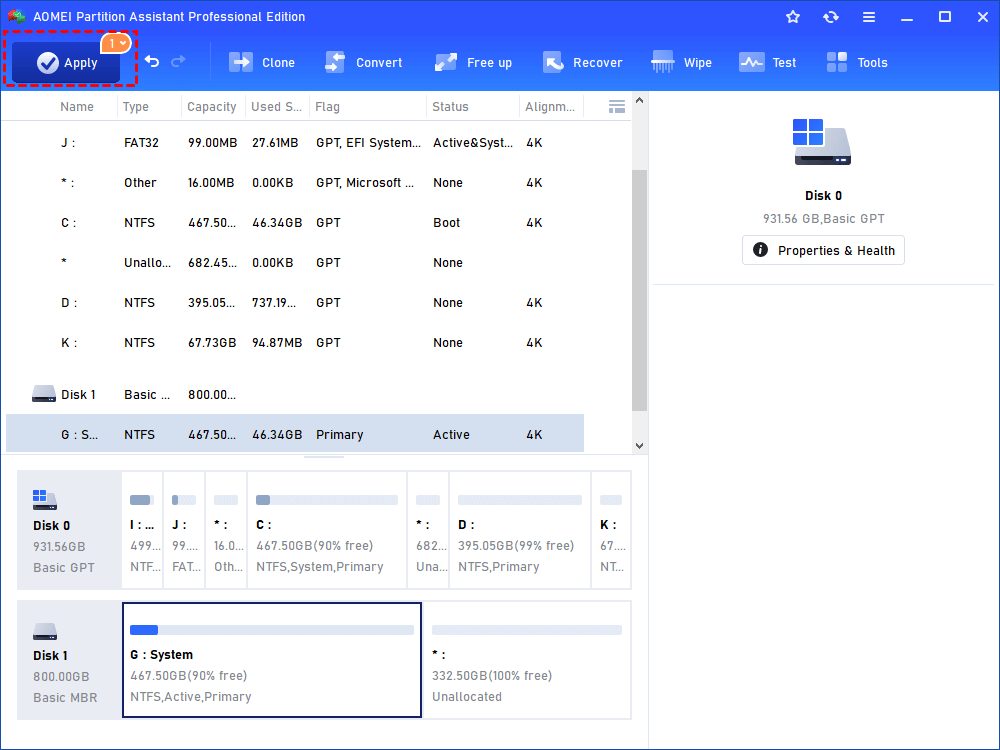
Step 5. Click "Apply" and then "Proceed" to transfer OS to the new hard drive.
Till now, you will get the same Windows on your new hard drive. Install the new disk for replacement and boot from the cloned hard drive. Then, you can begin to enjoy the "new" computer.
Conclusion
How to install Windows after replacing hard drive? From this article, you have been introduced to the step-by-step guide. As you can see, to reinstall Windows on new hard drive is never an easy task especially when you know little about the computer.
Luckily, in this tutorial, you are still shown an easier way to replace the hard drive without reinstalling the OS with the help of AOMEI Partition Assistant. Regardless of the method you choose, you get a "new" computer after the hard drive replacement. Plus, if you want to transfer OS on a Windows Server computer, you can switch to AOMEI Partition Assistant Server.

