How To See Local Users in Windows 10 and Manage Them?
This guide explains how to view and manage local users and groups in Windows 10. Step-by-step instructions help you open local users and groups, even if they don’t appear in Computer Management.
By Irene / Updated on October 16, 2025
What is Local Users and Groups in Windows 10?
Properly managing user accounts is important for keeping your Windows system secure and organized. If you want to add a new user, limit access for specific tasks, or change permissions, understanding how to access Local Users and Groups is essential.
Local Users and Groups (lusrmgr.msc) is a built-in Windows tool that lets you manage all user accounts and groups on your computer. It allows you to create, edit, or delete accounts, change passwords, and assign user roles. You can also add or remove users from admin or standard groups and control account settings.
However, just like BitLocker, this feature is only available in Windows 10 Pro, Enterprise, and Education editions. Windows 10 Home doesn't provide BitLocker and users cannot access it through Computer Management, which is why some think the tool is missing. If you use Windows 10 Home, you can try other methods or use third-party tools to manage local users.
How to see Local Users in Windows 10?
For those on a supported Windows edition, there are several straightforward ways to open the tool. This section outlines the common and effective methods.
Way 1. Using the Run Command
This is the most direct way to access local users and groups.
Step 1. Press the Windows Key + R on your keyboard to open the Run dialog box.
Step 2. Type lusrmgr.msc and press Enter or click OK.
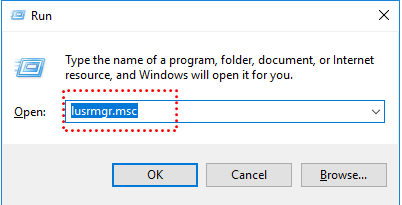
Step 3. The Local Users and Groups window will open immediately.
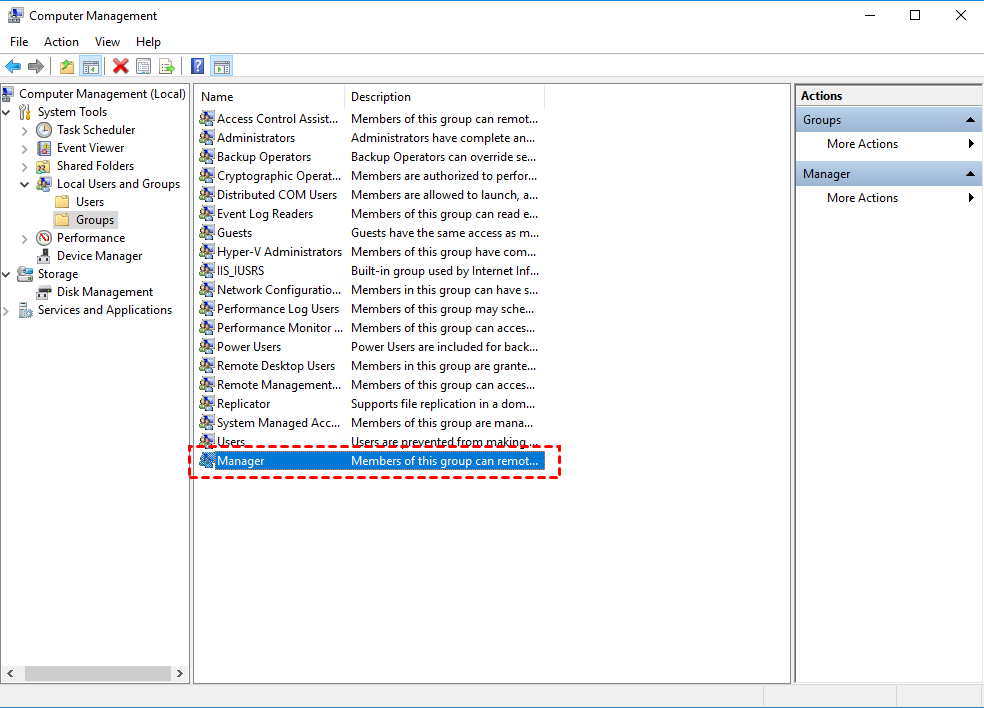
Way 2. See Local Users and Groups in Computer Management
You can also see Local Users and Groups in Computer Management if your Windows edition supports it.
Step 1. Right-click the Start button and select Computer Management from the menu.
Step 2. In the left-hand pane, navigate to System Tools > Local Users and Groups.
Step 3. You can expand this section to manage Users or Groups.
Can you see Local Users and Groups in Windows 10 Home?
Windows 10 Home does not include the Local Users and Groups (lusrmgr.msc) snap-in. If you try to open it, you’ll see an error saying this feature isn’t available for your version of Windows. This means Home users can’t manage accounts through the same graphical interface found in Windows Pro or Enterprise editions. Instead, they must rely on limited settings menus or use command-line tools, which can be confusing.
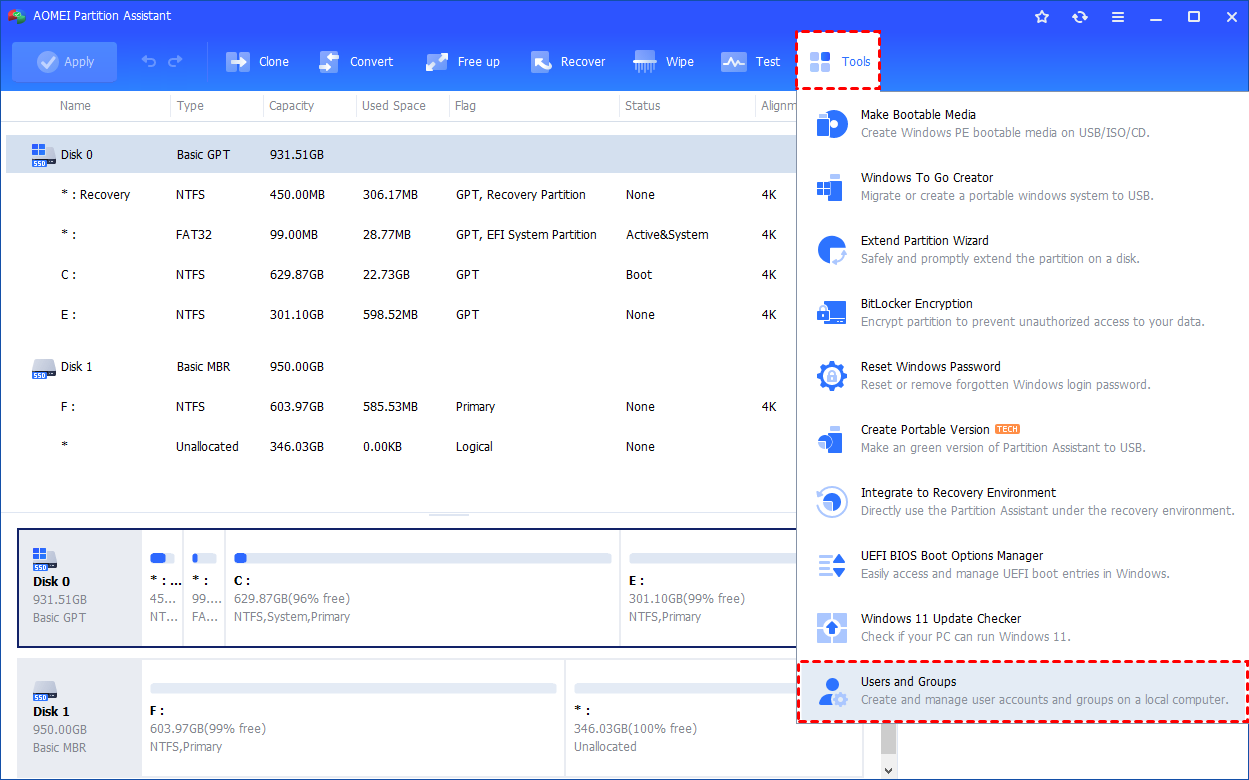
To solve this, you can use AOMEI Partition Assistant, a powerful and easy-to-use PC management tool. It includes a built-in “Users and Groups” feature that lets you create, delete, and edit user accounts, even on Windows Home. With its simple graphical interface, you can manage accounts and permissions quickly without using complex commands or system snap-ins.
The Best Windows Disk Partition Manager and PC Optimizer
Option 1. Create Local Groups in Windows 10 Home
Step 1. Install and launch AOMEI Partition Assistant. Click the "Tools" main tab and select "Users and Groups".
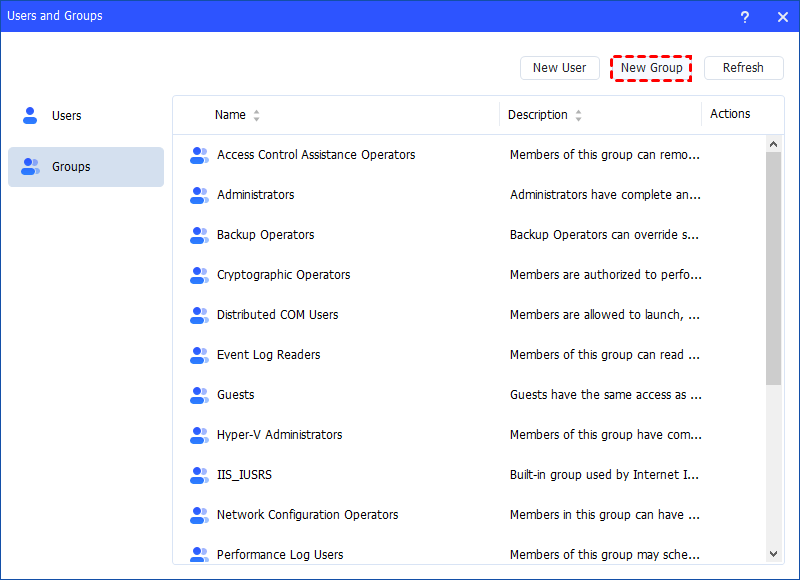
Step 2. Click the "Groups" tab and then click the "New Group" button to create a new group. You can also click the "Refresh" button to refresh the group list.
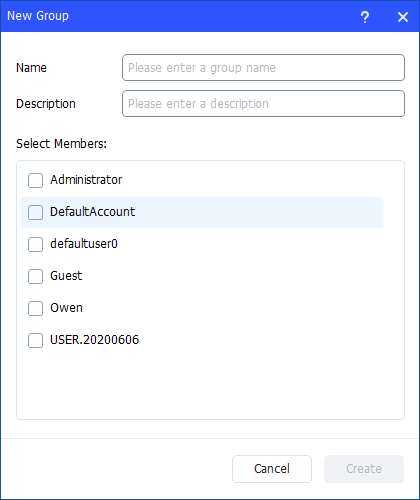
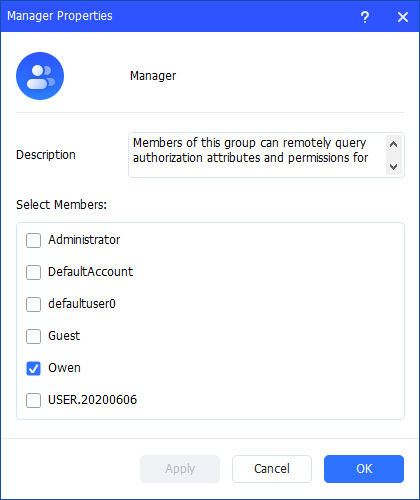
Step 3. Then, type the name and description for the new group. And, you can select user accounts as members of the group.
Notes:
- To perform this procedure, you must provide credentials for the Administrator account on the local computer (if you are prompted) or you must be a member of the Administrators group on the local computer.
- A local group name cannot be identical to any other group name or user name on the local computer that is being administered. The local group name can contain up to 256 uppercase characters or lowercase characters, except for the following: " / \ [ ] : ; | = , + * ? < > @
- A group name cannot consist solely of periods (.) or spaces.
Step 4. After all is set, click "Create" to create the new group.

Finally, you can see the group is created successfully in Windows Local Users and Groups. And, you can also manage the new group.
Option 2. Easily Manage Local Groups
Step 1. Under the "Groups" tab, you can also manage your local groups. Find the group you want to manage and click the three-point button for management.
Step 2. You can manage members of the group, rename, delete, and edit the properties of the group.
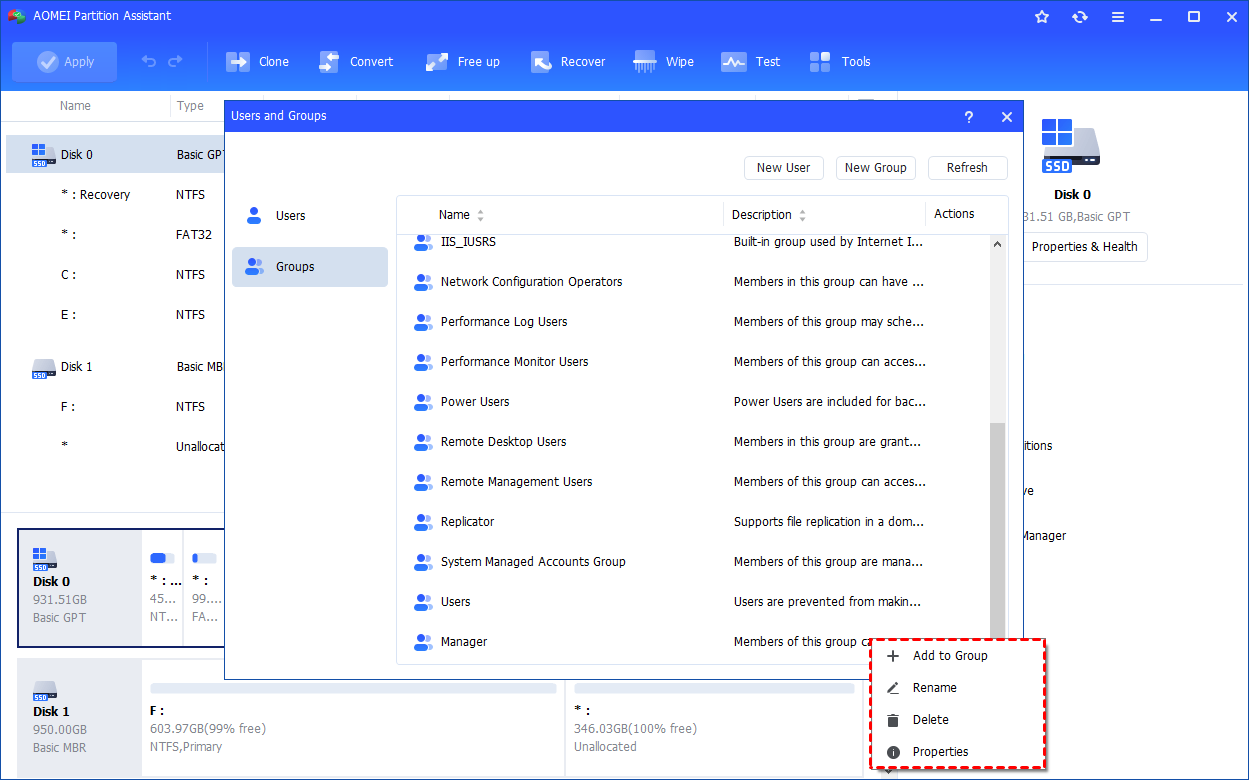
Option 3. How to Add to Group
Click the "Add to Group" option to change the group description and add/remove user account(s) to the group. Click "Apply"or "OK" to apply the change.
Note: All the rights and permissions that are assigned to a group are assigned to all members of that group.
Option 4. How to Rename a Group
Click the "Rename" option to change the name of the group, modify the description, and add/remove user account(s) to the group as well. Click "Apply"or "OK" to apply the change.
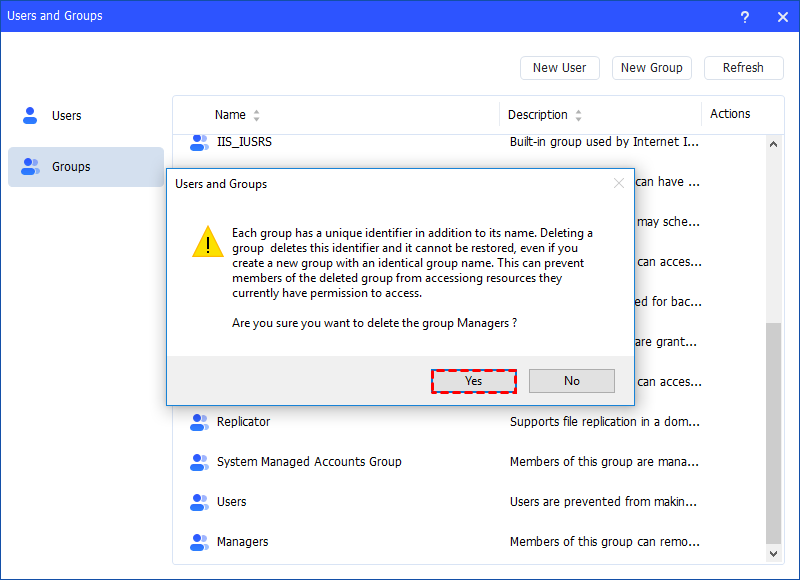
Option 5. How to Delete Group
Click the "Delete" option to delete the unnecessary group. You will get a pop-up window saying that deleting the group will delete its identifier. Click "Yes" if you confirm, and then the account will be deleted directly.
Notes:
-
Some default built-in groups, for example, Administrator, Users, Guests, and so on, cannot be deleted.
-
Deleting a local group removes only the group. It does not delete the user accounts, computer accounts, or group accounts that were members of that group.
-
A deleted group cannot be recovered, so please be cautious before deleting a group.
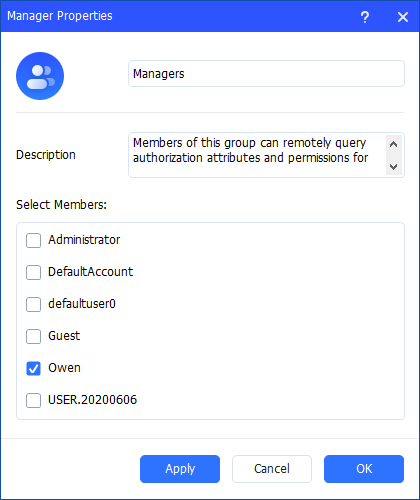
Properties
Click the "Properties" option to check the group properties. You can change the description of the group and add/remove user account(s) to the group. Click "Apply" or "OK" to apply the change.

Conclusion
Managing local users and groups is an important part of keeping your Windows system secure and organized. While Windows 10 Pro and Enterprise editions include the Local Users and Groups tool, Windows 10 Home users often find it missing. In that case, AOMEI Partition Assistant offers a simple and powerful solution. Its built-in “Users and Groups” feature lets you easily create, edit, and manage accounts on any Windows edition without using command-line tools.
Beyond user management, AOMEI Partition Assistant also provides other valuable functions like migrating OS to SSD to move your Windows installation to a new drive without reinstalling, App Mover to transfer installed programs from one drive to another to free up space, and Disk Clone Wizard to create an exact copy of your hard drive for backup or upgrade purposes. With these tools, AOMEI Partition Assistant becomes a complete PC management solution that helps you work more efficiently and securely.
The Best Windows Disk Partition Manager and PC Optimizer

