[2022] How to Install Windows Server 2012 R2 from USB Easily?
How to install Windows Server 2012 R2 from USB? In this tutorial, every step to make the installation will be explained in detail and meanwhile, easier third-party software will be introduced to help you with Server 2012 R2 installation.
By AOMEI / Updated on December 4, 2024
Overview of Windows Server 2012 R2
Windows Server 2012 R2, which is code named “Windows Server 8.1”, is the 7th version of the Windows Server OS developed by Microsoft, as part of the Windows NT family of operating systems. Windows Server 2012 R2 was first unveiled on June 3, 2013 at TechEd North America, and released on Oct 18 in the same year.
How to create Windows Sever 2012 R2 bootable USB from ISO?
If you want to install Windows 2012 R2 on your PC, you should first create a bootable USB after downloading an ISO file. Compared with other installation media like DVD and CD, a bootable USB seems more portable that you can take it anywhere you go. If you still have no idea how to perform the creation. Don’t worry, because in the following content, I’ll walk you through every step to create Windows 2012 R2 bootable USB from ISO.
1. Prepare a USB for the installation. It is supposed to be not less than 8 GB in size and in FAT32. The USB doesn’t necessarily need to be erased because in the course of the installation, it will be erased automatically. In this way, remember to back up the USB first.
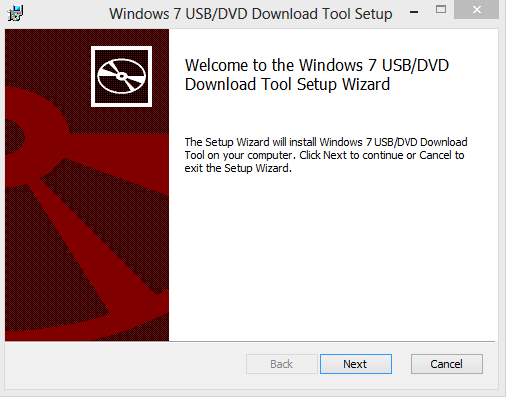
2. Download and install Windows 7 USB/DVD Download Tool from the internet.
Run the .exe file as a local administrator on your PC or it won’t be installed properly.
Hit “Next”.
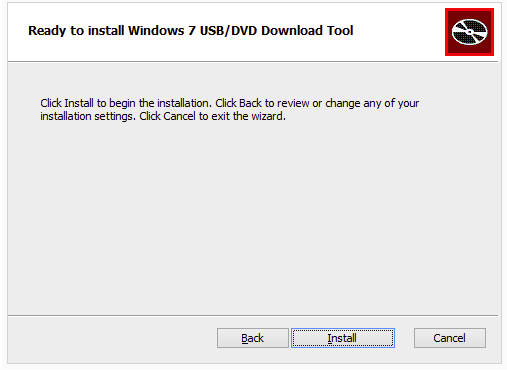
Hit “Install”.
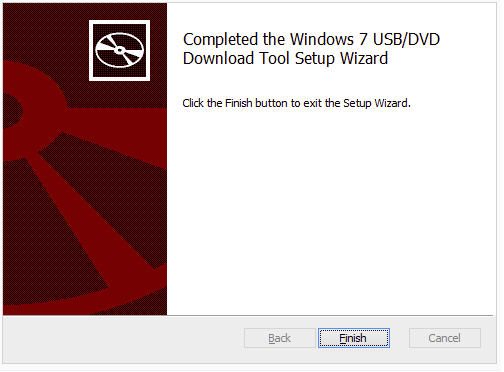
Hit “Finish”.
3. Run the tool you previously installed.
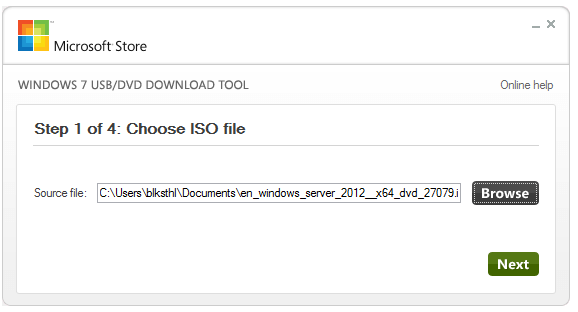
4. Browse to Windows Server 2012 R2 ISO file and select it as the source file and click on “Next”.
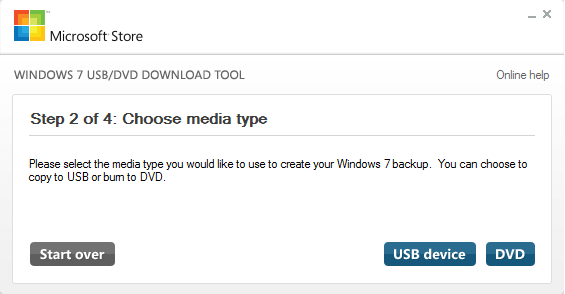
5. Select “USB device” to proceed.
6. If you see the window below, it means you haven’t connected the USB to the computer properly, it has been formatted incorrectly or there is insufficient storage. Make sure your USB device meets “4GB minimum storage space + FAT32 file system”.
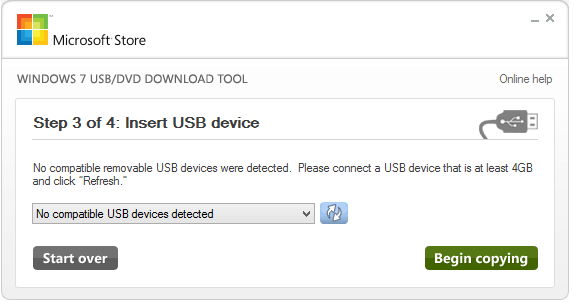
7. Insert a USB stick that meets the requirements and hit the refresh button. Now, you can hit “Begin copying” to get started.
8. If the USB stick is ok, the copy will begin. Otherwise, you haven’t erased it beforehand, you will see this dialog. Click on “Erase USB device” to proceed.
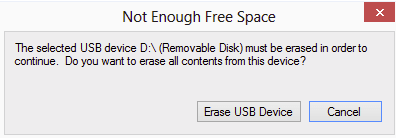
9. Hit “Yes” and the format and copy will start.

How to install Windows Server 2012 R2 from USB?
After successfully creating the installation USB, the next thing you’ll do is to install the OS from it. But before we start, please make a backup of your PC in case of any data loss during Server 2012 R2 installation.
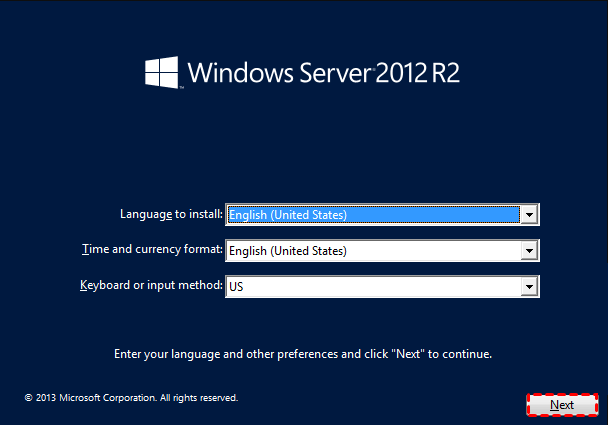
1. Plug the prepared USB stick into your PC and boot from it (you must change the boot order in BIOS so that the PC can boot from the USB device). When prompted with the notification “Press any key to boot from CD or DVD”, hit the “ENTER” key. Then, select a language, region, and input method. After finished, hit “Next” to proceed.
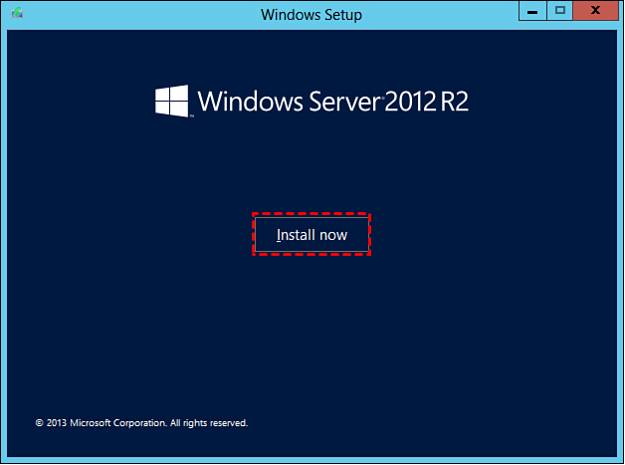
2. When you see the button “Install now”, just click on it.
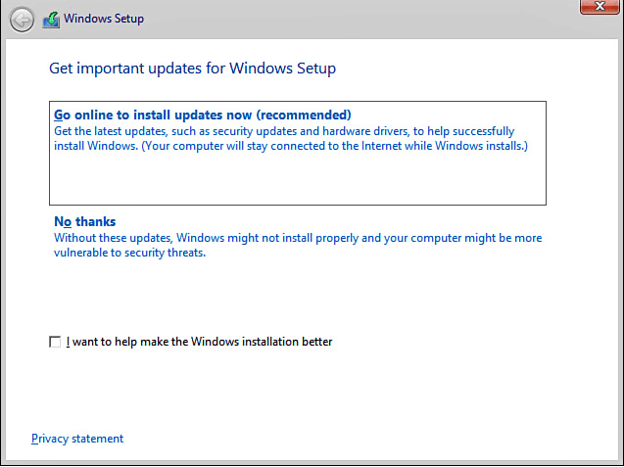
3. Now, Windows will copy .temp files and the Windows Setup screen will be displayed. If your PC is connected to the internet, select “Go online to install updates now”.
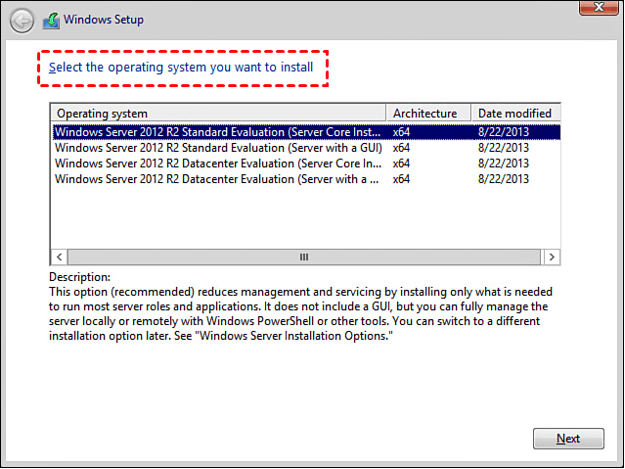
4. Select a Server 2012 R2 version from the OS list and click on “Next”.
5. Accept those license items and hit “Next”.
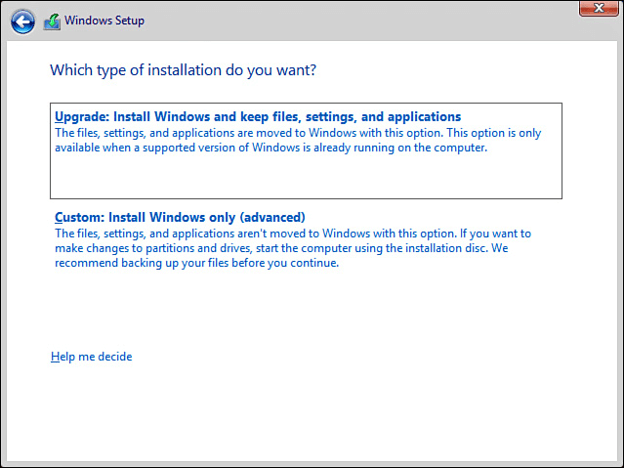
6. Select custom installation.
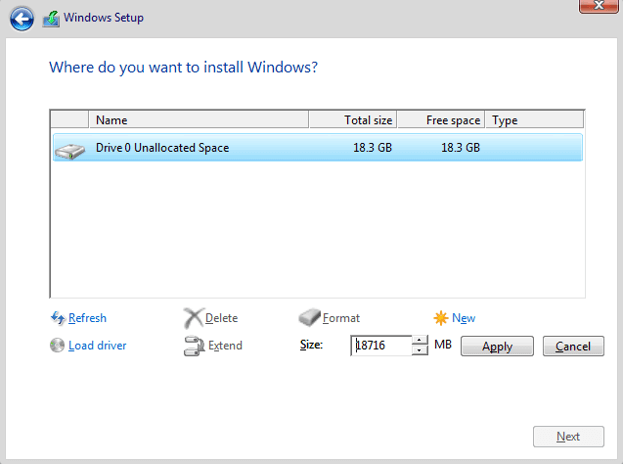
7. Select a hard drive where you want to install the operating system and click on “Next”.
8. Then, hit “Next” and the installation will begin. When prompted whether or not to overwrite the existing files, click on “No” to leave the files as usual.
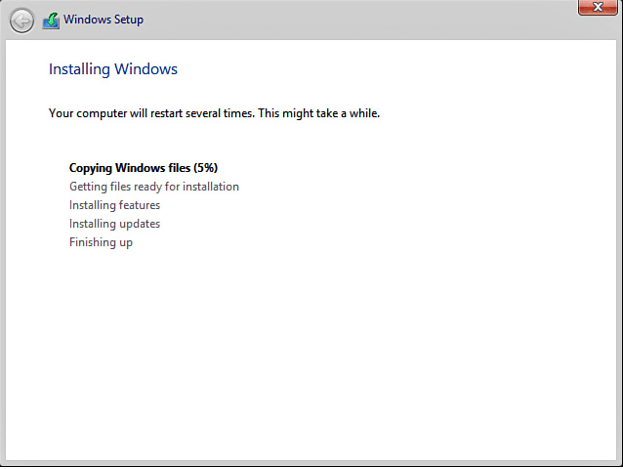
The installation may take around 1 hour. When it’s finished, you can try running the installed Windows Server 2012 R2.
Easier way to install Windows Server 2012 R2
In the paragraphs above, you’ve learnt how to Install Windows Server 2012 R2 from USB. As you can see, it takes up to 17 steps to finish the installation. It’s too complex and time-consuming for novices. So, here, I’ll introduce another easier and more secure alternative to help you clean install Server 2012 R2 on your computer.
That’s AOMEI Partition Assistant Server, which helps directly migrate OS from the current partition to another hard disk (SSD or HDD) on server 2025/2022/2019/2016/2012. Unlike Server 2012 R2 installation from a bootable USB, this method will transfer the entire Server 2012 boot files and other programs installed on the boot partition to another hard drive so that all data and files are secure. More than this impressive feature, this software also helps with partition clone and disk clone if you want to transfer files between partitions and hard drives.
Note:
1. There must be unallocated space on the SSD or HDD you’re moving the OS to and also, the target hard drive should be equal to or larger than the used space of current OS partition.
2. If there is no unallocated space on the destination disk, you can create it by shrinking or deleting a partition.
3. If you prepare to migrate OS from a MBR disk to a GPT disk, then, ensure that the motherboard supports EFI or UEFI boot. Or else, you must convert SSD to MBR in advance.
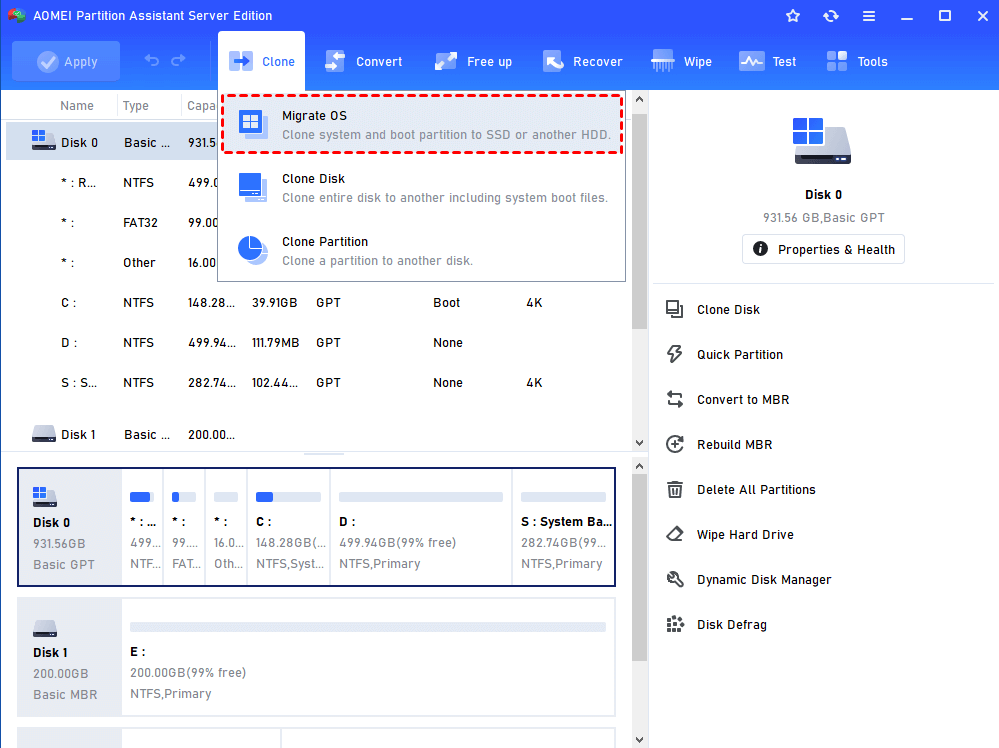
Step 1. Install and run AOMEI Partition Assistant Server, and then, all disks and partitions’ info will be displayed on your screen.
Step 2. Click “Clone” in the top toolbar, and choose “Migrate OS”.
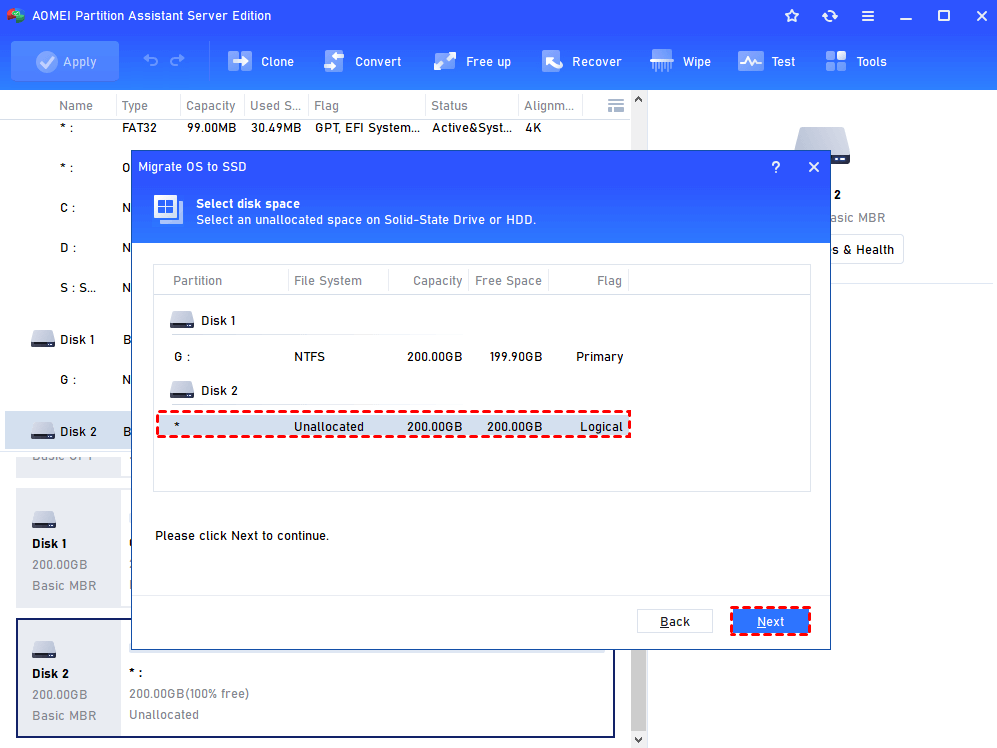
Step 3. Select a piece of unallocated space in the destination disk and hit “Next”.
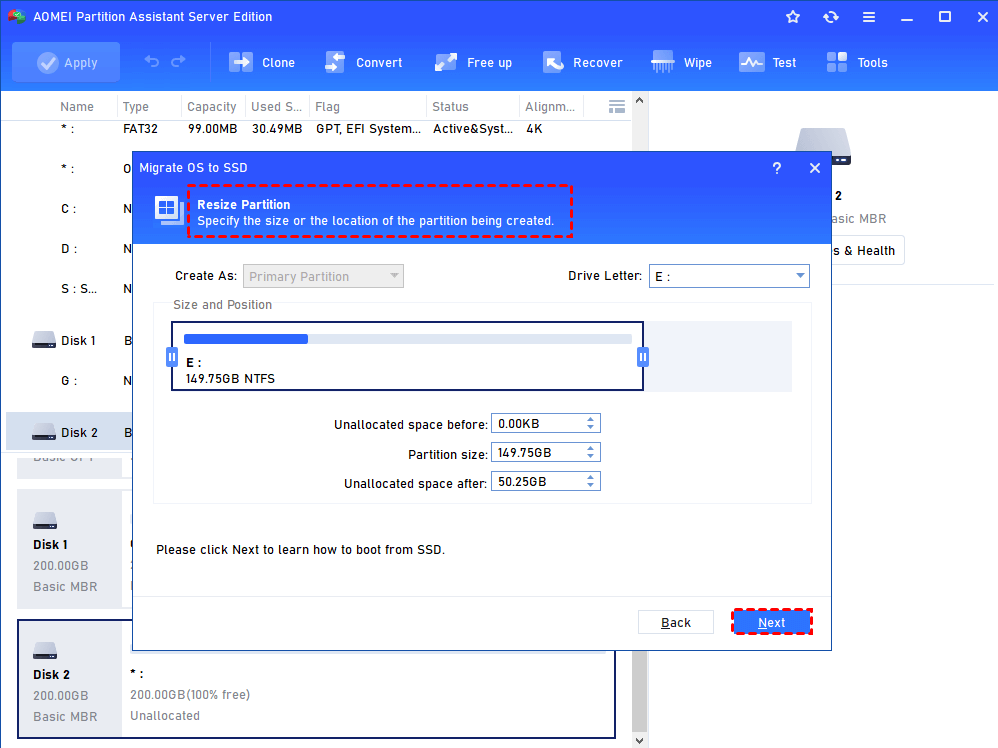
Step 4. Specify the size of the created partition or you can just keep the default settings. Then, hit “Next”.
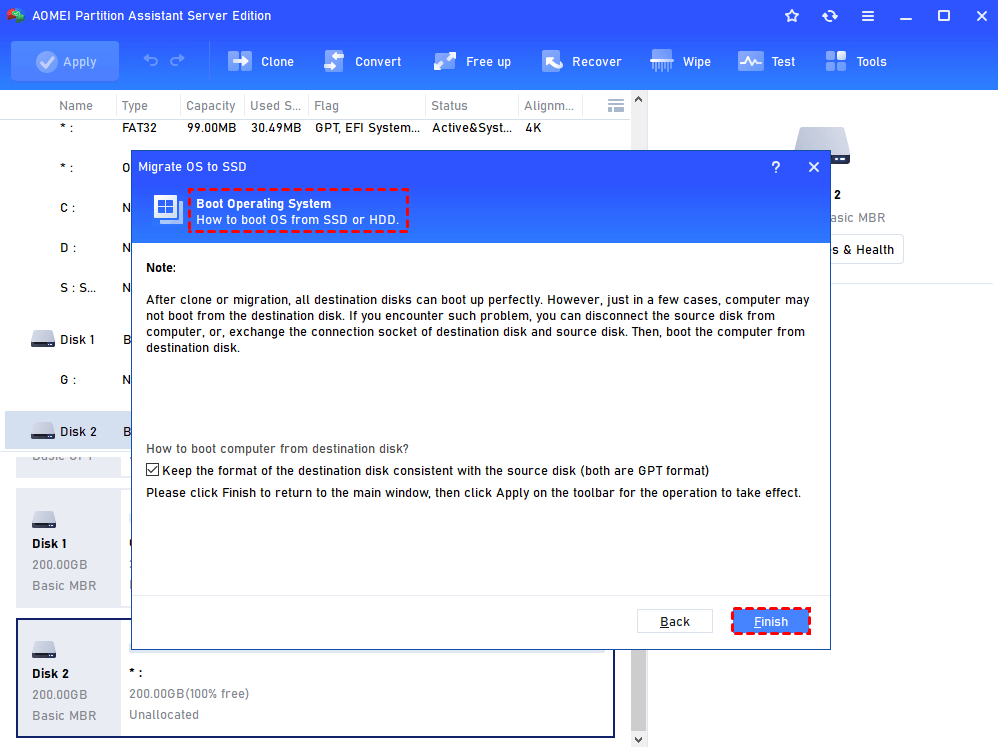
Step 5. Read the note and after that, hit “Finish”.
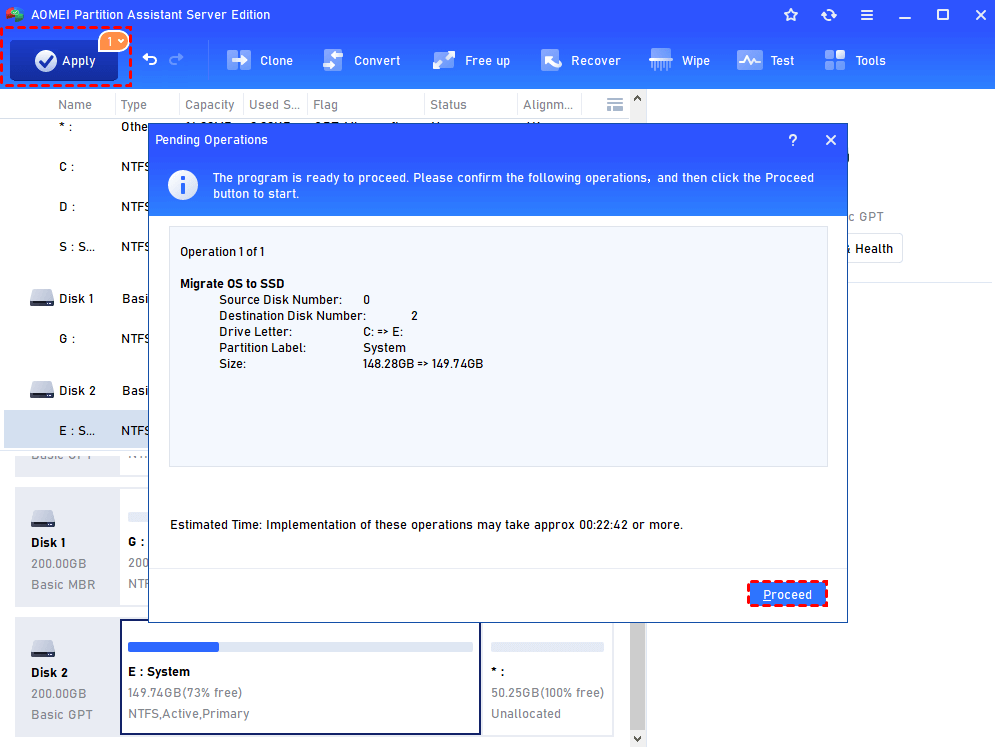
Step 6. Click on “Apply” > “Proceed” to start the OS migration.
In order to boot into Windows Server 2012 R2 smoothly after the installation, remember to change the boot order to set the destination SSD or HDD as the first boot device. Also, if the source disk and the target disk are not in the same partition styles, you have to switch the boot mode from Legacy to UEFI, or UEFI to Legacy.
Conclusion
Install an operating system is never easy for beginners for plenty of knowledge is involved. To make a successful installation, you need to create a bootable USB, change boot order in the BIOS mode, and finally, install the OS. In this article, you’ve learned how to install Windows Server 2012 R2 from USB by following the most explicit guide.
In the second half of the page, an easier tool AOMEI Partition Assistant Server is also introduced to help install Server 2012 R2 more efficiently. If you wish to provide billable technical services to your clients, you’d better try the software’s Technician edition.

