Best Way to Move OS to A New Samsung SSD without Reinstalling
If you want to know how to move OS to a new Samsung SSD without reinstalling in Windows 11/10/8/7, you can refer to this post. You will learn a powerful data migration software to transfer OS safely and easily.
By AOMEI / Updated on December 4, 2023
Why move OS to a new Samsung SSD?
With the increasing requirements for PC performance, SSDs have been widely produced by disk manufacturers, say Samsung Corp. Samsung has produced several high performing SSD drives: 870 EVO, 990 PRO, and so on.
Compared with traditional HDD, SSD provides faster read and write speed. Therefore, moving OS to a new Samsung SSD drive will greatly improve your PC experience. No matter use it as the replacement of the existing data disk or the existing system disk, Samsung SSD does a great job. Using SSD for OS and HDD for storage can be a good choice to store data.
What’s more, cloning OS to SSD saves time and effort because you don’t have to reinstall applications and reconfigure Windows settings. Well, do you have any idea about how to transfer OS from HDD to Samsung SSD? You may need a step-by-step guide.
What needs to prepare to migrate Windows OS?
It is known that Samsung SSD usually provides dedicated data migration software named Samsung Data Migration (SDM). That software will clone the old hard drive to a new Samsung SSD without reinstalling. That means everything will be cloned to a Samsung SSD, including the operating system and personal data. For a user who wants to move only OS to a Samsung SSD, that application won’t be much helpful.
In that case, I think it is worth trying AOMEI Partition Assistant Professional, which is more flexible than Samsung Data Migration. Specifically, this partition manager can move only OS drive to SSD or clone entire system disk from HDD to Samsung SSD depends on you. The following example will show you how to move OS to a new Samsung SSD.
Step-by-step: Migrate OS to a new Samsung SSD without reinstalling
In this part, I will show you how to migrate OS to a new Samsung SSD with AOMEI Partition Assistant Professional. If you are interested, please refer to the following:
1. Shut down your PC, install a Samsung SSD by plugging a SATA cable into the motherboard’s SATA controller, and connect the other end of the cable and a SATA power connector to the new SSD. You can use an external USB adapter as well.
2. Install and run AOMEI Partition Assistant Professional. Click Clone> Migrate OS in the top pane and read the preface in the next window.

3. Select the Samsung SSD here as the target disk. Check the option "I want to delete all partitions on this disk 2 to migrate system to the disk" if there is (are) partition(s).

4. Resize the system partition on the target disk Samsung SSD if you wish.

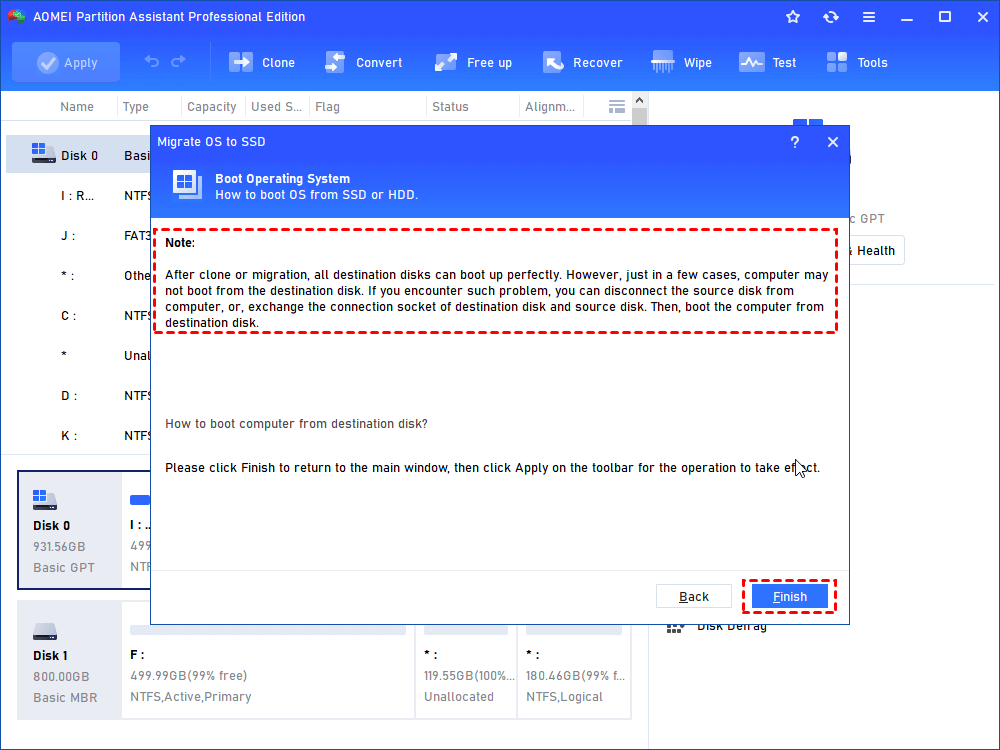
5. Here is a Note that may be useful later.
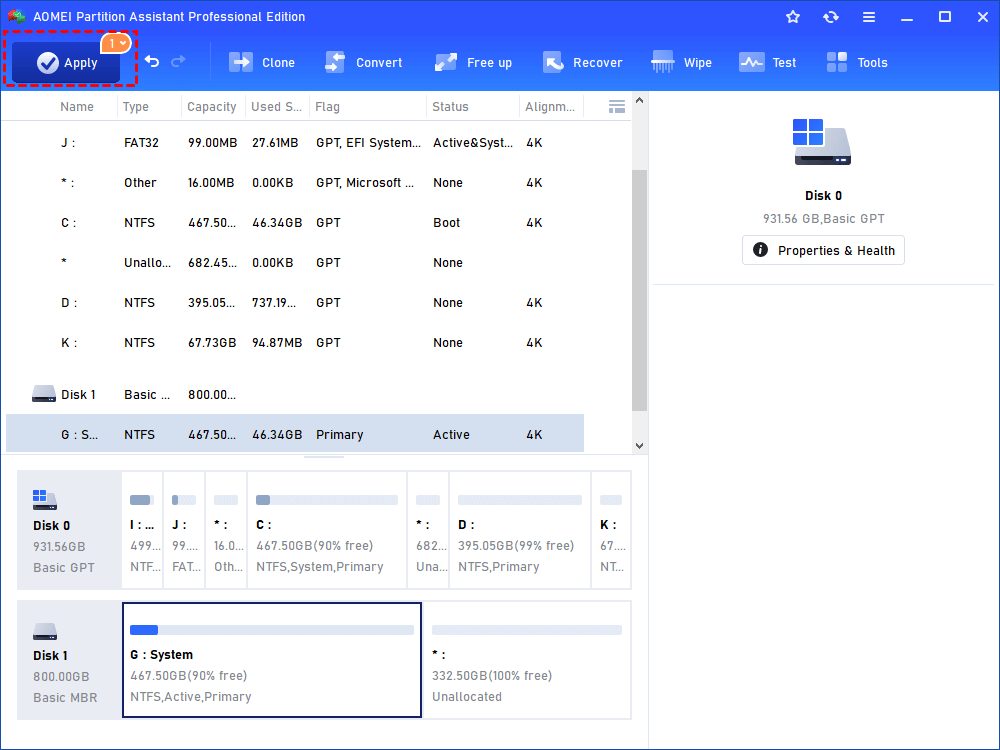
6. What you can see now is the virtual outcome of the above operations. Click Apply to make it real.
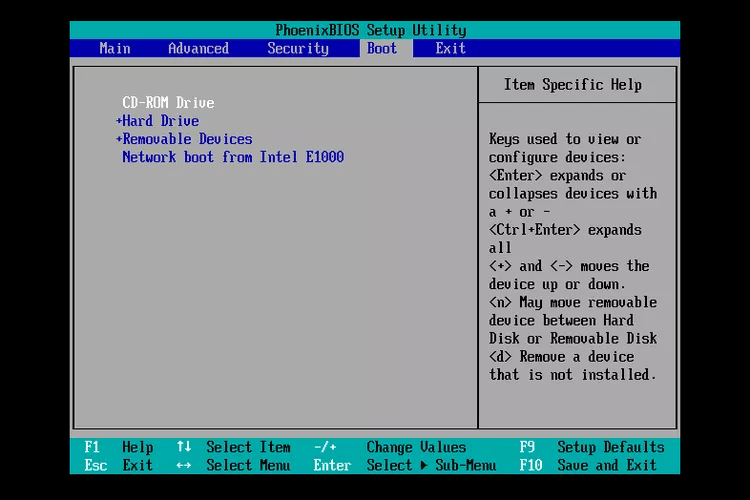
After that, to boot computer from this new SSD, you should go into BIOS setup and change the Samsung SSD's boot order as the first boot device. In this way, the computer will boot from the SSD.
Samsung Data Migration software tutorial
If you change your mind and plan to clone old HDD to Samsung SSD with Samsung Data Migration, this article also introduces how to migrate data with it briefly.
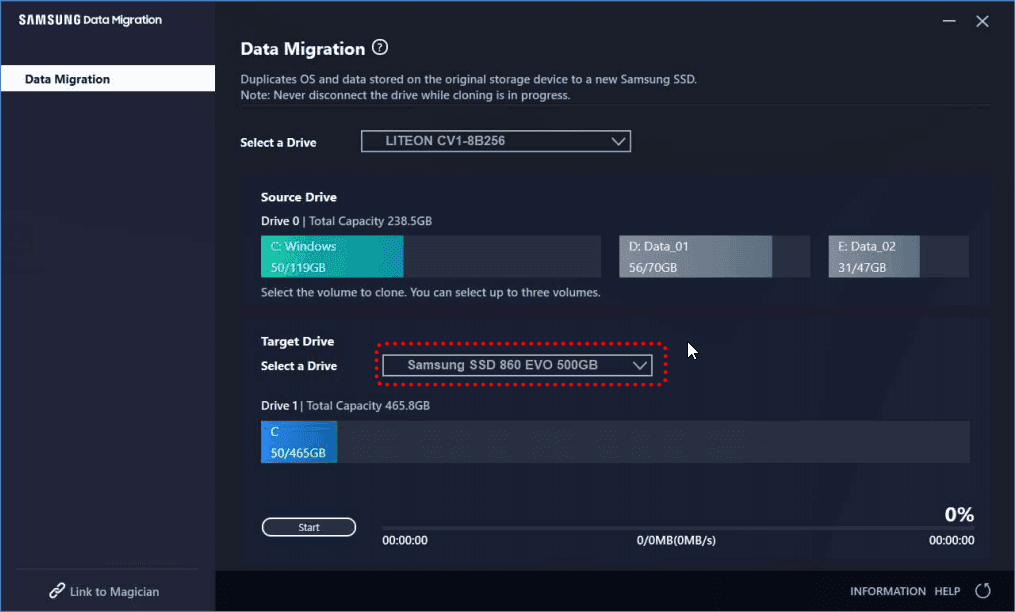
Step 1. Run Samsung Data Migration, it will automatically detect the drive where the OS is installed and select it as the source drive.
Step 2. Next, select the target drive.
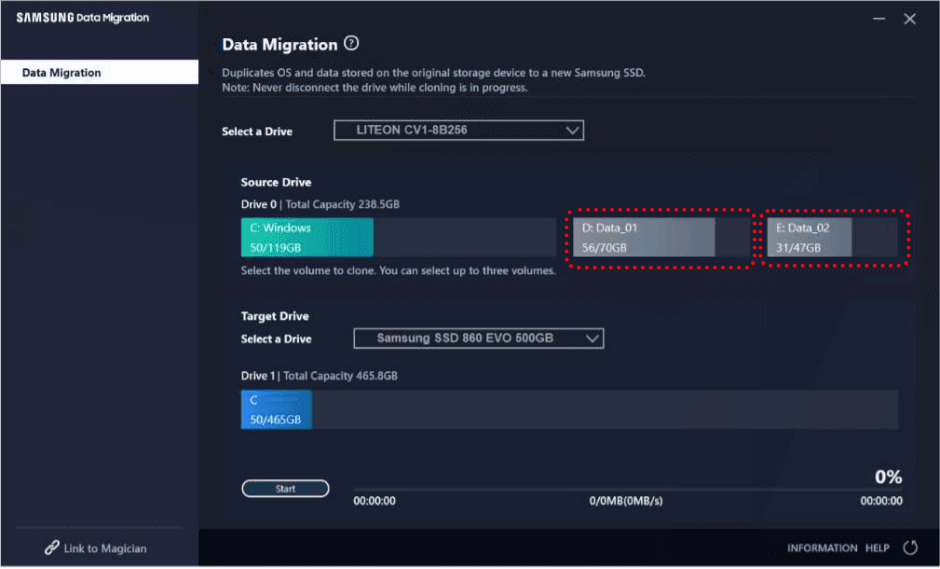
Step 3. If you want to clone other volumes, you can select it and click "Start".
Warning:
Sometimes, Samsung Data Migration doesn't work, you may see some problems such as Samsung Data Migration is stuck at 99%, 100%, or 0%, Samsung 850 EVO not detected in Windows 10, cloning failed -00001[ffffffff], etc. If you can't solve it. Please switch to AOMEI Partition Assistant Professional.
Conclusion
AOMEI Partition Assistant is an effective tool to move OS to a new Samsung SSD. In fact, this tool can apply to other brands of SSD, like Crucial SSD, Kingston SSD, and SanDisk SSD. This partition manager is compatible with GPT disk and MBR disk, so you can transfer OS from GPT disk to SSD without reinstalling. AOMEI Partition Assistant could be used in Windows XP, Vista, 7, 8, 8.1, 10, and 11, so feel free to download it.

