How to Move Programs from SSD to HDD without Data Loss?
How can I move programs from SSD to HDD? If you still have no idea how to do it, don’t worry, as in the following contents, some practical and simple ways will be provided to help transfer programs or apps from SSD to HDD without any data loss.
By AOMEI / Updated on May 12, 2023
Why move programs from an SSD to an HDD?
Nowadays, many PC owners choose to install SSDs or replace their HDDs with SSDs as the latter ones provide better performance like higher startup speed and shorter load time. Meanwhile, an SSD is also quieter when running and consumes less power compared with its counterpart. However, when it comes to price, you’ll no longer feel excited as an SSD is much more expensive than an HDD when of the same capacity. Thus, you may choose to buy an SSD with a smaller capacity such as 125GB, 250GB, or 500GB.
As the capacity is smaller, the storage space of an SSD could run out quickly after a few programs are installed. As usually, the SSD is where the OS is installed, when the drive is full, the PC can become literally sluggish and slow. In this case, many people decide to move some programs from their SSD to HDD to free up space.
How to move programs from an SSD to an HDD?
Since you’ve already learnt the necessity, here, we’ll go ahead and learn how to move installed programs to another drive on Windows 7, 8, 10, 11.
As there’re many ways for SSD to HDD program transfer if you search on the internet, this time, I listed the easiest and most practical ones for you to refer to.
Note: Before proceeding with the program transfer, you must check which partitions belong to the SSD and which partitions belong to the HDD first in Disk Management so you can perform the operation flawlessly.
Method 1. With cut and paste
This is absolutely what people first think of when it comes to drive to drive program transfer. You just need to cut the program from the source drive and paste it on the destination drive. However, if you want to move a large number of programs from an SSD to an HDD, it can take a lot of time. Besides, you could run into various permission issues if you log in the PC not as an administrator.
Note: Due to security issues, you may still meet the permission error even though the PC belongs to you.
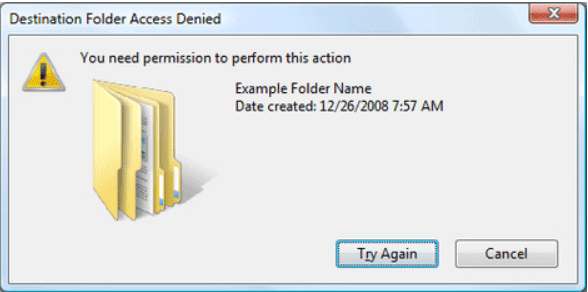
To resolve the permission error, do as follows.
Part 1. Launch the local group policy editor
1. Hit “Windows + R” to open the “Run” box.
2. Type “gpedit.msc” and hit “ENTER”.
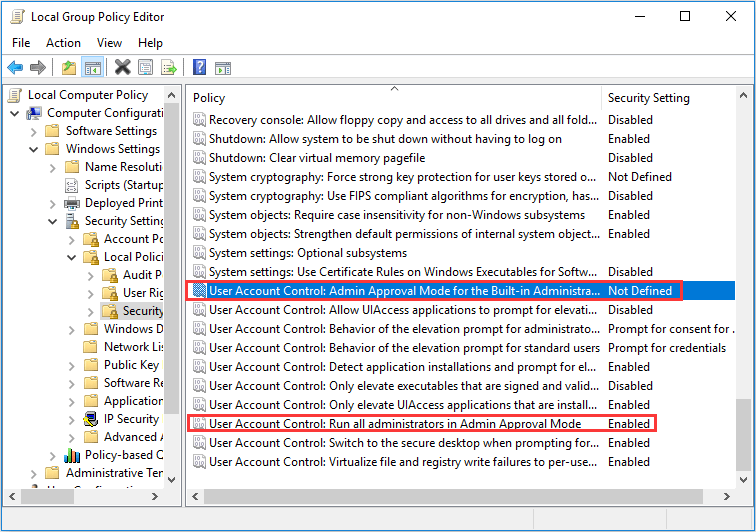
Part 2. Enable admin rights
1. Follow the path “Computer Configuration > Windows Settings > Security Settings > Local Policies > Security Options”.
2. Highlight “Security Options” and scroll down to find the 2 “User Account Control” as the screenshot shows.
3. Right-click on either of them and select “Properties” to enable them both.
4. Save the changes.
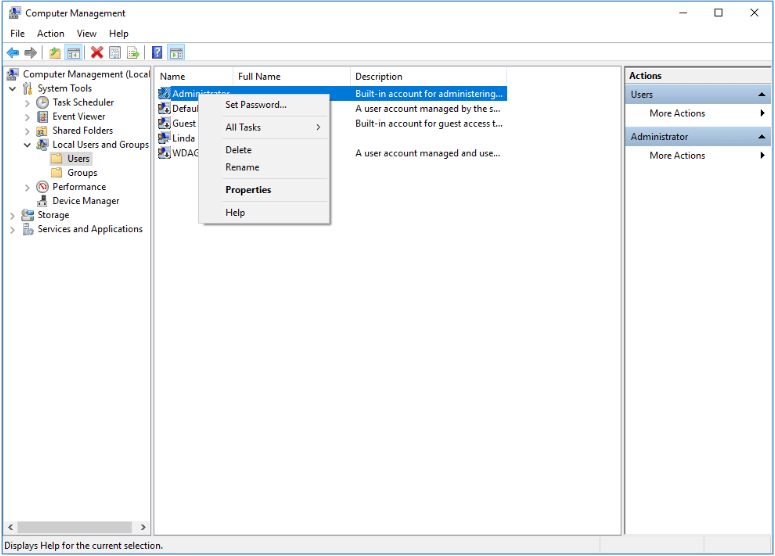
Part 3. Activate the administrator account.
1. Select and right-click on “This PC” from the desktop and select “Manage”.
2. Follow “System Tools > Local Users and Groups > Users.”.
3. Select and right-click on “Administrator” and then, choose “Properties”.
4. Uncheck the option “Account is disabled” and hit “OK”.
Method 2. With Windows app move feature
Microsoft also provides its own convenient feature to move programs from an SSD to an HDD on condition that the programs are installed from the Microsoft Store.
1. Login the Microsoft account on the PC and then, you can preview all the apps you installed in the app library of the Microsoft Store.
2. Hit “Windows + I” to launch Windows settings.
3. Follow “Apps > Apps & features”. All existing apps and programs are on the right side.
4. Scroll to the programs you want to move to the SSD, select it, and click the “Move” button. In the dropdown list, preset the destination drive and click on “Move” again.
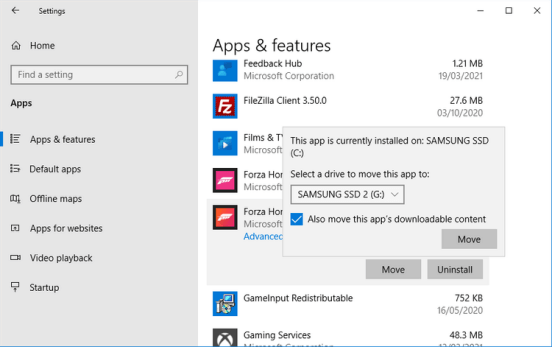
Note: This method can only be applied when the program is installed from the Microsoft App Store.
Method 3. Try a third-party disk manager
As you can see, both the methods above help move programs from drive to drive, but to some extent, they have limits. To make things much easier, this time, I recommend AOMEI Partition Assistant Professional – a powerful and multifunctional disk management utility - to help move one or multiple programs from SSD to HDD without data loss. Moreover, if you want to transfer OS-related partitions to an SSD or HDD, you can try the feature of OS to SSD migration.
Download the demo of the powerful disk management software to have a try!
Option 1. Move one/multiple programs from an SSD to an HDD
With the feature of “App Mover”, you can easily select one or multiple programs and move them to another drive in only a few clicks. The process is lossless and no boot file will be lost so you can normally boot from the program after the transfer.
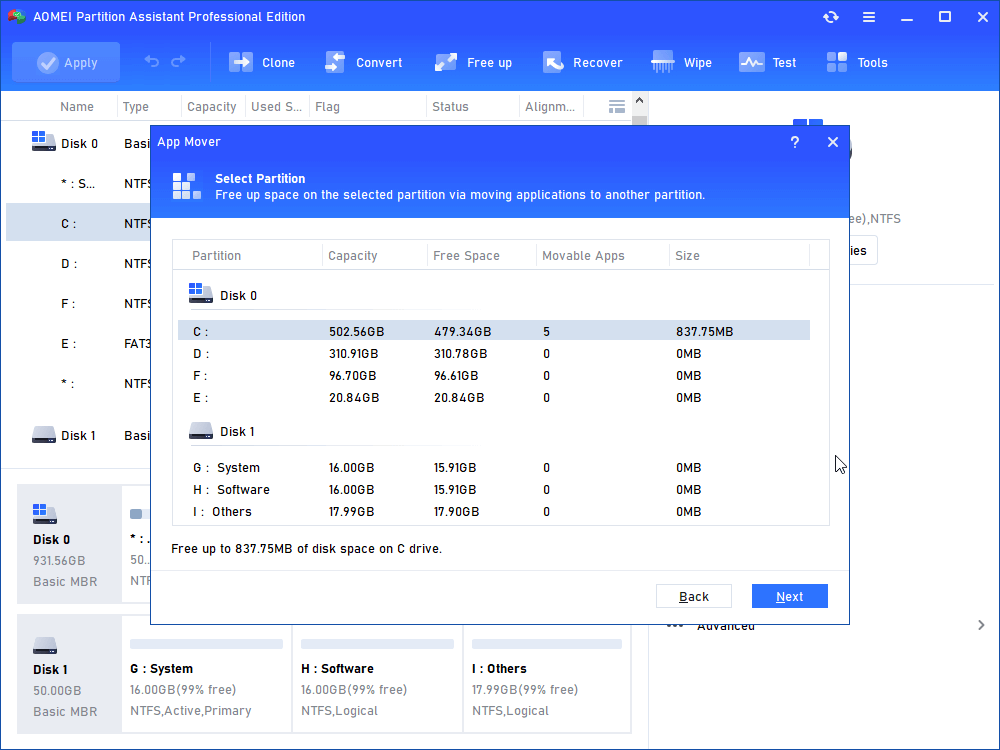
Step 1. First, install the HDD to your PC and install and run AOMEI Partition Assistant Professional. Then, follow “Free up > App Mover” as the screenshot shows.

Step 2. In the “Select Partition” window, all partitions will appear and you can see the size of free space along with the number of movable apps of each partition. Select the partition where the programs you want to move are and hit “Next”.
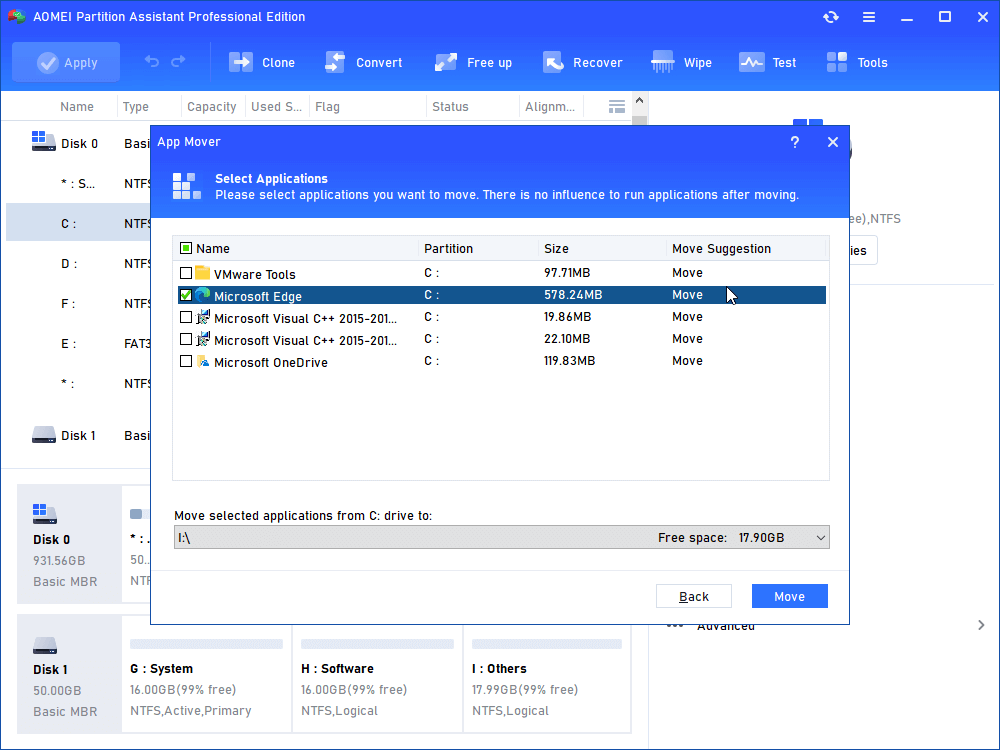
Step 3. All programs in the selected partition will be listed. Now, it’s time to tick the programs you want to move and set the HDD as the destination drive. When all is done, click on “Move”.
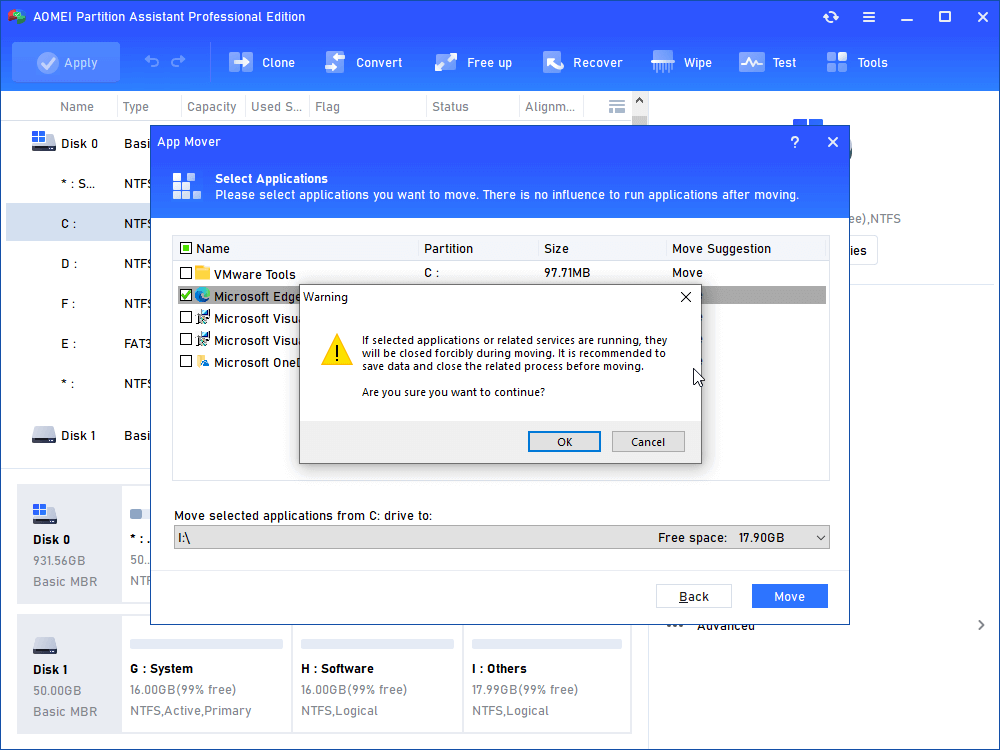
Step 4. When the program transfer starts, you’ll be prompted with a warning saying that you’ll forcibly shut down the currently running applications. Hit “OK” to start the migration.
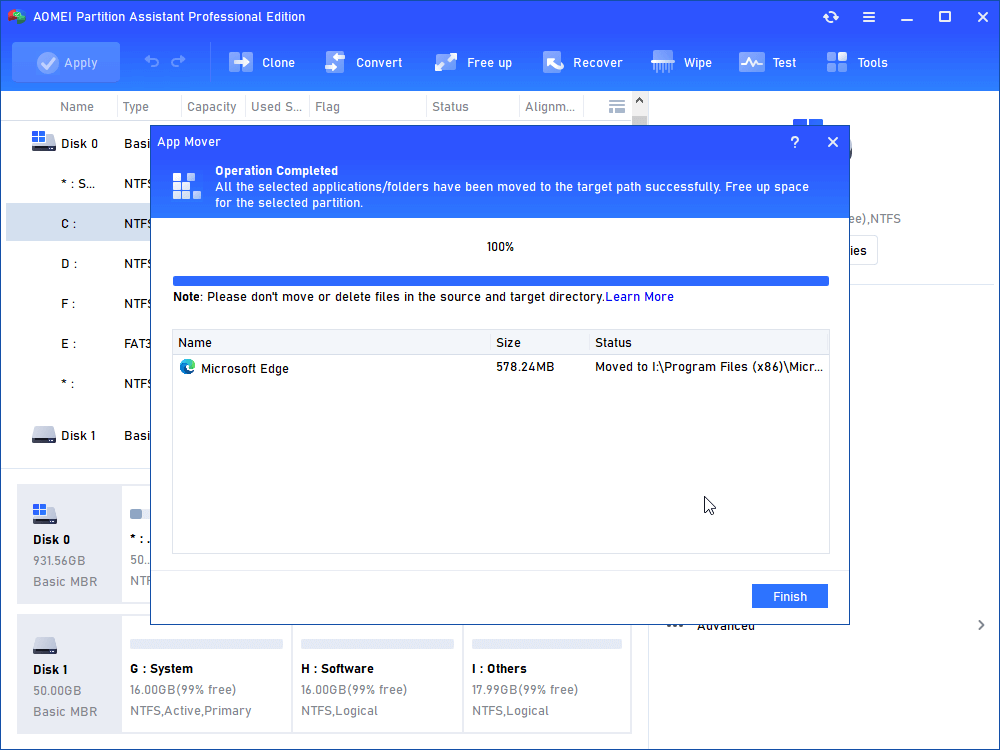
Step 5. Wait until the progress hits 100%. Then, click on “Finish” to quit the program.
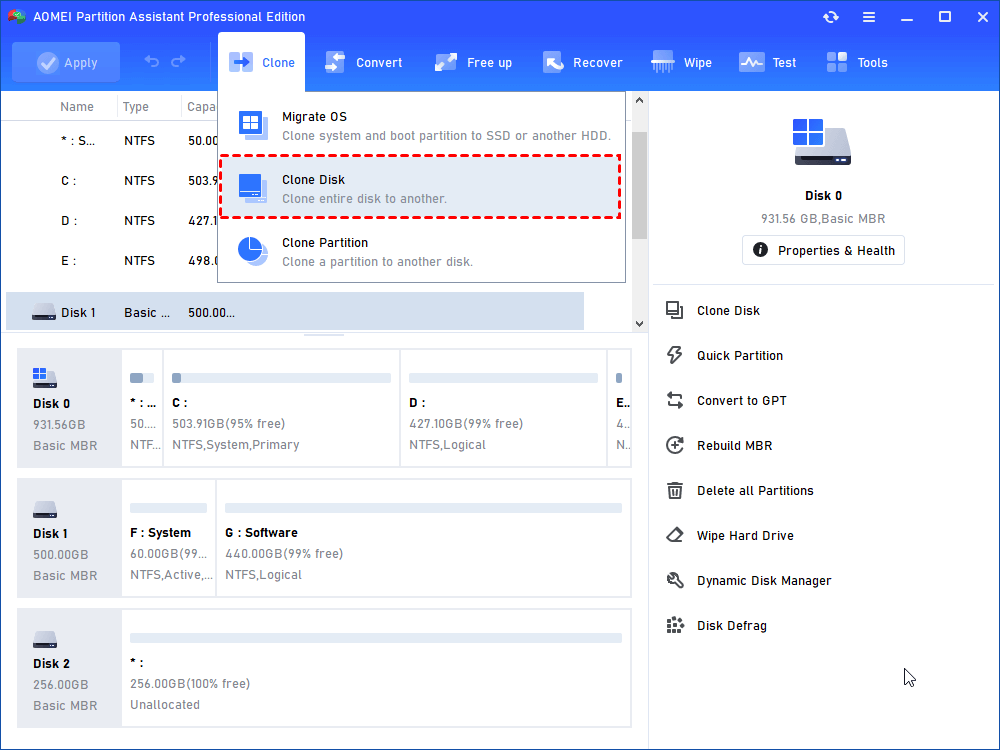
Option 2. Copy an entire SSD to an HDD
If you want to transfer all programs to a new hard drive like an HDD or an SSD, you can also try the “Disk Clone Wizard” of the AOMEI product to copy the entire current hard drive to the new HDD or SSD.
How to change default install location for programs?
Actually, Windows allows its users to change default install location for their programs so you won’t install the programs on the SSD which can be easily full by mistake.
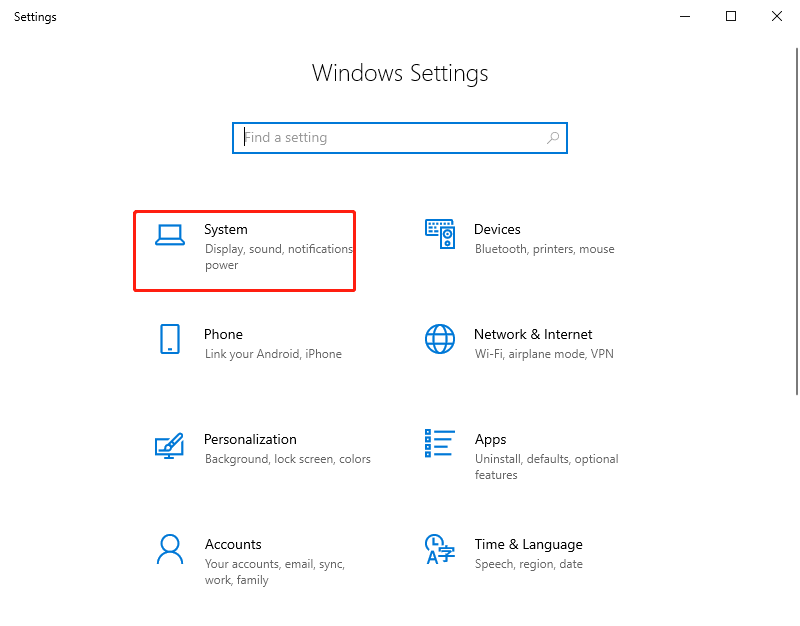
1. Hit “Windows + I” to launch Windows Settings. Then, hit “System”.
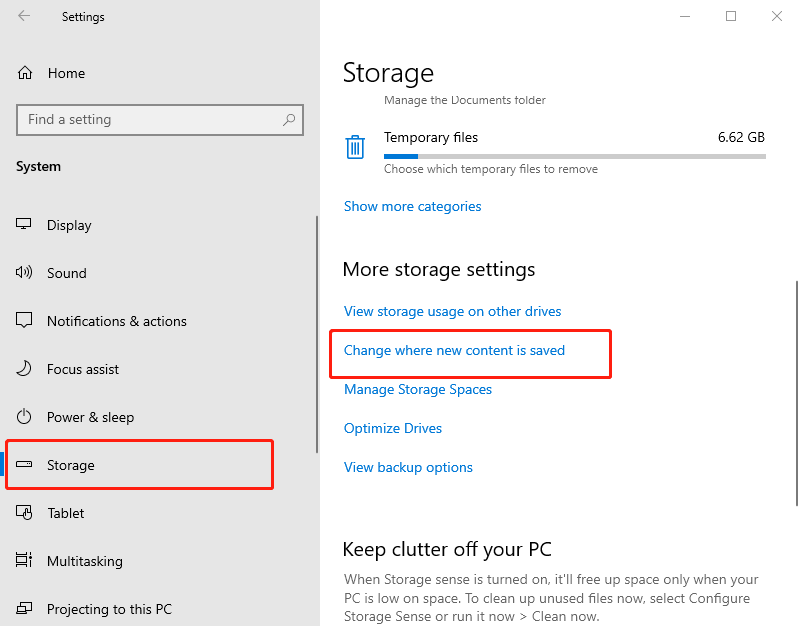
2. Follow “Storage > Change where new content is saved”.
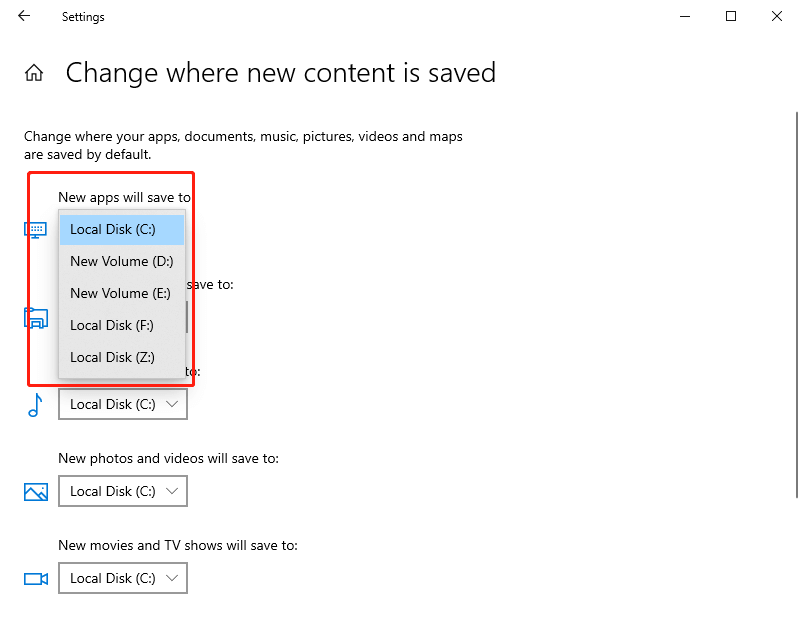
3. Now, change the default install location for programs
Conclusion
How to move programs from SSD to HDD? In this post, both Windows built-in solutions and a third-party disk manager – AOMEI Partition Assistant Professional – are provided to help you tackle it. By comparison, the AOMEI product is more powerful and has no limits. With it, you can transfer programs to a new hard drive in only a few clicks without any data loss. If you want to perform the program transfer operation on Server computers, you can try the Server edition.

