Recovery Partition Not Showing Windows 11/10? Fix It Now!
Learn how to fix the recovery partition not showing issue in Windows 11/10 with this step-by-step guide. It provides straightforward solutions to help you recover lost partitions quickly and efficiently.
By Hedy / Updated on July 31, 2025
Why is recovery partition not showing?
If your recovery partition is not showing on Windows 11/10, it could be due to several reasons. Here are the most common causes:
1. The recovery partition is hidden: Windows automatically hides recovery partitions to prevent accidental deletion or modification. These partitions are usually marked as “hidden” or “unallocated” in Disk Management, making them invisible in File Explorer.
2. No drive letter assigned: If the recovery partition doesn't have a drive letter, it won’t appear in File Explorer. However, this is intentional and normal for recovery partitions.
3. Deleted or overwritten by accident: Sometimes during disk cleanup, repartitioning, or OS reinstallation, the recovery partition might be deleted or overwritten unintentionally.
4. Corrupted partition table: A corrupted partition table can cause the system to fail to detect or correctly identify the recovery partition.
5. Disk errors or bad sectors: If your hard drive has physical damage or bad sectors where the recovery partition is located, the system may not be able to read or display it.
How to fix recovery partition not showing on Windows 11/10
If your computer isn't displaying the recovery partition, there are three effective methods you can try to fix the problem.
Fix 1. Unhide the recovery partition
If the recovery partition is hidden, you can easily unhide it using a trusted tool like AOMEI Partition Assistant. This all-in-one partition manager offers powerful features for disk and partition management—including partitioning drives, cloning disks, converting between MBR and GPT, migrating the OS to SSD or HDD, and more.
Follow these steps to unhide the recovery partition using AOMEI Partition Assistant:
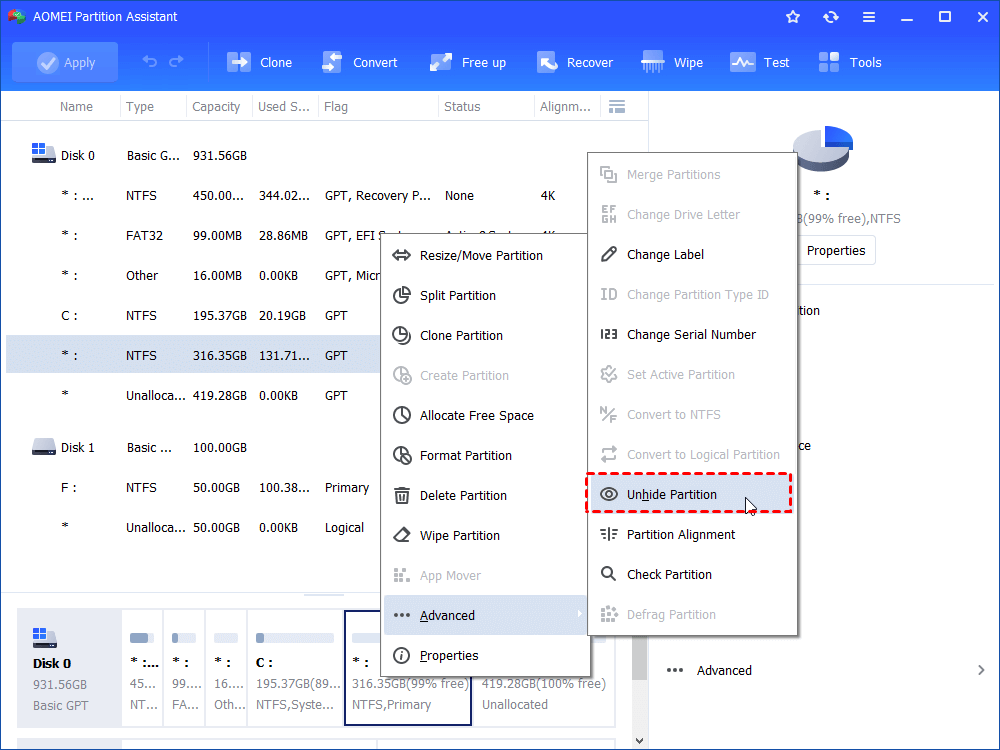
Step 1. Download AOMEI Partition Assistant, install and launch the program. On the main window, right-click the recovery partition, select Advanced>Unhide Partition at the drop-down menu.
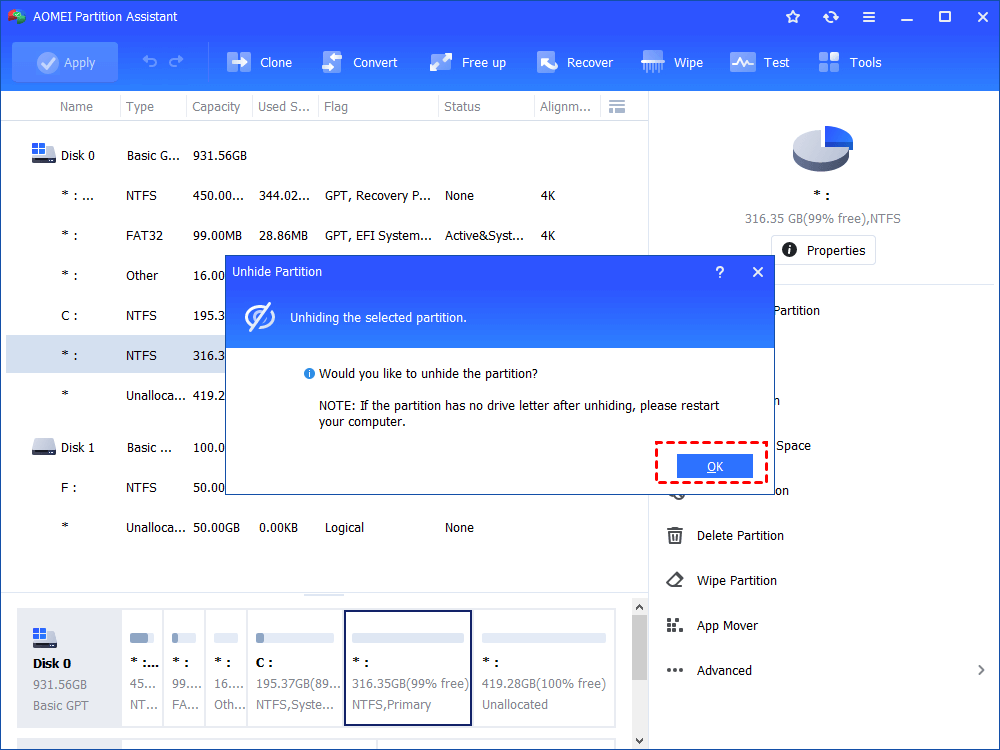
Step 2. At the next window, click OK to continue.
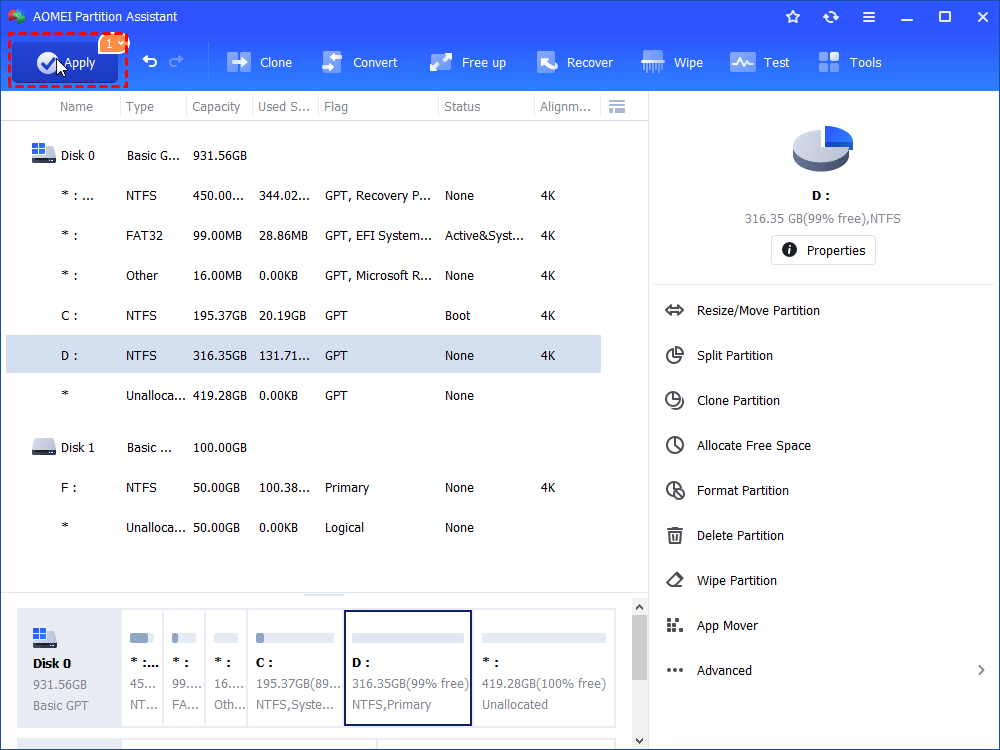
Step 3. Check the result of Pending Operations and the changes of recovery partition. Then click Apply on the toolbar to show recovery partition and hidden files in Windows 7/8/10.
Fix 2. Assign a drive letter to the recovery partition
If the recovery partition isn’t visible on your computer, it might be due to the absence of a drive letter. To protect system integrity, recovery partitions are typically hidden and don’t come with a drive letter—only a limited set of options appears in Disk Management.
To make the recovery partition visible, you can assign a drive letter to it. Using AOMEI Partition Assistant is highly recommended for this task, as it allows you to do so safely without risking data loss.
Here’s how to assign a drive letter using AOMEI Partition Assistant:
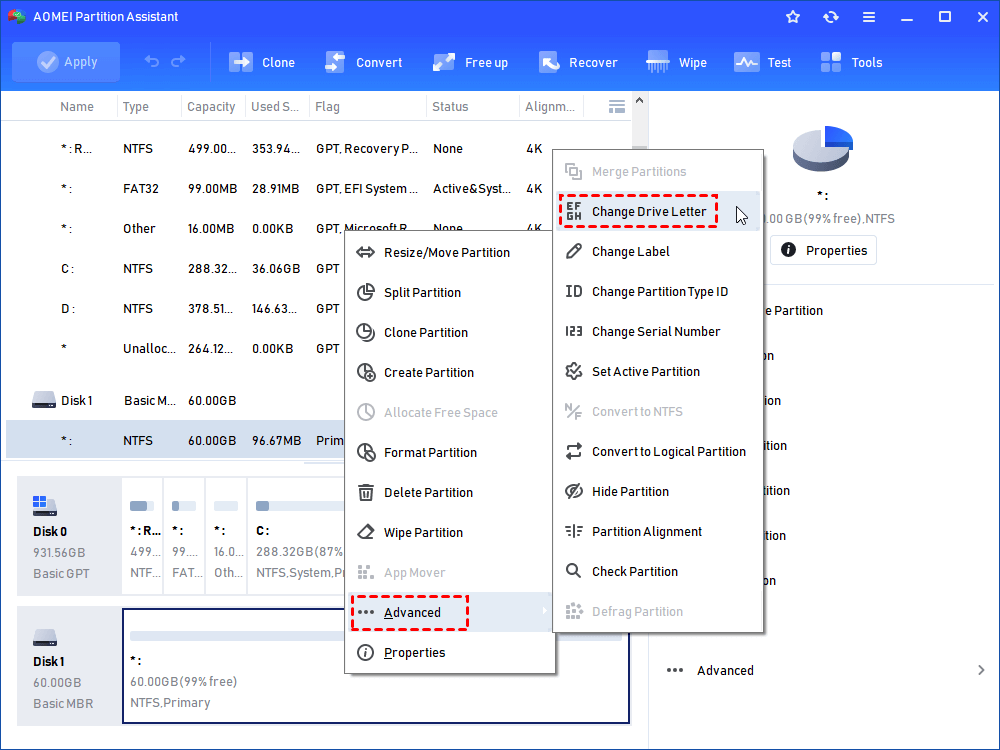
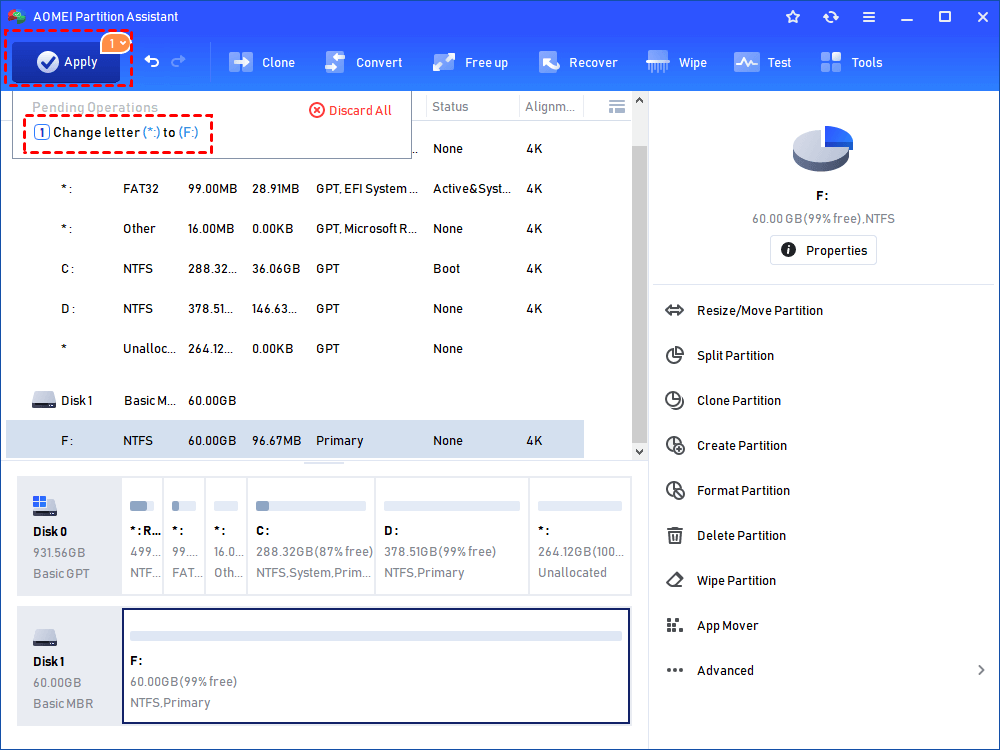
Step 1. Launch AOMEI Partition Assistant, it will show you all storage devices in the main interface. Right-click the recovery partition, select Advanced > Change Drive Letter.
Step 2. Then, select a drive letter for the drive.

Step 3. Click Apply to submit the task.
Fix 3. Recover deleted recovery partition
AOMEI Partition Assistant is a top-tier solution for hassle-free partition recovery on any Windows system. Designed for simplicity and efficiency, it’s an ideal pick for users who want a reliable, user-friendly tool.
With a clean and intuitive interface, it makes the recovery process easy for both novices and experienced users. The standout “Partition Recovery” feature allows you to restore lost or missing partitions with minimal effort.
Powered by advanced recovery algorithms, it safeguards your data throughout the process. No complicated steps or technical know-how required—making it a perfect choice for those who prefer a straightforward, hands-off solution.
Step 1. Install and run AOMEI Partition Assistant. Select "Recover" > "Partition Recovery" on the main interface.
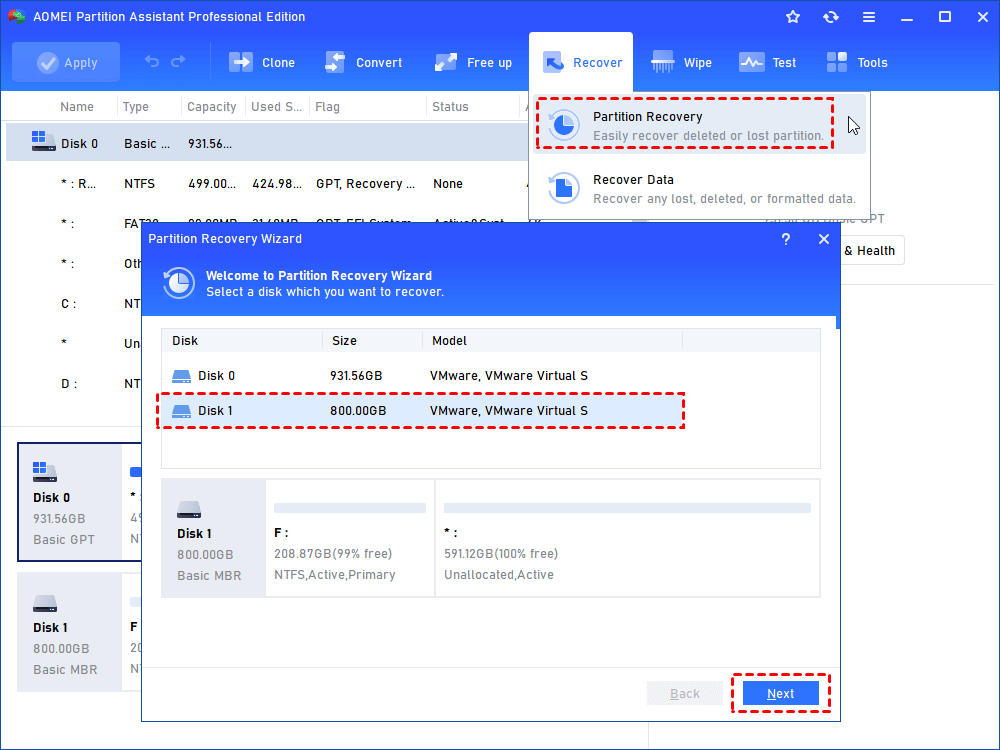
Step 2. Select the disk we’d like to recover. Here we need to select the disk where the recovery partition original was.
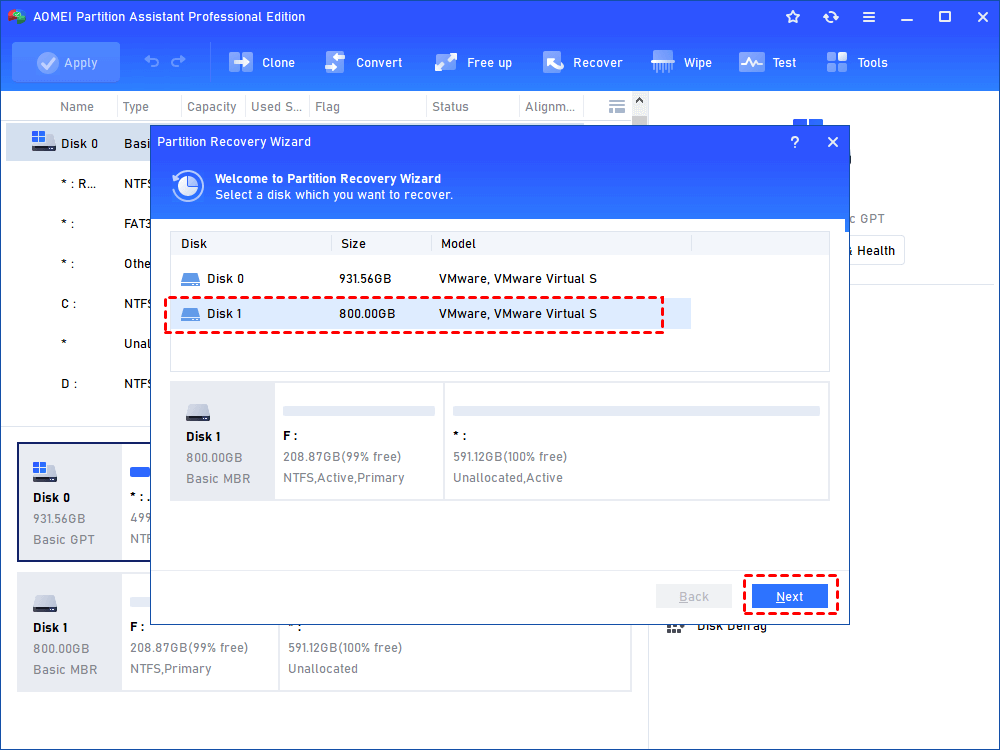
Step 3. Select "Fast Search" (recommended, less time). If the drive is not found, try Full Search.

Step 4. Select the drive and click "Proceed" to start recovering. When it is completed, click "Finish".

Check if the recovery partition is back in the main interface, Disk Management or Windows File Explorer.
Conclusion
This guide addressed the common issue of missing recovery partitions, covering both the causes and a variety of practical solutions. Whether you prefer automated tools or manual approaches, there’s a method that fits your comfort level.
Losing a recovery partition isn’t a disaster—it’s a fixable problem. With the right tools and knowledge, you can restore it with ease. Keep this guide handy for future reference, and rest assured there’s always a solution within reach.

