[Answered] Should I Use FAT32 or NTFS for Bootable USB?
Should I use FAT32 or NTFS for bootable USB?It depends on several factors. In this post, you will know the full answers and learn how to choose the right file format for the bootable USB flash drive.
By Hedy / Updated on June 30, 2025
“Hi, I have a BUFFALO USB3.0 compatible USB memory standard 32GB black RUF3-C32GA-BK, which I bought to be used in making a boot drive, but I could not make it, therefore thinking of re-formatting and using it for saving data, most probably images/videos on my Windows 10 laptop. As there are various file formats, I do not know which should select, FAT32 or NTFS.”
What is USB to boot Windows?
A bootable USB is a portable storage device (like a flash drive) configured to install or run an operating system—such as Windows—on a computer. Instead of relying on a DVD or internal hard drive, the system boots (starts up) directly from the USB. This is commonly used to install Windows, troubleshoot system errors, or perform a clean OS reinstall.
To make a USB bootable, tools like Rufus, Media Creation Tool, or AOMEI Partition Assistant write Windows installation files and a bootloader onto the drive, allowing the BIOS/UEFI to recognize and boot from it.
Should Iuse FAT32 or NTFSfor bootable USB?
Whether you should use FAT32 or NTFS for a bootable USB depends on a few key factors, including the system's firmware (BIOS or UEFI) and the size of the files you need to store on the USB drive. Here's a quick breakdown:
✅ Use FAT32 if:
★ You’re booting in UEFI mode (most modern systems).
★ Your bootable ISO doesn't contain files larger than 4GB.
★ You want maximum compatibility across operating systems (Windows, Linux, macOS).
★ You're creating a bootable Windows installer using Microsoft Media Creation Tool (it uses FAT32 by default).
FAT32 has a 4GB single-file size limit and a maximum partition size of 32GB on Windows tools (though other tools can create larger).
✅ Use NTFS if:
★ You're booting in legacy BIOS mode (older systems).
★ Your ISO or files exceed 4GB in size.
★ You want to enable file permissions, compression, or encryption features on the drive.
★ You're creating a bootable USB for installing Windows with large WIM files (e.g., custom Windows images).
NTFS is not natively supported by UEFI on many systems. You might need to use a FAT32 boot partition with NTFS for the rest.
How to set the best file system format for bootable USB
To format a bootable USB, especially if you're planning to install Windows, Linux, or run a utility tool from it, follow these step-by-step instructions based on your needs. The process varies slightly depending on your operating system and the tool you use.
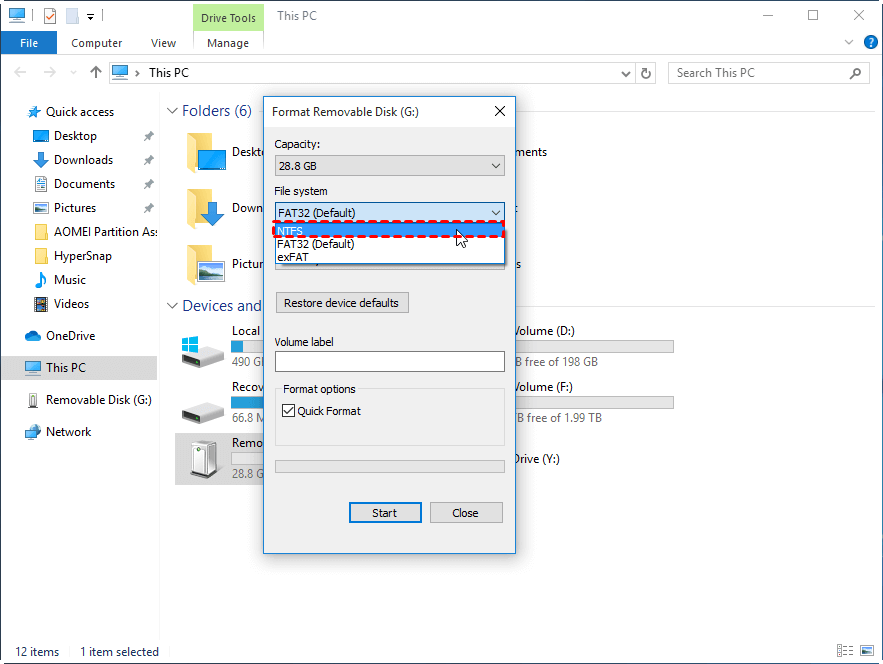
Method 1. Format bootable USB via File Explorer
To begin with, the simplest way to format a USB drive is by using Windows File Explorer:
Step 1. Insert your USB drive into the PC.
Step 2. Open This PC, then right-click on your USB drive and choose Format.
Step 3. Under File System, select FAT32 or NTFS, depending on your bootable media requirements.
Step 4. Check Quick Format and click Start.
Although this method is quick and user-friendly, it offers limited control over advanced formatting settings.
Method 2. Use Disk Management
Alternatively, you can use Disk Management for more control:
Step 1. Press Win + X and select Disk Management.
Step 2. Locate your USB drive, right-click it, and choose Format.
Step 3. Choose the desired file system (FAT32 or NTFS) and assign a volume label if needed.

Step 4. Click OK to confirm.
This method is particularly useful if your USB drive has multiple partitions or if you want to delete and re-create them before formatting.
Method 3. Use Command Prompt
If you prefer a more technical approach, the Command Prompt provides powerful formatting capabilities:
Step 1. Press Win + R, type cmd, and press Enter.
Step 2. Type diskpart and hit Enter.
Step 3. Input the following commands one by one:
list disk
select disk 1 (replace 2 with the number of your USB drive)
list partition
select parition 1
format fs=fat32 quick or format fs=ntfs quick
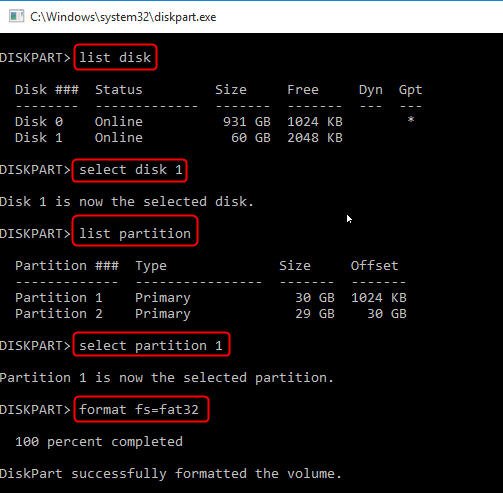
Using Command Prompt gives you precise control over the formatting process and ensures all previous data and partitions are fully removed.
Method 4. Format bootable USB via AOMEI Partition Assistant (recommended)
Compared with the previous methods, AOMEI Partition Assistant offers more advanced formatting options and supports a wider range of file systems. Whether you're creating a USB to install Windows or another operating system, formatting the USB with the correct file system—such as FAT32, NTFS, or exFAT—is crucial. AOMEI Partition Assistant simplifies this task with its intuitive interface and advanced formatting capabilities.
With just a few clicks, you can select your USB drive, choose the desired file system, and apply the changes. It supports formatting even large USB drives that Windows File Explorer might not handle correctly, especially useful when FAT32 is required for boot compatibility.
In addition, AOMEI Partition Assistant also allows users to create bootable media, rebuild MBR, check for bad sectors, and more, making it a go-to solution for anyone preparing bootable drives for system installation or repair.
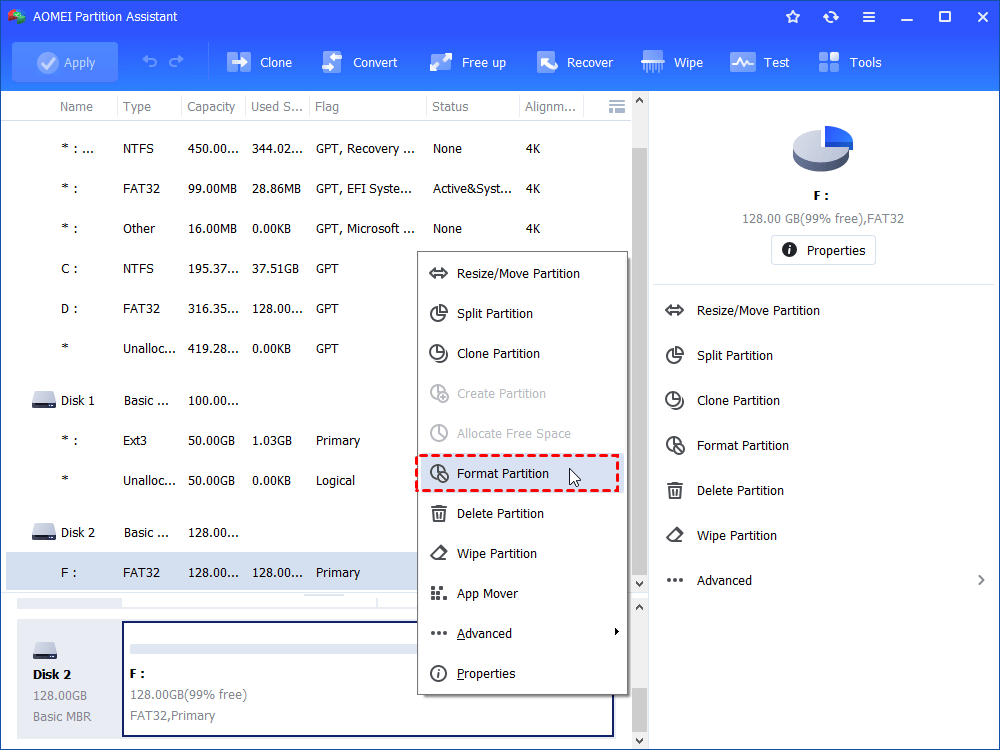
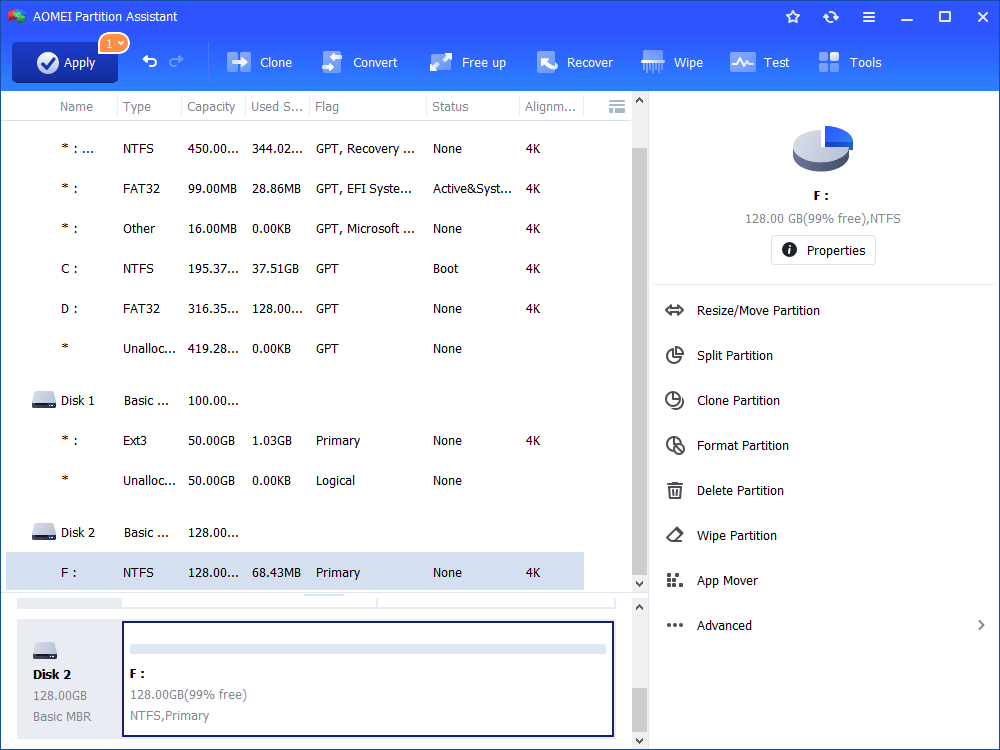
Step 1. Download AOMEI Partition Assistant, install and run it. In the main interface, right-click the target drive and select “Format Partition”.
Step 2. In this small window, specify the file system of the drive based on your own demand and click “OK”.
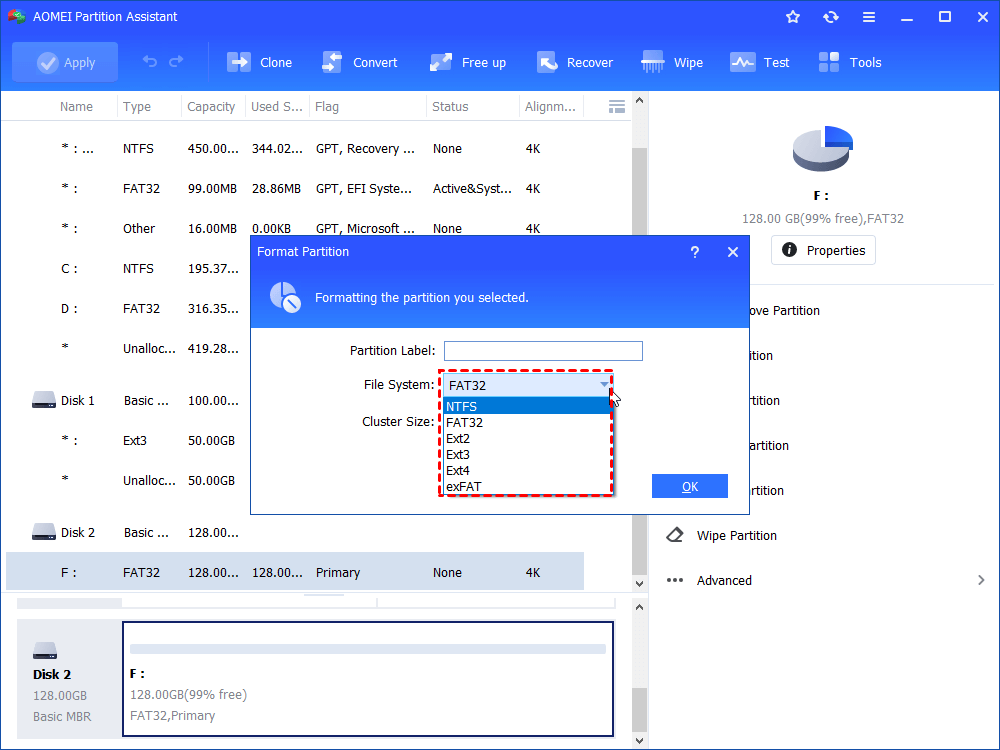
Step 3. Preview the operation. Then, click “Apply” and “Proceed” to perform it.
Conclusion
In summary, choosing the best file system for a bootable USB depends on the use case and system compatibility. While File Explorer and Disk Management are sufficient for basic tasks, Command Prompt provides more granular control. However, for the most versatile and reliable results, AOMEI Partition Assistant stands out as the top recommendation. No matter which method you choose, always double-check the file system requirements of the bootable media you plan to create.

