P2V Guide: How to Turn Hard Drive into Virtual Machine
Want to convert hard drive to virtual machine? Discover the step-by-step P2V process using Windows Disk Management and professional cloning tools.
By Lucas / Updated on January 14, 2026
Transition between physical and virtual environments is a game-changer for both IT professionals and casual enthusiasts. Many users find themselves needing to turn hard drive into virtual machine (a process often called P2V or Physical to Virtual) to preserve legacy software, test new configurations safely, or back up an entire operating system in a bootable format.
By converting your physical system into a virtual disk, you create a portable version of your Windows computer that can run inside software like VMware, VirtualBox, or Hyper-V. This article will provide a detailed, authoritative guide on how to successfully convert hard drive to virtual machine environments using professional tools and native Windows features.
Why Should You Turn Hard Drive into Virtual Machine?
Transitioning a physical system into a virtual one offers immense flexibility for testing and legacy support. Here is why this process is becoming a standard practice for power users and businesses alike.
Whether you are upgrading to a new PC and want to keep your old setup as a reference, or you need to run an older version of Windows that doesn't support modern hardware, the ability to convert physical disk to virtual machine format ensures your data and applications remain accessible. It eliminates the risk of hardware failure, as your "computer" becomes a simple file that can be backed up to the cloud or an external drive.
How to Convert Hard Drive to Virtual Machine
Now, let’s see how to convert hard drive into virtual disk. First, you need to create a virtual disk and then clone your host hard disk to your virtual disk.
Part 1. Get a Virtual Drive: Preparing the Target Virtual Disk
Before you can migrate your data, you need a virtual "container" to hold your operating system and files. This is achieved by creating a virtual hard disk (VHD) within your current Windows environment.
This virtual drive acts as the landing zone for your physical data. It must be at least as large as the used space on your physical drive to ensure a successful migration.
Option 1. Using Disk Management to Create a VHD
Windows provides a built-in utility to create virtual disks. This is the first step in the journey to turn hard drive into virtual machine.
Step 1. Right-click the Start button and select Disk Management. Go to the Action menu and select Create VHD.

Step 2. Choose a storage location and set the size (ensure it is large enough to accommodate your physical disk's data).
Step 3. Select VHDX for better reliability and click OK.
Once the disk appears, right-click it to Initialize and then create a New Simple Volume.
Option 2. Easily create virtual disk via professional disk tool
If your Disk Management can’t create a virtual disk successfully, don’t worry, you can choose AOMEI Partition Assistant. This tool also has a user-friendly UI for all users to easily create, delete, and resize VHD on your Windows PC.
Step 1. Click the tab "Virtual Disk", you will see 3 options available for VHDs: create VHD, attach VHD, and detach VHD. Select the "Create VHD" option after clicking the "Virtual Disk" tab.
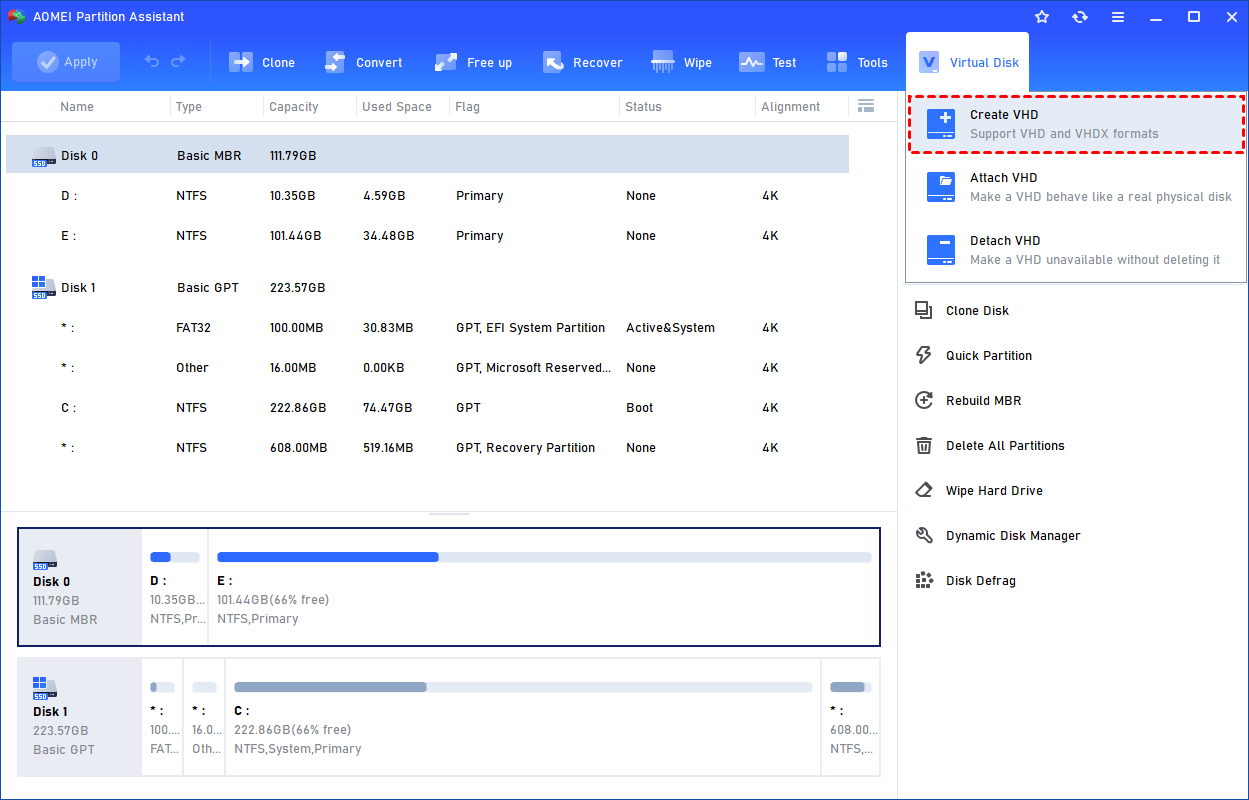
Step 2. You can specify the virtual disk location and size.
Optionally, you can click the "Advanced" option to set the virtual hard disk format and type. (By default, the VHDX format and the Dynamically expanding type are checked.)
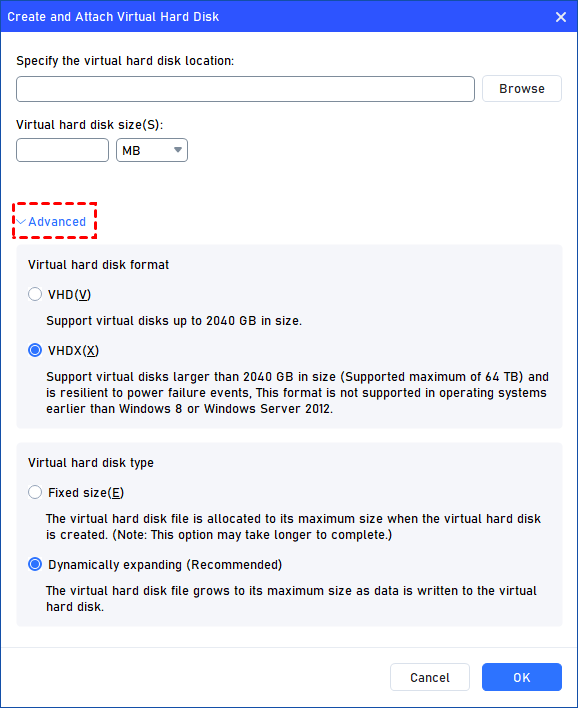
Virtual hard disk format: VHD and VHDX are supported.
For VHD, it supports virtual disks up to 2040GB in size.
For VHDX, it supports virtual disks larger than 2040GB in size. (Up to 64TB) This format is not supported in operating systems earlier than Windows 8 or Windows Server 2012.
Virtual hard disk format: Fixed size and Dynamically expanding are supported.
For fixed size, the virtual hard disk file will be allocated its maximum size when it is created. So it will take much longer to create.
For Dynamically expanding, the virtual hard disk file will grow to its maximum size as data is written to it. (Recommended)
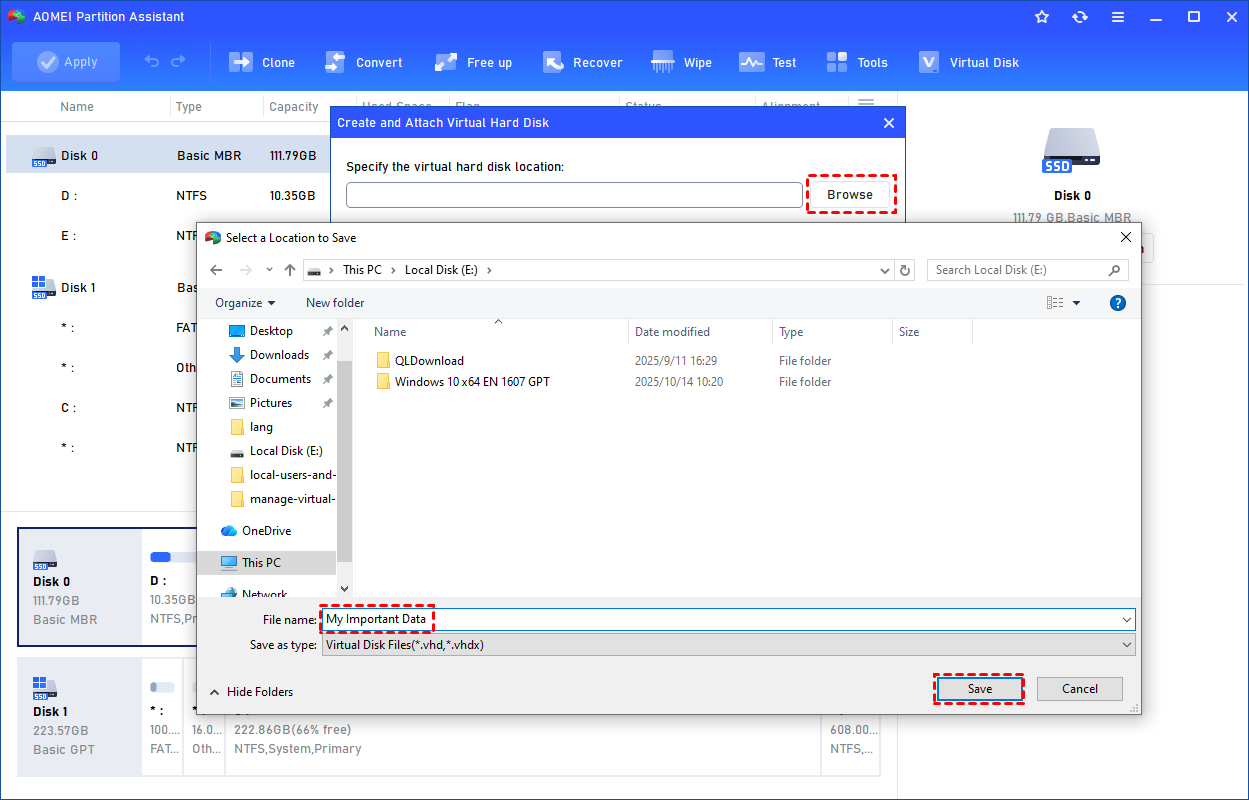
Click "Browse" to select a location to create the VHD. Please enter a file name for the virtual disk and click "Save".
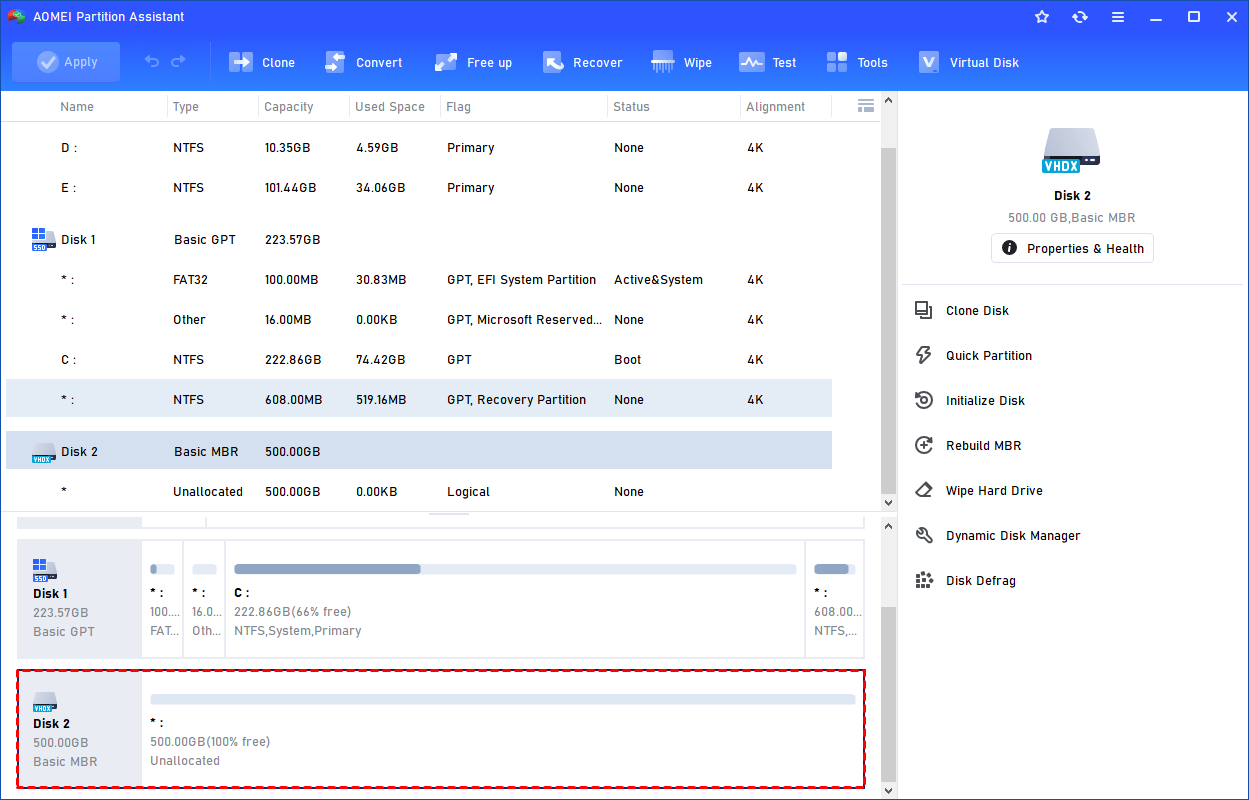
Step 3. Once the virtual disk location and size are set up, you can click "OK" to start creating the VHD.

Step 4. After the reload process is finished, you will see that the VHD has been created successfully. It will be attached automatically.
Part 2. How to Convert Hard Drive to Virtual Machine via Cloning
Once the virtual container is ready, the next step is to replicate the data from your physical hardware to the virtual file. This process effectively allows you to convert hard drive to virtual machine environment seamlessly.
Standard copy-pasting will not work for this task because it doesn't capture the boot sector or system partitions. You need a cloning method that ensures the virtual disk is an exact, bootable replica of your physical host. To ensure a bootable and stable result, AOMEI Partition Assistant provides a robust "Clone Disk" feature specifically designed to convert physical disk to virtual machine layout with high precision.
While it is a powerhouse on Windows for P2V tasks, its "Clone Disk" functions are what truly set it apart. These features allow the software to recognize a mounted VHD file as a target drive, enabling a sector-by-sector replication of your system.
Step 1. Install and launch AOMEI Partition Assistant, click "Clone" in the main interface, and select "Clone Disk".

Step 2. Choose the hard disk that you need to clone as the source disk and click "Next".

Step 3. Select another drive as the destination disk, and then click "Next".

Step 4. Then, you can check the source and destination disk in the next window or change to "Sector to Sector clone", and click the "Confirm" button to continue if there is no problem.

Here, you can also click the "Settings" button to adjust the partition size on the destination disk or tick "4k alignment" to improve the reading and writing speed of the SSD.

Step 6. You can preview the disk cloning operation by viewing the "Pending Operations". To commit the "Pending Operations", please click "Apply" and "Proceed".

Ending
Learning how to turn hard drive into virtual machine is an invaluable skill for data preservation and system flexibility. By using Disk Management to get a virtual drive and leveraging the advanced "Clone Disk" capabilities of AOMEI Partition Assistant, you can convert physical disk to virtual machine format safely and efficiently. This process not only secures your legacy data but also provides a versatile way to manage your computing environment across different hardware.
FAQs
1. Is a virtual machine as fast as a physical hard drive?
Generally, a virtual machine will be slightly slower than a physical system due to the software emulation layer. However, if you store the virtual disk file on an NVMe SSD, the performance difference is often negligible for standard office or legacy tasks.
2. Do I need a new Windows license for the virtual machine?
When you turn hard drive into virtual machine, Windows may detect a significant hardware change and require reactivation. If you have a retail license, you can usually transfer it, but OEM licenses are typically tied to the original physical hardware.
3. Can I convert a Mac hard drive into a virtual machine?
While AOMEI Partition Assistant is a new software for macOS that handles NTFS and disk management, the P2V process for Mac is more complex due to Apple's hardware locks. However, for Windows drives, the process outlined above is the most reliable method.
4. What happens to the original physical disk after the conversion?
Nothing happens to your original disk. When you convert hard drive to a virtual machine, you are simply creating a copy. Your physical PC will continue to function exactly as it did before.
5. Which virtual disk format should I use, VHD or VHDX?
VHDX is the superior format for modern Windows users. It supports larger capacities (up to 64TB) and has built-in protection against data corruption during power failures, making it the best choice when you convert physical disks to virtual machine containers.

