Volume Stuck at 100 on Windows 11? Fix it Now!
The volume stuck at 100 on Windows 11 can be fixed by updating driver or check disk errors. If this issue causes any data loss, you can also follow to recover the missing files.
By Irene / Updated on April 1, 2025
User case: Volume stuck at 100 on Windows 11
Windows 11 sound stuck at 100! I am completely stumped by this one. This morning windows started setting itself to 100 on the volume. When this happens, there is also a volume indicator overlay on the screen as well. The volume can be lowered for just a fraction of a second then it starts raising again, almost like a stuck volume up key on a keyboard.
I do not, however, have any volume controls on my keyboard. This is not related to a specific audio output device because the volume remains maxed no matter which output device is selected. I have a 3.5mm jack external speaker, a speaker built into one monitor, 3.5mm headphones, USB headphones, and Bluetooth earbuds. It doesn't matter which device, same problem. Sometimes, but not always, while the volume is maxed out, I cannot change the audio device.
- Question from www.reddit.com
Volume control is an important part of a computer system. If your Windows volume is stuck at 100% and you can’t adjust it using shortcut keys, the system tray, or external devices, the issue may be caused by a driver problem, system conflict, or hardware failure. This is a common issue in Windows, but there are ways to fix it.
This guide will share some troubleshooting steps, including updating drivers, checking for disk errors, and system maintenance. During the fixing process, it is better to use a tool. AOMEI Partition Assistant, mainly a disk management tool, can also help by improving system stability. It offers many practical features that can resolve conflicts affecting audio settings. In addition to this tool, you can also use some Windows tools. Read on to learn how these tools can help fix the problem.
How to fix Windows 11 volume stuck at 100?
If your Windows 11 volume stuck at 100%, the issue may be caused by many factors. Fortunately, there are several ways to fix it. This section provides step-by-step solutions, including checking for disk errors, restarting the Windows Audio service, performing a clean boot, and updating audio drivers. Additionally, if data loss occurs due to system crashes, AOMEI Partition Assistant offers reliable recovery options. Follow the instructions below to troubleshoot and resolve the issue efficiently.
Fix 1. Check and fix errors for bad sectors
If the audio issue stems from corrupted system files due to disk errors, it is better to check the bad sectors from a partition. AOMEI Partition Assistant is a reliable tool for managing partitions and checking disk health. It works on Windows 11, 10, 8, 8.1, and 7, offering a simple interface that is easy to use for both beginners and advanced users. You can download it to check and repair bad sectors to fix computer stuck at 100% issue.
If your hard drive has too many bad sectors, transferring all data to a new disk can be a good solution. AOMEI Partition Assistant includes a “Clone Disk” to help you copy your entire disk safely and efficiently.
The Best Windows Disk Partition Manager and PC Optimizer
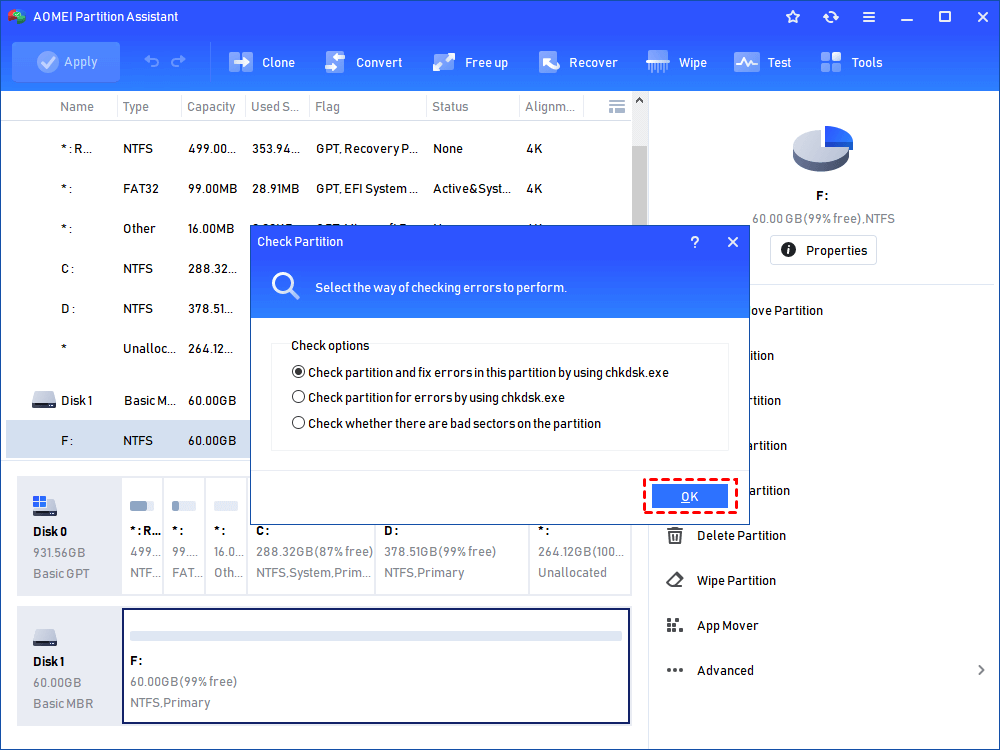
Step 1. In the main interface, right-click the target drive and then click "Check Partition".

Step 2. Choose the "Check partition and fix errors in this partition by using chkdsk.exe" option, then click "OK".
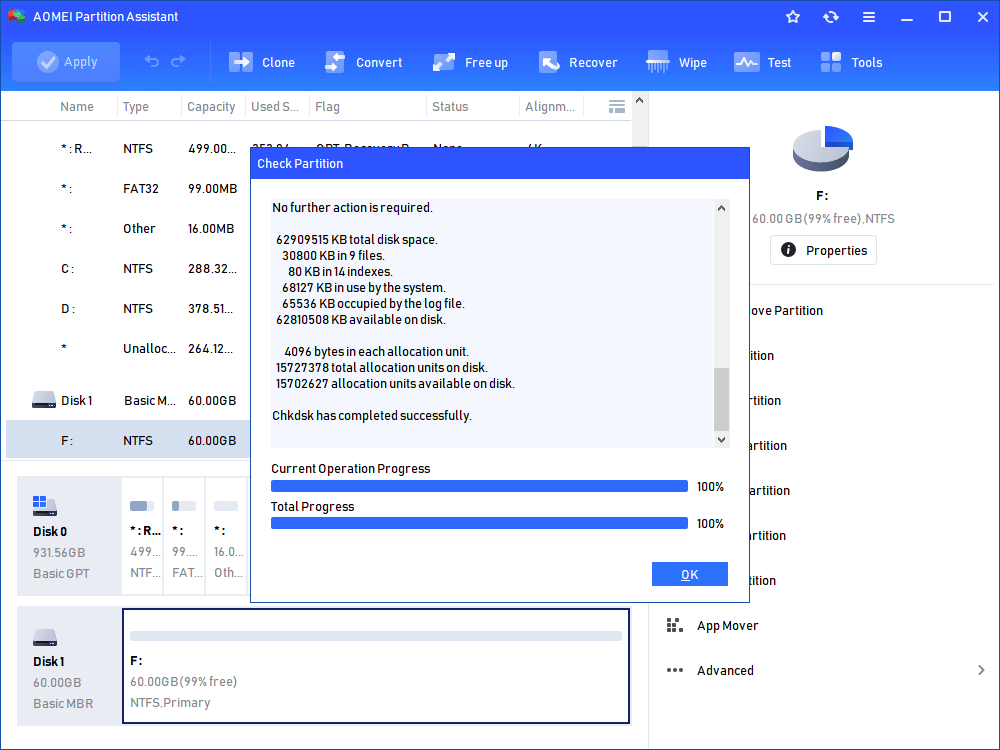
Step 3. Wait for a while and click "OK" when it's finished.
Fix 2. Restart Windows Audio Service
If your sound isn’t working or the audio service has stopped, restarting the Windows Audio service may help. This issue can occur due to incorrect service settings, driver conflicts, or system errors. Follow these steps to restart the service:
Step 1. Press Win + R to open the Run dialog. Type services.msc and press Enter to access the Services window.
Step 2. Scroll down, find Windows Audio, right-click it, and select Restart.
Step 3. Do the same for Windows Audio Endpoint Builder to ensure a complete reset.
Fix 3. Perform a Windows 11 clean boot
Running Windows in a Clean Boot state helps identify software conflicts by disabling unnecessary startup programs and services. This method is useful for diagnosing issues caused by third-party applications. If the volume stuck at 100 on Windows 11, please follow these steps:
Step 1. Type System Configuration in the Windows search bar and press Enter. In the Services tab, check Hide all Microsoft services, then click Disable all.
Step 2. Switch to the Startup tab and select Open Task Manager.
Step 3. Right-click on third-party applications and choose Disable. Go to the Boot tab, check Safe boot, and click OK > Restart.
After restarting, enable the disabled programs one by one. If the issue reappears, the last enabled program may be the cause, and you should disable it again.
Fix 4. Update, roll back, or reinstall the audio driver
If you're experiencing sound issues, updating, rolling back, or reinstalling the audio driver may help. These steps can fix driver errors or compatibility problems with Windows. Follow these instructions:
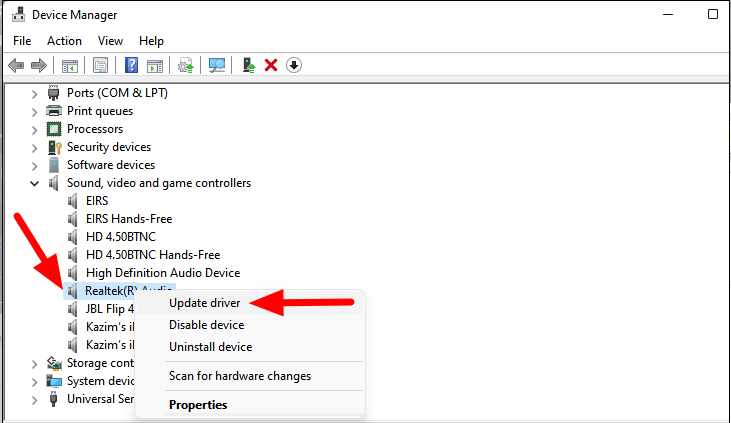
Step 1. Right-click the Windows button and select Device Manager. Expand Audio inputs and outputs by clicking the small arrow next to it.
Step 2. Right-click your audio device and choose Properties.
Step 3. Go to the Driver tab and click Update Driver, then select OK. Or you can directly find the audio icon and unfold the list to choose the specific driver for updating.
You can also return to the Driver tab to roll back the driver or uninstall the device if updating doesn’t solve the problem of Windows 11 volume stuck at 100.
Bonus tip: How to recover lost data caused by volume stuck at 100 on Windows 11?
The volume bug is often linked to driver conflicts, such as USB audio devices, or crashes in the AudioEndpointBuilder service. If this leads to system freezes, crashes, or a Blue Screen of Death (BSOD), unsaved work may be lost if auto-save fails.
If the system becomes unresponsive, users may force a shutdown by holding the power button, risking data loss. In rare cases, severe driver conflicts can strain system resources (CPU/RAM), disrupting background tasks like cloud backups or file indexing. This may result in failed backups or incomplete data synchronization.
If you lost any data due to volume stuck at 100 on Windows 11, 10, 8, or 7, AOMEI Partition Assistant can help restore lost data. It supports recovering over 1000 file types, including documents, photos, videos, audio, emails, and compressed files. Additionally, it works with various storage devices such as HDD, SSD, USB drive, and SD card, making data recovery simple and efficient.
The Best Windows Disk Partition Manager and PC Optimizer
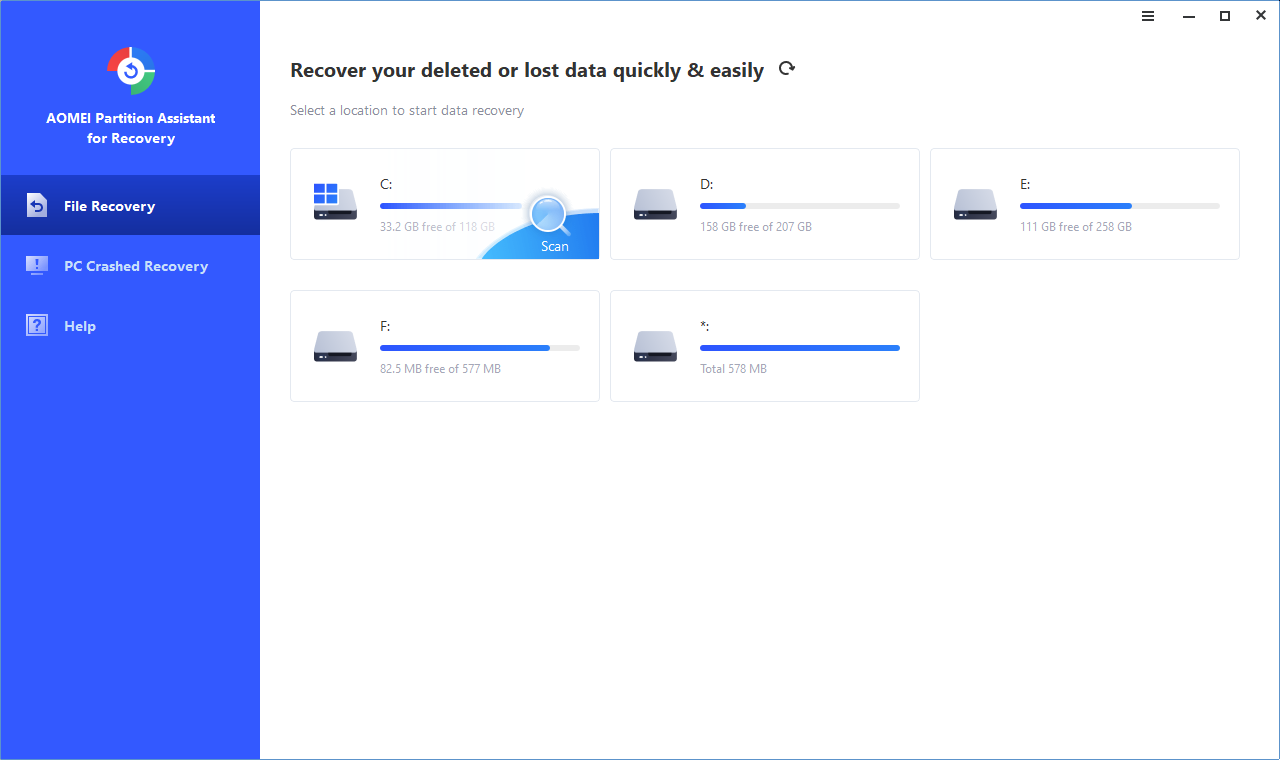
Step 1. Download and install the data recovery software. Locate and click on the options labeled "Recover" and "Recover Data".

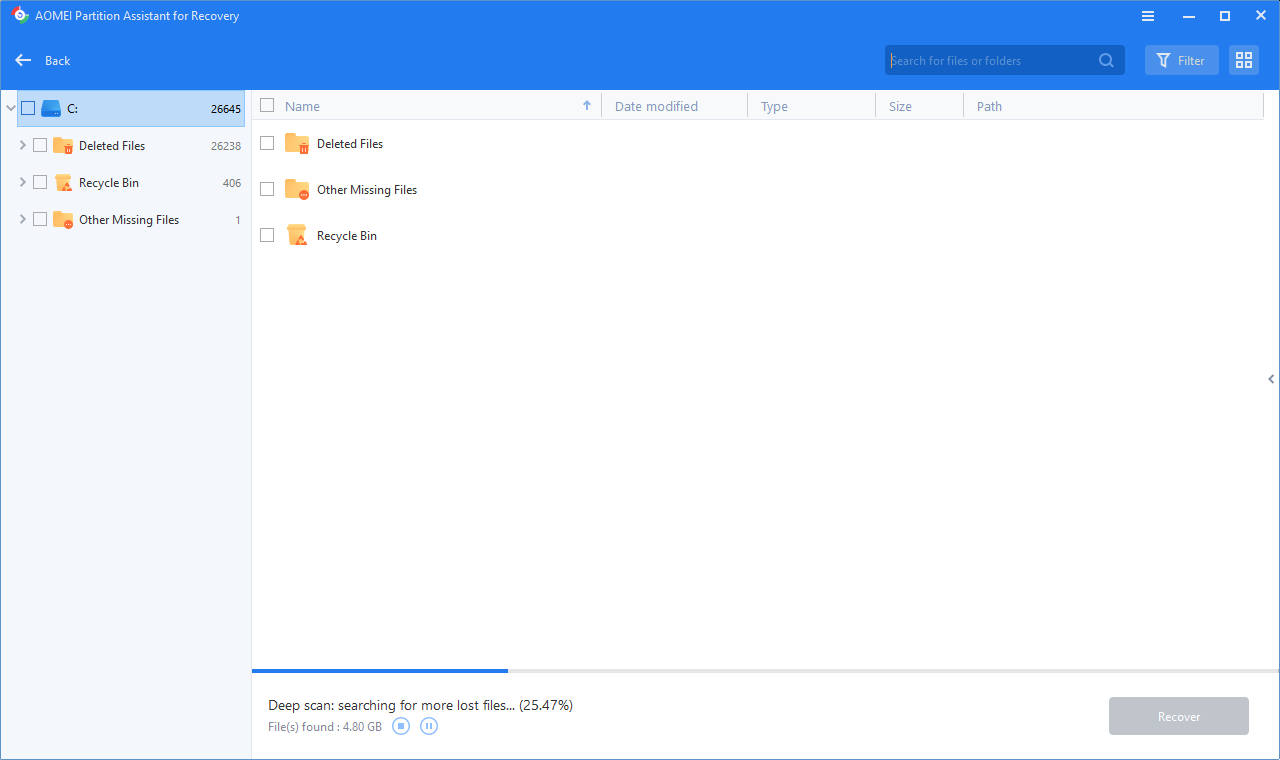
Step 2. Identify the partition where the lost files were originally stored. Initiate the scanning process by clicking on "Start Scan".
Step 3. A comprehensive list of deleted files will appear. Select the specific files you want to recover and click on the "Recover" button.
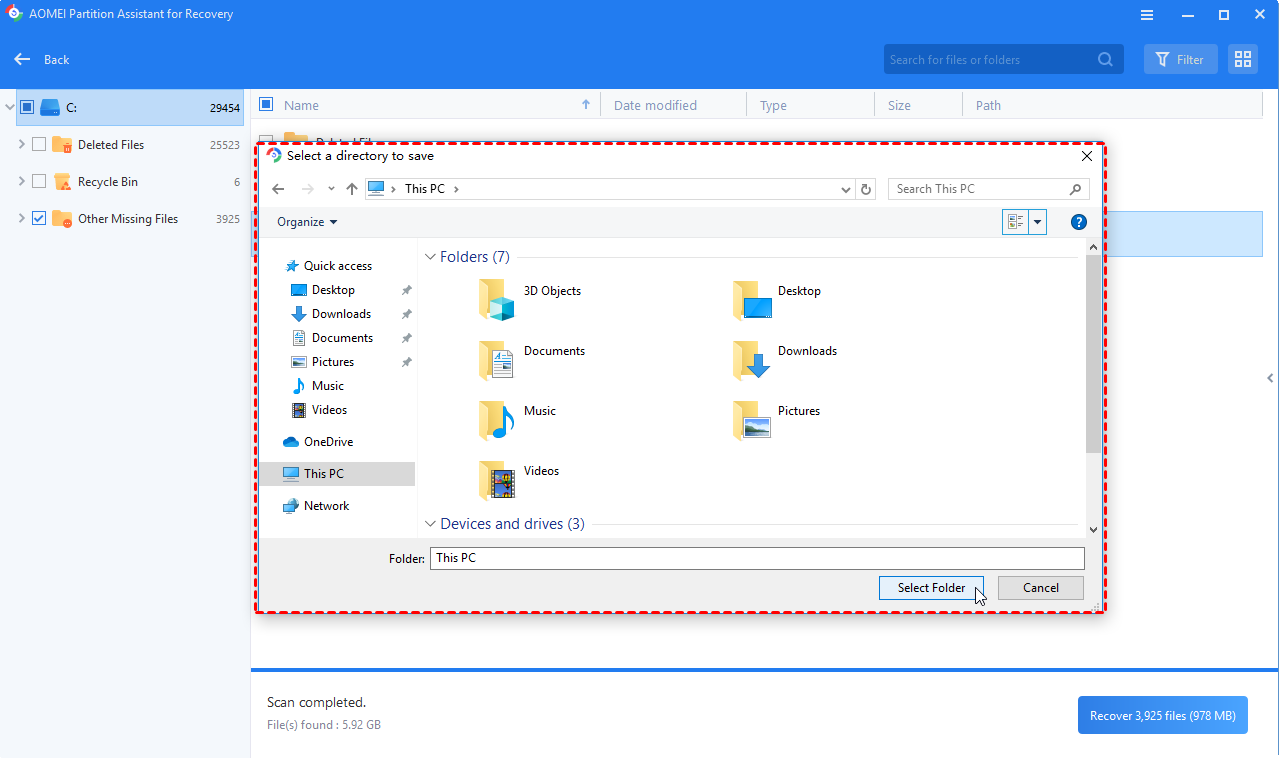
Step 4. Choose a destination folder path to save the recovered files. Proceed by clicking on "Select Folder".
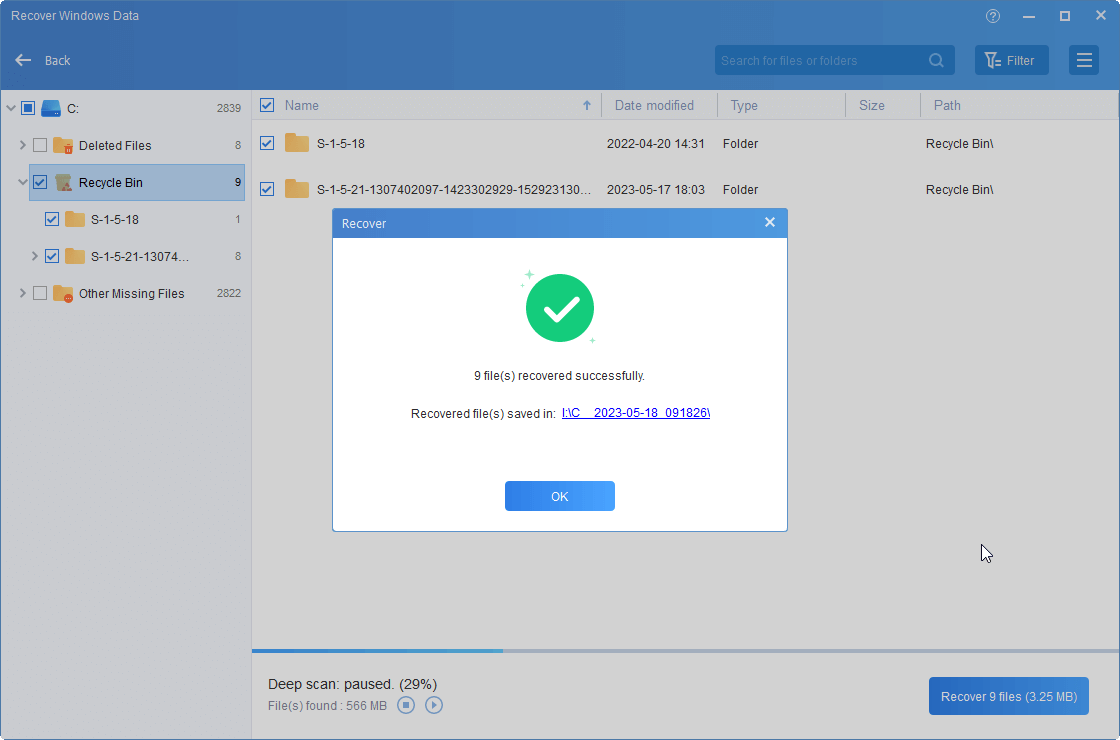
Step 5. Once you see the window below, it indicates that the lost files have been successfully recovered. Simply click "OK" to finish the task.
Conclusion
If the volume stuck at 100 on Windows 11, it may be due to driver issues, system conflicts, or hardware malfunctions. This tutorials outlines several troubleshooting methods, including checking for bad sectors, restarting the Windows Audio service, performing a clean boot, and updating or reinstalling audio drivers.
For additional stability and data protection, AOMEI Partition Assistant offers tools to check disk health, fix errors, and recover lost data caused by unexpected crashes. By following these solutions, you can effectively resolve the issue and prevent further disruptions to your system.
The Best Windows Disk Partition Manager and PC Optimizer

