How to Back Up Windows 11 to External Hard Drive (2 Stepwise Methods)
How to back up Windows 11 to external hard drive? If you realized the importance of back up Windows 11, this post will share 2 clear guidance for you to achieve that.
By Irene / Updated on June 12, 2024
Backup, is a quite common habit for most computer users to keep their data safe. It can do loss prevention and system recovery. And, an increasing number of users are recognizing its significant role in providing these advantages:
Having backed up Windows 11 to external hard drive can be beneficial to these situations:
✍ Hardware failure: If your computer's hard drive fails, backing up Windows 11 to external hard drive enables you to quickly restore your system and data on a new drive.
✍ Software corruption: A corrupted operating system or software can lead to data loss. A backup helps you recover your system without losing data.
✍ Ransomware or malware: In the event of a ransomware attack or malware infection, backing up Windows 11 to external hard drive allows you to restore your system to a clean state.
✍ Upgrades and updates: Before major system updates or upgrades, creating a backup ensures you can revert to the previous state if the update causes issues.
How to back up Windows 11 to external hard drive
Here are 2 ways to back up to external hard drive for Windows 11. The inbuilt tool, File History is suitable for personal data backup. If you need to back up all files on your disk, including system-relating data, you can just move to the second method.
Way 1. Use File History for Windows 11 backup
One way to keep your files safe is by using a tool called File History in Windows 11. It makes extra copies of your stuff from places like your desktop, documents, music, photos, and videos. You end up with lots of backups. So, if you lose, damage, or delete your files, you can use these backups to get them back.
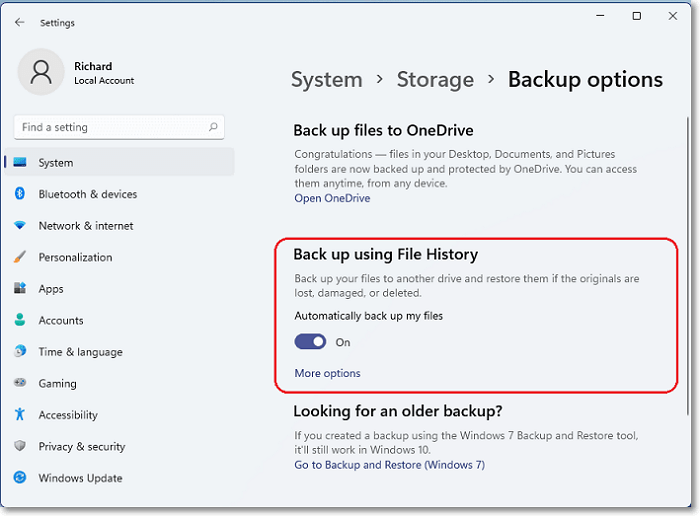
Step 1. Let's start by connecting an external hard disk. Open the Backup Options window under System and click on Storage. Then, click on Advanced storage settings. Now, pick "Add a drive" from the Back up using the File History menu.

Step 2. Turn on the "Automatically back up my files" option. Just click On it.
Step 3. Now, you can pick "More options." Here, you can choose how often, how long, and what kinds of backups you want File History to keep.
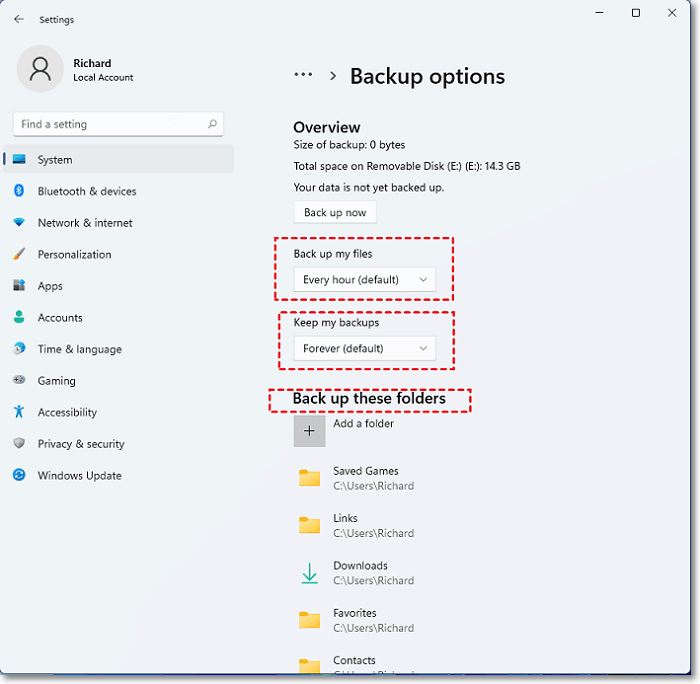
- Three options:
- Back up my files: File History automatically saves your files every hour by default. However, you can change this. You have several choices, from every 10 minutes to every 24 hours.
- Keep my backups: By default, backups are kept forever. But you can decide. Choose to save them for one month up to two years before they're removed.
- Back up these folders: If you wish to add more folders to your backup, simply click on "Add Folder." This will show you a list of all available folders. And if you decide you don't want a specific folder in the backup anymore, just pick it and click on "Delete" to remove it from the backup list.
Step 4. Once you're done, remember to save your changes and then leave. After that, click on "Backup now". Whenever you connect the drive to your computer, Windows 11 will take care of backing up your files automatically.
▌Tip: How to restore the backup via File History
If you need to restore the backup, you can follow the following guidance:
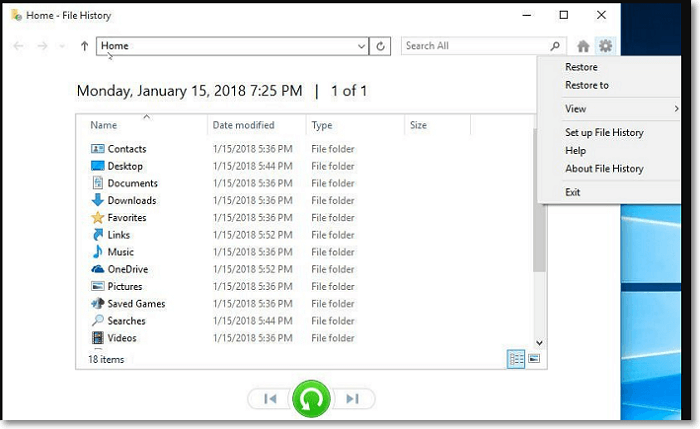
Step 1. Go back to the Backup options in File History and click on the last choice at the bottom that says "Restore files from a current backup".
Step 2. Then, you'll find arrows pointing left or right. Use them to find the backup version you need. Or, you can use the search bar to look for your files.
Step 3. Choose "Restore" from the menu. If you prefer, click on the gear symbol and pick "Restore" instead.
Way 2. Clone the entire disk to back up Windows 11 to external hard drive
File History in Windows 11 is handy for external drive file backups, but it has limits. It focuses on personal files like documents, pictures, music, and videos, not full system images, including vital system settings, configurations, and apps. If you want to backup Windows 11 OS, it doesn’t work.
In short, it is good for simple file backups, but those needing comprehensive system backup and disaster recovery should consider more powerful third-party backup solutions. AOMEI Partition Assistant Professional can meet your demands.
The Disk Clone features can create exact copies of entire disks, including operating systems, applications, settings, and data, allowing you recover quickly from hardware or system problems. It suits for both daily data reserve and major settings protection.
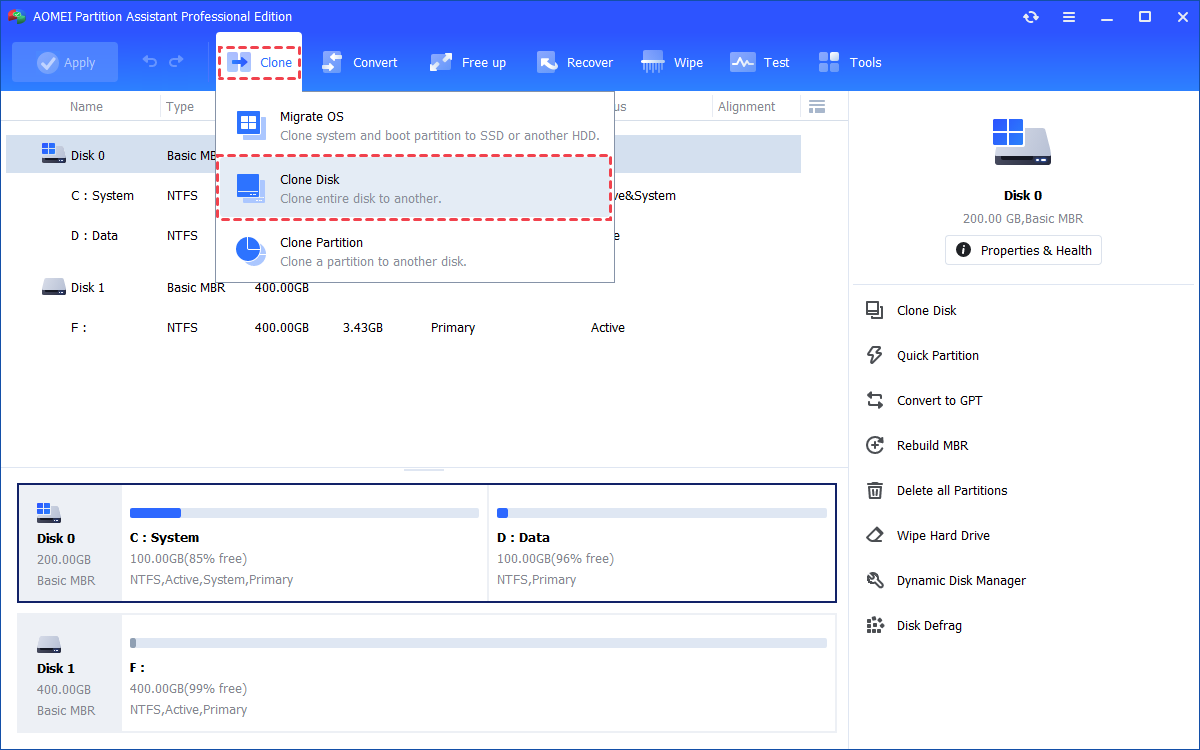
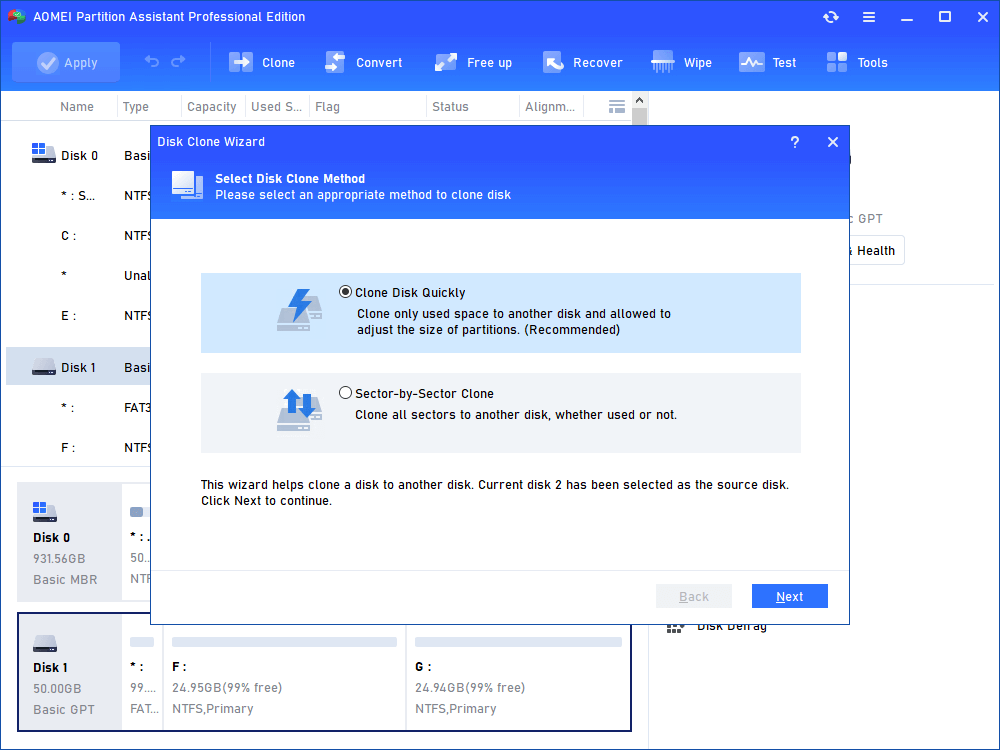
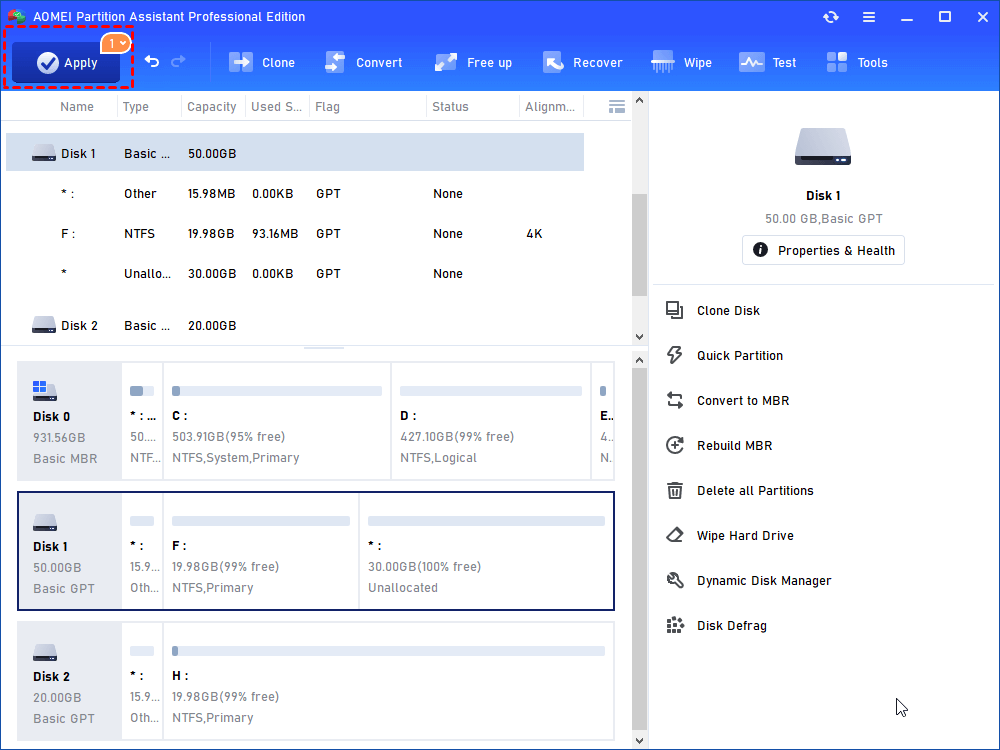
Step 1.Install and launch AOMEI Partition Assistant, click the "Clone" main tab and select "Clone Disk". (You can also right-click the Disk you want to clone and select the "Clone Disk" tool to run disk clone.)
Step 2. Choose the hard disk that you need to clone as the source disk and click "Next".
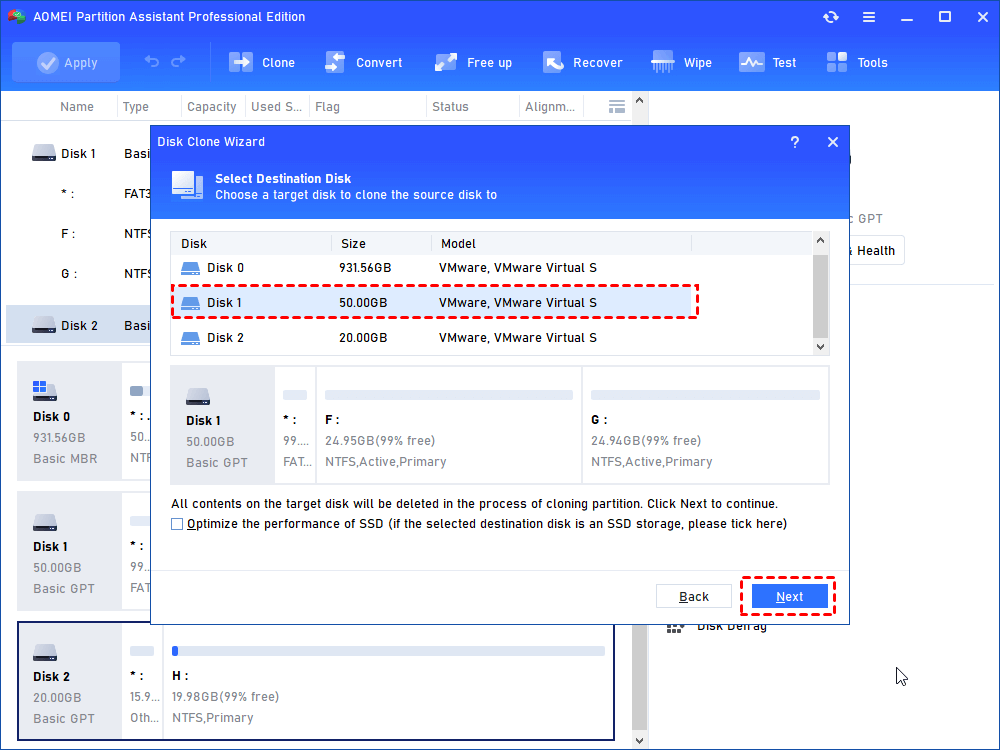
Step 3. Select the destination disk to put the data of the source disk on, and then click "Next".
Step 4. Then, you will enter the Confirm interface where you can check the source and destination disk. After all is set, you can click the "Confirm" button to continue.
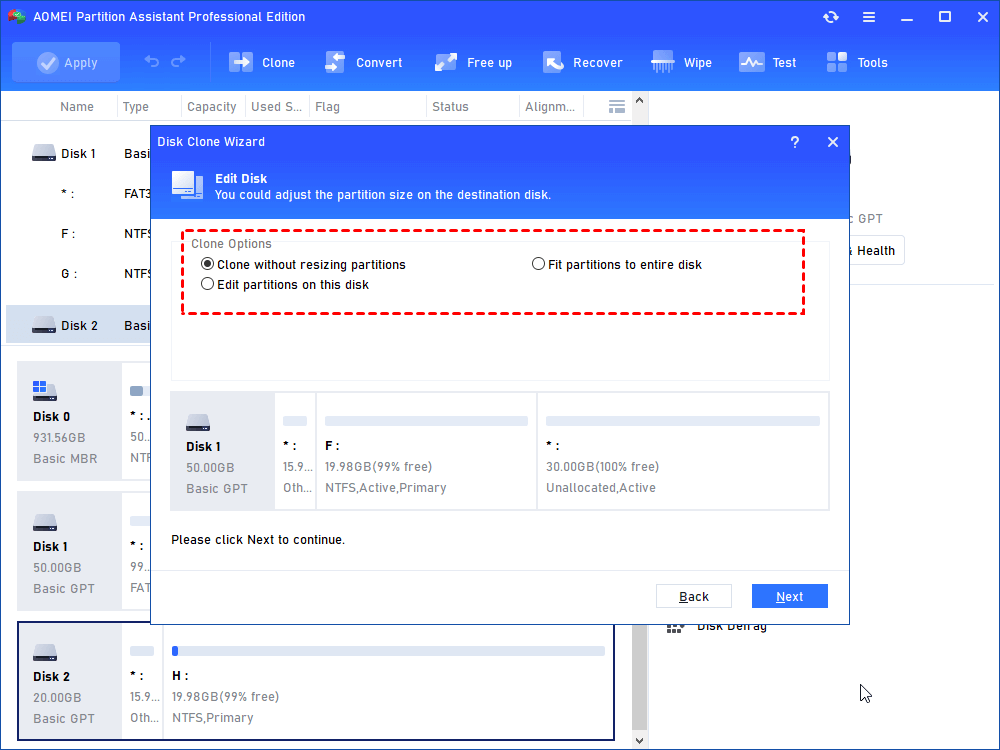
In lower left corner of the window, you can click the "Settings" button to adjust the partition size on the destination disk. There are three options for you:
- Clone without resizing partitions: all partitions will be cloned to the target disk as the original partition size. It is available when the target disk is larger than the source disk. If it is smaller, this option will be grayed out.
- Fit partitions to entire disk: all partitions will be cloned to the target disk and take up its full capacity according to the original partition size proportion.
- Edit partitions on this disk: you can change every partition size on the target disk as you need.
After finishing the adjustment, please click "Save".

Notes:
- You can tick "4k alignment" to improve the reading and writing speed of SSD if the selected destination disk is an SSD storage.
- All data on this selected destination disk will be wiped out after you save the operation to physical disk. If there is important data on the destination drive, please make a backup in advance.
- If you clone to a smaller SSD, the first option is grayed out. If you select Sector-by-Sector Clone, it is unable to adjust the size on the destination disk.
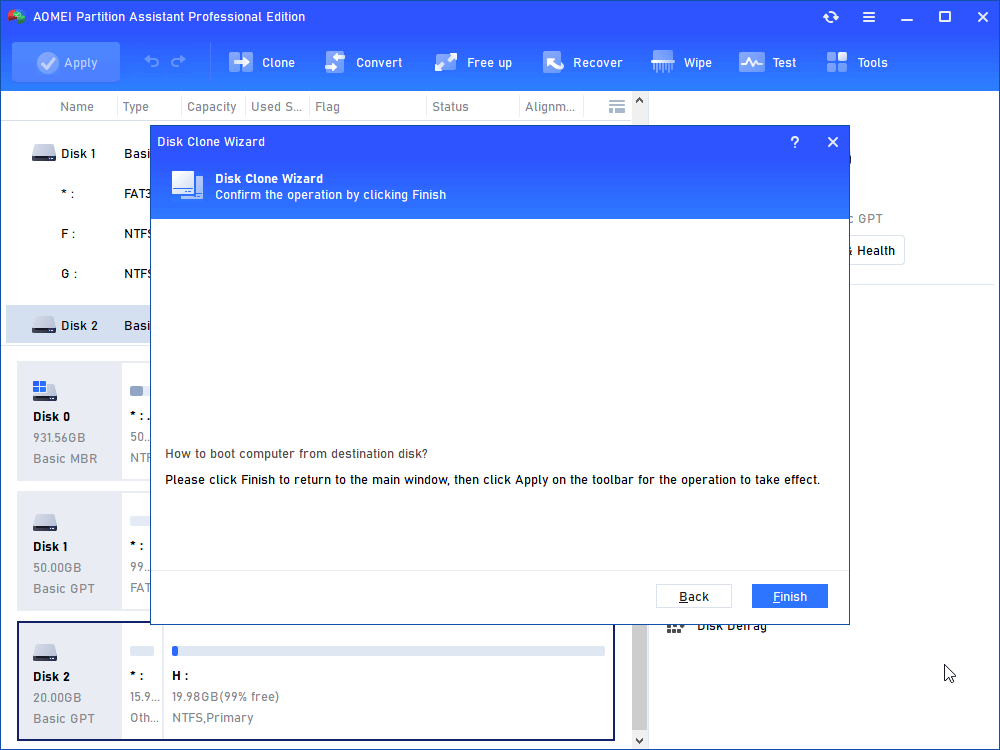
Step 5. You can preview the disk cloning operating by viewing the "Pending Operations". To commit the "Pending Operations", please click "Apply" and "Proceed".
Step 6. The cloning process will start and you can check the cloning process.
If you are cloning the system hard drive to another hard drive, to successfully boot from the destination hard drive and avoid the embarrassing moment that cloned SSD won’t boot, please do as below:
Step 1. Restart your computer, long press the "F2" key (perhaps other keys like DEL), and access the BIOS environment.
Step 2. Change the boot order and set the cloned hard drive as the first boot drive in BIOS.
Step 3. Press "Enter". Now you should boot the computer from the cloned hard disk successfully.
Note: if you want to clone only the C drive or boot-related partitions to another hard drive, its “Migrate OS to SSD" feature can be helpful, which only transfers the OS partition to another hard drive and allows you to boot from it smoothly.

Conclusion
How to back up Windows 11 to external hard drive? We share 2 methods for meeting different needs. For simple file backups, File History can be an easy way. But for backing up Windows 11 to external hard drive with all data, AOMEI Partition Assistant is the most ideal choice.
Apart from cloning disk for backing up Windows 11, you can also rely on it for your computer management. You can use it to allocate free space to extend drive space, migrate OS to SSD for performance enhancement, and regularly cleaning PC to keep device healthy. Windows Server Users can choose the Server Edition for easy computer management.

