How to Fix Windows 11 Version 24h2 Failed To Install?
This article explains why Windows 11 version 24H2 fails to install and offers easy fixes. Learn how to solve install, download, or update errors quickly for a smooth upgrade.
By Irene / Updated on September 12, 2025
About Windows 11 version 24H2 failed to install errors
Most Windows 11 updates install smoothly, but sometimes the “Windows 11 version 24H2 failed to install” error appears. The update may stop during download or installation, or even roll back after a restart.
This problem often comes from low disk space, damaged update files, outdated drivers, or disabled update services. External devices and unstable networks can also interrupt the process.
To fix this, you can start by freeing up disk space and clearing the Windows Update cache. If that does not work, try running SFC and DISM scans to repair system files. Updating drivers or removing external devices may also help. When the error still persists, use an ISO for in-place upgrade or check if your PC is under a compatibility block. If you encounter the Windows 11 version 24H2 installation error, there are several ways to solve it. The steps below will guide you through the most effective fixes.
How to fix the Windows 11 version 24H2 failed to install issue?
When you encounter Windows 11 version 24H2 download error, it usually points to issues with disk space, system files, or settings. The following solutions address these problems and help your update complete without errors.
Fix 1. Extend C Drive Space
One major reason Windows 11 version 24H2 fails to install is not enough space on the C drive or System Reserved Partition. The update process requires free space to download files, create backups, and finish installation. If the drive is too full, the update may stop with error codes such as 0xc1900104. By extending the C drive, you give Windows the room it needs to complete the update successfully.
A practical way to do this is by using the “Allocate Free Space” feature in AOMEI Partition Assistant. With this tool, you can transfer unused space from another partition, like D: or E:, directly to the C drive. The process is safe, doesn’t delete data, and is easy even for beginners. This method is especially useful for fixing installation errors caused by limited disk space. To fix the C drive full issue, the multifunctional tool also many effective solutions.
The Best Windows Disk Partition Manager and PC Optimizer
Step 1. Right click partition D and select Allocate Free Space.

Step 2. Set how much space you want to allocate form partition D and choose C partition as a target partition.

Step 3. Preview the result after allocation. If that’s what you want, just click "Apply" on upper left to carry out the operation.

Notes:
1. If it looks not like what you want, or you want C drive to be larger, you can click Discard behind Apply and do the operations above once more.
2. You can also complete the “increase c drive space from d drive” task using Extend Partition feature of this software.
Fix 2. Run the Windows Update Troubleshooter
One way to resolve the Windows 11 version 24H2 failed to install issue is by using the built-in Windows Update troubleshooter. Sometimes, temporary glitches in the system can block updates. Restarting your computer first can refresh the operating system and solve minor problems. After the restart, try running the troubleshooter to detect and fix update issues automatically.
Step 1. Press the Windows key + X and select "Settings."
Step 2. Click on "System," then select "Troubleshooting" from the right pane.
Step 3. Navigate to "Additional Troubleshooters" and locate "Windows Update."
Step 4. Click "Run" to initiate the troubleshooter, which will automatically detect and resolve update-related issues on your computer.

Fix 3. Check Your Internet Connection
A stable internet connection is essential for downloading Windows 11 update files. Poor connectivity can cause the Windows 11 version 24H2 failed to install issue. Restarting your router or modem often resolves temporary network problems. Follow these steps to ensure a reliable connection:
Step 1. Check your WiFi signal strength, and move your laptop closer to the router if needed.
Step 2. Verify that your Ethernet cable is connected securely.
Additionally, you can reset your network adapter to resolve any network-related issues:
Step 1. Go to "Settings" and select "Network and Internet."
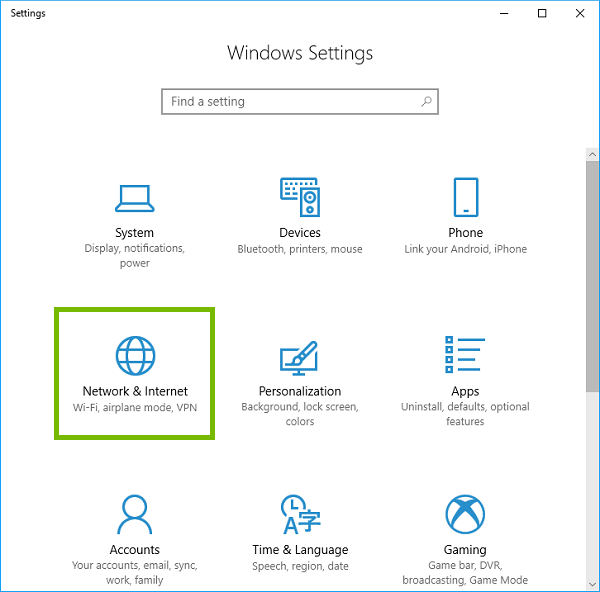
Step 2. Click on "Advanced network settings."
Step 3. Select "Network reset" and then click on the "Reset now" button.
Step 4. Confirm by clicking "Yes."
Fix 4. Repair System Files
Corrupted system files can prevent updates from installing, causing the Windows 11 version 24H2 failed to install issue. Running the built-in SFC and DISM tools can detect and fix damaged files, allowing the update to complete successfully. You can follow these steps:
Step 1. Press the Windows key, type cmd in the search bar, and click it to run as administrator,
Step 2. Run the DISM restore health command DISM/Online/Cleanup-Image/RestoreHealth
Step 3. After completing 100% scan command execution, run the System File Checker command sfc /scannow.
Step 4. Restart your PC when done, and try installing the Windows 11 update again.
Fix 5. Perform a Clean Boot in Windows 11
Conflicts between startup programs and services can sometimes block updates, leading to the Windows 11 version 24H2 failed to install issue. Performing a clean boot ensures that only essential services run, which can help the update complete smoothly.
Step 1. Press Windows key + R, type msconfig, and click OK.
Step 2. Navigate to the Services tab in the System Configuration window.
Step 3. Choose the box next to Hide all Microsoft services and click the Disable All button.
Step 4. Then, navigate to the Startup option and click on Task Manager.
Step 5. In the Startup tab, click on each entry and disable them individually.
Step 6. Exit Task Manager and return to the Startup tab in the System Configuration window, then select OK.
Conclusion
The Windows 11 version 24H2 failed to install issue can occur for several reasons, such as limited disk space, corrupted system files, network problems, or conflicts with startup programs. Using the methods described above, including extending the C drive with AOMEI Partition Assistant, running the Windows Update troubleshooter, checking your internet connection, repairing system files, and performing a clean boot, can help resolve the problem. Applying these steps carefully ensures that your system has the space, stability, and proper configuration to complete the update successfully.
The Best Windows Disk Partition Manager and PC Optimizer

