How to Wipe and Partition Hard Drive?
When you find your disk performance gets slow, but you don’t want to replace it, you could try to wipe and partition hard drive so that you can start from scratch. The detailed tutorial is presented in this passage.
By Hedy / Updated on January 7, 2025
Can I wipe my hard drive and start over?
"I have a computer that is cluttered up with junk and incomplete uninstalls that have gone bad and left shadows of old programs and games on my hard drive. I would like to wipe the hard drive clean and start over like it's a brand new drive, so I can reinstall these things that the computer thinks is already there. How do I do it? Is it bad for the hard drive to do what I want to do?"
As the user described above, when the hard drive is crowded with unimportant files or programs, your PC gets slow, affecting your computer experience. In such a case, you may want to wipe and partition hard drive, so that you can take it as a new drive to store new data. This is also the main content we are going to talk about.
To walk you through the process of wiping and partitioning hard drive in a comprehensive and detailed way, we divide it into two parts:
How to wipe hard drive?
Since there are two kinds of hard drive: HDD and SSD, which are working with different principles, it proves to be ineffective that erasing HDD and SSD in the same way. For instance, if you wipe SSD with the same method of wiping HDD, you may decrease its lifespan or damage its performance. Thus, you'd better erase them in a respective way.
To this end, AOMEI Partition Assistant Professional, the powerful and practical hard drive eraser, would be your best choice, it provides "Wipe Hard Drive" for wiping hard disk drive (HDD) while "Secure Erase SSD" for wiping solid-state drive (SSD). Both of the two methods can be finished only in several clicks. You will learn the step-by-step guide on how to erase all partitions on hard drive in the following content.
- ★Notes:
- No matter you wipe an HDD or SSD, you will erase all the data on it permanently, which won't be restored anymore even by the most professional recovery software. So before wiping, remember to back up your important data in case you will use them one day.
- If there is OS on your HDD or SSD, you can create a bootable media to wipe in WinPE mode, so that you can commit other operations after wiping.
▶ Case one. HDD
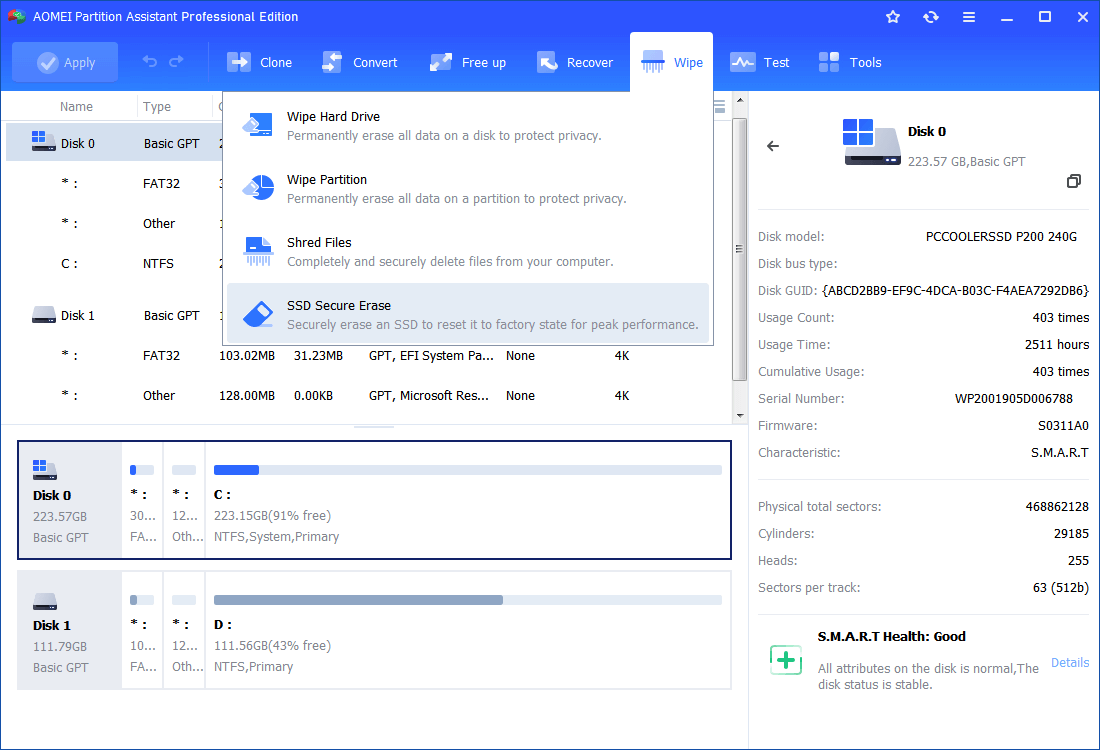
Step 1. Run AOMEI Partition Assistant, click the "Wipe" main tab and select the "Wipe Hard Drive" option.

Step 2. Select the disk you want to wipe and click "OK" to continue.
Step 3. Select a wiping method to wipe the selected hard drive and click "OK". By default, the wiping method is Fill in 0.
Step 4. Return to the main user interface, check the pending operation, and click “Apply” > "Proceed".
▶ Case two. SSD
Step 1. Launch AOMEI Partition Assistant. Click "Wipe" and choose "SSD Secure Eras".
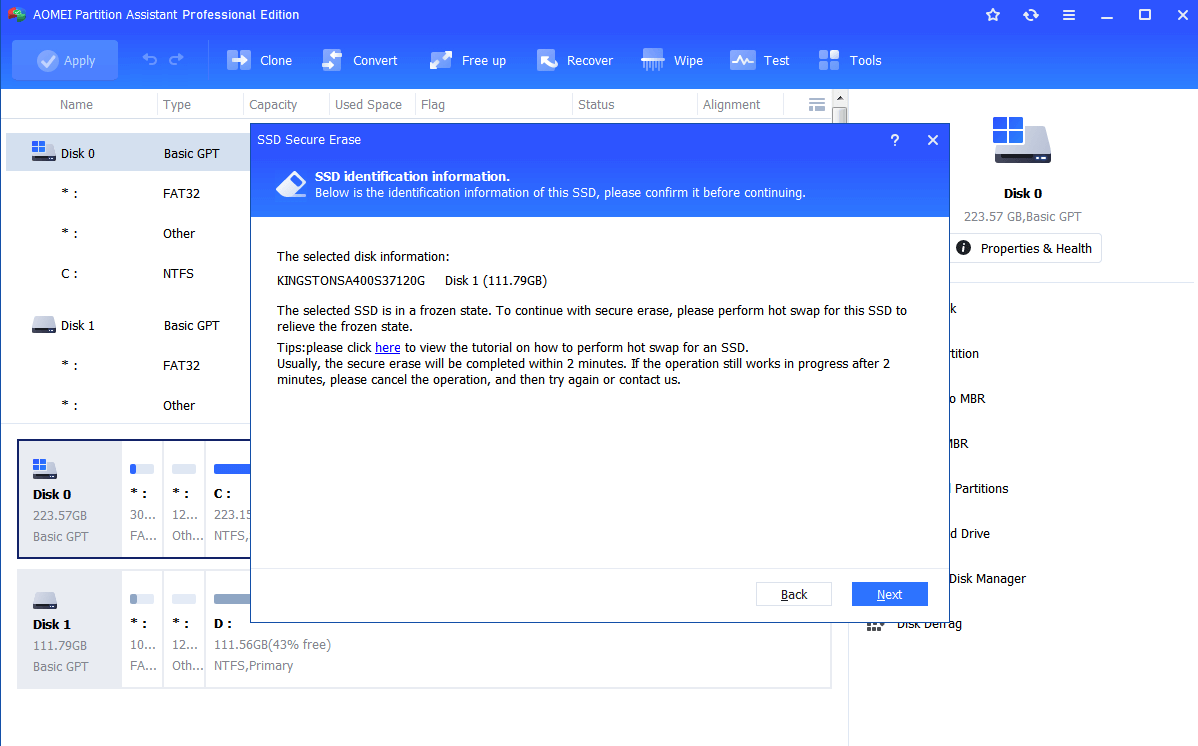
Step 2. Choose the disk you are going to erase from the list and click "Next".

Step 3. In the pop-up window, check the SSD identification information again in case that you erase a wrong disk. You'll find the SSD is under a frozen state which is set to ensure no one can modify your drive settings. Perform a hot swap to disable this restriction.
- How to perform a hot swap?
- Open your computer case (rear cover or drive shell for a laptop) and find the target SSD.
- Unplug the power cable and disconnect the SATA data cable from the SSD.
- A few seconds later, reconnect the SATA cable to the SATA port and plug the power cable back.
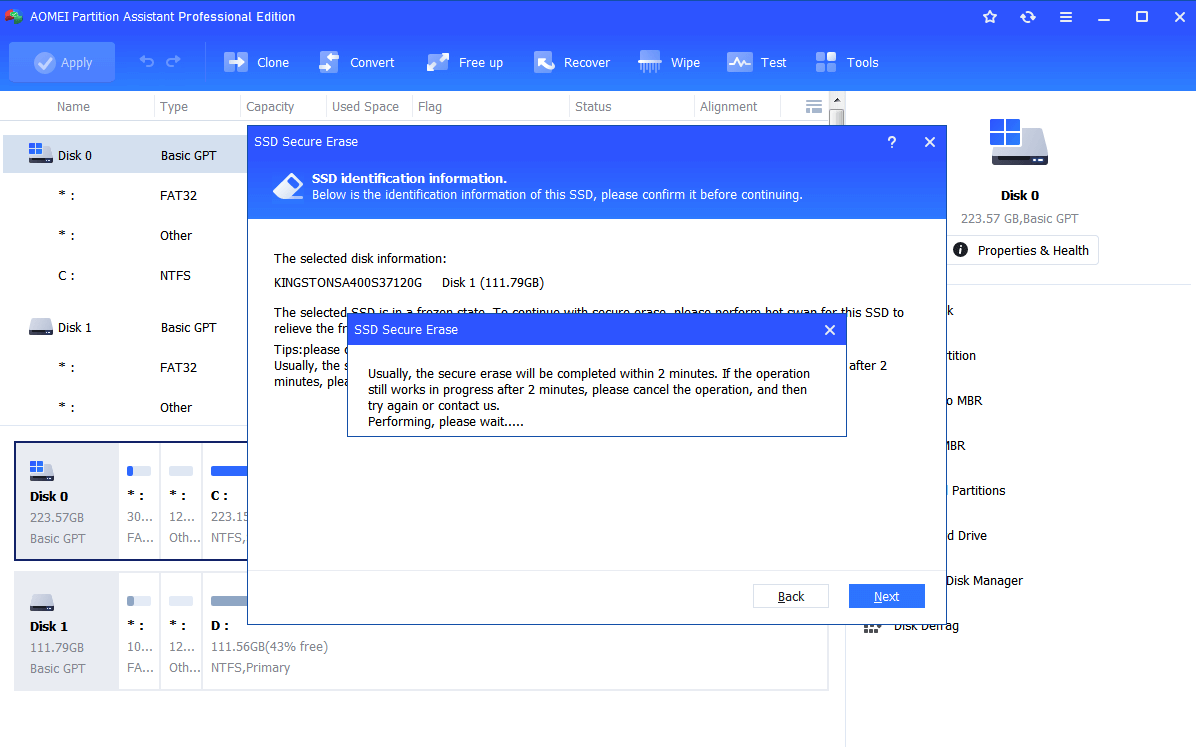
Step 4. Now, click "Next" to start wiping all data on SSD securely and completely. The erasing process will take a short time.
From above, you can easily figure out how to wipe hard drive and delete all partition and do no harm to your disks with the help of AOMEI Partition Assistant Professional. When you finish, you could move to the next part of "wipe and partition hard drive".
How to partition hard drive?
After wiping a hard drive, all the partitions are gone and show as unallocated space now, which seems like you have gotten a new hard drive. It's known to all that the unallocated space can't be used directly until it's partitioned. Thus, to make use of the disk, you have to create partitions on it to store your new data. Although it's available to use DiskPart or Disk Management to partition hard drive, AOMEI software will provide you with two easier ways to help you.
▶ Method 1. Create partition
This method allows you to create partitions with the unallocated space (like in today's case) or the existing partitions (you can apply it in the future).
Step 1: Launch AOMEI Partition Assistant. Right click the unallocated space and select "Create Partition".
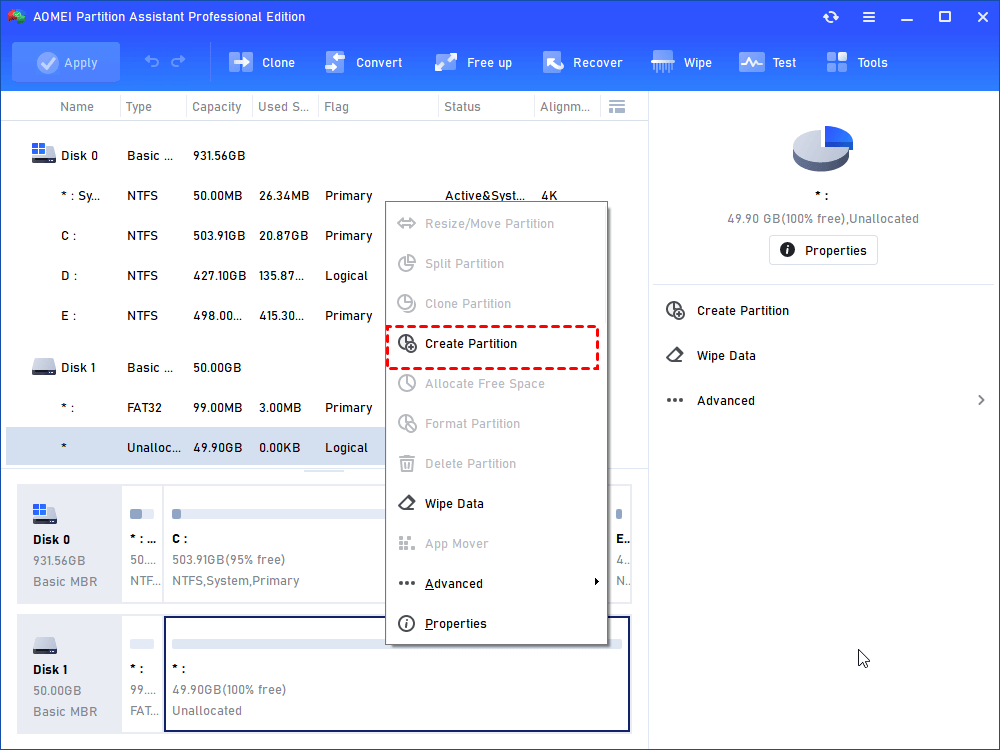
Step 2: In the pop-up window, click "Advanced" to specify the information for the new partition, including partition size, partition label, drive letter, files system (NTFS or FAT), and partition type (logical or primary). You could also specify the size of the new partition by dragging the both edges. When all settings are completed, click "OK" to continue.
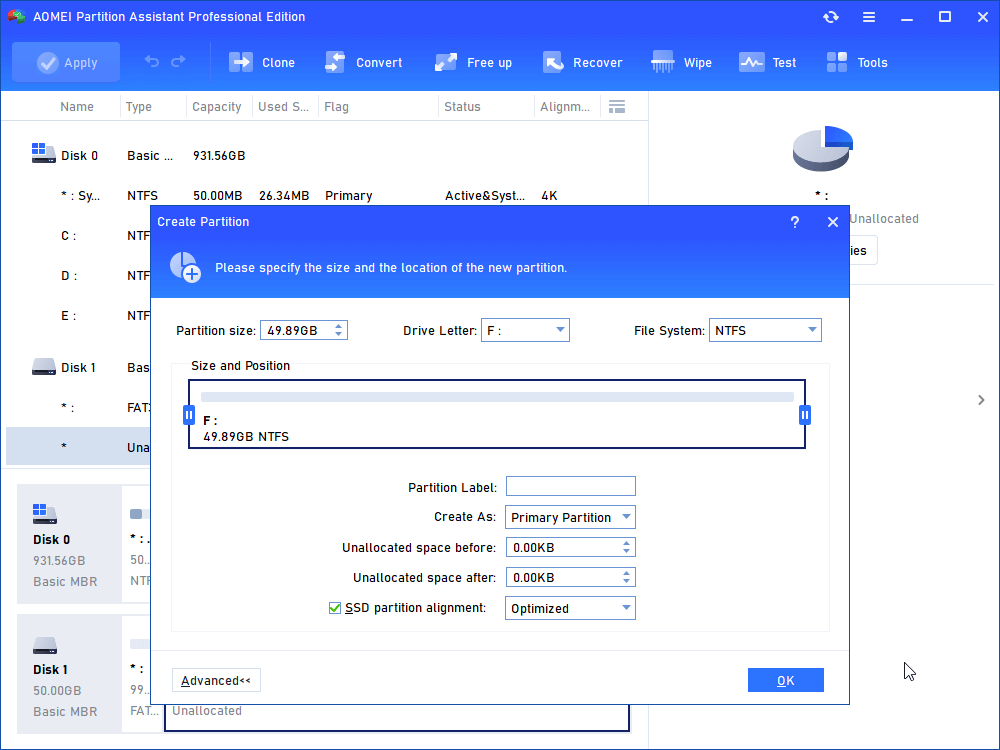
- ★Tips:
- We suggest you set the file system as NTFS because FAT32 has 4GB limit in size and 2TB in volume.
- If you set the drive letter as "None", the partition will be hidden, in other words, you cannot see it in "This PC".
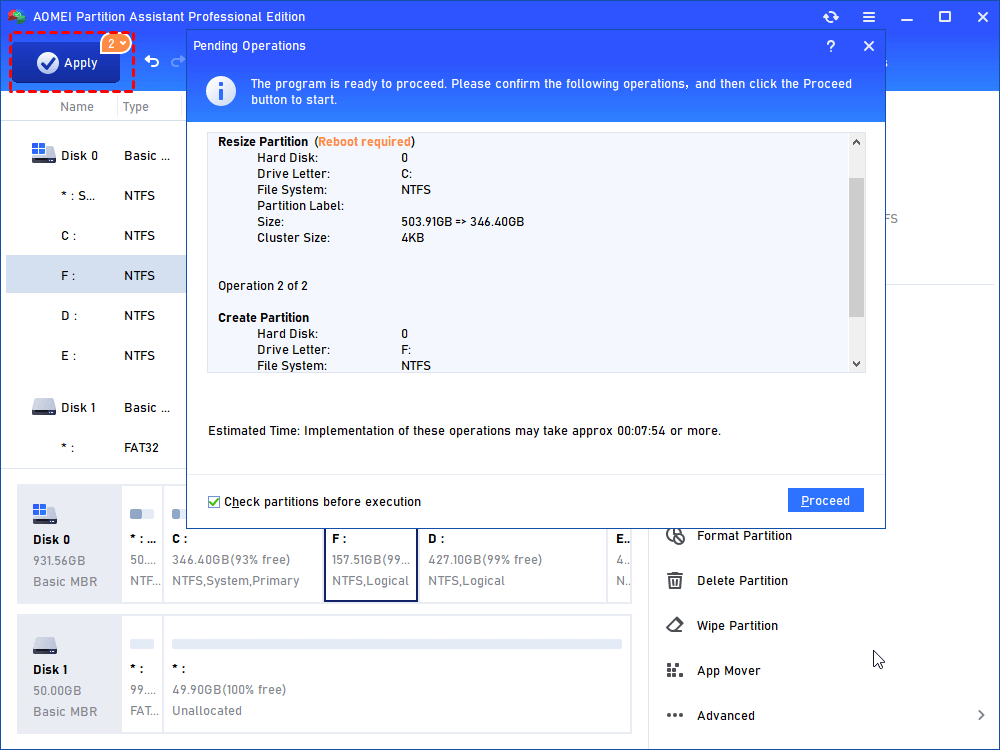
Step 3: Now you can preview the newly created partition. Click "Apply" on the toolbar to commit the operations.
If you want more than one partition, you could repeat the three steps again to create any number of partitions as you like. However, the other method below provided by AOMEI software is much easier than the above one, just scroll down to learn the details.
▶ Method 2. Quick partition
To manage your computer with ease, you may want more than one partition to enable you to have an operating system separate from data, private files, etc. "Quick Partition" in AOMEI Partition Assistant is specially designed to quickly create several partitions at one time, which is effective and time-saved.
To use this function, open AOMEI Partition Assistant Professional first. Then, right-click the disk you want to partition and then select "Quick Partition" in the drop-down menu.
Then you will see a window shown as below:
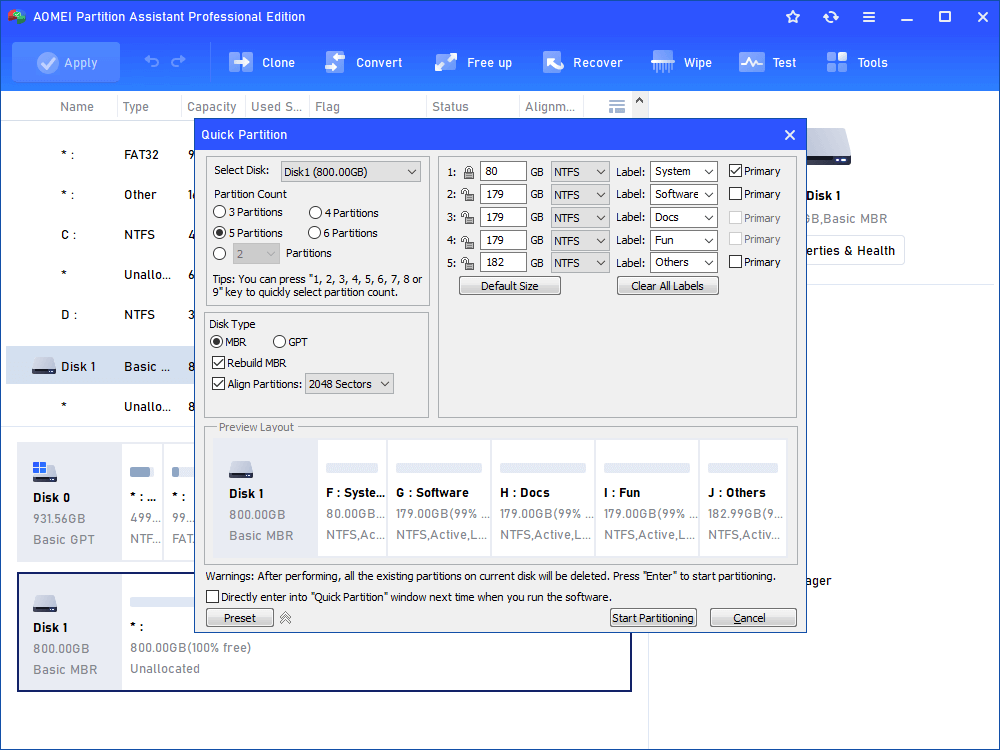
As the interface shows, you can set more specific information: choose the partition count as you want, disk type (MBR or GPT), change file system, partition labels, partition size, and so on. when you set, you can preview the layout at the bottom. If there is no problem, click "Start Partitioning" to begin.
Conclusion
How to wipe and partition hard drive? After reading this passage, you have learned the step-by-step guide to wipe hard drive and partition hard drive respectively. As we can see, with the help of AOMEI Partition Assistant Professional, it's not hard to finish the two parts safely and easily. Moreover, it has many other attractive and practical functions, such as converting MBR to GPT, allocating free space to another, cloning disk without reboot, and so on.

