Freeware: Clone mSATA SSD to mSATA SSD with Secure Boot
You can get detailed steps on how to clone mSATA to mSATA SSD without boot issues and reinstalling apps.
By AOMEI / Updated on September 14, 2024
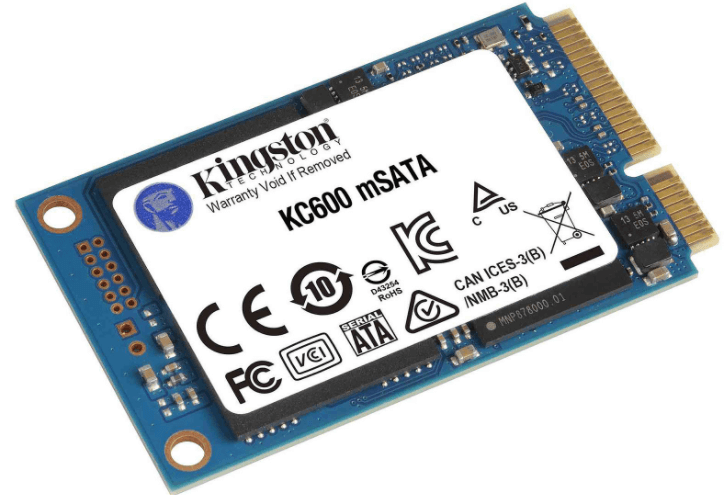
About mSATA SSD
mSATA (Mini-SATA) SSD (solid-state drive) has a small form factor and low power consumption. It is widely used in notebooks and ultrabooks. It’s bandwidth is up to 6GB per/second; It’s capacity might be 32GB, 128GB, 256GB, 1TB, etc. If your mSATA SSD in use is in low capacity, it’s not a bad decision to upgrade old mSATA to a large mSATA SSD. That is helpful in avoiding some issues, like Low Disk Space Warning.
When to clone mSATA SSD to mSATA SSD?
When it comes to replacing mSATA SSD with another one, you might be hesitating as you don’t want to experience the time-wasting and energy-consuming process of reinstalling kinds of applications, reinstalling Windows operating system, and pasting lots of files and folders.
To save you from the bothering operations, you can choose to clone mSATA to mSATA SSD to copy everything, including OS from the old SSD to the new SSD. After cloning, you can run apps & OS on the new mSATA SSD as normally as in the original mSATA SSD drive.
Freeware to clone mSATA SSD to another mSATA SSD
As there is no disk clone feature in Windows 11/10/8/7, you can complete mSATA SSD to mSATA SSD copy via third-party cloning software. Here AOMEI Partition Assistant Standard, a free yet easy-to-use GUI disk copy tool, is highly recommended. It comes with the following highlights to best satisfy your cloning requirements.
- Clone all partitions, including hidden boot related partitions, to the destination disk so that you can boot from it afterwards.
- Allow to clone larger mSATA SSD to a smaller one since it can clone only used sectors to the target hard drive.
- Migrate only OS related partition from mSATA SSD to another SSD with the "Migrate OS to SSD Wizard".
- Permit to align partitions to optimize SSD performance during cloning.
Preparations before Cloning mSATA SSD
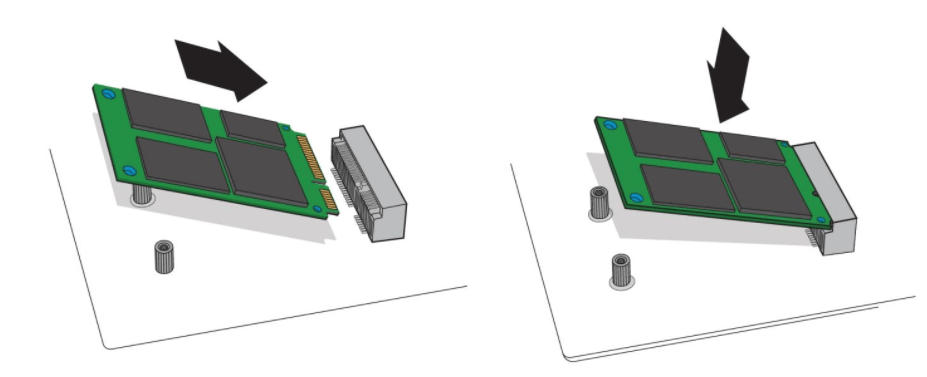
1. Connect mSATA SSD to computer
Shut down your system and unplug the power cable. Hold down the power button for 3-5 seconds to discharge residual electricity. Remove the case cover from your desktop. Locate the mSATA socket on the motherboard. Align notches on the mSATA SSD with the ridges in the mSATA socket, then insert it into the socket. (Note: A mSATA USB adapter is necessary if there no extra hard drive bay for the new mSATA SSD).
2. Compare the capacity of both the source and destination disk
After the destination disk has been connected and detected by your computer, please check out their capacity. Ensure the destination hard drive has enough space to contain data from the source disk. If not, you might need to remove unnecessary files from the source mSATA SSD.
3. Back up important data
Since the cloning process will overwrite everything on the destination disk, please make a backup first of all if there are something important. For this task, the free AOMEI Backupper can help you a lot.
4. Free download and install the mSATA to mSATA SSD cloning software.
Steps to clone mSATA to mSATA SSD
Step 1. Install and launch AOMEI Partition Assistant, click "Clone" in the main interface, and select "Clone Disk".

Step 2. Choose the hard disk that you need to clone as the source disk and click "Next".

Step 3. Select another drive as the destination disk, and then click "Next".

Step 4. Then, you can check the source and destination disk in the next window or change to "Sector to Sector clone", and click the "Confirm" button to continue if there is no problem.

Here, you can also click the "Settings" button to adjust the partition size on the destination disk or tick "4k alignment" to improve the reading and writing speed of the SSD.

Step 6. You can preview the disk cloning operation by viewing the "Pending Operations". To commit the "Pending Operations", please click "Apply" and "Proceed".

✍ Notes:
☞ A reboot is necessary as this operation involves system partition and needs to be performed under PreOS environment.
☞ This cloning software also supports you to clone HDD to mSATA SSD, clone mSATA SSD to HDD, clone HDD to HDD and so on.
☞ AOMEI Partition Assistant Standard supports only MBR data disk to MBR; you can upgrade to Professional version to clone MBR system to MBR/GPT SSD or GPT system disk to GPT/MBR disk.
Final words
With AOMEI Partition Assistant, you can clone mSATA SSD to mSATA SSD within simple clicks. This software can help you to manage your disk and partition conveniently and effectively. Some issues, like can’t extend C drive even there is unallocated space, file too large for the destination file system, etc. can be resolved effortlessly.

