Does Everything Erase If You Take Your SSD out?
Does everything erase if you take your SSD out? The answer is no. In this article, we will show you how to replace your SSD without losing any data by using backup application or a third-party data transfer expert.
By Lucas / Updated on February 19, 2025
If your present SSD is at capacity, it may be advantageous to upgrade to an SSD with a greater storage capacity. Then, the following inquiries may arise in your mind: Does everything erase if you take your SSD out? Will all of my data be lost if I replace my SSD?
The answer is "Yes" if no precautions are taken. After you remove the specified hard drive, the data will be inaccessible on your PC, as it is stored on a hard drive.
What is the necessity of replacing the SSD?
SSD has been extensively praised by a large number of PC users due to its superior durability and faster running speeds in comparison to HHD. However, there are instances in which users desire to replace SSDs with the following drives for a variety of reasons:
▶ SSD damage: The SSD is rendered unusable when it is damaged. Not only will it result in the accidental loss of critical data, but it may also cause the system to collapse. At this time, it is necessary to replace it with a new hard drive.
▶ The SSD space is inadequate: When the C: drive space runs out or the entire SSD is insufficiently spaced, the computer will operate at a significantly reduced speed. In such cases, it may be advantageous to upgrade to a larger SSD.
How to safely take your SSD out on Windows PC without losing data
Now, we will provide you with two secure and efficient methods for replacing your SSD without losing data. These methods include the use of a professional drive migration tool and the Windows backup application.
│Method 1. Try backup application
There is a backup function in Windows system that can backup and restore the system, you can use it to replace SSD on Windows PC. Don't worry about what happens if I remove my SSD, because it’s safe. Let's see the detailed steps to operate it.
✦ Before you do: You need to prepare an empty USB larger than the used space of the current SSD to store all the data of this SSD.
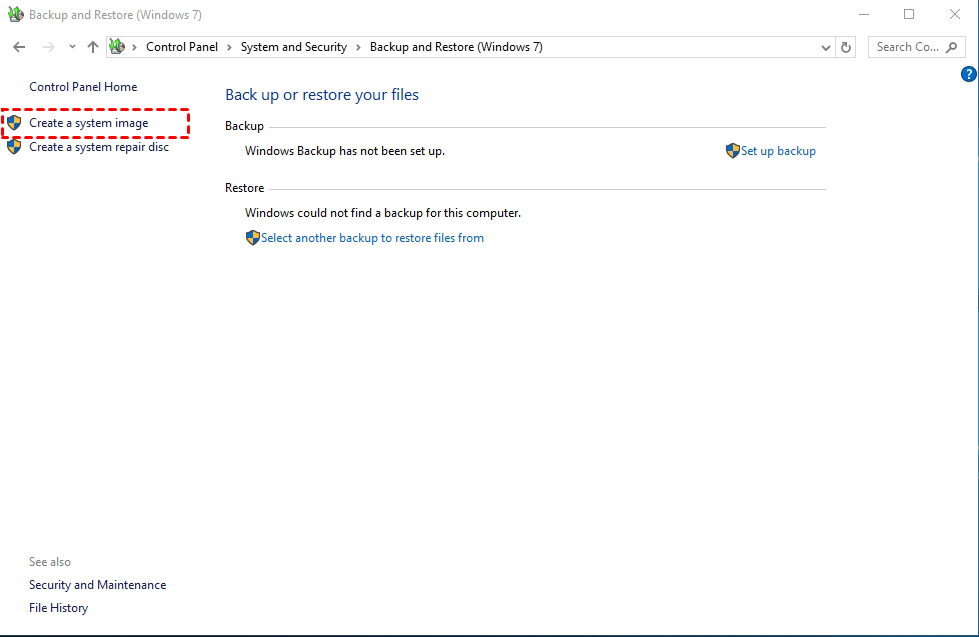
Step 1. Type "Control Panel" in the "Start" menu and press "Enter". Click "Backup and Restore (Windows 7)" under "System and Security", then click "Create a system image" in the ejected window.
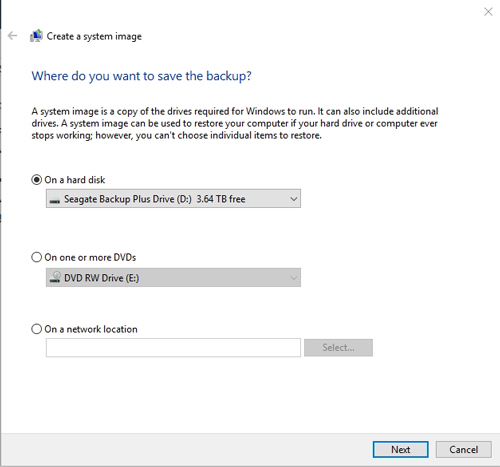
Step 2. You will be asked "Where do you want to save the backup", select the USB drive you have prepared and click "Next".
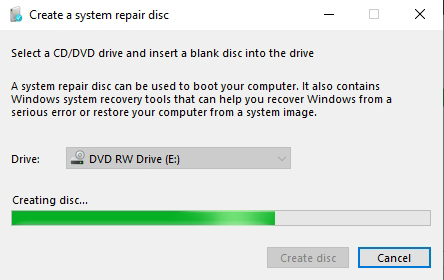
Step 3. After the backup is complete, you will be asked if you want to create a system repair disk, please follow the prompts.
After completing the system repair disk creation, please complete the SSD disk installation as required and follow the steps below to replace the original SSD to the new disk:
✍ Once you get to the blue screen, click "System Image" under "Troubleshoot" to start the System Image Recovery Wizard. Tick "Use the latest available system image" and click "Next".
✍ Choose format and partition the new hard drive, then click "Next", "Finish" and "Yes" in sequence to begin restoring the system image to the new hard drive.
│Method 2. Choose a third-party disk clone tool
The aforementioned information may have led you to the realization that it is exceedingly challenging to replace an SSD through the backup function. Furthermore, the operation may result in the accidental loss of critical data if it is conducted incorrectly. To safely take your SSD out, especially when you want to replace your old SSD with a new one, you can try AOMEI Partition Assistant Professional, a better drive clone expert.
It can eliminate your worries about "If I replace my SSD will I lose everything". It provides two methods in the "Clone Disk Wizard" function to clone disk to HDD/SSD without losing data:
♣ Clone Disk Quickly, which copies the used space of the SSD to another drive.
♣ Sector-by-Sector Clone, which will copy every sector of the SSD to the new drive, whether it is used or not.
Besides, if you just want to move Windows OS to SSD, you can use the "Migrate OS to SSD" function to do it. Please download the Demo to see how to upgrade SSD without losing data.
Preparation work
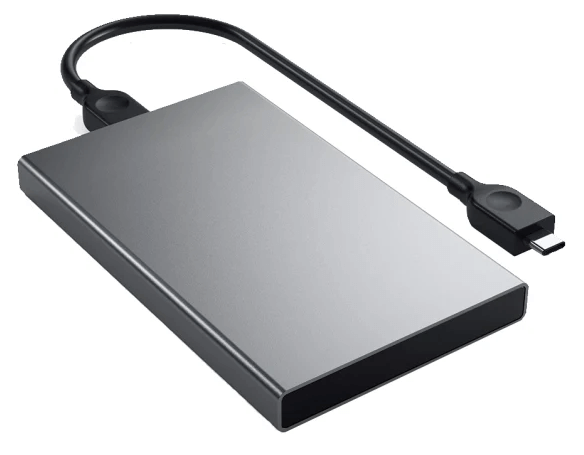
1. If you have a laptop, you must prepare a SATA to USB cable to connect the SSD to it;
2. if your PC is a desktop, you can install the new hard drive directly.
✐ In order to identify the new disk, don't forget to initialize it first, making the partition style of the new hard drive be the same as the old hard drive.
✐ The capability of the new drive must be larger than the used space of the SSD.
If you have already finished the preparation work, please follow the steps to replace SSD to a new hard drive:
Step 1. Install and launch AOMEI Partition Assistant, click "Clone" in the main interface, and select "Clone Disk".

Step 2. Choose the hard disk that you need to clone as the source disk and click "Next".

Step 3. Select the destination disk to store the data on the source disk, and then click "Next".

Step 4. Then, you can check the source and destination disk in the next window or change to "Sector to Sector clone", and click the "Confirm" button to continue if there is no problem.

Here, you can also click the "Settings" button to adjust the partition size on the destination disk or tick "4k alignment" to improve the reading and writing speed of the SSD if the target disk is an SSD drive.

Step 5. After returning to the main interface, check the pending operation and click "Apply" and "Proceed" to commit the operation.

Note: After successfully replacing SSD to another hard drive, you need to change boot drive to boot Windows from the new disk.

Further reading: How to safely erase an SSD
To safely erase SSD, you need to use disk-erasing tools. Normally, to update firmware and execute duties such as secure erase, the majority of manufacturers provide software for their SSDs. A concise inventory of utilities that individuals frequently employ is provided below: Intel Solid State Toolbox, OCZ Toolbox, Corsair SSD Toolbox, Samsung Magician, and SanDisk SSD Toolkit.
If your SSD doesn't have its manufacturing tool, you can also use AOMEI Partition Assistant Professional. It is capable of erasing all brands of solid-state drives. The SSD to be erased must be connected to a computer running the Windows 7 operating system, as the feature "SSD Secure Erase" is exclusively functional in Windows 7. Subsequently, there is the option to erase the SSD securely.

Conclusion
Does everything erase if you take your SSD out? Of course not, this tutorial answers your doubts. If you want to replace your SSD, you can try the clone method to safely transfer all data from old disk to the new one. If you want to properly erase your SSD, we suggest you choose professional disk erasing tools.
In all, AOMEI Partition Assistant can meet your different needs when you want to manage your disks or drives. Besides the mentioned functions, you can also try PC cleaner to clean junk files, move installed apps to another disk to release system disk space and repair system boot errors... And there is the Server version for Windows Server users to efficiently organize disk resources.

