How to Solve System Reserved Partition on the Wrong Drive in Windows?
Find the system reserved partition on wrong drive after installing Windows 11/10/8/7? This tutorial will show you how to move the system reserved partition to the right drive safely and easily.
By AOMEI / Updated on May 12, 2023
System reserved partition on a wrong drive
How can I move system reserved partition?
“I just did a brand new install of Windows 10 on my completely new PC today. I have Disk 0 and Disk 1. I installed the operating system on the Disk 0. But after the installation, I found that the system reserved partition was on the Disk 1. It is separate from the operating system. Is there a way for me to move the system reserved partition to the Disk 0 safely?”
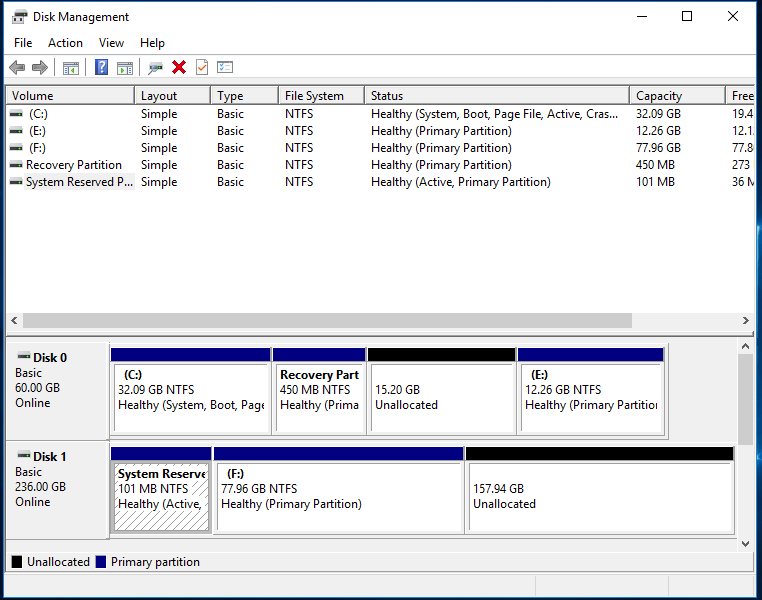
The system reserved partition is usually on the same disk as the system partition (usually the C: drive). However, some users find that the reserved system partition and the system partition are not on the same disk after installing the system, just as the user encountered in the case. This is caused by the installation environment, which may occur when the computer has multiple hard drives. This article will show you how to move the system reserved partition to the correct disk.
What is system reserved partition?
Before moving the system reserved partition, we need to figure out what is the system reserved partition?
When the Windows system manages the disk for the first time, the reserved system partition is used to store system boot files. When you use the Legacy BIOS and MBR partition scheme, a "Microsoft system reserved partition" is created; when you use the UEFI BIOS and GPT partition scheme, an "EFI system partition" is created. In fact, these two are both reserved system partitions that contain the boot files required to start Windows. So if this partition is missing, your computer will not boot.
How to move system reserved partition on another drive?
We can clone the reserved partition of the system to the system disk, and then delete the old partition. Since the system reserved partition contains files for booting the system, in order to prevent operation errors or other situations, please make a system repair disc first. Then follow the prompts below:
1. Press “Windows + R” and enter “diskmgmt.msc” to open Disk Management.
2. Create new simple volume on the system disk that is the same as or larger than the system reserved partition.
3. In order to make the old system reserved partition to be seen in Windows File Explorer, we need to assign it a drive letter (for example, O:).
4. Copy all the contents of the old system reserved partition to the newly created volume by copy and paste. It should include the Boot folder, bootmgr and BOOTSECT.BAK.
5. Delete the drive letter from the new system reserved partition, and then mark it as "active".
6. Now restart your computer to see if it starts successfully. If the startup is successful, please delete the old system reserved partition; if the startup fails, please use the system repair disk to repair.
Alternatives to solve "system reserved partition on wrong drive"
Since the previous method is more complicated and has the risk of making the computer unable to start, we do not recommend it to ordinary users.
To solve the system reserved partition on wrong drive safely and easily, I highly recommend you to use AOMEI Partition Assistant Standard. This is a professional disk/partition cloner, it can help you clone the system reserved partition to the system disk without losing data.
Note: To clone system disk, please upgrade to AOMEI Partition Assistant Professional.
Tips:
1. Before clone system reserved partition, you must make sure there is unallocated space on the hard disk where the operating system is located. If there is no unallocated space, then you can shrink a partition by clicking Resize Partition.
2. Please remember that the system reserved partition must be the primary partition. If your new system reserved partition is a logical drive, you should first convert it to the primary partition without losing data.
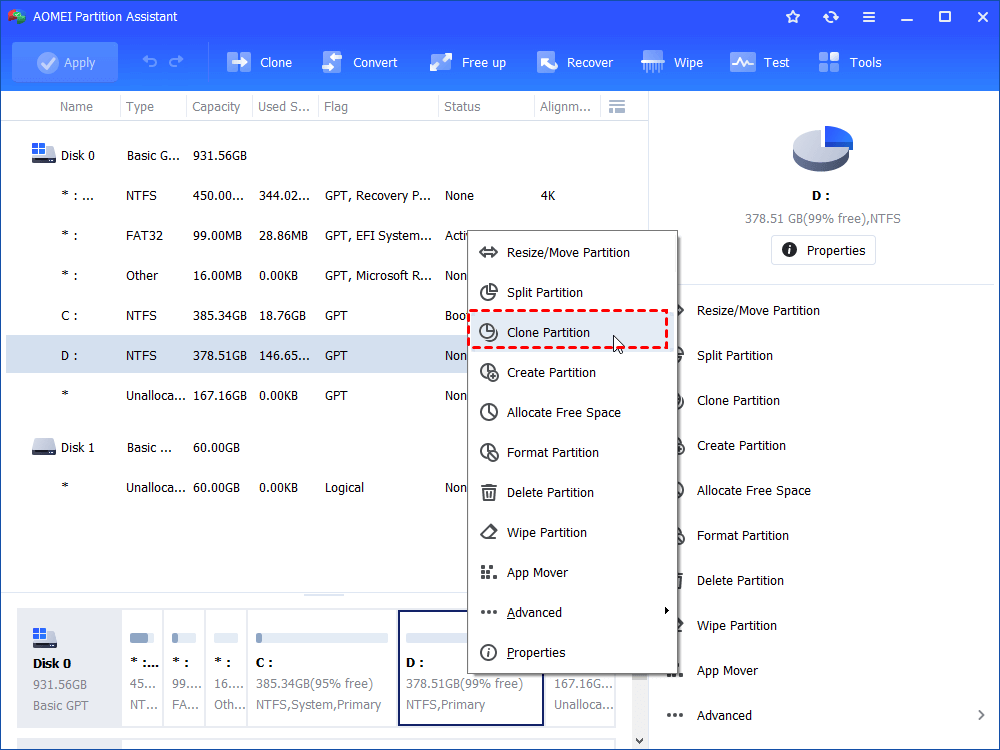
Step 1. Download, install and launch AOMEI Partition Assistant Standard. Right-click the target partition in the main windows, and select “Clone Partition”.
Step 2. In this window, two different ways are available to clone partition. Select one according to your needs and then click "Next".
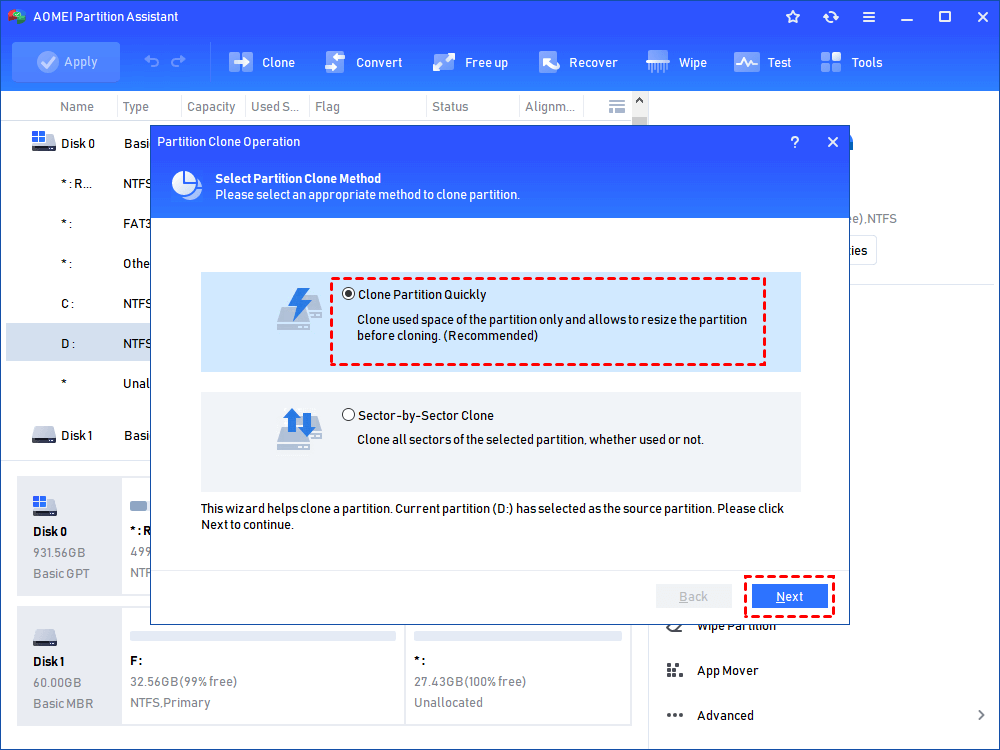
☞ Clone Partition Quickly only clones the used part and can adjust the partition size.
☞ Sector-by-Sector Clone is to clone the entire complete partition, including the unused part.
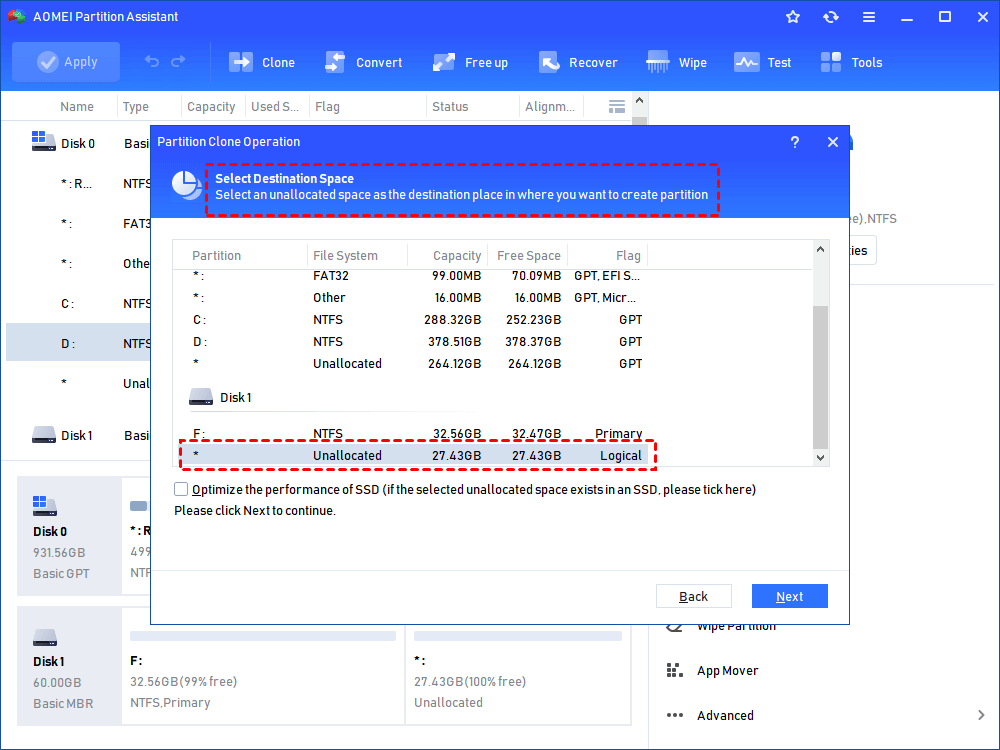
Step 3. Select an unallocated space on the disk where the operating system is located (Take Disk 2 as an example). If you are copying partition to SSD drive, you can tick the option "Optimize the performance of SSD". Then click "Next".
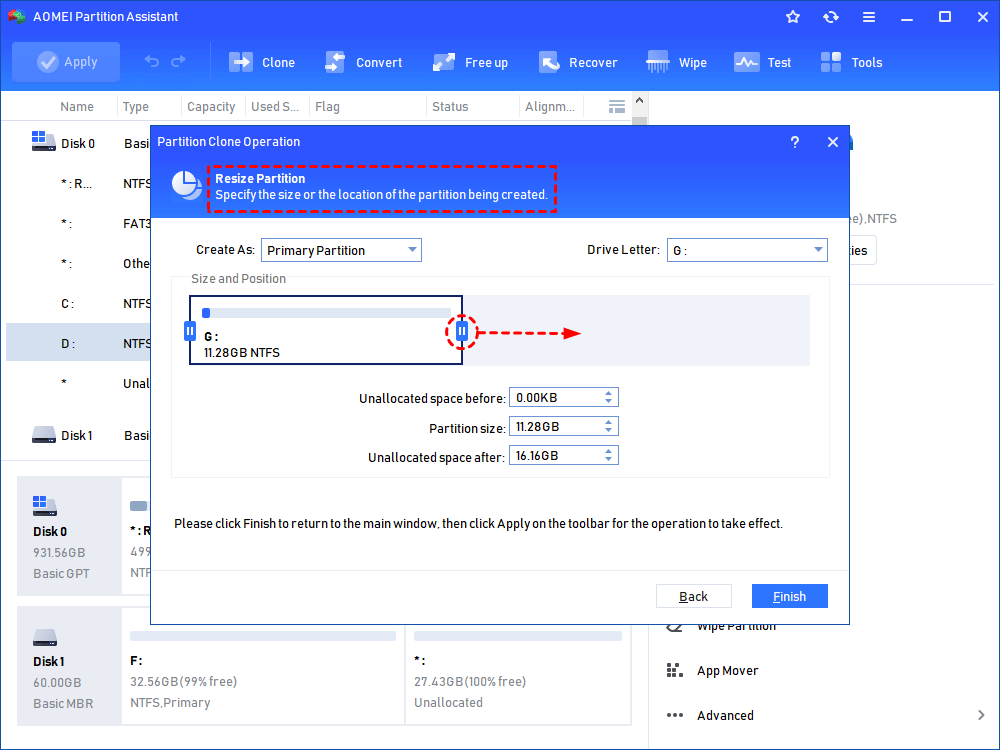
Step 4. In the pop-out window, you can resize the partition as you like, or you can keep the default settings and click "Finish".
Step 5. In the main interface, you can preview the result. If you are satisfied with it, click "Apply" and "Proceed" to execute this operation.

This tutorial details the solution for system reserved partition on the wrong drive. If you are using Windows Server, please upgrade to AOMEI Partition Assistant Server.

