How to Create A Partition in Windows 7 without Formatting
: How to make or create a new partition in Windows 7 32/64 bit without formatting a hard drive? In this post, you’ll learn how to get it done in the 2 most practical ways.
By AOMEI / Updated on March 12, 2024
Why need to create new partitions in Windows 7/8/10/11?
A hard disk drive (HDD) can be partitioned into multiple distinct partitions. Each partition works separately, so you can install another operating system (OS) along with Windows 7 or store different types of data.
It is not advisable to keep your data, applications, and operating system (OS) on the same partition, because it is like putting all eggs in one basket which increases the risk of data loss. If your Windows 7 crashes, the whole data in the system partition might be damaged. When partitioning a hard disk, one often creates multiple partitions for different use. The most common example is to partition a hard drive into 4 partitions, one for system, and the others for software, data, and backup.
How to create a partition with Disk Management
Windows 7/8/10/11 has its built-in tool - Disk Management, which can be used to create new partitions and perform other operations for disk management including partition format, volume extension, and volume deletion, etc.
To create a new partition:
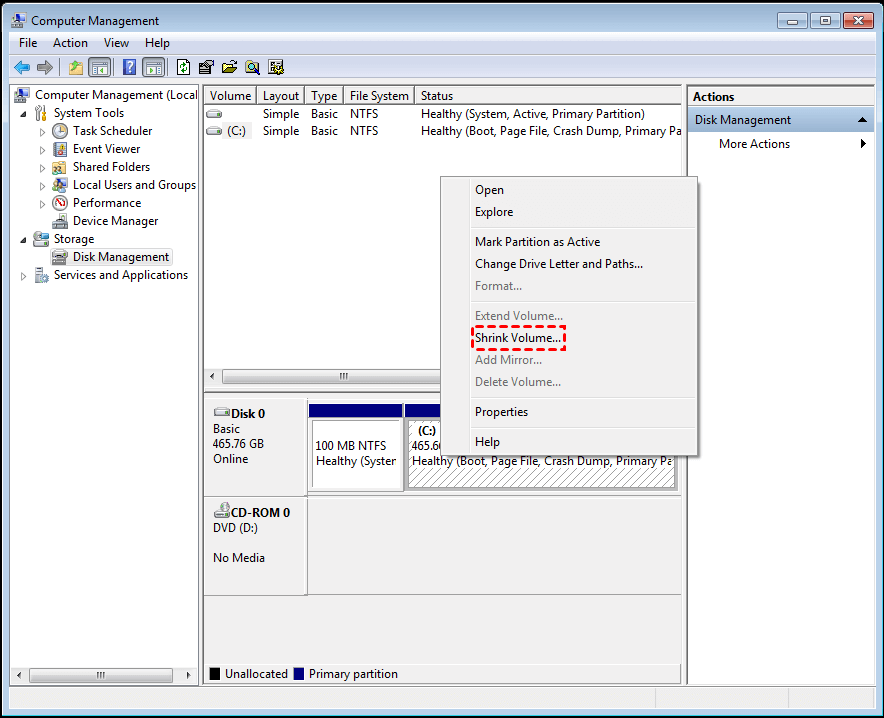
1. Open Disk Management. You can right-click My Computer, and go Manage > Storage > Disk Management to open it.
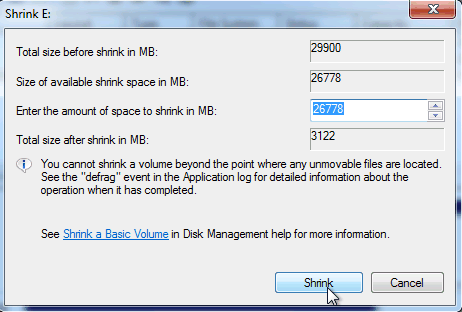
2. Right-click the partition you want to use to create new partition and select "Shrink Volume". Then enter the amount of space you want to shrink and click Shrink Volume to proceed. Follow the onscreen guide to finish the rest steps.
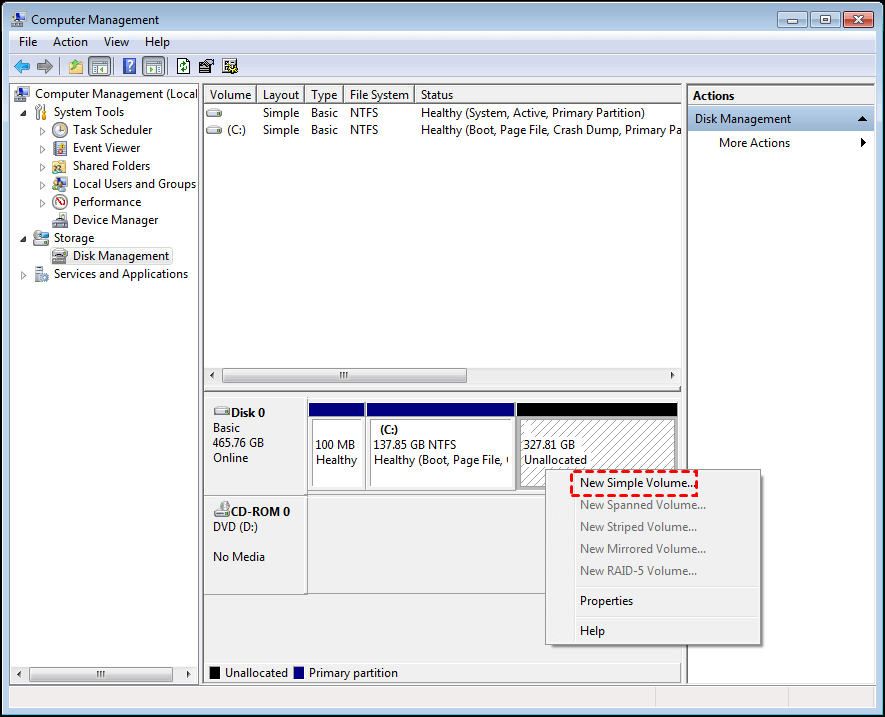
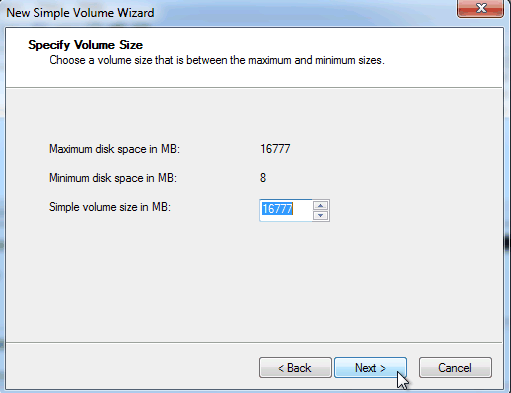
3. Right-click the unallocated space and select "New Simple Volume". Then follow the New Simple Volume Wizard to create a new partition.
If your disk style is MBR, sometimes creating partitions in Windows 7/8/10/11 may fail with an error that you cannot create a new volume in this unallocated space because the disk already reached the maximum number of partitions or the operation you selected will convert the selected basic disk(s) to dynamic disk(s). This happens because an MBR disk can only hold at most 4 primary partitions. The solution is either to convert MBR to GPT disk or use third-party software to create a partition.
Alternative to create a partition on Windows 7/8/10/11
AOMEI Partition Assistant Professional, a powerful utility for Windows 11/10/8.1/8/7/XP/Vista, enables you to create Windows 7/8/10/11 partitions in multiple ways. Here comes the simplest way. Let’s see how it works:
Step 1. First, install this Windows 7 disk partition software and launch it.
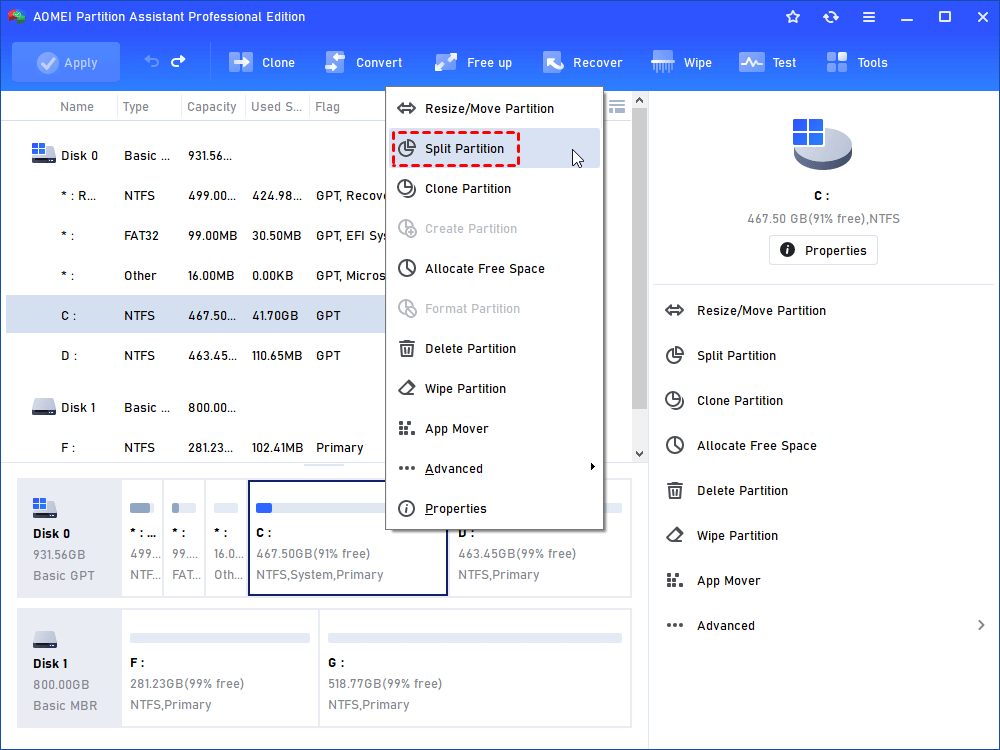
Step 2. Second, right-click a partition that has enough space to create a new partition and select "Split Partition".
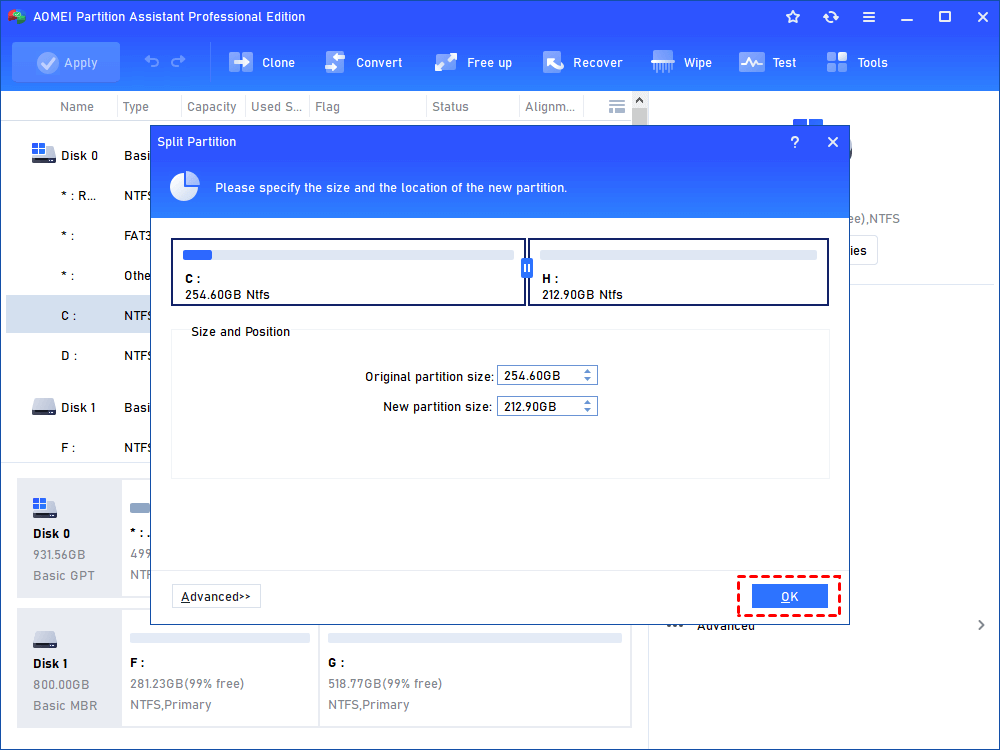
Step 3. Third, on this screen, drag the slider to adjust partition size.
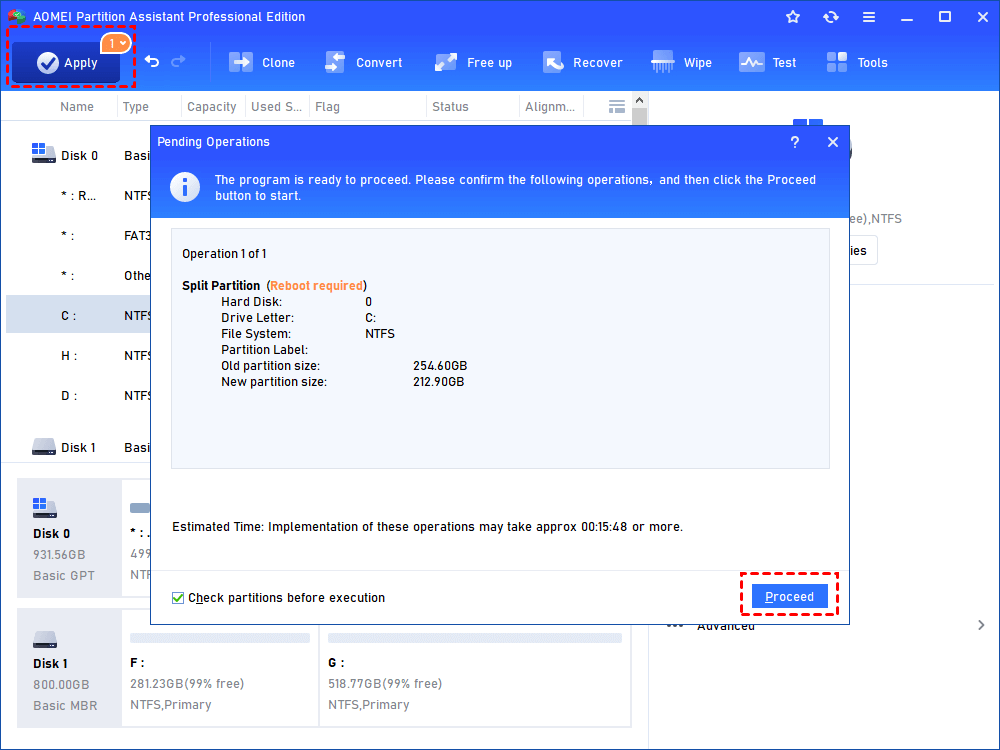
Step 4. Forth, after clicking OK, you can preview the operations. If there is no problem, click Apply to save the changes. Note that this program will not make any changes to your disk until you click Apply option.
Besides this method, you can also shrink a partition to create unallocated space and then use the unallocated space to create a Windows 7 partition. What is more amazing about AOMEI is that it allows you to shrink a partition from both sides, allowing you to manage disk and partitions it contains more flexibly.
More about AOMEI Partition Assistant
AOMEI Partition Assistant Professional is an impressive utility to help you manage your disk and the partitions it contains in Windows 11/10/8.1/8/7/XP/Vista. Providing a concise interface, AOMEI Partition Assistant allows you to create partitions in Windows 7/8/10/11 most easily and securely. In addition, it also brings many other useful features, such as Migrate OS to SSD, NTFS to FAT32 converter, Disk Copy Wizard, Convert MBR to GPT without data loss, and more. It can handle all storage devices that Windows detects. Besides the constantly used file system, NTFS and FAT 32, AOMEI Partition Assistant also supports FAT16/FAT12/exFAT/ReFS/Ext2/Ext3/Ext4.

