[Fixed] Error Writing Temporary File Make Sure Temp Folder Is Valid
Fix the 'Error writing temporary file. Make sure your temp folder is valid' message. Our guide provides step-by-step solutions for NSIS errors, including deleting temp files and running memory diagnostics.
By Lucas / Updated on May 15, 2025
Experiencing the "Error writing temporary file. Make sure your temp folder is valid" message can be frustrating, often appearing when you're trying to install software, uninstall an application, or even after a system restart. This error, commonly associated with the Nullsoft Scriptable Install System (NSIS), signals that Windows is encountering issues accessing or modifying the temporary folder. Essentially, the .EXE file of an application might be corrupted, which in turn affects the Windows Installer and prevents changes to the application.
Understanding the "Make sure Temp folder is valid"
The NSIS error "writing temporary file" indicates a problem where Windows cannot properly read from or write to its designated temporary (temp) folder.
- Corrupted Temporary Files: The existing files within the temp folder might be damaged.
- Temp Folder Misconfiguration: Incorrect settings can restrict access to the temp folder.
- Virus or Malware Infection: Malicious software can interfere with system processes, including temp folder operations.
- Pirated or Incorrect Installer: Using an unofficial or faulty installer can lead to this error.
Effective Solutions to Fix "Make Sure Your Temp Folder Is Valid" in Windows 10/11
If you're encountering the "NSIS error writing temporary file," several troubleshooting steps can help you resolve it.
Fix 1: Configure Temporary Files Permissions
One common reason for the "Error writing temporary file. Make sure your temp folder is valid" message is that your temporary folders are set to read-only. To fix this, you'll need to grant full control permissions.
Step 1. Open File Explorer by pressing Windows + E.
Step 2. Navigate to C:\Users\username\AppData\Local. Remember to replace "username" with your actual Windows username.
Step 3. Locate the Temp folder, right-click it, and select Properties.
Step 4. Go to the Security tab, select your username, and click Edit.

Step 5. Check the Allow box next to Full control and click OK to apply the changes.
Step 6. Restart your computer and check if the error is resolved.
Fix 2: Manually Delete Temporary Files
An accumulation of too many temporary files and loads of cached data can sometimes lead to the "temp folder is not valid" problem. Manually clearing these files can help.
Step 1. Open the Run dialog box by pressing Windows + R.
Step 2. Type %temp% into the box and press Enter. This will open your temp folder.
Step 3. Select all files by pressing Ctrl + A, then right-click and choose Delete.
Step 4. Reboot your device to see if the NSIS error has been fixed.
Fix 3: Re-download and Install the Application from Official Sources
If the installer you're using is pirated or from an untrusted source, it might contain malware or be inherently faulty, causing the "Make sure your temp folder is valid" error. Always download applications directly from the software's official website and attempt the installation again.
Fix 4: Compress the Installer File
Some users have found success in resolving this NSIS error by compressing the problematic .EXE installer file into a zipped folder.
Step 1. Open File Explorer. Use the search tool in File Explorer to locate the installer file that's triggering the NSIS error.
Step 2. Right-click the .EXE file and select Send to > Compressed (zipped) folder.
Step 3. Open the newly created zipped folder and try running the installer from within it.
Fix 5: Run Windows Memory Diagnostic Tool
Memory-related problems can sometimes manifest as installation failures. The Windows Memory Diagnostic tool can help identify if such issues are causing the "NSIS error writing temporary file."
Step 1. Type "Windows Memory Diagnostic" into the Windows search box and select it from the results.
Step 2. In the pop-up window, choose either Restart now and check for problems (recommended) or Check for problems the next time I start my computer, depending on your preference.
Fix 6: Perform a Clean Boot
Third-party applications can sometimes interfere with system processes and cause various Windows problems. Performing a clean boot starts your computer with a minimal set of drivers and startup programs, helping you determine if a third-party application is the culprit behind the "Make sure your temp folder is valid" error. If the error disappears during a clean boot, you can then systematically enable applications to identify and uninstall the problematic one.
Step 1. Press Windows + R, type msconfig in the text box, and press Enter.
Step 2. In the System Configuration window, go to the Services tab. Check "Hide all Microsoft services" and then click "Disable all".
Step 3. Navigate to the Startup tab and click Open Task Manager.
Step 4. In Task Manager, select each startup application you suspect might be causing issues and click Disable. Repeat this for multiple applications.
Step 5. Restart your computer to check if the "Make sure your temp folder is valid" error is resolved.
What to Do if You Accidentally Deleted Important Temporary Files?
While deleting temporary files (as in Fix 2) is generally safe, there's a small chance you might inadvertently remove a temp file that an application still needs. If you suspect this has happened, or if you've lost other important data, data recovery software can be helpful.
Products like PartitionAssistant Recovery are designed to recover various file types, including documents, pictures, videos, and audio, from different storage media like internal/external hard drives, SSDs, SD cards, and USB drives. These tools typically work by scanning the drive for traces of deleted files. Once the scan is complete, you can usually preview and select the files you wish to recover and choose a location to save them.
Step 1. Install and launch PartitionAssistant Recovery. Choose the exact partition or disk where your data is lost and click Scan.

Step 2. Then, the recovery tool start to scan and search. lt will execute the “Quickly Scan" first for finding your deleted data fast, and then execute the “Deep Scan" for searching other lost data.

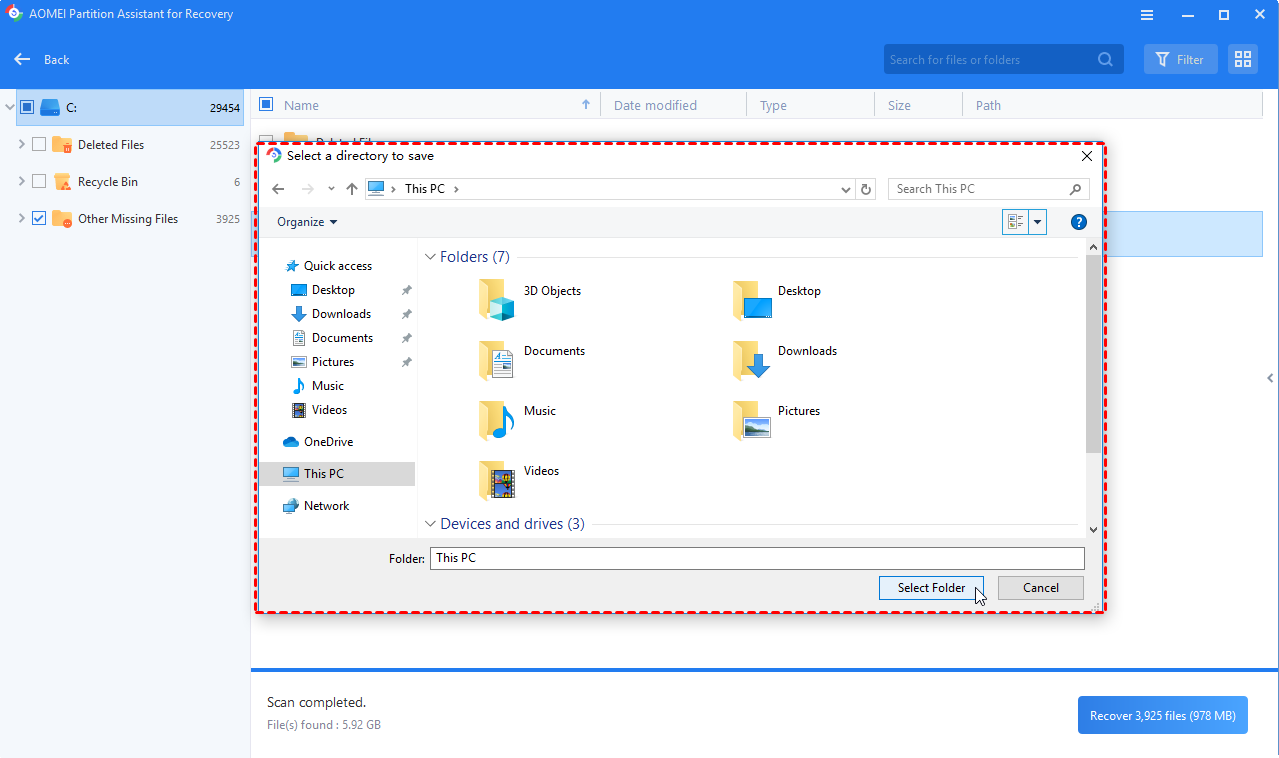
Step 3. Once the scan is completed, all deleted files, recycle bins and other missing files will be displayed. Please select the file you would like to recover and then click "Recover".

Step 4. Then, select a folder path to save your recovered files.
Step 5. Wait patiently for this process of recovering ends.
Note: The success of file recovery depends on various factors, including how much new data has been written to the drive since the deletion.
Conclusion
The error writes temporary file to make sure Temp folder is valid, while disruptive, is often resolvable by addressing issues with temporary file permissions, clearing out corrupted temp files, ensuring you're using legitimate installers, or checking for underlying system conflicts. By systematically working through the solutions outlined above, you can regain control over your software installations and maintain a smoother Windows experience. Regularly maintaining your system, such as periodically clearing temporary files and using reputable software sources, can also help prevent such errors from occurring in the future.

