[Fixed] Ndis.sys Failed Blue Screen Error
If you’re facing Ndis.sys failed BSOD error, don’t worry, in this post, you can learn why Ndis.sys failed and how to fix this problem. Additionally, you can also save your data if there is data loss during the error.
By Lucas / Updated on July 24, 2024

What is NDIS and Ndis.sys error?
NDIS stands for Network Driver Interface Specification. It is a programming interface for network drivers in the Microsoft Windows operating system. Essentially, NDIS allows different network interface cards (NICs) and network protocols to communicate with each other.
"Ndis.sys" is a system file in Windows that is associated with NDIS. It is a driver file responsible for managing network connections. An "NDIS" or "Ndis.sys" error typically indicates a problem with the NDIS system file or a related network driver.
What causes Ndis.sys failed error on Windows computer?
Typically, the file will not do any damage to your computer or impair its performance. However, a variety of causes can cause difficulties with the ndis.sys file, such as Ndis.sys failed BSOD with the error message driver_irql_not_less_or_equal, excessive latency, and so on.
• Corrupted or outdated network drivers.
• Malware or virus infections affecting system files.
• Hardware issues with the network adapter.
• Conflicts with other software or drivers.
• Registry errors or system file corruption.
There are other possible explanations. Some people have tried deactivating Ndis.sys to resolve this issue, however this is not advised. After all, it is required for Windows to work properly, and disabling it will cause it to restart automatically.
Quick fix data loss due to Ndis.sys failed BSOD error
Before you fix Ndis.sys failed issue, if you find any signs of data loss, you should perform data recovery before any operation, because all extra operations may overwrite your disk and make data recovery difficult.
Since your computer can’t boot successfully, you need a tool that can recover data without logging in system. In such cases, you can use PartitionAssistant Recovery which works with 200+ formats and provides impressive results from HDD, SSD, SD card, etc. You just need to create a bootable media with this tool on another well PC, and then you can use it to recover lost data from Ndis.sys failed PC.
Stage 1. Create data recovery bootable media
Step 1. Install and run this tool on a well-working PC. Click the "Crashed PC Recovery" button to create WinPE bootable media according to your needs and click "Create".
You can boot the boot failure computer into BIOS configuration, then set USB as the priority boot option under boot sequence.
Stage 2. Recover lost data caused by Ndis.sys failed
Step 1. After you enter PartitionAssistant Recovery. Choose the exact partition or disk where your data lost and click Scan.
Step 2. Then, the recovery tool start to scan and search. lt will execute the “Quickly Scan" first for finding your deleted data fast, and then execute the “Deep Scan" for searching other lost data.
Step 3. Once the scan is completed, all deleted files, recycle bins and other missing files will be displayed. Please select the file you would like to recover and then click "Recover".
Step 4. Then, select a folder path to save your recovered files.
Step 5. Wait patiently for this process of recovering ends.
How to fix Ndis.sys failed
Now, let’s learn how to solve Ndis.sys failed BSOD error.
You need to boot into Safe Mode to access computer, so first, we’ll show how to enter Safe Mode.
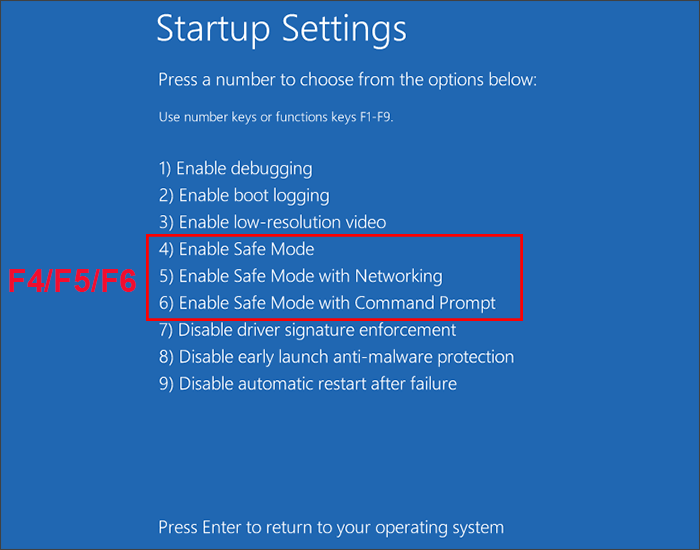
Step 1. Open your computer and quickly press the F8 key or the Ctrl key to access the Startup Settings screen. Subsequently, use the F4/F5/F6 keys to select the desired safe mode for booting.
Step 2. After a few minutes, your computer will enter Safe Mode.
You can choose which Safe Mode boot according to the following methods.
Method 1. Update or rollback network drivers
Outdated or incompatible network drivers frequently cause the Ndis.sys Failed error. Follow these procedures to upgrade or roll back your network drivers:
Step 1. Press "Win" + "X" and select "Device Manager."
Step 2. Expand the "Network adapters" section.
Step 3. Right-click on your network adapter.
Step 4. Select "Update driver" and follow the on-screen directions to update.
Step 5. To roll back, click "Properties," go to the "Driver" tab, and if it is accessible, choose "Roll Back Driver."
Step 6. Restart your computer after updating or reverting the driver.

Method 2. Replace network interface card
If upgrading or rolling back the network drivers does not address the problem, consider replacing the Network Interface Card (NIC) using the following steps:
Step 1. Find out the make and model of your current NIC. This information is usually available in Device Manager or on the NIC itself.
Step 2. Check the NIC's compatibility with the system specifications.
Step 3. Unplug the power supply after turning off the computer.
Step 4. Find the NIC by opening your computer casing, then remove it.
Step 5: Insert the new NIC into an open PCI slot, ensuring it is securely in place.
Step 6: Reconnect any disconnected cables and shut the computer case.
Step 7: After starting your computer, install the new NIC's needed drivers.
Step 8: Connect to the internet and confirm that the new NIC is active.
Method 3. Use third-party tool to run boot repair
To solve Ndis.sys failed, you can try boot repair. AOMEI Partition Assistant Professional can also help you. After creating a bootable media, you can also try “Repair MBR” function when you finish data recovery.
Step 1. Insert the bootable device you created before to the computer with MBR errors, and boot the PC from the bootable device.

Step 2. It will show you the main interface of AOMEI Partition Assistant. Right-click the system disk, and select Rebuild MBR.
Step 3. Select the type of MBR for the current OS.
Step 4. Finally, click Apply and Commit on the toolbar to execute the operations.
Now, reboot your PC from your disk to check whether the Ndis.sys failed BSOD fixed or not.
Method 4. Scan malware on your PC
Many malicious entities successfully masquerade as ndis.sys, causing a variety of ndis.sys issues. As a result, it is vital to check your computer for malware and viruses. To determine whether ndis.sys is a virus, simply look at its location. If the path is not C:WindowsSystem32drivers, the file is most likely a virus.
After you enter Windows via Safe Mode, you can follow the steps:
Step 1: To open Settings, press Windows + I.
Step 2: Navigate to Update & Security > Windows Security > Virus and Threat Protection.
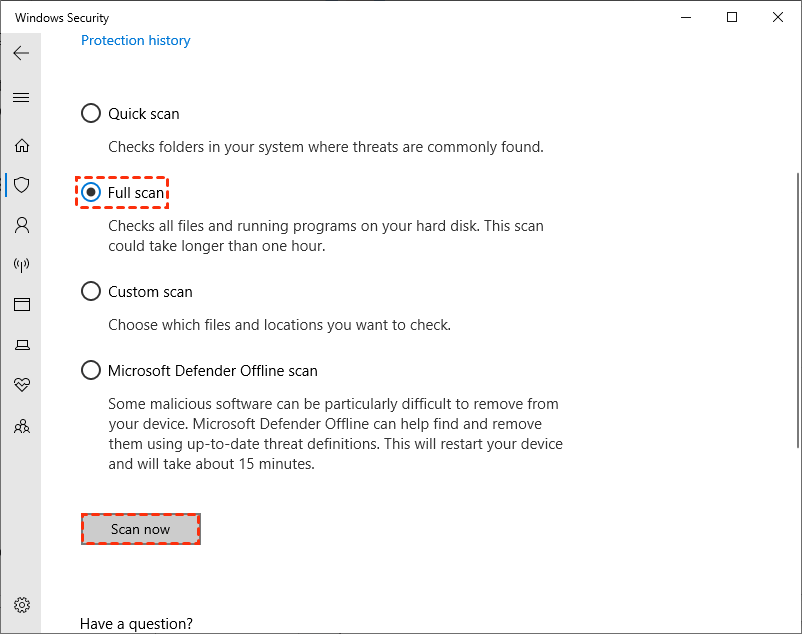
Step 3: When you open Windows Defender Security Center, click Run a new advanced scan and select Full scan.
Step 4: Click Scan Now to begin scanning your machine.
Method 5. Run SFC scan
While using the Ndis.sys If you are suffering a failed BSOD, thoroughly analyze your system. The SFC scannow, CHKDSK, and DISM commands can be used to identify and resolve underlying issues.
Step 1. Open Command Prompt as administrator.
Step 2. Type in the following commands and hit "Enter" after each line.
sfc /scannow
chkdsk /f /r
DISM/Online/Cleanup-Image/RestoreHealth
To ensure these command lines scan and resolve issues, you need to restart your computer after entering them.
Method 6. Perform system restore
You can perform a System Restore to return your system to its original state and perhaps resolve the Ndis.error sys Failed.
Step 1. In Safe Mode boot, search for and open Create a restore point in the Windows search bar.
Step 2. Click the "System Restore" button in the System Properties window.
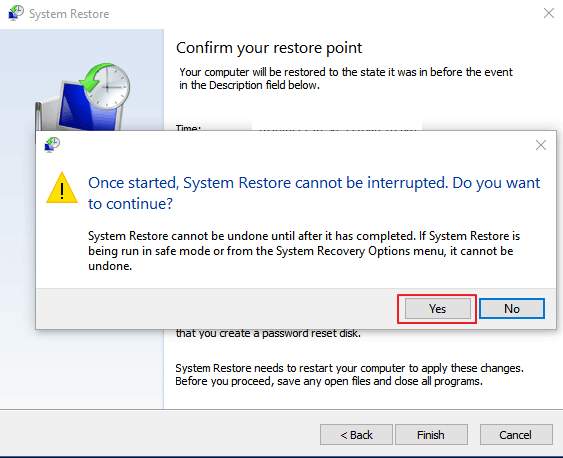
Step 3. Select a restore point before the Ndis.sys error occurred.
Step 4. To Restore the System process, follow the on-screen instructions.
Conclusion
These are the steps you may take to solve the Ndis.sys Blue Screen Error on your computer. They are not difficult, and anyone may do them on their own. Be very careful while dealing with files and downloads on your PC. When you encounter the blue screen error, don't worry and use one of our techniques, instructions, or software to restore your computer/PC to its nice status.
FAQs about Ndis.sys failed error
1. What is Ndis.sys failed error?
Ndis. sys failed error is a common issue encountered by Windows users, often leading to system crashes or the dreaded blue screen of death (BSOD). This error is related to the NDIS (Network Driver Interface Specification) system file, responsible for managing network connections in Windows.
2. Is Ndis.sys failed error dangerous for my computer?
While Ndis.sys failed errors can be frustrating and disruptive, they are not inherently dangerous for your computer. However, they can indicate underlying issues that may need attention to prevent further problems. It's essential to address these errors promptly to ensure stability and computer performance.
3. Can I prevent Ndis.sys failed error from occurring?
While it's not always possible to prevent Ndis.sys failed errors entirely, you can take steps to minimize the risk. These include regularly updating your network drivers, using reputable antivirus or antimalware software to protect against infections, maintaining proper hardware connections, avoiding software conflicts, and keeping your operating system up to date with the latest patches and updates.

