6 Ways to Use Disk Management Commands like a Pro
In this post, you will learn how to open Disk Management from Command Prompt, as well as learn some common and useful commands to manage disk partitions.
By AOMEI / Updated on May 12, 2023
How to open Disk Management from command prompt?
In Windows 10/8/7, there is a very useful built-in tool for managing disk and volume-related tasks. Some users may not know of this tool because it is buried deep down in Windows. Luckily, you can open Disk Management from command prompt in all versions of Windows and it is really quick.
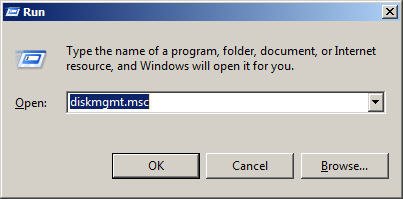
Press Windows + R key to bring out the Run window. From there, type in “diskmgmt.msc” and press Enter.
Then you will see Disk Management with all the disks and partitions listed. If you right-click on a partition or disk, it will bring out many available options. You can shrink volume, extend volume, delete volume, convert to GPT/MBR, convert to dynamic disk, etc.
Some of the options may be grayed out due to various reasons. For example, Disk Management will not allow you to delete recovery partition, but you can delete recovery partition from command prompt. For managing disk partitions, you can do more with Windows built-in command utility DiskPart.exe.
Delete partition using disk management command
In Disk Management, some crucial partitions (for example recovery partition) cannot be deleted. When you right-click on it in Disk Management, you will see the option Delete Volume is greyed out. Some computer manufacturer has made a factory recovery partition on the hard drive that allows you to restore the computer to factory default settings. It may also be called OEM partition. Microsoft has mentioned that the factory recovery partition will not be available after upgrading to Windows 10.
If you need to delete the OEM partition to free up a few gigabytes of space, then you can use Diskpart commands.
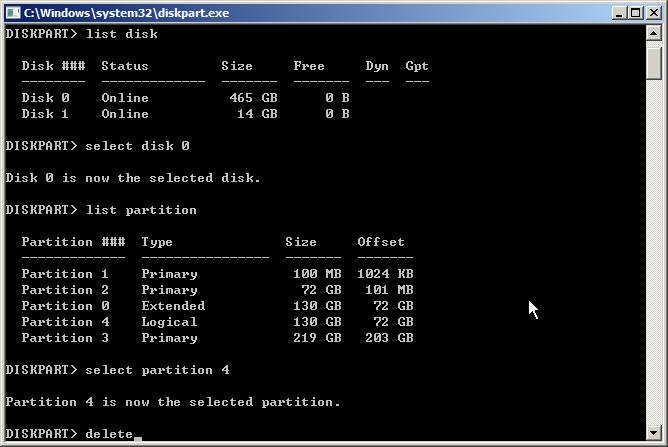
1. Type “diskpart.exe” in the Run box and press Enter to open DiskPart command window.
2. Type “list disk” and press Enter.
3. Type “select disk [disk number]” and press Enter.
4. Type “list partition” and press Enter.
5. Type “select partition [partition number]” and press Enter.
6. Type ”delete” and press Enter.
When the operation complete successfully, you can exit DiskPart.
Extend partition or create a new partition
If you delete a partition or shrink a partition, it will generate some unallocated space. To make use of the unallocated space, you can either add it to the contiguous partition or create a new partition.
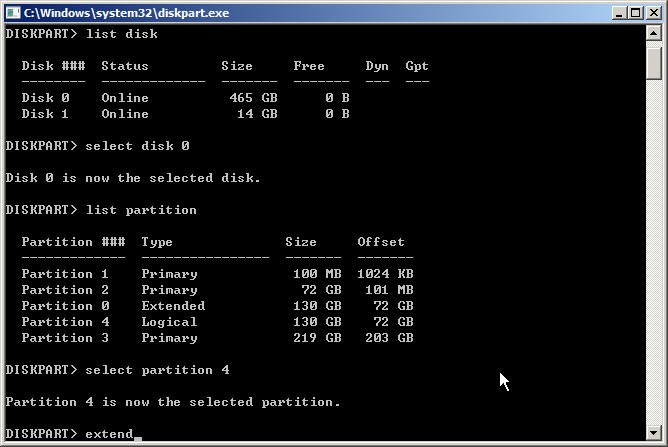
To extend partition from command line, open Diskpart window and type the following:
▶list disk and press Enter.
▶select disk [disk number] and press Enter.
▶list partition and press Enter.
▶select partition [partition number] and press Enter.
▶extend size=n (if you do not specify the extend size, all unallocated space will be added to the contiguous partition) and press Enter.
To create a new partition from command prompt, type the following:
▶list disk and press Enter.
▶select disk [number] and press Enter.
▶create partition primary [size=n] or create partition logical [size=n] and press Enter.
▶assign letter=H (you can assign any unused drive letter to the new partition) and press Enter.
If your hard drive was initialized as MBR partition style, then it can only have 4 primary partitions or 3 primary partitions plus many logical partitions. Therefore, if your hard drive already has 3 primary partitions and you need more partitions, then you can create a logical partition.
Convert to GPT or MBR from command prompt
GPT partition style is more advanced than MBR. If you want to break the 2TB hard drive limit, you can convert MBR to GPT. As you may know, GPT and MBR disks use different boot modes. If you want to boot from MBR disk, you need to make sure BIOS-based Legacy mode is enabled. If you want to install Windows10/8/7 on GPT disk, you need to enable UEFI boot mode. In addition, if you want to upgrade to Windows 11, you'll have to convert the MBR boot disk to GPT, because Windows 11 could only boot from UEFI mode.
If you do not configure it right, Windows will fail to boot. If you receive the error “Windows cannot be installed on this disk. The selected disk is of GPT partition style”, then you need to either change Legacy to UEFI or convert the disk to MBR disk.
To convert GPT/MBR during Windows installation:
1. Press Windows and F10 key simultaneously to open a command prompt.
2. Type”diskpart” and press Enter.
3. Type”list disk” and press Enter.
4. Type “select disk [disk number]” and press Enter.
5. Type “clean” and press Enter.
6. Type “convert mbr” and press Enter.
This operation will clear all the data on the drive. If there is valuable data on it, you should create a backup before applying this. If you want to convert MBR to GPT disk, you just need to change the last command to “convert gpt”.
Convert FAT32 to NTFS files system from command prompt
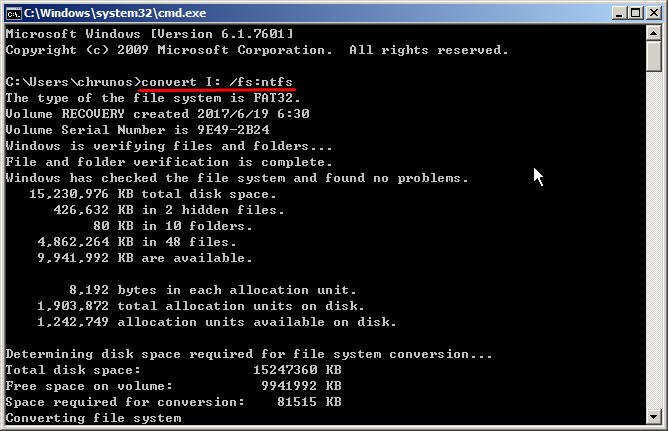
Fat 32 is the most compatible file system, so most of the USB is formatted with FAT32 by default. When you try to move a file that is larger than 4 GB, you will receive an error “the file is too large for the destination file system”. In that case, you can convert FAT32 to NTFS without data loss.
You can type “cmd” in a Run box and press Enter to open a command line window.
In the command prompt window, type: convert [drive letter:] /fs:ntfs and press Enter.
After converting to NTFS, you cannot convert back to NTFS unless you try third-party tools.
Better disk management software
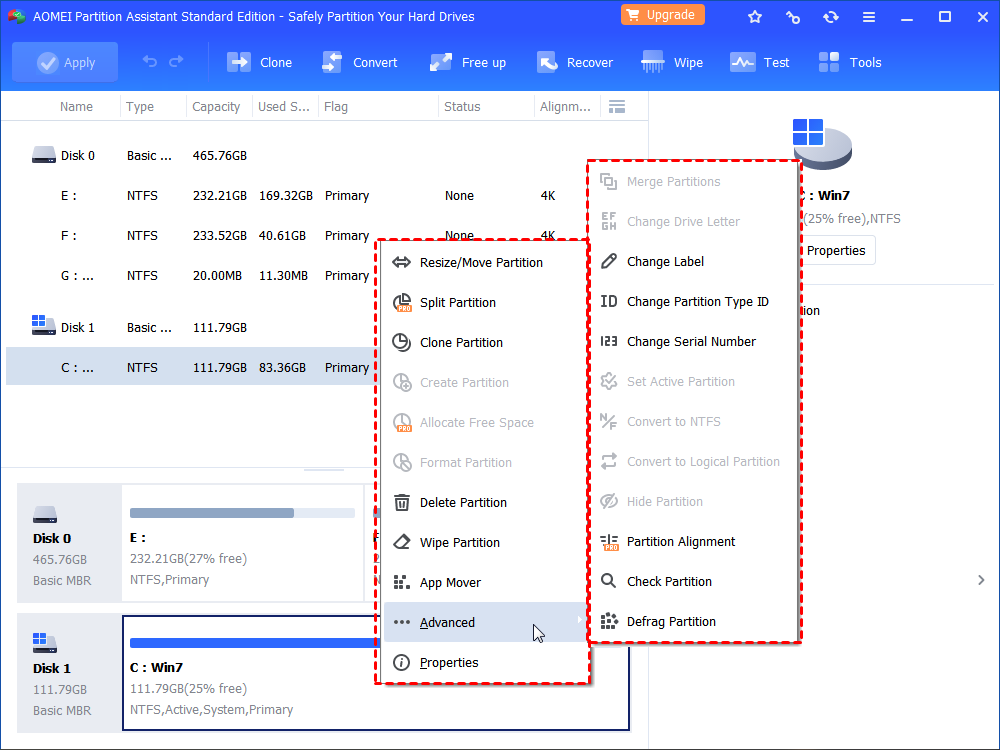
If you need to more advanced features regarding disk and partition management, you can use the free partition manager: AOMEI Partition Assistant Standard. It is available both in GUI and command prompt. It provides more features than Windows built-in disk management tools. For example, you can use it to convert disk to MBR/GPT without data loss, convert FAT32 to NTFS, NTFS to FAT32 without reformatting the drive.
It is very easy to use, just like Disk Management. You can just right-click on a partition or disk and all the available operations will be listed. It provides 8 wizards to guide you every step of the way. It also allows you to preview the partition layout before you actually apply any changes to your hard drive. You can see the interface below:
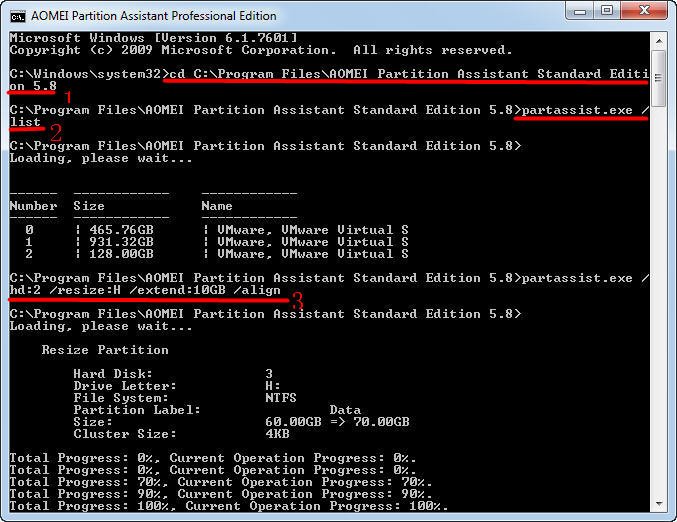
If you get used to partitioning hard drive from command prompt, you can upgrade to Professional edition.
As you probably know that Windows built-in disk management commands have some limitations. For example, you can only extend volume when there is contiguous unallocated space, and converting to GPT/MBR will wipe out all data on the disk. Therefore, to perform advanced operations on disk partitions, you can use AOMEI Partition Assistant instead.

