

[Stepwise] How to Automatically Delete Duplicate Files In Windows 10
Read to learn how to automatically delete duplicate files in Windows 10. To effectively free up space, you can get some other practical methods as well.
By Irene / Updated on May 13, 2025
Why do you need automatically delete duplicate files for Windows?
Duplicate files take up extra space on your computer and can slow it down. These are files that already exist in another location—such as photos, videos, documents, music, or other types of files. To keep your system clean and running well, it’s important to find and delete these duplicates.
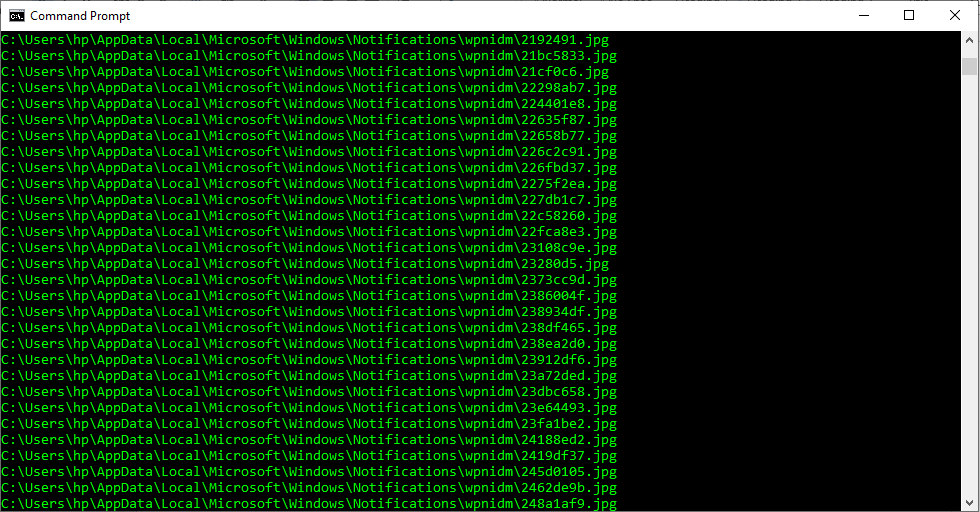
Windows 10 does include some built-in tools, like File Explorer, Windows Search, and Command Prompt, that can help you find duplicate files. However, these methods are mostly manual and not very efficient. You often have to check each file one by one, comparing names, dates, or types, which can be time-consuming and easy to get wrong. Even files that look the same might not be true duplicates, and it’s hard to be sure just by looking.

Using Command Prompt allows more control, but it requires technical knowledge. One small mistake in the command can lead to deleting the wrong files. Also, none of these tools can automatically check the file content to confirm if it’s really a duplicate. This makes the process even harder, especially when you have many files. By the way, if you want to recover accidentally removed files, you can click to read.
Because of these limitations, using professional software is a better option. These tools are designed to scan your files automatically, compare them accurately, and safely remove duplicates with minimal effort. They save you time and help you keep your computer organized without the hassle of manual work.
How to automatically delete duplicate files in Windows 10?
If you want to automatically delete duplicate files in Windows 10, the best way is to use a reliable tool like AOMEI Partition Assistant. This tool has a Duplicate Files Finder that quickly scans your PC, even finding hidden duplicates. You can check the files before deleting them to avoid mistakes.
Manual methods often take time and can miss files. But the AOMEI is more accurate and lets you scan the way you want. In just minutes, you can free up a lot of space. It’s a smart and reliable choice for removing duplicate files in Windows 10.
The Best Windows Disk Partition Manager and PC Optimizer
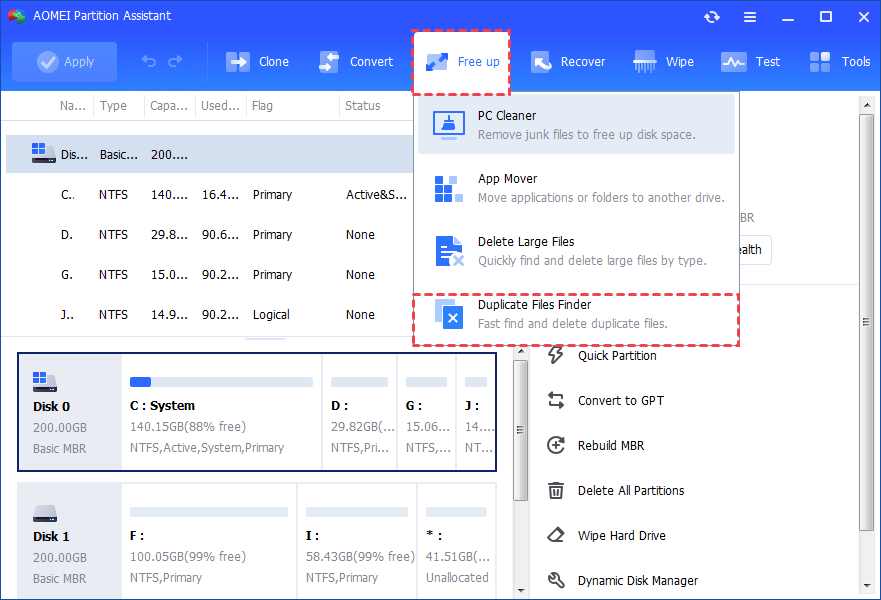
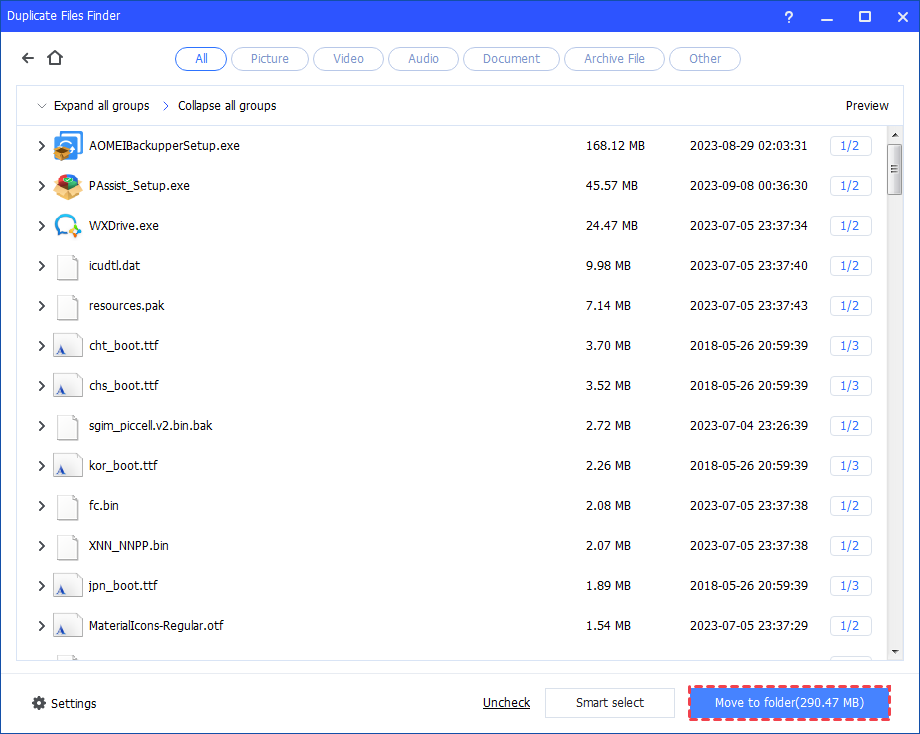
Step 1. Click the "Free up" on the main tab and select "Duplicate Files Finder".
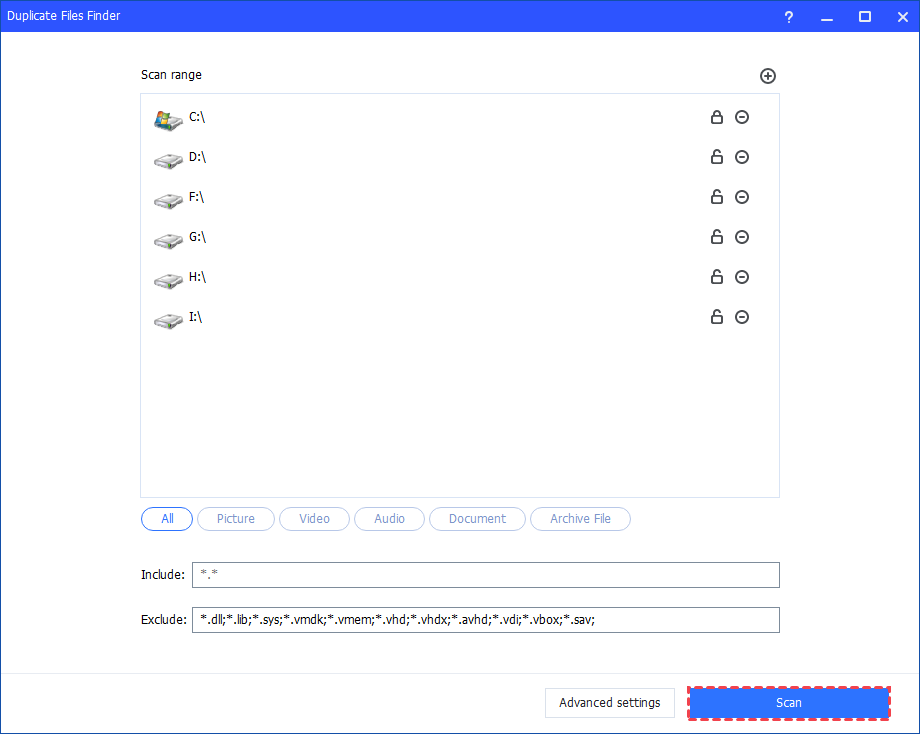
Step 2. Here, all partitions on your computer will be displayed. You can personalize it and click "Scan".
Step 3. After the process is finished, all duplicate files that meet the conditions you set will be displayed. You can click the "Preview" button to see the duplicate files.
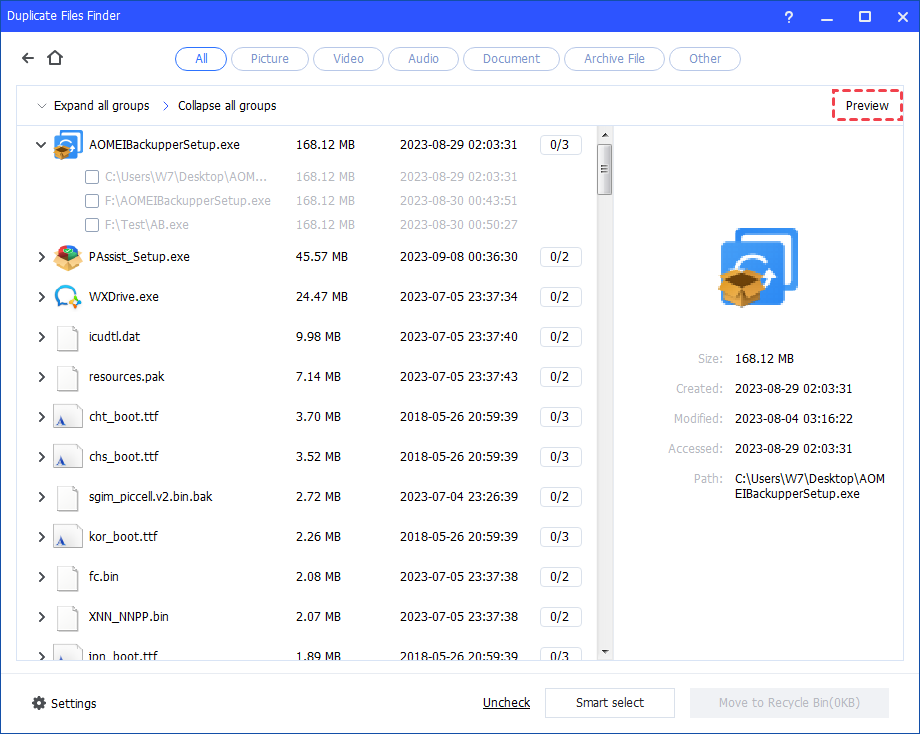
Step 4. You can select the duplicate files you want to delete. Or, click "Smart select" to automatically select duplicate files. Then, click "Move to folder".
More options to free up space
To effectively free up space for Windows 11, 10, 8, and 7, AOMEI Partition Assistant also offers many options for users.
The Best Windows Disk Partition Manager and PC Optimizer
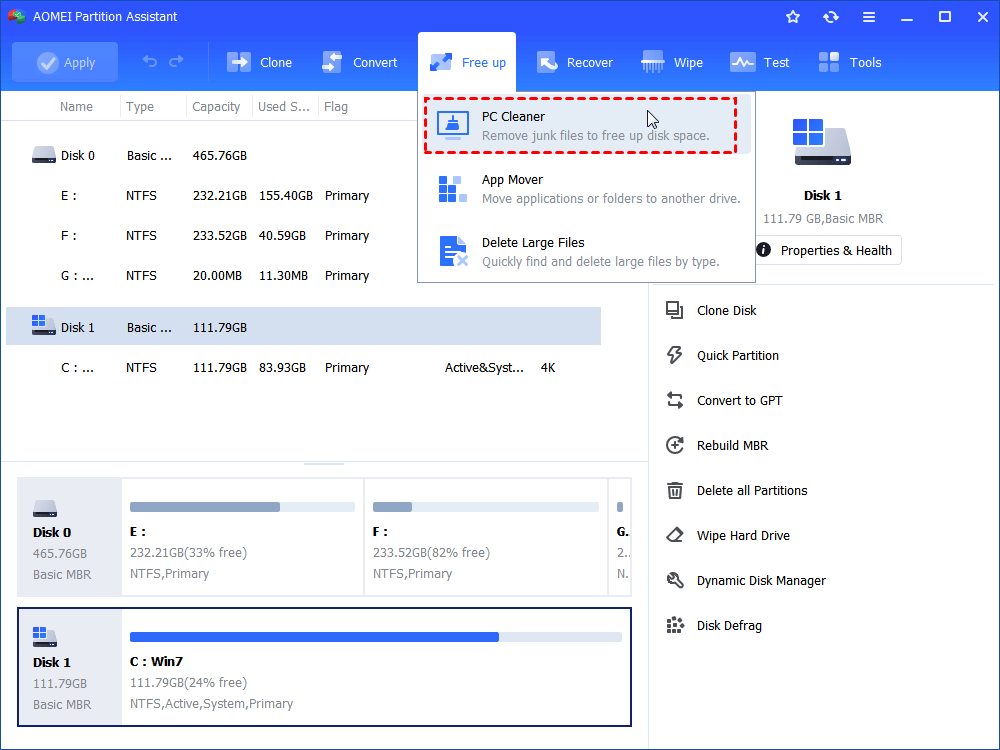
Option 1. Use PC Cleaner to move junk files
The best cleanup software for Windows 10 includes a powerful tool called PC Cleaner. It's a convenient way to keep your PC clean every day. It quickly and automatically finds and removes junk files and other unnecessary data from your hard drives, helping you free up space with ease.
Step 1. Click "Free up" > "PC Cleaner" in turn.
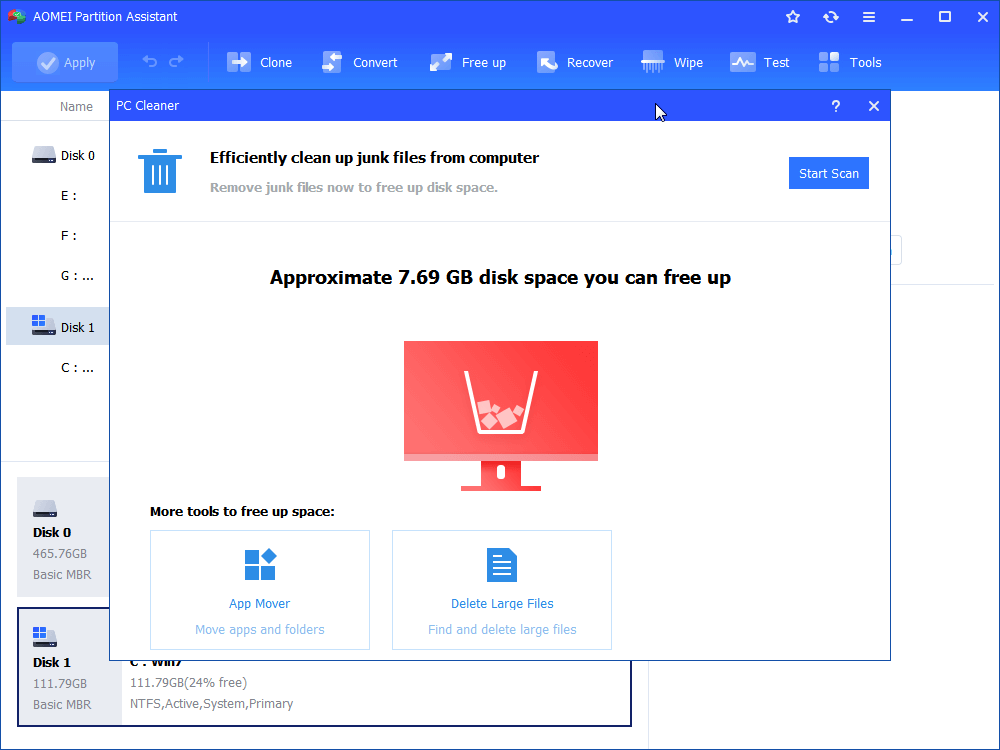
Step 2. In the pop-up window, click "Start Scan" to scan for junk files.
Step 3. Wait until the scanning process completes.
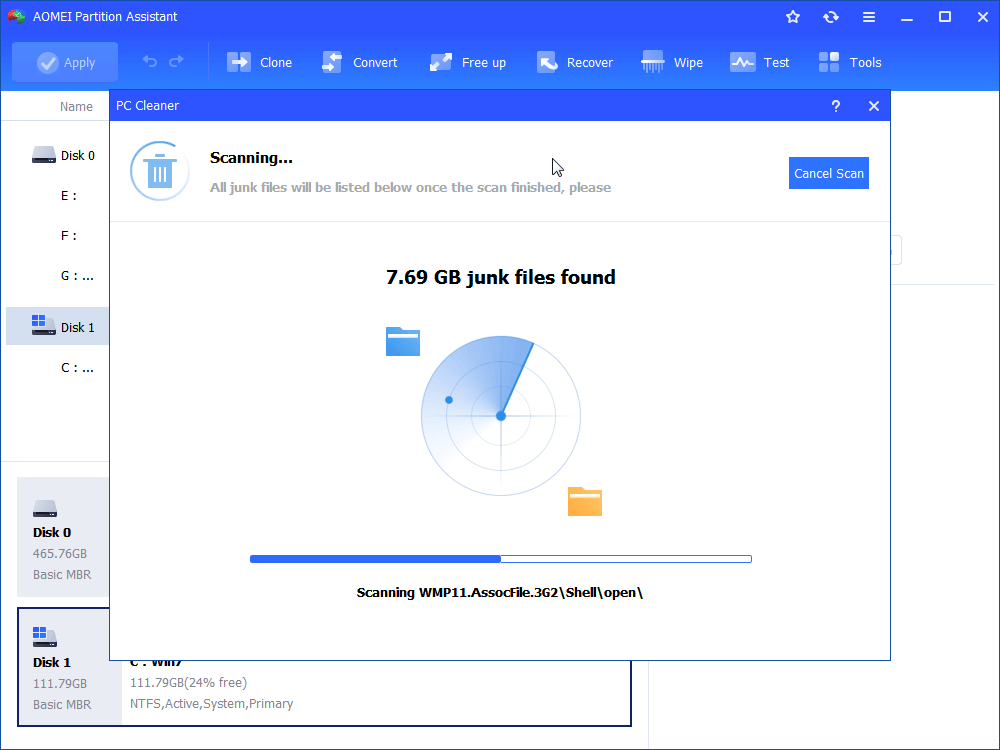
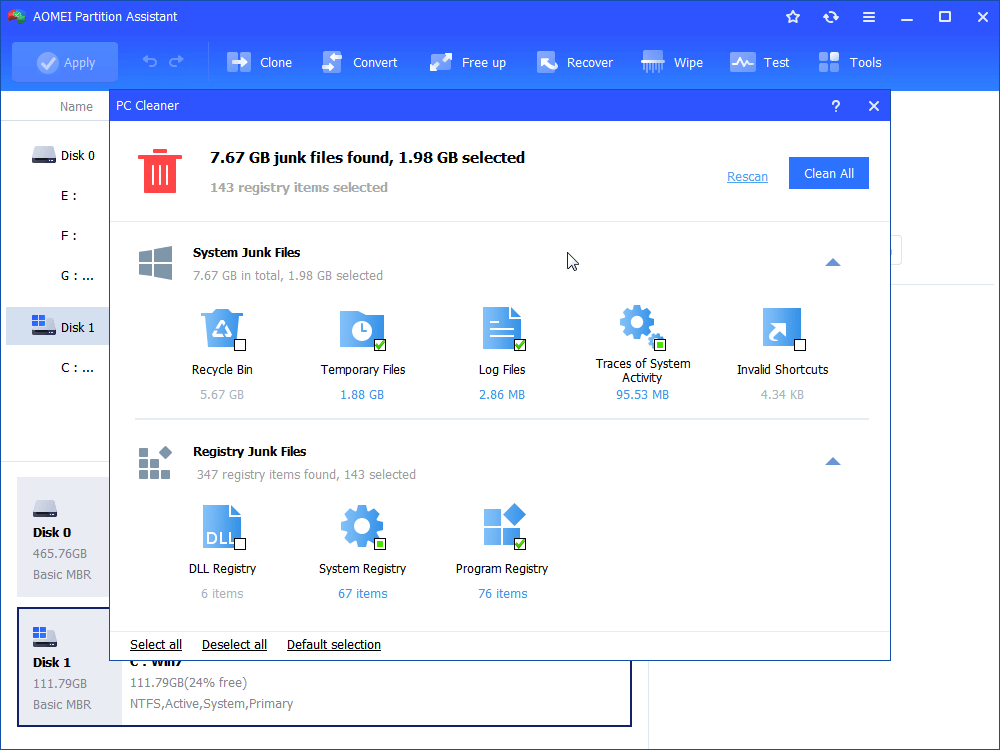
Step 4. After the scan is completed, all kinds of available junk files will be listed. Then, tick the options you want to clean, then click "Clean All" to begin the cleaning process.
Step 5. When you see a correct symbol displayed in the interface, you can click "Back" to exit the Window.
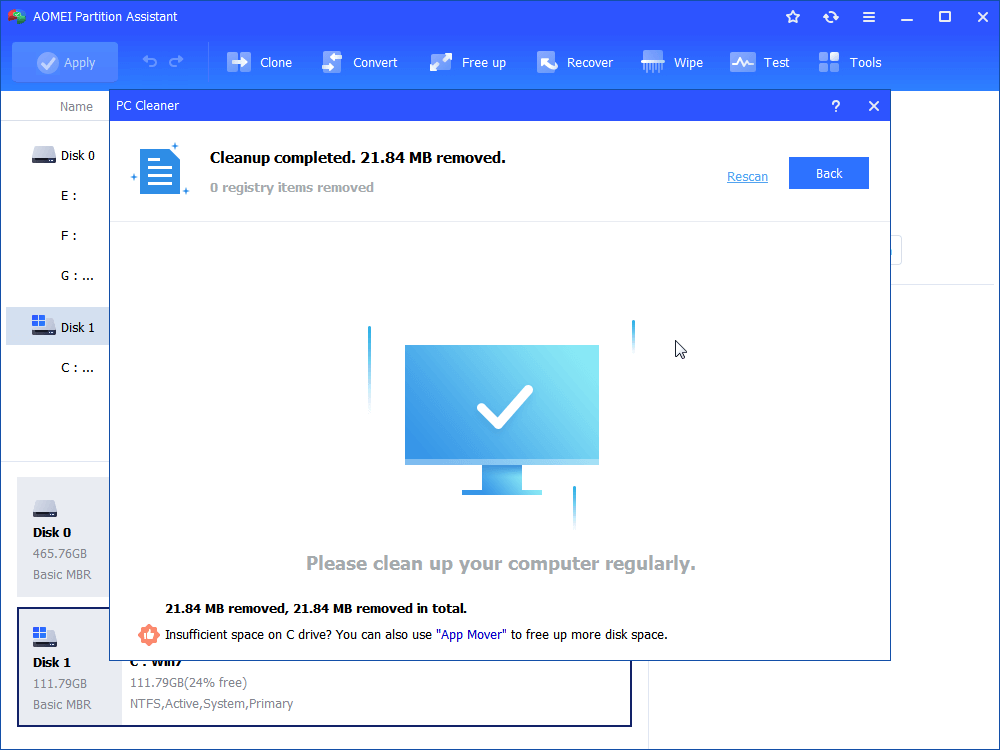
Now, all junk files are removed by this handy tool.
Option 2. Delete large files
Large, unnecessary files can quickly fill up your storage. AOMEI Partition Assistant will also automatically detect and delete large files on your computer.
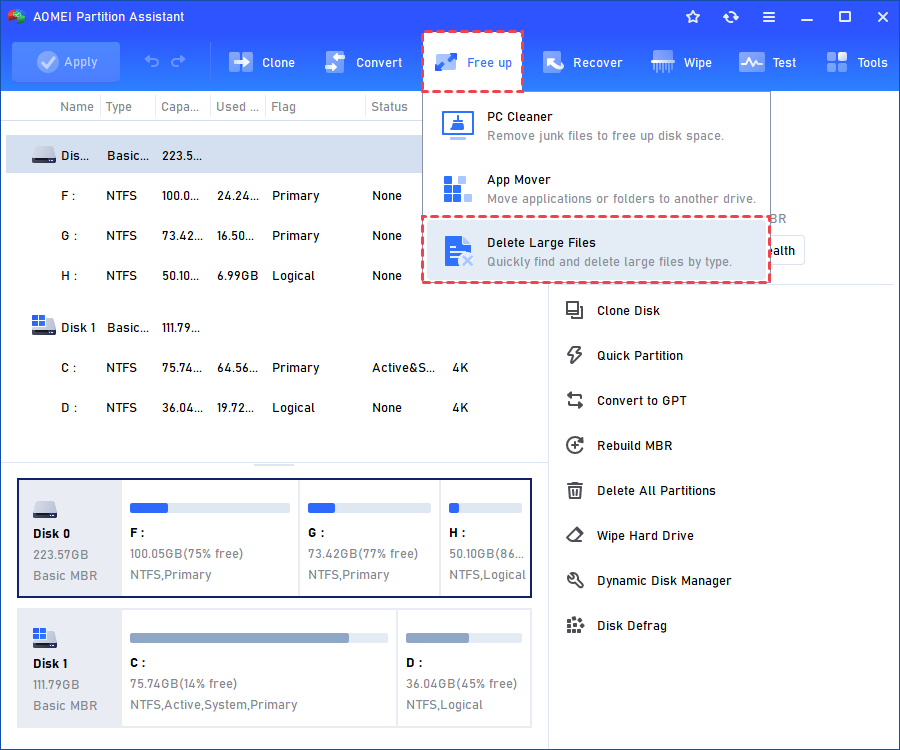
Step 1. Click "Free up" and "Delete Large Files".
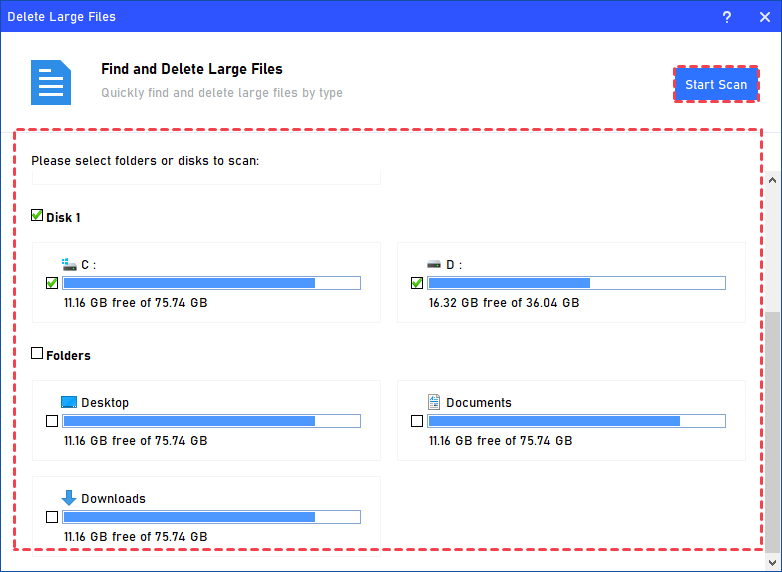
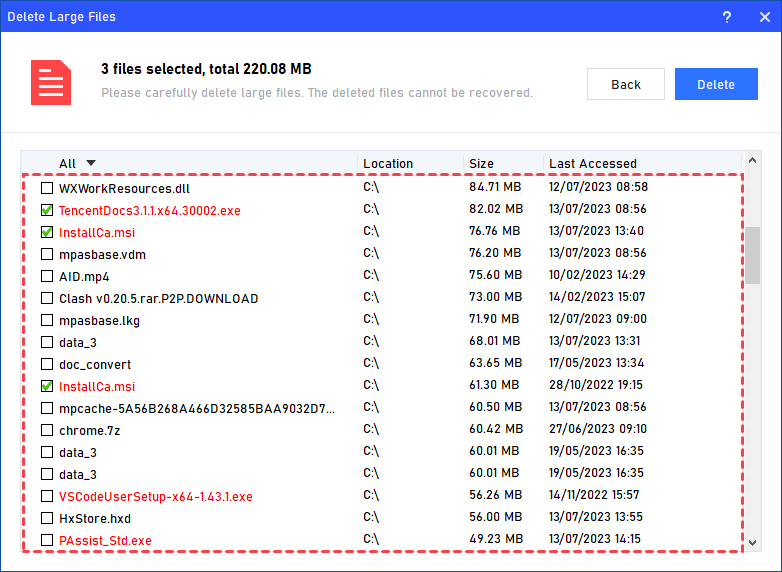
Step 2. In the pop-up window, select the partitions that you want to find and delete large files, and click "Start Scan" to scan for files larger than 16MB.
Step 3. When the scan is complete, all large files found are listed. Tick the files you want to delete, and then click the "Delete" button.
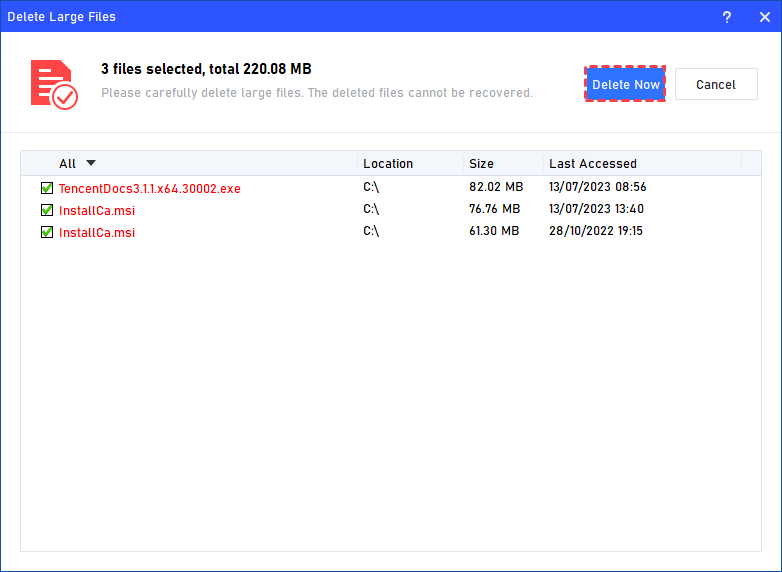
Step 4. The next window will ask you to confirm the files you have just ticked for deletion. If it’s correct, click “Delete Now” to begin the deletion process.
Step 5. Just for a while, the large files will be deleted successfully, and then you will see a warm notification suggesting you clean up your PC regularly.
Option 3. Move installed programs to another drive
Uninstalling apps isn't always the best option for creating more space—if you need them later, you'll have to reinstall and set them up again. AOMEI Partition Assistant offers an App Mover feature that lets you move apps to another drive instead. Just make sure the target drive has enough space before you start.
The Best Windows Disk Partition Manager and PC Optimizer
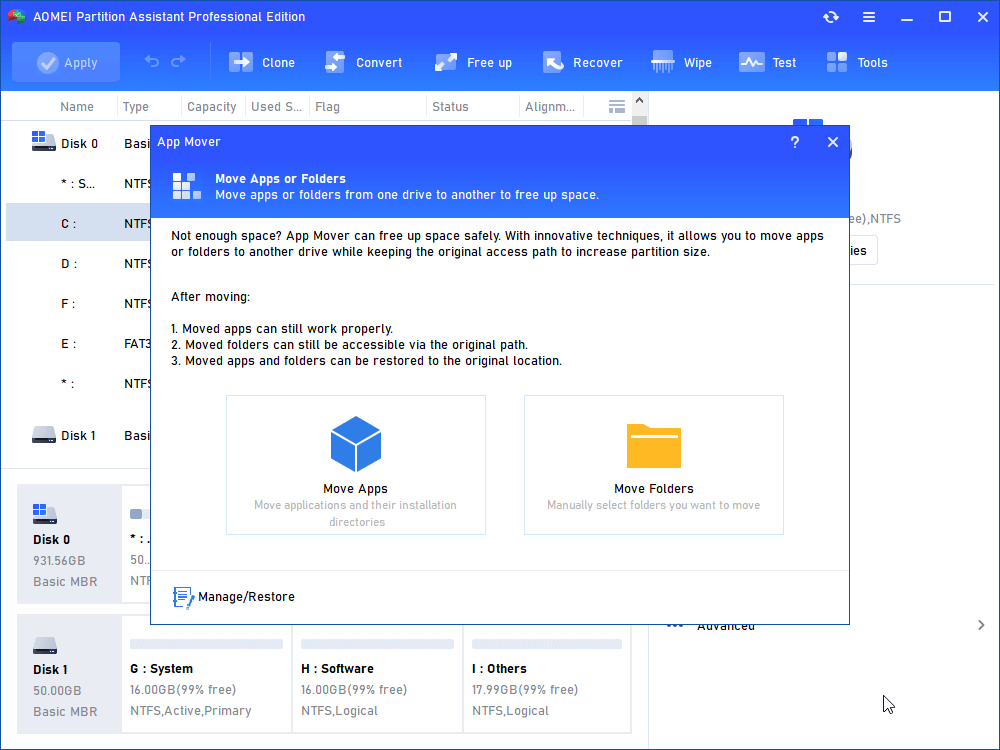
Step 1. Open the tool to clean up for Windows 10, and then click "Free up" > "App Mover" at the top interface.

Step 2. There are two options. Here we choose the "App Mover" option. By the way, the "Move Folders" allows you to move folders to a different drive.
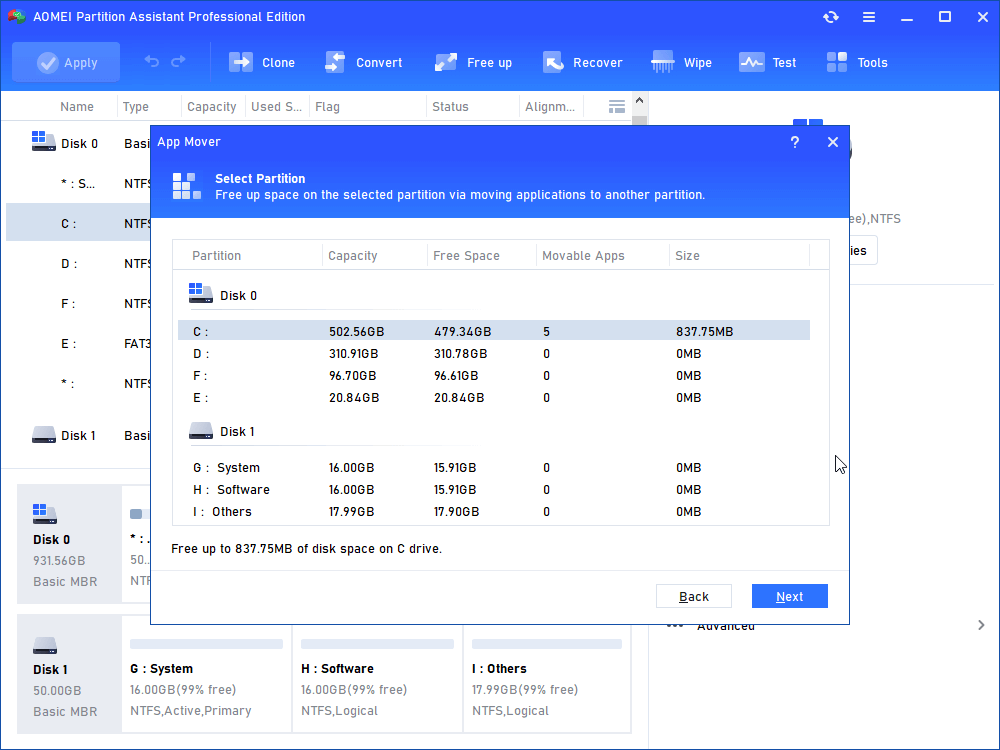
Step 3. All your partitions will be listed in the window. Choose one partition that you want to move applications from and click "Next".
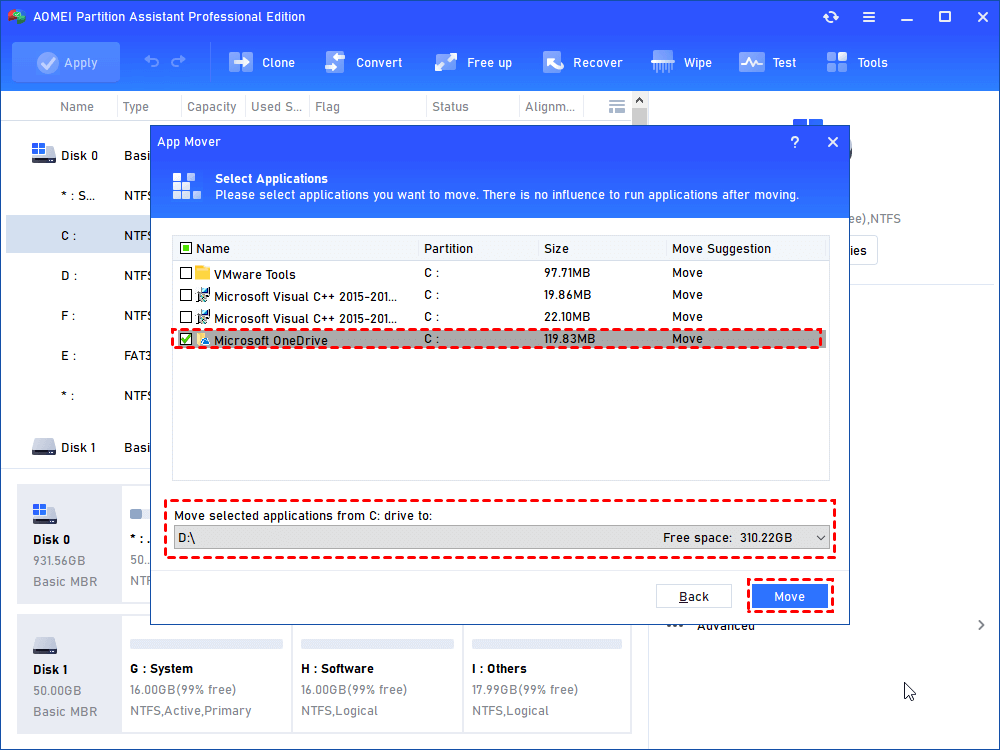
Step 4. Choose all applications you want to move and select a destination path, then click "Move".
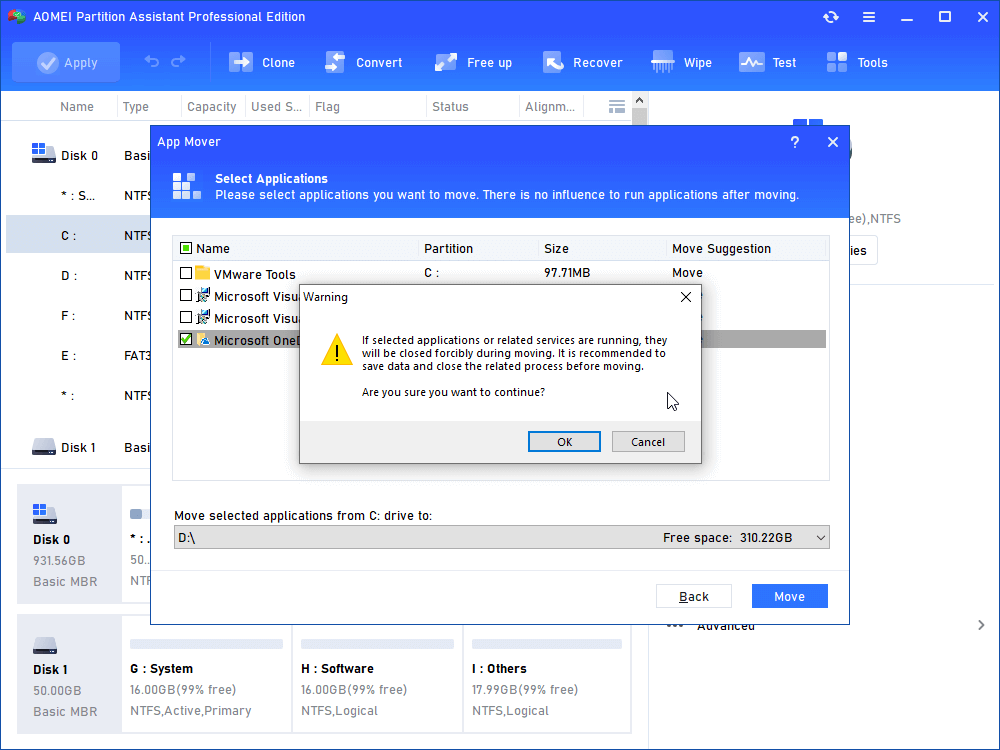
Step 5. Click "OK" on the pop-out window to begin the process.
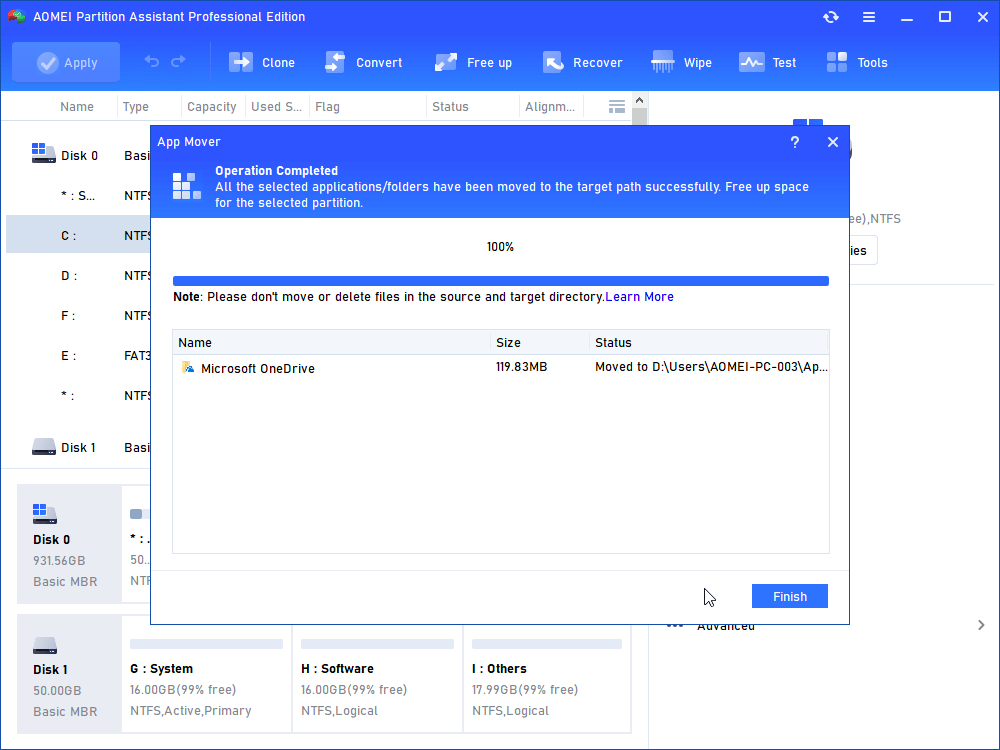
Step 6. Click on "Finish" to exit.
Option 4. Merge partitions
AOMEI Partition Assistant allows you to merge partitions in Windows safely without losing your data. You can easily combine two partitions or merge with unallocated space, even if it’s not next to the target partition. You can follow the steps below to merge partitions on Windows 11, 10, 8/8.1, or 7 without any risk of data loss.
The Best Windows Disk Partition Manager and PC Optimizer
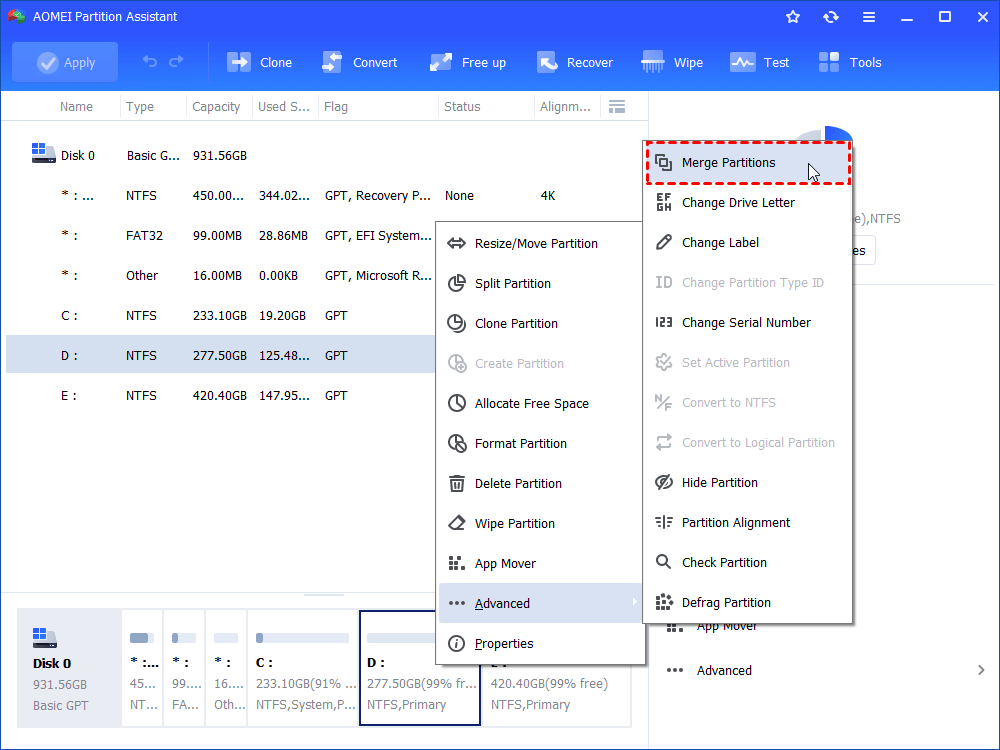
Step 1. Open AOMEI Partition Assistant, right-click the partition you want to merge and select "Advanced" > "Merge Partitions".
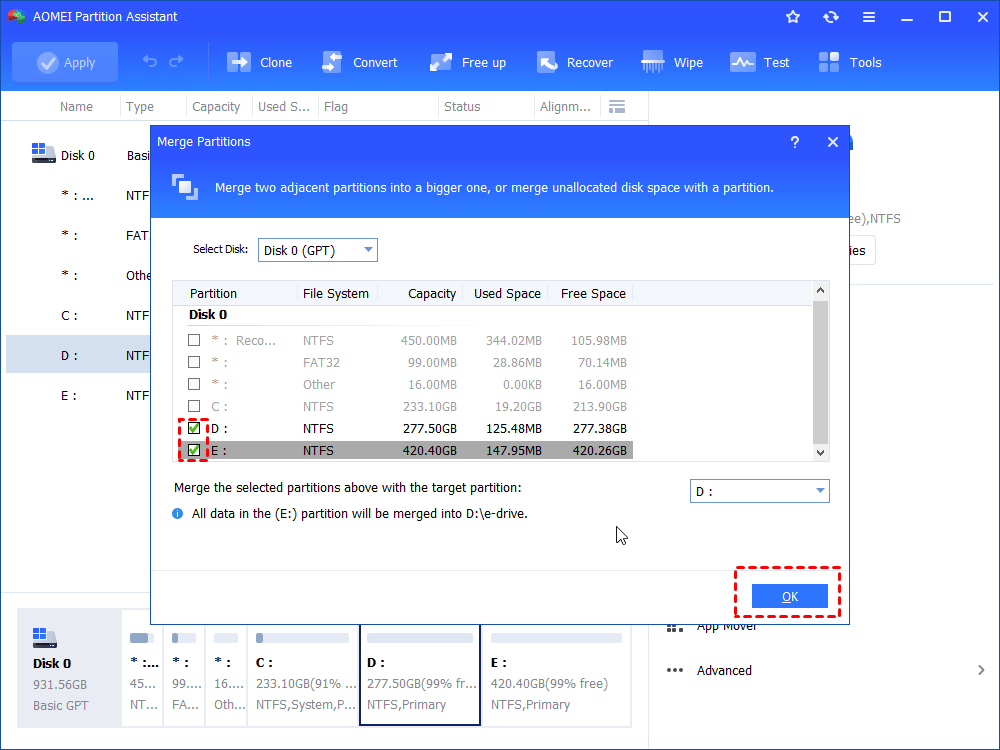
Step 2. Then select the adjacent partition or unallocated space, and click “OK”.
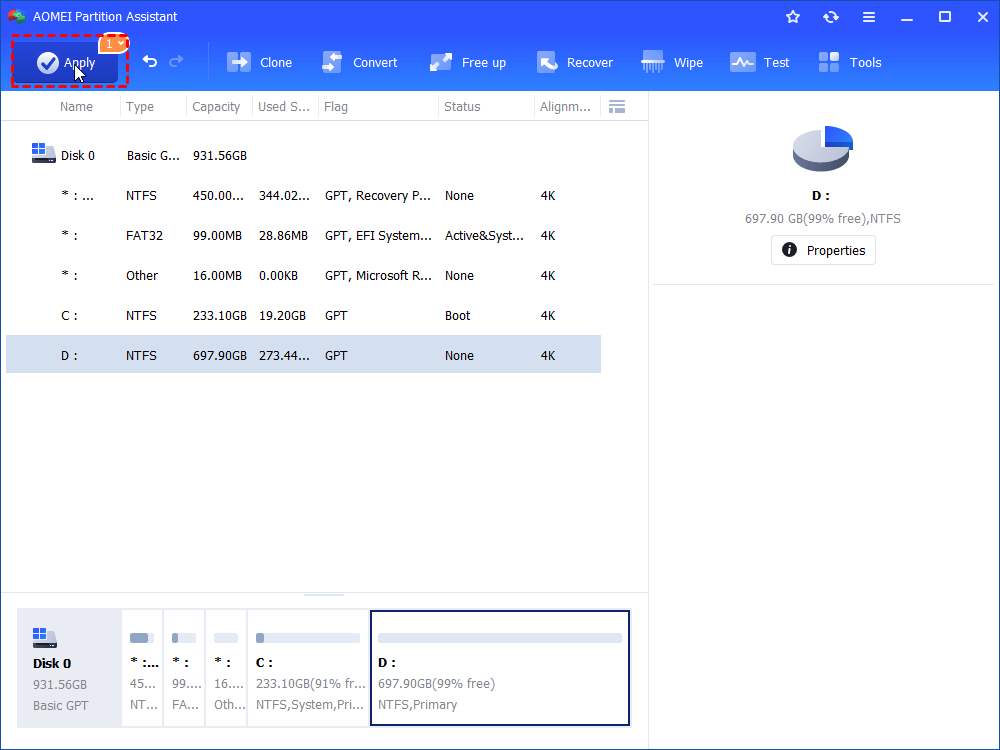
Step 3. Back to the main interface, and click “Apply” to merge partitions.
Conclusion
Automatically deleting duplicate files in Windows 10 helps free up space and improve your PC’s performance. Instead of spending time on slow and manual methods, using a reliable tool like AOMEI Partition Assistant makes the process faster, safer, and more accurate. With just a few clicks, you can scan, preview, and remove duplicate files easily—keeping your system clean and running smoothly. This powerful software also provides many options to free up space.

