

How to Remove Duplicate Images from Folder on Windows 11, 10, 8, 7
In this page, you are going to learn how to remove duplicate images from folder with Duplicate Files Finder on Windows 11, 10, 8, and 7.
By AOMEI / Updated on July 11, 2025
Help! I need to remove duplicate images from folder
Recently, I found a folder in my D drive with a lot of duplicate images and I don't know how they were generated. It would waste a lot of time to delete them manually. How do I find duplicate photos in a folder and optimize storage?
To locate duplicates and remove them easily, you can try Duplicate Files Finder. Please learn more useful information from the following content.
Why there are duplicate images in a folder?
Understanding the reasons why duplicate images are appeared in folders is crucial to how you manage and remove them.
First, human error is a common cause, especially when working with files manually. Individuals may accidentally create duplicate images when copying or moving images.
Additionally, incorrect setup or management of an automated backup system may also result in duplicate images in a folder. Backups may create entire copies of a folder, leaving images scattered and making it difficult to find specific images.
Importing images from multiple sources can also lead to duplicates, such as collecting from different devices or downloading images from different websites, where different file names and formats can exacerbate the problem.
Furthermore, duplication can occur when multiple versions of an image are saved with minor modifications or adjustments during the editing or post-processing stage. Improper configuration of file synchronization tools can also generate duplicate files.
The importance to remove duplicate images from folder
When there is not enough space on the C drive or other drives, remove duplicates can free up valuable storage space on your device or server. In addition, here are the other points highlighting the reasons to remove duplicate images from a folder:
✦ Efficient Organization: Eliminating duplicates leads to a more organized and streamlined image library.
✦ Enhanced System Performance: Large numbers of duplicate files can slow down file operations, impacting system performance.
✦ Faster File Management: A clean, duplicate-free folder allows for quicker and smoother file management processes.
✦ Productivity: A clutter-free folder enhances productivity by reducing the time and effort needed to locate images.
In summary, removing duplicate images from a folder is essential to optimize storage, boost efficiency, and maintain a well-organized and visually appealing image collection.
Step-by-step: Remove duplicate images from folder
Is there a way to delete duplicate files in a folder? Yes it is. You can try PartitionAssistant Cleanup, which can deep scan duplicate images and delete them with “Duplicate Files Finder” feature.
It is powerful in that it can scan the target partition or folder for duplicate images and then delete them according to your preference, or you can automatically delete those unnecessary images by using "Smart Select". In addition, it also supports scanning different types of duplicate files such as Video, Audio, Document, Archive File and so on. If you have deleted image by accidentally, recover the lost picture immediately.
Now, please download it to see how to remove duplicate images from folder step by step.
Free Up Disk Space To Keep Your PC Running Smoothly and Efficiently
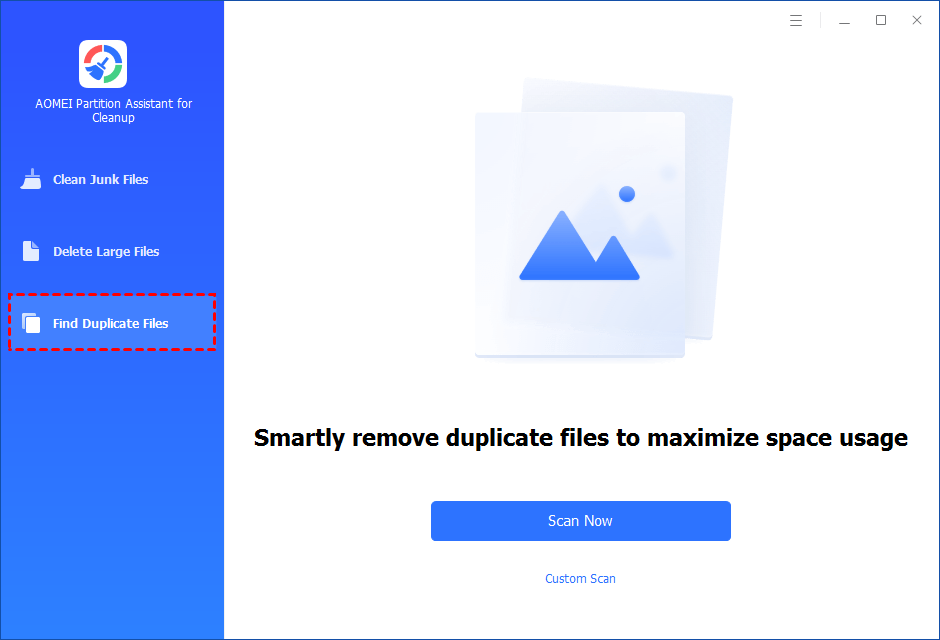
Step 1. Install and launch PartitionAssistant Cleanup. Click the "Find Duplicate Files" tab.
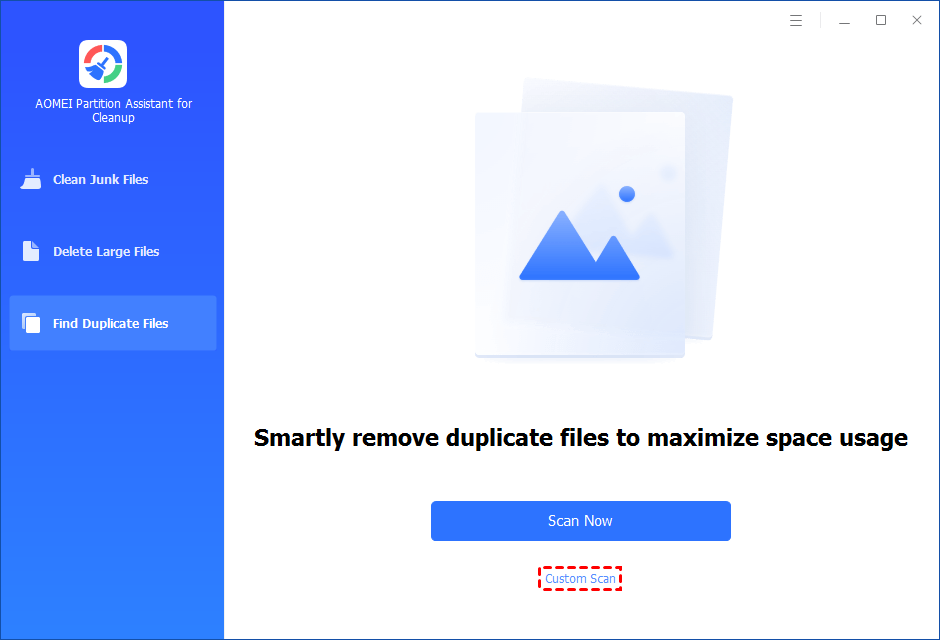
Step 2. You can either click "Scan Now" to start the scan of your system C: drive. Or, click "Custom Scan" to manually select paths to be scanned. (Here, we take the "Custom Scan" as an example.)
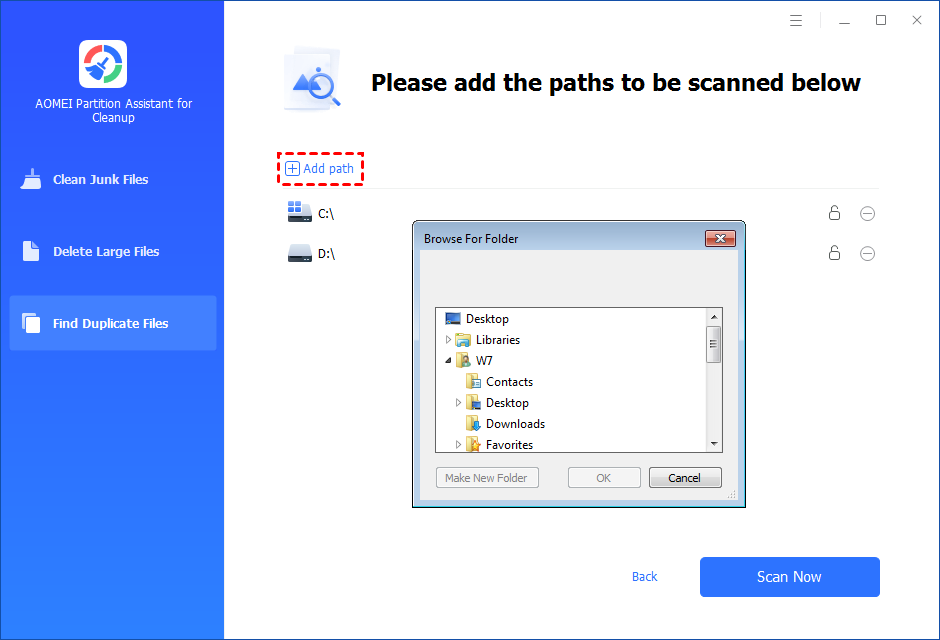
Step 3. After clicking "Custom Scan", all local and external drives on your PC will be displayed. You can also click the "Add Path" button, and then a browse folder window will pop up. So you can add more paths on this PC, like Desktop, Downloads, and other folder paths.
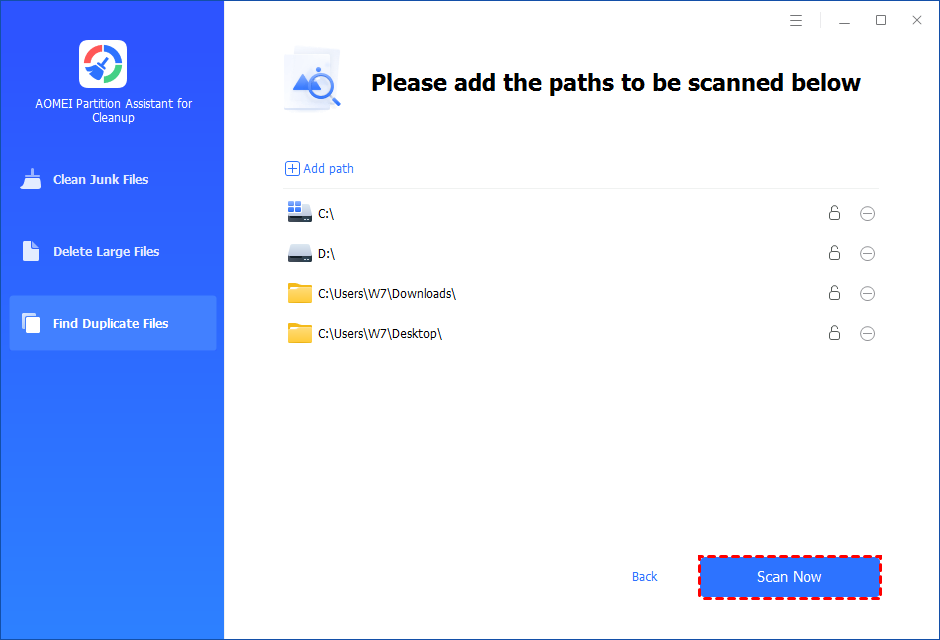
Step 4. Once necessary paths are added, you can click the "Scan Now" button to start the scan process.
The scan process might take time. After the scan is complete, all duplicate files will be listed. You can click the button behind to locate them.
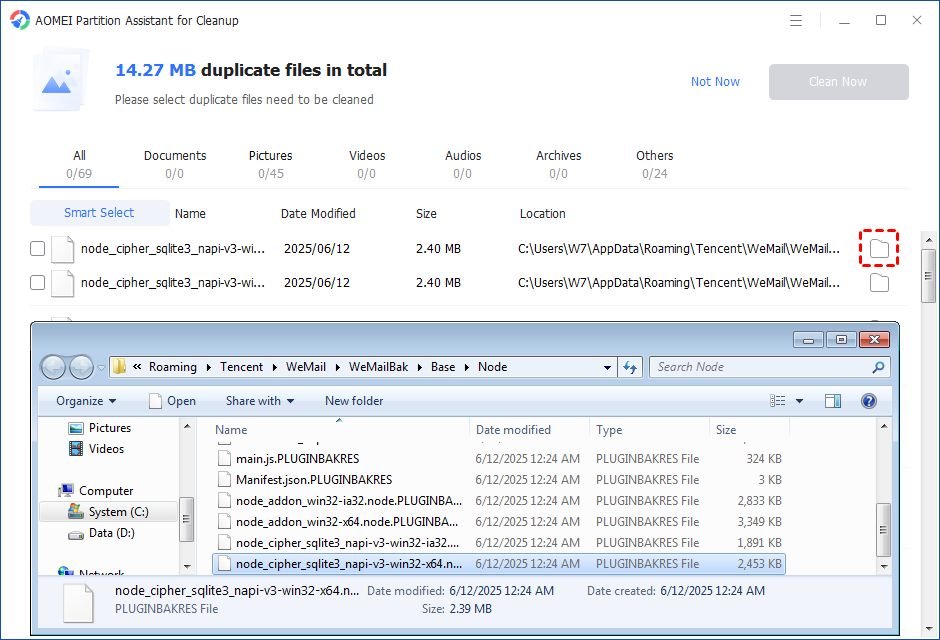
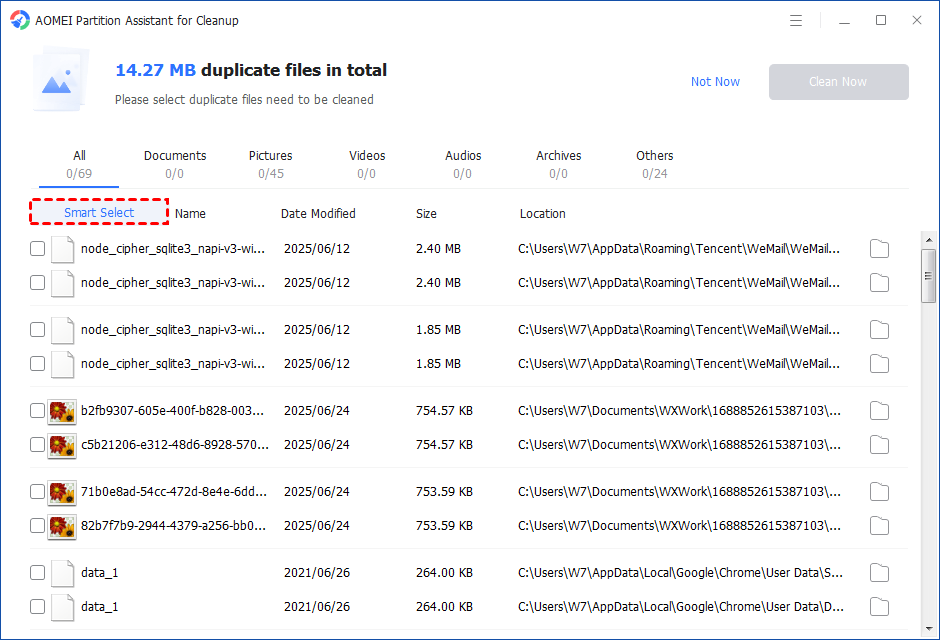
You can either manually select duplicate files, or click the "Smart Select" button to automatically select unnecessary duplicate files to delete.
Tips: If the "Smart Select" is ticked, only the oldest duplicate file will be unticked. It means that all duplicate files except the oldest one will be ticked to delete. (The oldest file means the file that was created first. This file will not be deleted. All other duplicate files are considered copies of the oldest file. )
If you manually select all copies of duplicate files, you will get a pop-up warning window to keep at least one copy of the duplicate files. If you indeed want to delete all copies of duplicate files, you can click "OK" so all copies of duplicate files will be selected to delete.

After unnecessary duplicate files are selected, please click the "Clean Now" button to start the deletion.

Step 5. The deletion might take time. After the process is finished, the selected files will be deleted, and you will get a cleaning completed window displaying how much data you deleted in total.

Conclusion
Efficiently managing your image library is essential for productivity and organization. By employing the methods outlined in this article, you can effectively remove duplicate images and streamline your visual resources.

