

How to Manage: Windows 11/10 File Explorer Too Many Folders
Is a cluttered File Explorer slowing down your PC? Discover why Windows 11 has too many folders and how to fix it. We provide expert tips to manage, organize, and consolidate your files and folders, boosting both your productivity and your computer's performance.
By Lucas / Updated on June 17, 2025
Are you constantly scrolling through an endless list of folders in your Windows 11 File Explorer? It’s a common frustration that can turn finding a single file into a monumental task. This digital clutter not only hinders your productivity but also raises an important question: can too many files slow down your computer? While the number of files isn't the direct culprit, a disorganized system with files scattered across your primary drive can contribute to slower performance.
If you have too many folders and need to consolidate them, you've come to the right place. This guide will walk you through why your File Explorer is so cluttered and provide effective methods to reclaim a clean, efficient digital environment.
Why Does Windows 11 File Explorer Show Too Many Folders?
Understanding the root cause of the clutter is the first step toward a solution. This section explains the common reasons why your File Explorer might seem overpopulated with folders.
Several factors contribute to the "too many folders" phenomenon in Windows 11. The operating system itself creates a number of default folders for user profiles (Documents, Pictures, Downloads, etc.) and system functions. Additionally, the “This PC” view in File Explorer now includes folders for cloud storage services like OneDrive by default, adding to the list.
Over time, software installations sprinkle their directories across your drives, and without a disciplined filing system, your file-saving habits can quickly lead to a sprawling, disorganized mess. This combination of system-generated, application-created, and user-created folders is the primary reason you see Windows 11 File Explorer with too many folders.
How to Manage Folders in Windows 11 File Explorer
Regaining control of your digital space is achievable with a few strategic adjustments. This section provides detailed, step-by-step methods to help you organize and declutter your File Explorer.
Way 1. Customize the Navigation Pane
One of the quickest ways to reduce visual clutter is to customize the Navigation Pane on the left side of File Explorer. This method allows you to hide shortcuts and folders you don't use regularly.
Step 1. Open File Explorer by pressing Win + E on your keyboard.
Step 2. Right-click on any space in the Navigation Pane (the left-hand column).
Step 3. From the context menu, select "Show all folders" to uncheck it. This will condense the view to a more manageable list.
Step 4. For further customization, click the three-dot menu (...) in the command bar at the top, and select "Options".
Step 5. In the "Folder Options" window, go to the "View" tab.
Step 6. Under the "Navigation pane," you can uncheck options like "Show libraries" or "Show This PC" if you prefer a cleaner look.

Step 7. Click "Apply" and then "OK" to save your changes.
Way 2. Customize Quick Access
The Quick Access view is designed to show your frequently used folders and recent files, but it can become cluttered itself. Tailoring it to your workflow is an effective way to manage what you see first.
Step 1. Open File Explorer. Your Quick Access folders are at the top of the Navigation Pane.
Step 2. To remove a folder from Quick Access, simply right-click it and select "Unpin from Quick Access".
Step 3. To add a folder you use often, navigate to that folder, right-click it, and select "Pin to Quick Access".
Step 4. To prevent new folders from being automatically added, click the three-dot menu (...) > "Options".
Step 5. Under the "General" tab, in the "Privacy" section, you can uncheck "Show frequently used folders in Quick Access". This gives you full manual control over what appears there.
Way 3. Optimize Folder View
Optimizing how folders display their contents can make navigation much more efficient. Windows 11 allows you to apply specific view templates (e.g., General items, Documents, Pictures) to folders.
Step 1. Right-click on a folder you want to customize and select "Properties".
Step 2. Go to the "Customize" tab.
Step 3. In the "Optimize this folder for:" dropdown menu, select the type of files the folder contains (e.g., "Pictures," "Music," "Videos"). This changes the available columns and details in the folder view to be more relevant.
Step 4. If you want all subfolders within the current folder to inherit this view, check the box that says "Also apply this template to all subfolders".
Step 5. Click "Apply" and "OK".
Way 4. Move Some System Folders to Another Location
For those who find that their C: drive is overwhelmed with default user folders like Documents, Downloads, or Pictures, moving them to another drive is an advanced and highly effective solution. This not only cleans up your primary drive but can also improve performance by freeing up space. While Windows offers a manual way to do this, it can be risky and complex. A safer and more reliable method is to use a dedicated third-party tool.
AOMEI Partition Assistant Professional stands out as a comprehensive and user-friendly Windows computer management software. It offers a suite of powerful tools designed to manage disks and partitions efficiently. One of its most valuable features for this situation is the "Move Folder" utility within its "App Mover" function, designed specifically to move large folders, including user profile folders, from one drive to another without data loss.
Step 1. Install and run AOMEI Partition Assistant, click "Free up" on the top-right corner and then choose "App Mover".

Step 2. In the new window, click "Move Folders". (If you want to move apps or programs, just click "App Mover" on the left.)
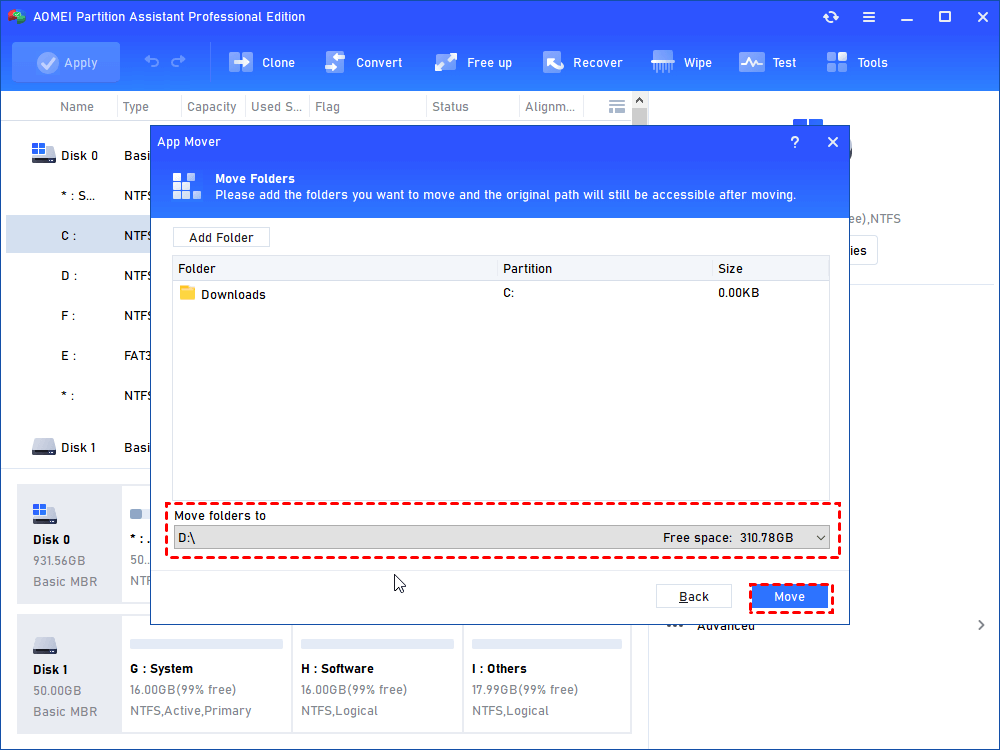
Step 3. Select the folders you want to move. Choose the new drive under the window, and click "Move".
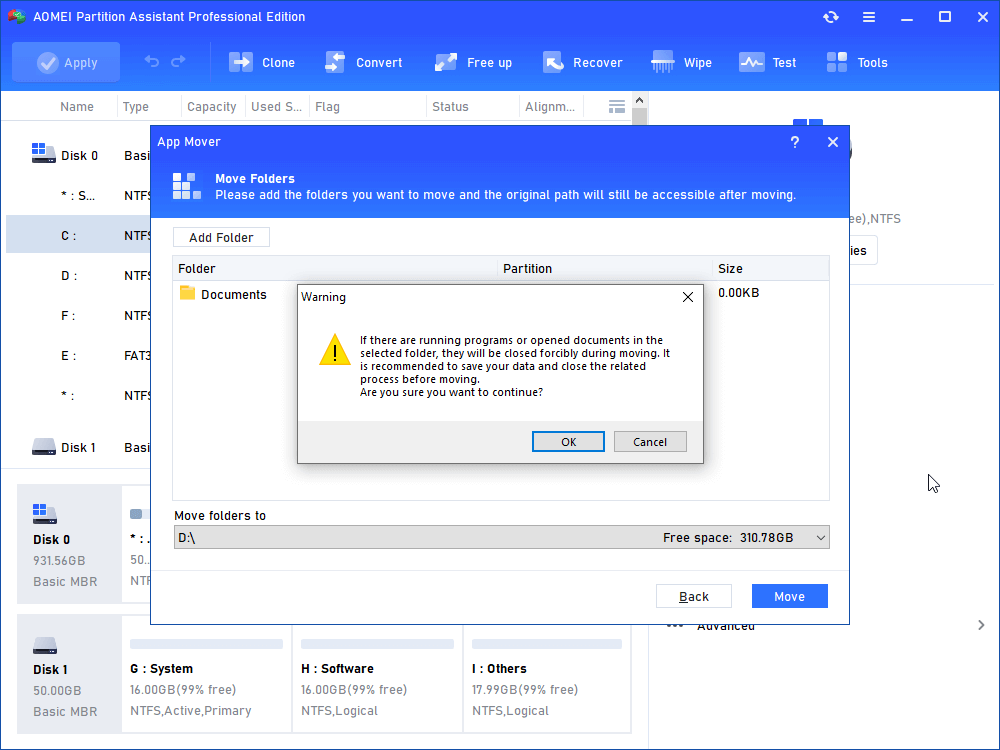
Step 4. You will see a pop-up message to confirm forcibly closing running applications when moving starts. Click "OK" to begin the process.
Step 5. Wait for a while, and click "Finish" to complement the movement.
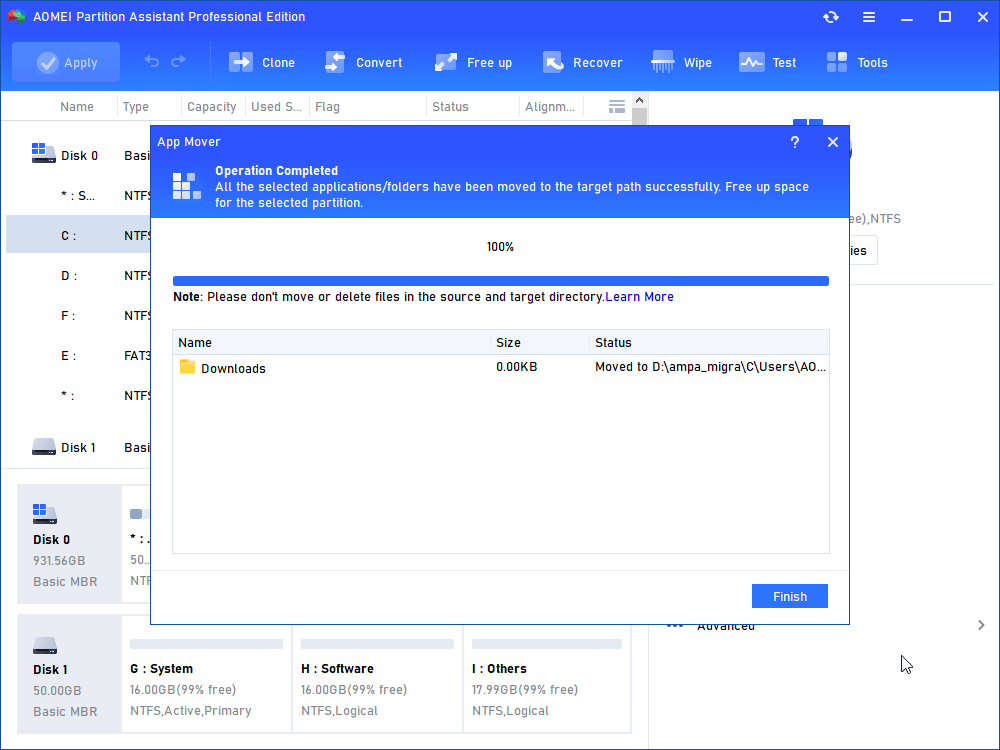
The software will securely move the folder to the new location. Once completed, click "Finish". The system will now recognize the new location as the default for that folder.
Further Tips: Move Installed Programs to Another Drive Without Reinstallation
After you've addressed the issue of Windows 11 File Explorer having too many folders, you might still find your C: drive is running low on space, which can negatively impact performance. This is often because of installed applications. If you have too many folders and programs and need to consolidate them, moving large applications to another drive is a great next step.
The "App Mover" feature in AOMEI Partition Assistant Professional is the perfect tool for this task. It allows you to transfer installed programs from one drive to another (e.g., from C: to D:) without the need for a complicated and time-consuming reinstallation process. The software handles all the path and registry changes, ensuring the moved application runs just as it did before. This is an excellent way to free up gigabytes of space on your system drive, leading to a faster and more responsive computer.
Ending
Navigating a cluttered File Explorer can be a significant drag on your daily computer use. By taking proactive steps to customize the Navigation Pane and Quick Access, optimizing folder views, and strategically moving large system folders and applications, you can transform your experience. While Windows provides basic tools, leveraging a professional solution like AOMEI Partition Assistant Professional ensures that even complex tasks like moving folders and applications are handled safely and efficiently.
A well-organized digital environment not only saves you time but also contributes to a smoother, faster-running PC. Stop letting folder chaos control your workflow and start building a more organized system today.

