How to Use NTFS Drives on macOS Sonoma?
Users can get the best methods for managing macOS Sonoma NTFS write permissions. This overview explores helpful software options and troubleshooting tips for external drives that are not working on the latest system.
By Irene / Updated on January 12, 2026
Can macOS Sonoma read an NTFS drive?
macOS Sonoma primarily uses the Apple File System, commonly known as APFS, as its default format. This modern system is specifically designed for the flash and SSD storage found in newer Mac computers because it offers strong encryption and efficient space sharing between volumes. While macOS Sonoma can easily interact with other formats like FAT and ExFAT for Windows compatibility, its relationship with the Microsoft-developed NTFS format is more restricted.
If you connect an NTFS-formatted drive to a Mac running macOS Sonoma, the system provides read-only access. This means you can open and view your files or copy them onto your Mac, but you cannot make any changes to the drive itself. You are unable to save new files, edit existing documents, or delete data on an NTFS drive because Apple does not natively support writing to this proprietary Microsoft format. To gain full write access without reformatting the drive, users typically need to rely on third-party software or specific technical workarounds to bridge the gap between the two operating systems.
How to use NTFS drive on macOS Sonoma?
Case 1. Fix NTFS drives read-only on Sonoma
To use an NTFS drive on macOS Sonoma, you first need to check why it is read-only. Right-click the drive, choose Get Info, and if it says you can only read the files with no way to change it, the drive is likely formatted for Windows using NTFS. macOS cannot write to NTFS drives on its own, so system settings won’t solve the problem.
To get full access without formatting and losing data, a professional tool like PartitionAssistant NTFS for Mac is the best solution. This software lets macOS read and write to Windows drives, so you can move, edit, and delete files just like on a regular Mac drive.
⭐Note: Don't forget to configure the Security Policy in iOS Recovery Mode to allow this tool can run smoothly.
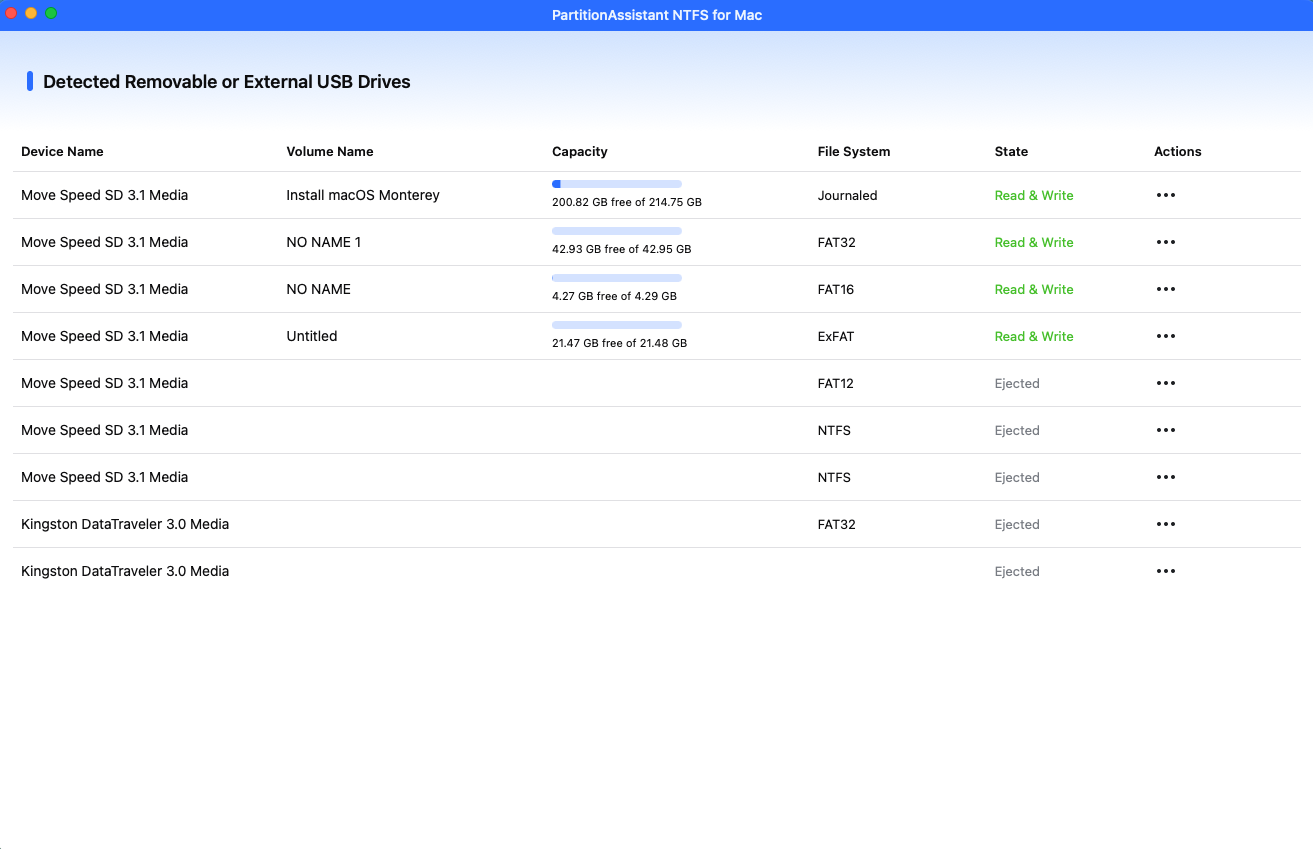
Step 1. Open PartitionAssistant NTFS for Mac and connect your NTFS external hard drive to macOS Sonoma. Then the connected, removable, and external hard drives will be automatically mounted and listed.
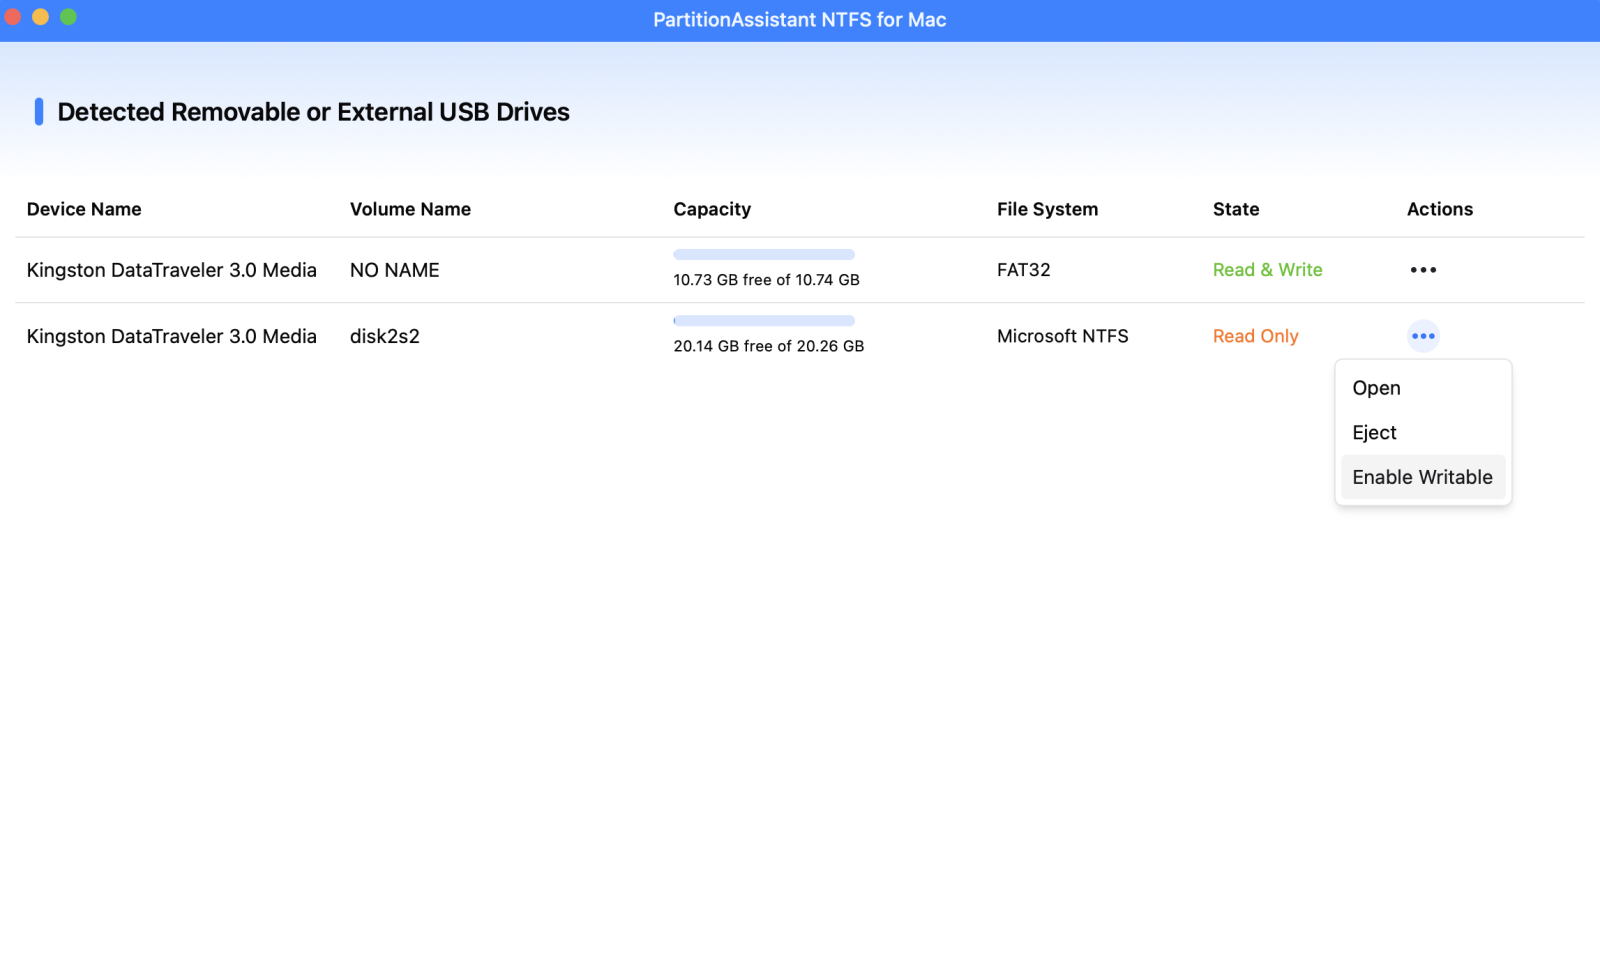
Step 2. Now, click the three dots, and your NTFS drive will show "Enable Writable", click it to change the state, and your NTFS drive can be read-write on your Mac.
Step 3. Now you can normally write data to the NTFS drive on your Sonoma like copy, delete, move, and rename files.
If your drive is already compatible with Mac but is simply locked by user settings, you can fix the read-only status manually by changing hard drive permissions. After opening the "Get Info" window, scroll to the "Sharing & Permissions" section at the bottom. You may need to click the lock icon and enter your administrator password to make changes.
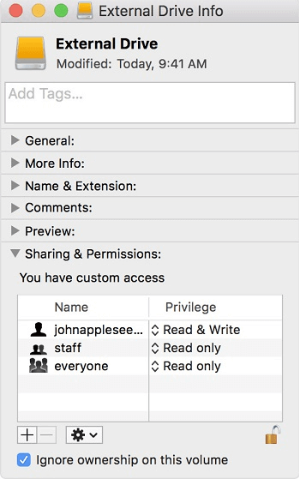
Once unlocked, look for the option to "Ignore ownership on this volume" and check the box. This simple adjustment tells the computer to treat you as the owner of all files on that specific drive, instantly granting you the permission to read and write data without needing extra software.
Case 2. Fix NTFS drives not showing on Sonoma
If your NTFS drive isn’t showing on macOS Sonoma, it might be detected but not mounted. Checking Disk Utility can help identify this issue.
Step 1. Press Command + Space, type Disk Utility, and press Enter to open it.
Step 2. Look at the sidebar on the left for your external NTFS drive.
Step 3. If the drive name is grayed out, click the Mount button at the top of the window.

Step 4. If the drive mounts succe ssfully, it should now appear on your desktop and in Finder. Step 5. If mounting fails or an error appears, consider using a dedicated NTFS driver for Mac.
Using a third-party NTFS mounter often resolves native macOS NTFS issues and restores full read/write access.
Case 3. Fix NTFS drives not working on Sonoma
If your NTFS drive isn’t working properly, the file system may be corrupted. macOS’s First Aid can help fix it.
Step 1. Open Disk Utility by pressing Command + Space, typing Disk Utility, and pressing Enter.
Step 2. Select your NTFS drive from the sidebar on the left.
Step 3. Click the First Aid button at the top of the window.
Step 4. Confirm to run First Aid and let macOS scan the drive for errors.
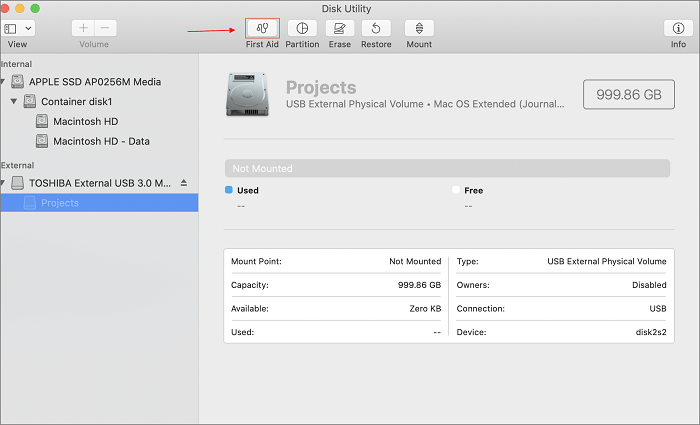
Step 5. Wait for the process to complete; First Aid will attempt to repair the directory and file system.
Step 6. Once finished, check if the drive now appears in Finder and works correctly.
Running First Aid can often restore a corrupted NTFS drive so Sonoma can read it again.
Conclusion
Can NTFS drives on macOS Sonoma work? Yes, they can, but Macs can only read NTFS drives by default and cannot write to them. While macOS Sonoma offers robust performance with its native APFS format, the limitations of NTFS mean Mac users are restricted to a read-only environment unless additional tools are used. Whether your drive is limited by system permissions, hidden due to mounting errors, or needs repair through First Aid, understanding these hurdles is the first step toward a smooth workflow. By using professional NTFS drivers like PartitionAssistant NTFS for Mac or native disk management tools, you can bridge the gap between Windows and Mac, keeping your data accessible and editable across both platforms without needing to reformat.
FAQs
🗨️ How to open NTFS drives on Mac?
By default, macOS can read NTFS drives but cannot write to them. To open and access NTFS drives, simply connect the drive to your Mac. If you need full read/write access, you’ll need a professional NTFS driver like Partition Assistant NTFS for Mac.
🗨️ Why can't I read NTFS on my Mac?
Most Macs can read NTFS drives, but sometimes the drive may not appear due to system permissions, mounting errors, or corruption. Use Disk Utility to check if the drive is detected or repair it with First Aid. If you still cannot access it, a dedicated NTFS driver may be needed.
🗨️ Do I really need NTFS for Mac?
You only need NTFS software if you want to write to or edit files on an NTFS drive. If you only need to read or copy files from Windows drives, macOS can handle that natively.
🗨️ Does macOS recognize exFAT?
Yes. macOS fully supports exFAT, which allows both read and write access on Mac and Windows without additional software. To format to exFAT on Mac, you can follow this guide.
🗨️ Is exFAT slower than NTFS?
In general, exFAT can be slightly slower than NTFS for very large files or heavy operations, but for most everyday use, the difference is negligible. exFAT is optimized for cross-platform compatibility rather than raw speed.
🗨️ Is APFS better than NTFS?
For Mac users, APFS is better because it is optimized for macOS, offering faster performance, better space management, and stronger encryption. NTFS is designed for Windows, so it only works on Mac with limitations or extra software.

