5 Ways to Fix Stuck at Scanning and Repairing Drive
Have you ever been stuck at scanning and repairing drive when you want to fix your PC problems? Don’t worry, this article will bring you five effective methods to resolve this issue quickly on Windows PCs.
By Hedy / Updated on February 13, 2025
Overview of stuck at scanning and repairing drive
The "Scanning and Repairing Drive" process is part of Windows' Automatic Repair system, also known as Startup Repair. When a boot issue occurs, Windows automatically launches Automatic Repair, displaying messages such as Preparing Automatic Repair, Diagnosing Your PC, and finally, Scanning and Repairing Drive C, D.... Users can also manually initiate Startup Repair through the Advanced Options menu in the Windows Recovery Environment (WinRE).
However, some Windows 10 users encounter an issue where this process becomes stuck, sometimes for several minutes or even hours. Multiple factors can contribute to this problem, including:
⌖ Improper shutdowns due to forced shutdowns or power failures.
⌖ Bad sectors on the hard drive.
⌖ Virus infections affecting system files.
⌖ Incorrectly configured drivers.
⌖ Other underlying system issues.
This raises the question: How long should scanning and repairing take, and how can it be fixed? This guide presents five effective solutions to resolve the issue of Windows 10 getting stuck at scanning and repairing drive.
How to fix stuck at scanning and repairing drive
This section outlines effective methods to resolve the issue of Scanning and Repairing Drive getting stuck at 10%. However, before proceeding with any fixes, it is crucial to back up all important files to prevent potential data loss during the repair process.
Way 1. Check and repair the disk in Safe Mode
A common cause of Windows 10 getting stuck at Scanning and Repairing Drive at 0% is the presence of bad sectors on the hard drive. To resolve this, checking and repairing the disk is recommended. Since Windows cannot boot normally under these circumstances, the following steps should be performed in Safe Mode:
Step 1. Press and hold the Power button to force the computer to turn off and on three times.If this does not work, use a bootable installation media to start your PC.
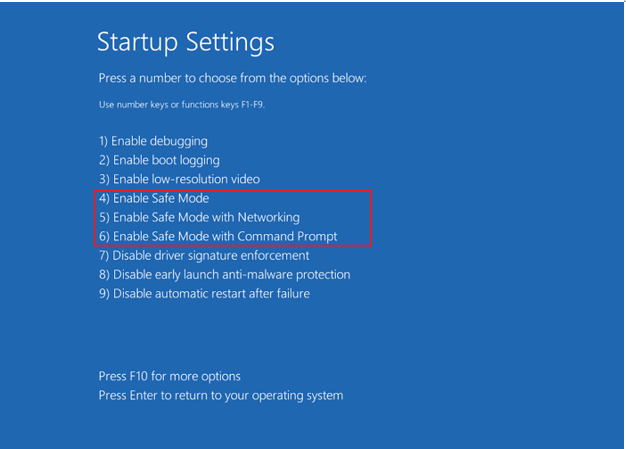
Step 2. In WinRE, navigate to Troubleshoot > Advanced Options > Startup Settings > Restart. On the next screen, press F4 to enter Safe Mode or F5 to enter Safe Mode with Networking.
Step 3. Open the Start Menu, type Command Prompt, right-click it, and select Run as administrator. In the command window, enter the following command:
chkdsk C: /f /r

Step 4. When prompted, type Y and press Enter to schedule the disk check for the next startup.
Step 5. Once the scanning and repairing process is complete, restart the computer and check if the issue has been resolved.
Way 2. Check File System
To resolve the Scanning and Repairing Drive Stuck issue in Windows 10, running the System File Checker (SFC) can help detect and repair corrupted system files. Follow these steps:
Step 1. Repeat the first two steps from the previous method to enter Safe Mode.
Step 2. Type cmd in the Windows Search bar. Right-click Command Prompt and select Run as administrator.
Step 3. In the command window, enter the following command and press Enter:
sfc /scannow

Step 4. Wait for the Process to Complete. The scanning process may take several minutes. Do not close the Command Prompt window until you see the message "Verification 100% complete".
Step 5. Once finished, restart the computer and check if the issue has been resolved.
Way 3. Run Automatic Repair
If the previous methods do not resolve the Scanning and Repairing Drive Stuck issue, running Automatic Repair may help. Follow these steps to perform the repair:
Step 1. Insert a Windows 10 installation disc or bootable USB into the computer and boot from it.
Step 2. Once the Windows setup screen appears, select your preferred language, time format, and keyboard input method, then click Next.
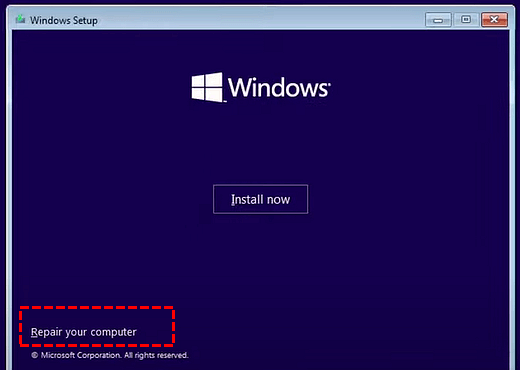
Step 3. On the next screen, click Repair your computer in the bottom-left corner.
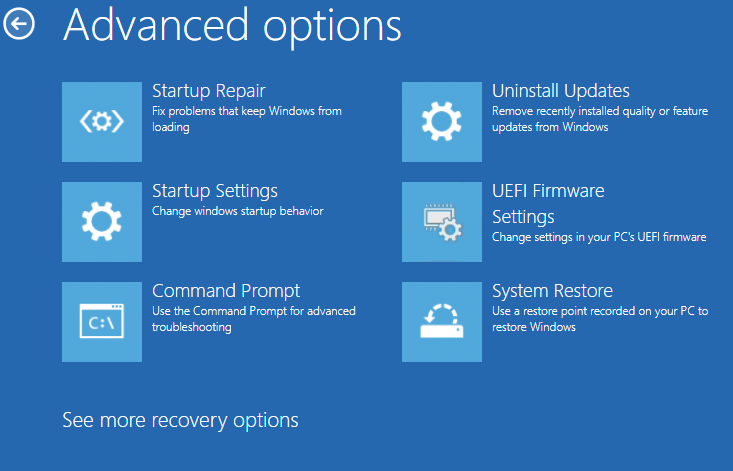
Step 4. Select Troubleshoot > Advanced Options.
Step 5. Click Startup Repair and follow the on-screen instructions.
Step 6. Once the Automatic Repair process is complete, restart your computer and check if the issue has been resolved.
Way 4. Run System Restore
If the Scanning and Repairing Drive is stuck at 0%, performing a System Restore can help revert the system to a previous state when the issue did not exist. This method is only applicable if a restore point was created beforehand. Follow these steps:
Step 1. Press and hold the Power button to force shut down the computer three times. Upon the third restart, Windows will enter the Recovery Environment automatically.
Step 2. Click Troubleshoot > Advanced Options > System Restore.
Step 3. In the System Restore window, click Next.
Step 4. Choose a restore point from the list and click Next. Review the details and click Finish to start the restoration.

Step 5. Once the process is complete, restart the computer and check if the issue is resolved.
Way 5. Turn to third-party boot repair software
When a computer gets stuck in the Scanning and Repairing Drive process, it often indicates that the system is unable to load essential OS files or disk information required for booting. In such cases, users can either wait for the process to complete or use reliable boot repair software for a faster solution.
A recommended approach is to use a second functional computer to create a bootable USB drive with the help of professional partition management software like AOMEI Partition Assistant. ItsBoot Repair feature allows users to boot into the AOMEIWinPE environment and resolve boot errors efficiently. By applying this tool, you can restore system functionality and ensure a smooth startup without errors.
Step 1. Download and install AOMEI Partition Assistant on a functional PC, then connect a USB drive to it.
Step 2. Select Recover > Boot Repair from the main interface.

Step 3. Choose the create a bootable disk option to generate WinPE bootable media.
Step 4. Connect the drive to the malfunctioning computer and try to start it. Once you log in successfully, it will automatically load the Boot Repair tool and initiate the boot entries scanning process.
Step 5. Once the process completes, all boot entries will be displayed. Select the entries that you want to repair and click the Repair button.
Step 6. After the repair is successful, remove the bootable USB drive and reboot the PC from the original system drive.
Conclusion
In summary, this guide has outlined five effective methods to resolve the stuck at Scanning and Repairing Drive issue. If you encounter this problem, consider applying these solutions to restore your system’s functionality.

