How to Shrink Volume in Windows Server 2016 Successfully and Safely
This tutorial will show you how to shrink volume in Windows Server 2016. After that, you can use allocated space to create a new partition or extend the partition.
By Cherry / Updated on December 4, 2024
Why shrink volume in Windows Server 2016?
Shrinking volume means decreasing the size of the target partition. That is a useful practice if you want to make the fullest use of the disk space. For example, if you have a 350 GB hard drive and use only 100GB, you can shrink the partition to 150 GB. That will generate about 150GB of unallocated free space, which you can create another new partition for data storage or extend the old partition.
If you want to know how to shrink volume in Server 2016, you are in the right place. This post will show you how to shrink Windows 2016 volume with detailed steps, including using Windows built-in tools, such as Disk Management, Diskpart, and an easier third-party utility.
Step-by-step: How to shrink volume in Windows Server 2016
To shrink partition on Windows Server 2016, there are three methods: Disk Management, Diskpart and 3rd-party partition software. The most obvious benefit of Windows native tools to shrink volume is fast and safe. Meanwhile, they have some limitations, which force you to find a better way. We’ll explain in the following part.
│Solution 1. Shrink volume with Server 2016 Disk Management
Step 1. First of all, press "Windows + R“, type in "diskmgmt.msc" and hit Enter to open Disk Management.
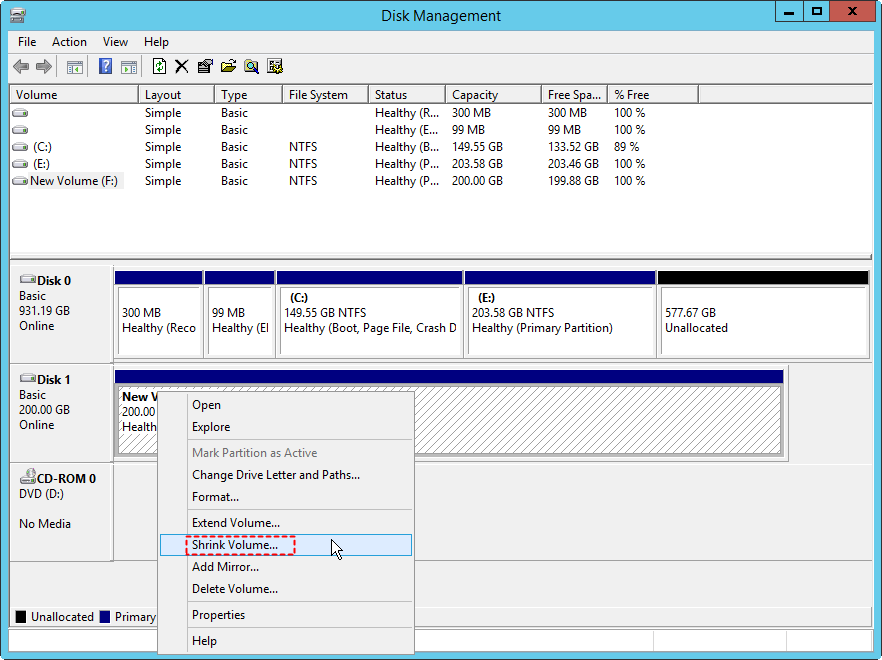
Step 2. Just right-click the partition you are going to shrink, select “Shrink Volume”.
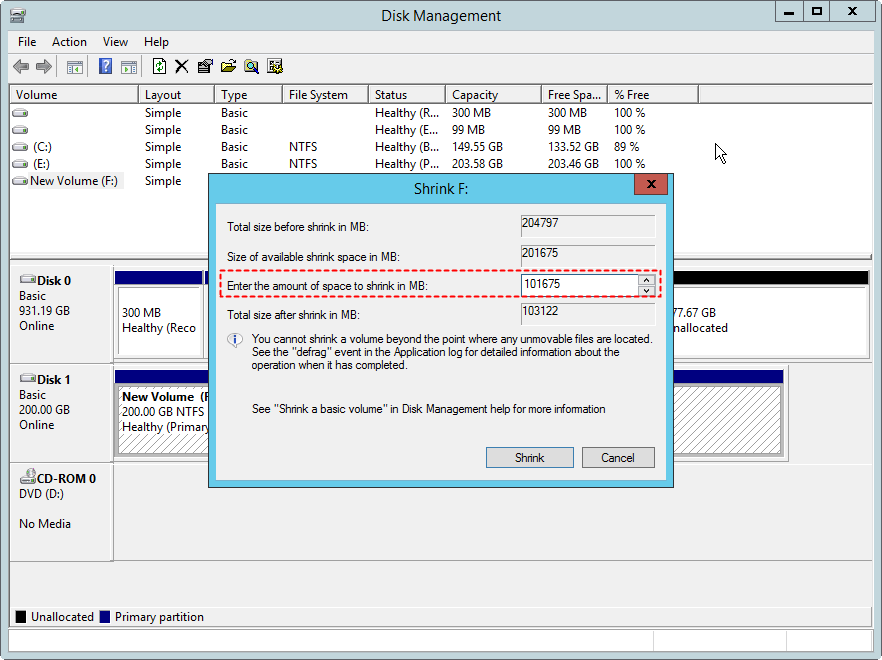
Step 3. In the subsequent window, you can adjust how much space you want to shrink. The amount of available space to shrink depends on how much data is stored on the volume.
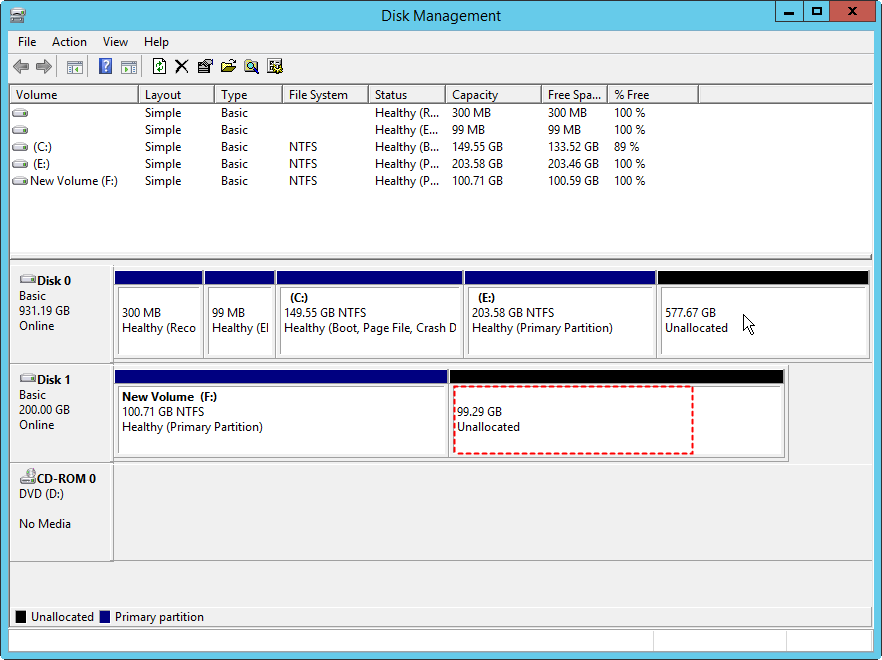
After the shrinking process has completed, you can see there is an unallocated space behind the shrunk volume.
Warning:
✎ Sometimes, Disk Management doesn't allow shrinking volumes or just a little space. This is because there is some disk fragmentation or other non-removable files like paging file, hibernation, etc. on that partition, in which case you cannot shrink the volume.
✎ The amount of available shrink space can be limited by the amount of space currently allocated on the hard disk, that is, you can only shrink a volume to at most half of the available space.
✎ Disk Management only supports shrinking partitions formatted with the NTFS file system.
│Solution 2. Shrink Server 2016 Volume with Diskpart
Diskpart is another Windows Server native utility for users to manage disk partitions. To use Diskpart to shrink volume on Windows Server 2016, you can use the following parameters. But here you need to open the prompt by pressing ‘WIN+R”, then type “diskpart” and press “Enter” to open Diskpart.
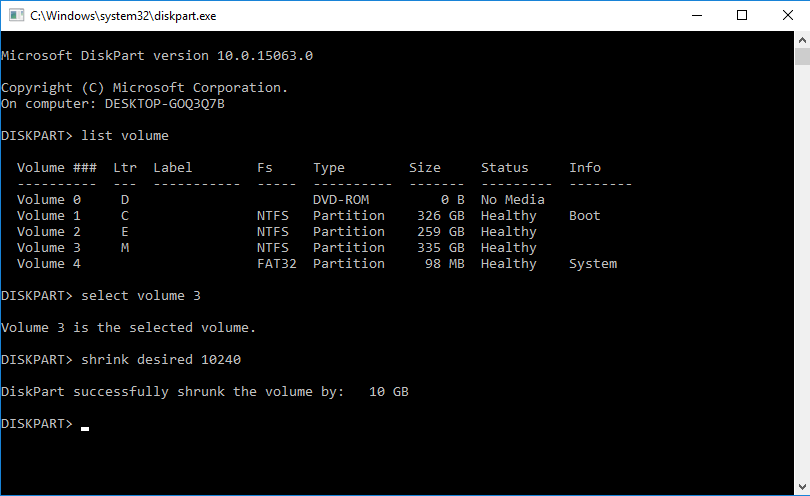
● Type “list volume” and hit Enter. Here will list all the volumes on the PC.
● Type “select volume 3” and hit Enter. Select the volume you want to shrink.
● Type “shrink desired 10240” and hit Enter. It will shrink 10240MB (10GB) for the volume.
Warning:
Similar to Disk Management, Diskpart will not be able to shrink the volume when there is disk fragmentation on the partition. In this case, you need to defragment the disk first and then use its syntax to shrink the volume. You cannot shrink the volume using the Diskpart utility if there are any unremovable files at the end of the partition. If the file system of the selected partition is not in NTFS format, the volume cannot be reduced either.
│Solution 3. Shrink volume in Windows 2016 with partition software (Recommended)
When you failed to shrink volume via Disk Management and Diskpart, you can try AOMEI Partition Assistant Server. It breaks the limitations of Disk Management and Diskpart, allowing users to shrink/extend/format volumes in any scenario while keeping all data safe. Besides, it is not only compatible with the newest Server 2025, and other Windows Server versions, but also compatible with Windows 11/10/8/7.
Attention:
✦ If the volume you want to shrink is the system partition, contains some running applications, or contains the AOMEI Partition Assistant installation contents/page files, this operation will be executed under the PreOS mode.
✦ If you want to shrink the Bitlocker encrypted partition, you need to unlock it on the interface of AOMEI Partition Assistant Standard, which is completely safe.
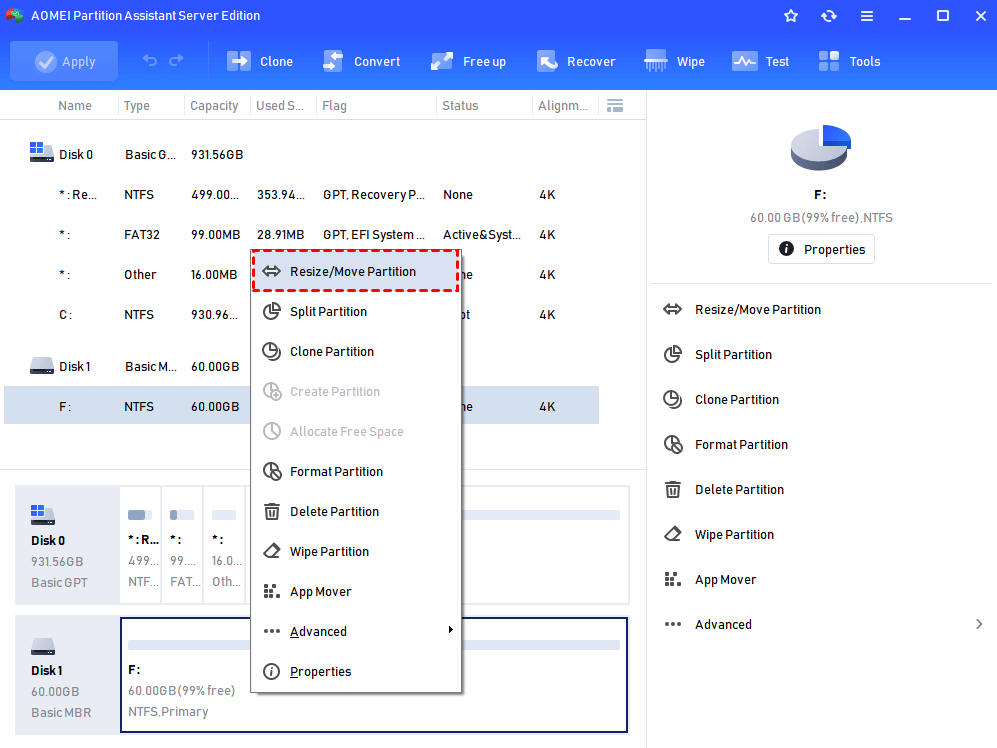
Step 1. Install and launch the software, right-click the partition you want to shrink (here takes F partition as an example), select “Resize/Move Partition”.
Step 2. You can drag the mouse from the edge towards the central to shrink the partition as the following picture shows, or type the specific number to shrink volume for the Windows Server 2016.

Step 3. After the resizing, click “OK”, you will be back to the main interface. Click “Apply” at the toolbar to submit the pending operations.
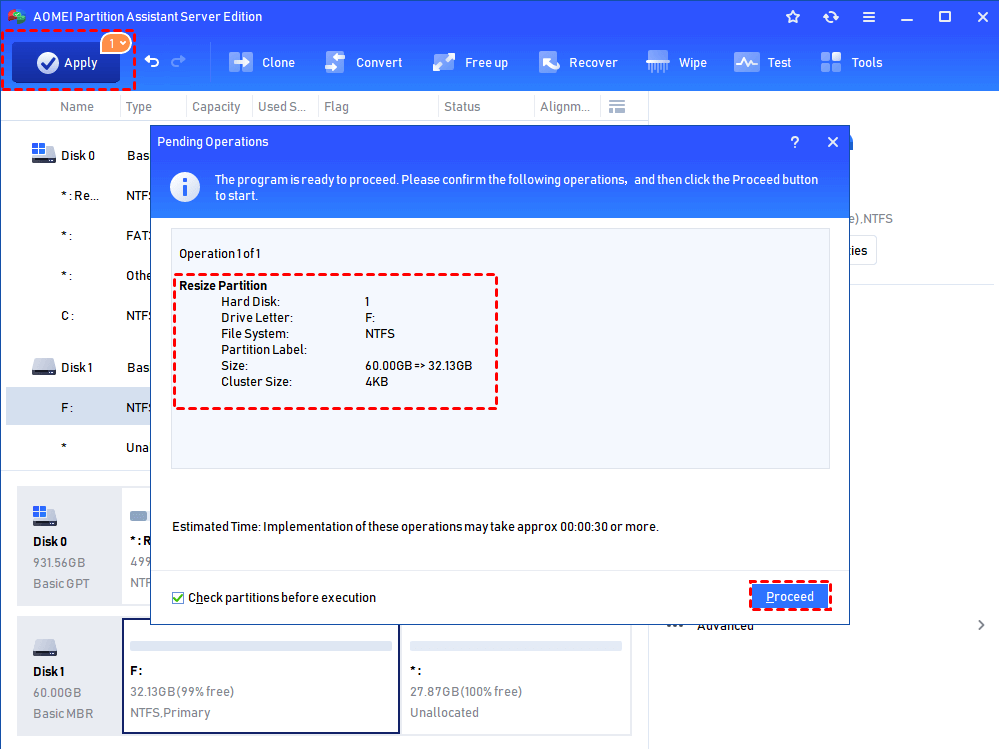
At last, wait for the process to be done.
│What’s more….
After shrinking volume in Windows Server 2016, you can create a new partition or extend other partition’s size with the unallocated free space.
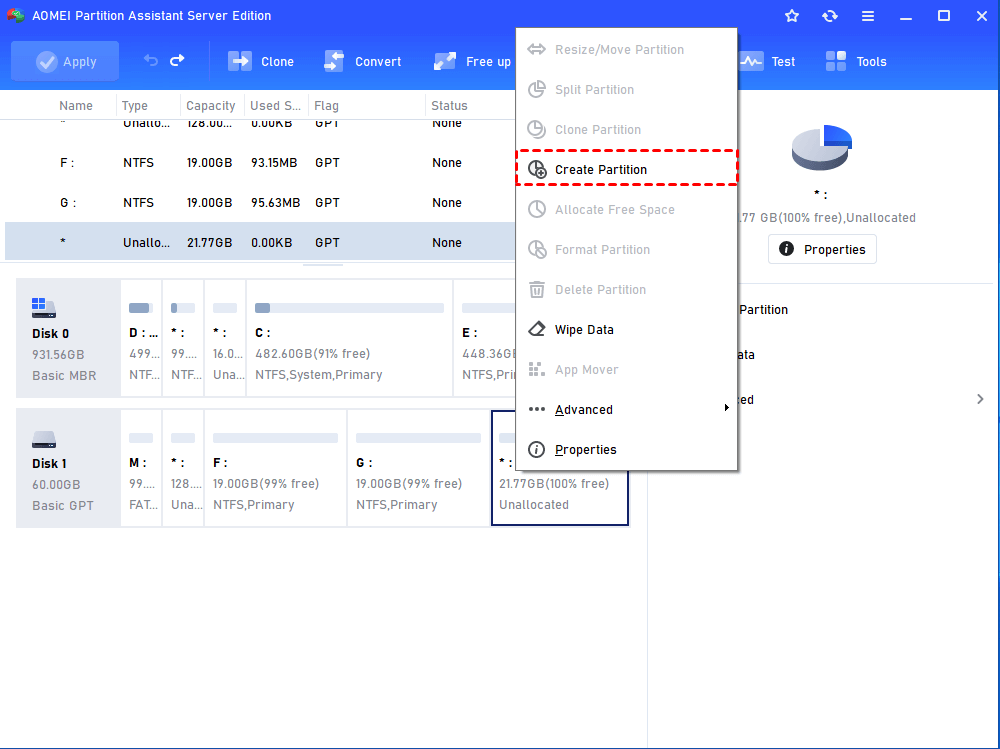
Creating new partition with the unallocated space is quite simple. This can be done via the above three tools. In Disk Management, you just right-click the unallocated space, select “New Simple Volume” and follow the guides. In Diskpart, you need to type “create partition primary size=n” to create new partition. In AOMEI Partition Assistant Server, right click the unallocated space, select “Create Partition” and follow the prompts.
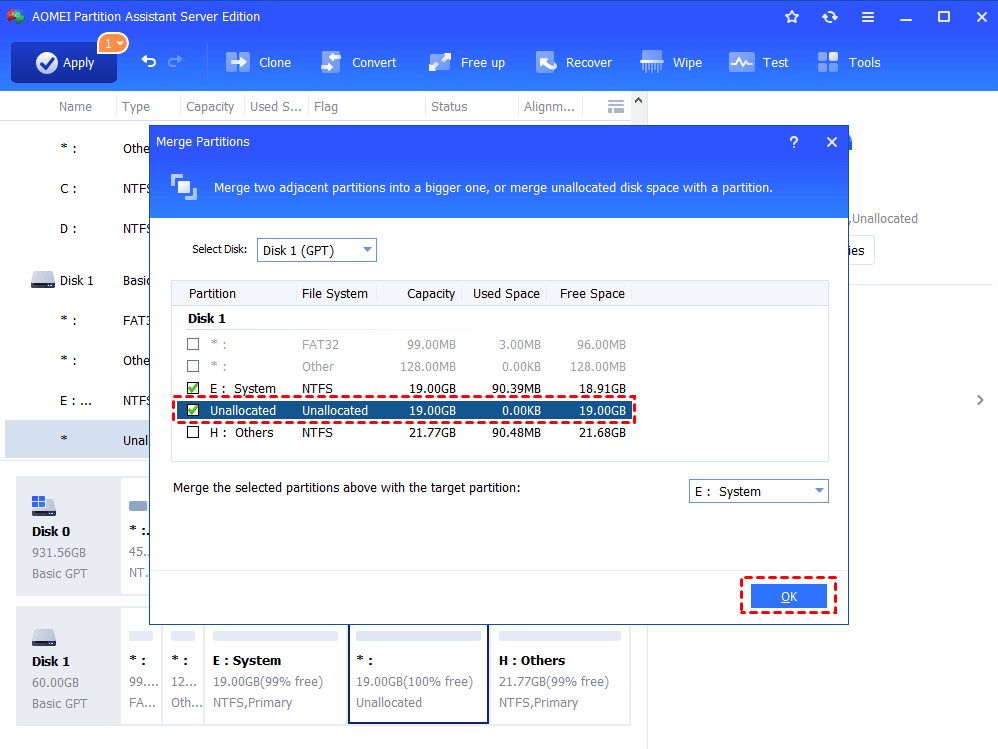
But for extending other partitions, Disk Management and Diskpart will let you down since they only work when the unallocated space is behind the volume you wish to extend, and the unallocated space is right after the shrunk partition and cannot be moved. In this case, AOMEI Partition Assistant can help you as well. Its “Merge Partitions” function can directly merge the unallocated space (no matter where it is) into the target partition.
Conclusion
We have shown you how to shrink volume in Windows Server 2016 with three different methods. By comparison, AOMEI Partition Assistant Server is much easier and simpler; even there is any unmovable file to hinder. What’s more, it has various great other functions like migrating Windows Server to SSD, allocating free space from one partition to another, converting dynamic disk into basic without data loss, and more.
To install this wonderful program on an unlimited number of computers within one company to save money, you can try AOMEI Partition Assistant Unlimited. What's more, the Technician version is specially designed for technicians to provide billable services & unlimited for enterprise usage. And the Unlimited and Technician have a useful feature, Create Portable Version, which can create AOMEI Partition Assistant to a removable device.

