How to Move User Profile to Another Drive in Windows Server 2019
If you want to move user profile to another drive in Windows Server 2019 to release some space on the C drive, you can read this guide to learn 2 ways.
By Lucas / Updated on March 5, 2026
Can I move my user profile to another drive?
When you establish a new user account in Windows Server 2019, the system will create a user profile folder in the Users folder on the C drive with the username as the name of the profile folder. The new profile is then filled with default data directories.
This is an acceptable arrangement for the vast majority of Windows machines.
However, if you have a desktop PC with a relatively small SSD as the system drive, it makes sense to move one or more of these subfolders to a new location. Because the drive space is limited, though you can delete large files from your PC, a small system disk might still not provide more space for your Server to run as before.
So, to reclaim more free space on the system drive, you can move a user profile that's not so important to another drive.
How to move user profile to another drive in Windows Server 2019
You might think it’s easy to move a user profile from the current drive to another, but, the truth is that your system may not allow you to move the users’ folder and move is not enough, you need to change the profile path in the system, otherwise the user can’t sign in and use the profile data.
So, in this part, we will show you how to move the user profile with CMD and change the path in the Registry Editor. And if you can’t handle these two tools easily, don’t worry, we have an easier choice for you.
Method 1. Using Windows built-in tools
First, we’ll use the “xcopy” command in CMD to move all files in the user profile folder, and then we change the path in the Registry.
▶ Section 1. Create a temporary account
Step 1. Open the Settings, and go “Account” > “Add someone else to this PC”.
Step 2. Finish all settings, name, passwords, etc.
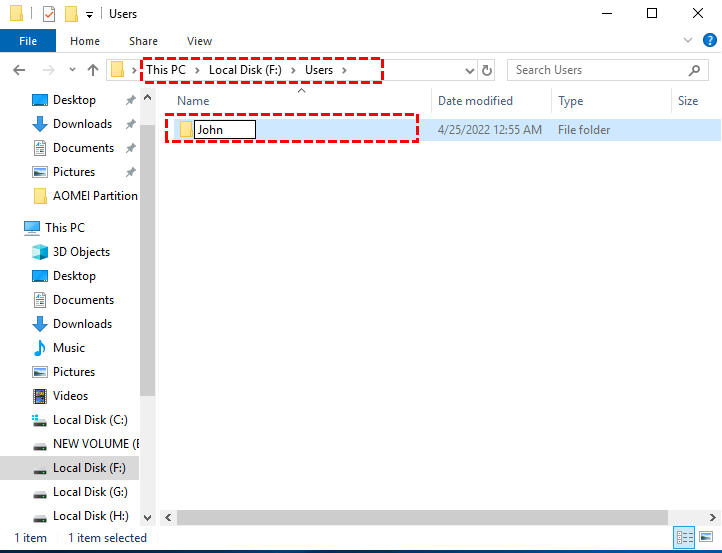
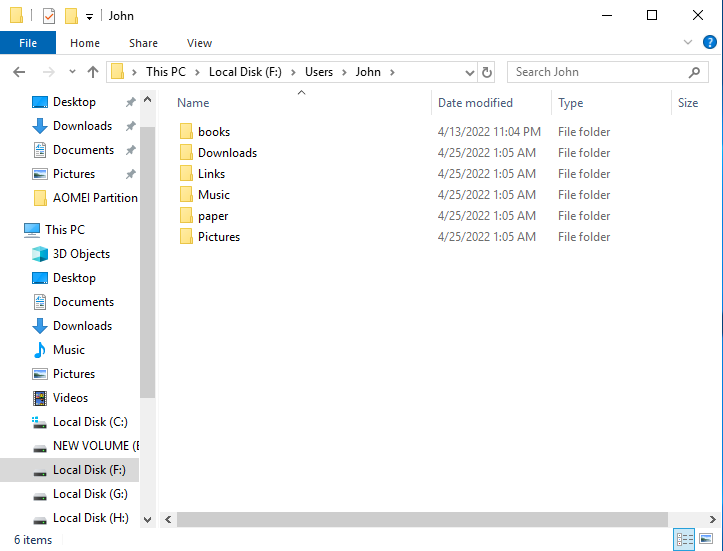
Step 3. Open “This PC”, select the target drive you want to save the moved user profile, create a folder named “Users”, and create a subfolder named the same as the user profile folder you want to move. In the example, the new location is the F drive and the name is John.
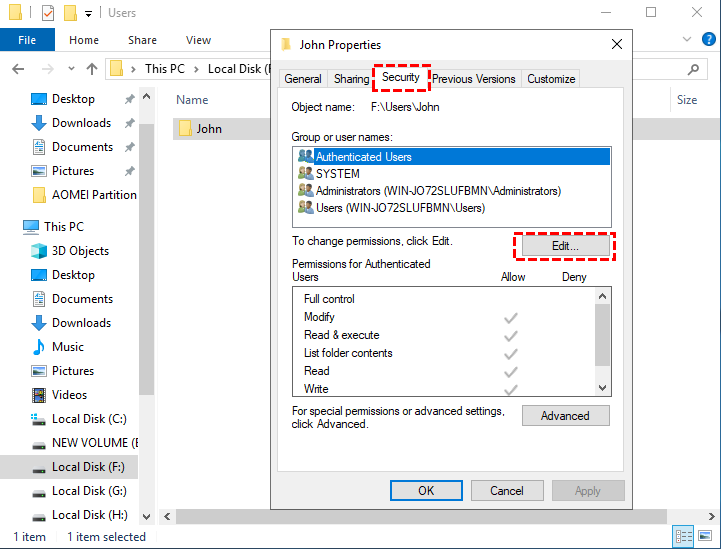
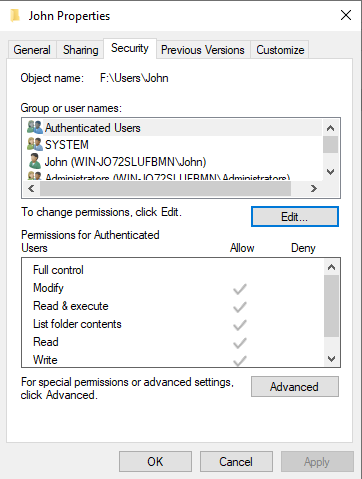
Step 4. Right-click this folder, choose “Properties” > “Security” tab > Edit.
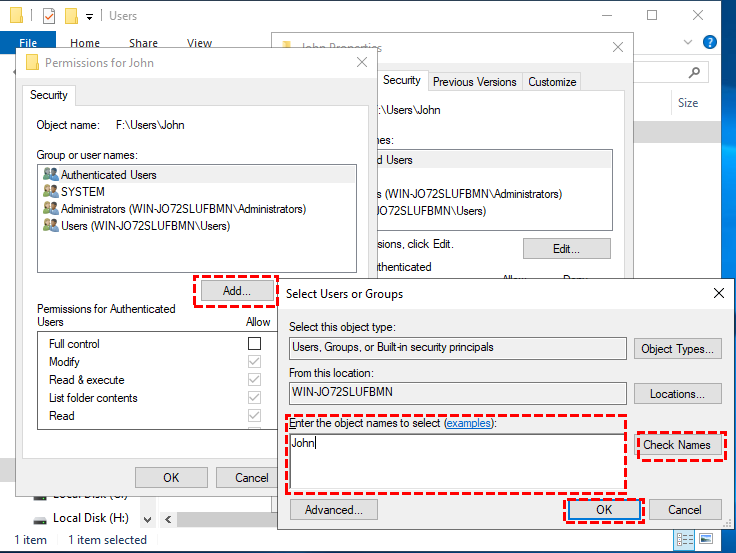
Step 5. In the new window, click “Add”, and enter the object name, click “Check Names” > “Ok”.
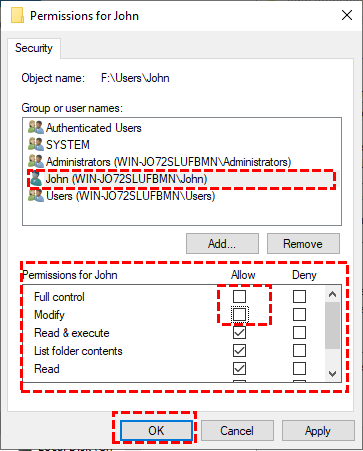
Step 6. Now you’ll back to the security window, select the new account (here is John), tick all permissions in the “Permissions for XXX”, and click “OK”.
Step 7. Now the folder is ready to store the user profile.
▶ Section 2. Use xcopy command
Step 1. Search CMD in the search box next to the start button, right-click the best match, and choose “Run as administrator”.
Step 2. Type: xcopy “C:\Users\John\*.*” “F:\Users\John” /E /C /H /K /O, and click “Enter”. Please change the location drive letter and the name to yours.
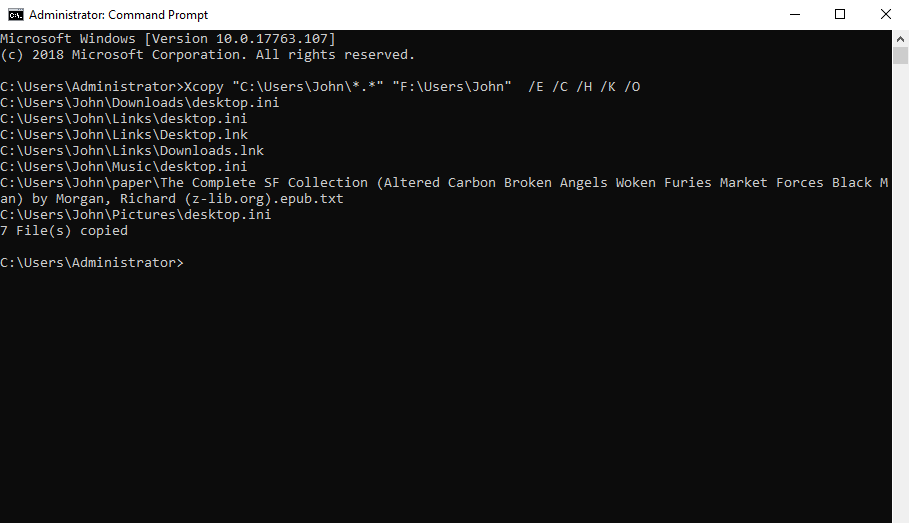
Wait for a while, and all contents in that folder on the C drive will be moved to the new location.
And now, please reboot your PC, and sign in with your Admin account.
▶ Section 3. Change the path info in the Registry Editor
To make sure all works normally after the move, you must change the path in the Registry Editor.
Step 1. Press “Win” + “R”, and type “regedit.exe” in the Run dialogue.
Step 2. Negative to the “ProfileList” by this path:
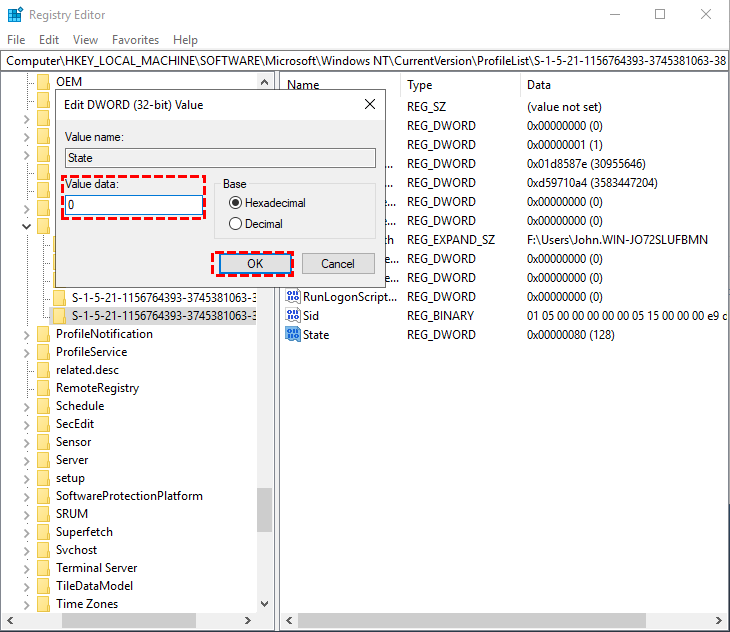
• HKEY_LOCAL_MACHINE\SOFTWARE\Microsoft\Windows NT\CurrentVersion\ProfileList
Find the temporary account we created before in the left panel, and then select “ProfileImagePath” in the right menu, click twice to open “Edit String”. Now, please change the drive letter from “C” to your location drive, and click “OK”.
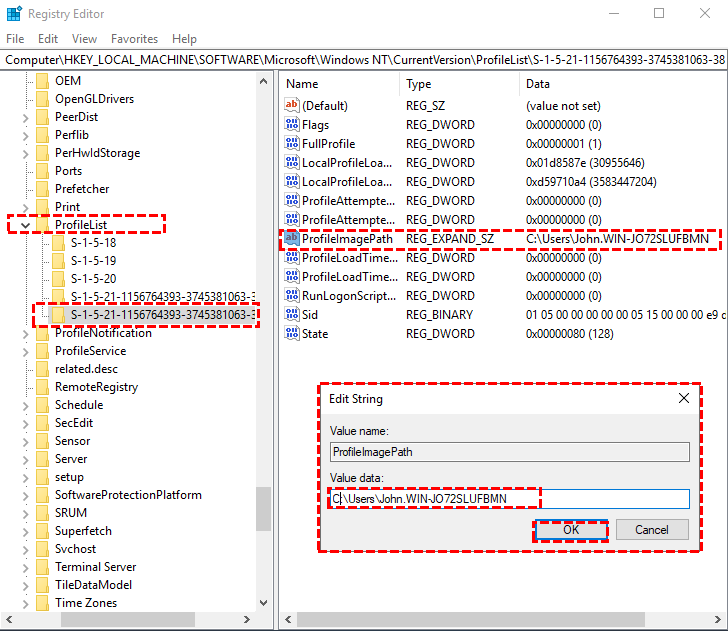
Step 3. Click “State” and change the “Value data” from “0” to “1” and click “OK”.
Now, restart the PC, and the user profile is moved successfully. And then you can delete the old profile folder.
Method 2. Using the user profile folder move tool to do an easy-move
You see, if you use Windows tools to move the user profile, you’ll have lots of work to make sure it can run well after the move. To simplify the cumbersome steps, you can turn to AOMEI Partition Assistant Server to easily move the user profile to another drive in Windows Server 2019.
Its “Move Folder” utility can move large folders from one drive to another and automatically set the path, so you don’t need to use Registry Editor. And this tool also supports Windows Server 2025, 2022, 2016, 2012, 2008, so if you want to upgrade to Server 2022, this tool can still help you manage your disk with all useful functions such as “Convert to GPT”, “Extend partition”, “Disk Clone Wizard”, etc.
Here are all steps.
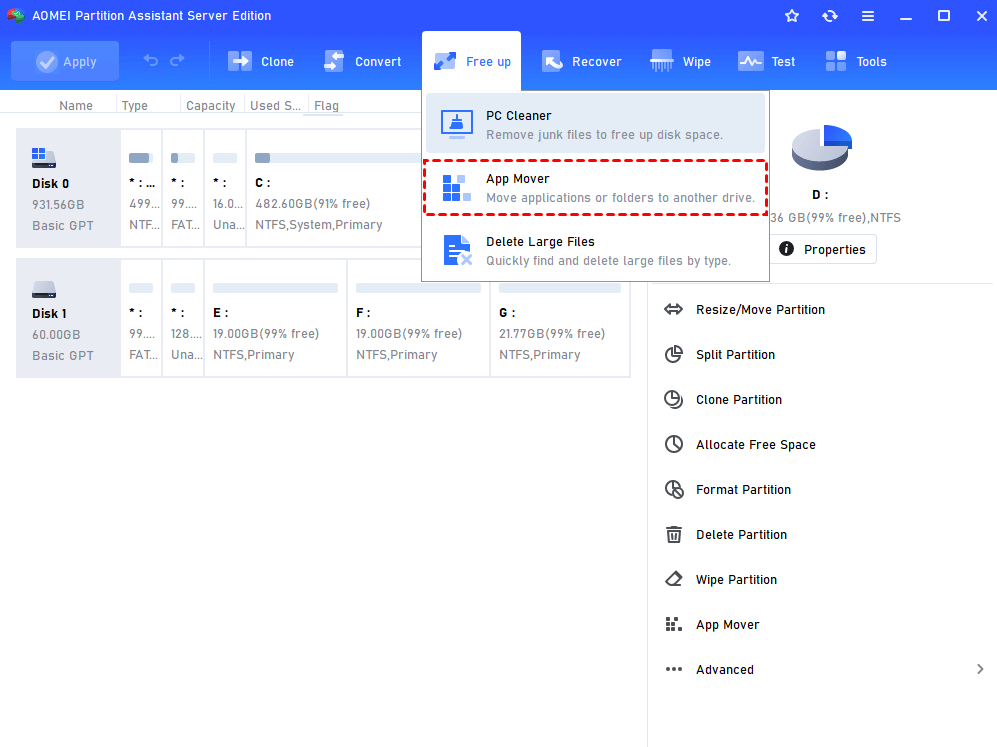
Step 1. Install and run AOMEI Partition Assistant, click “Free up” on in the top toolbar, and choose “App Mover”.
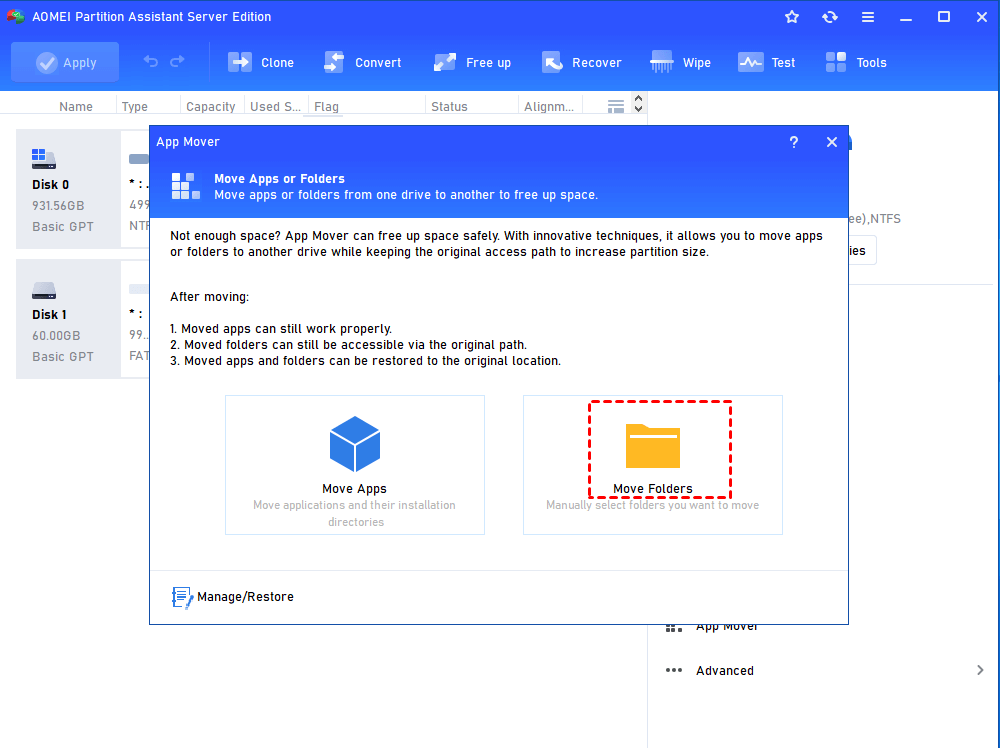
Step 2. In the new window, click “Move Folder”.
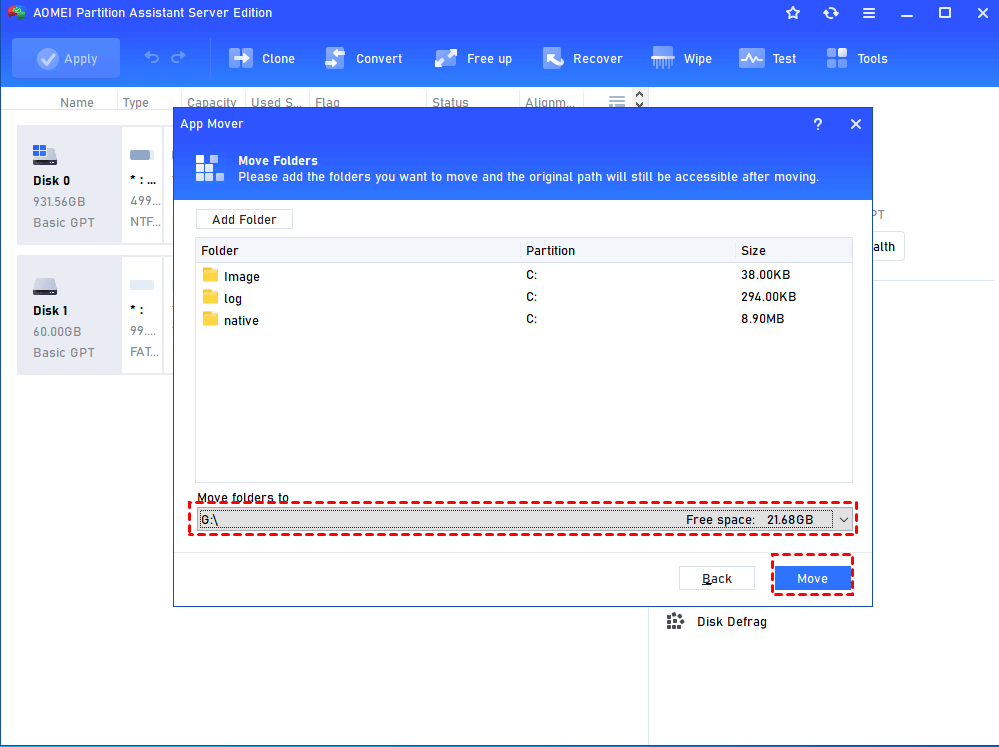
Step 3. Click “Add Folder” and select the folder you want to move. Choose the location drive under the window, and click “Move”.
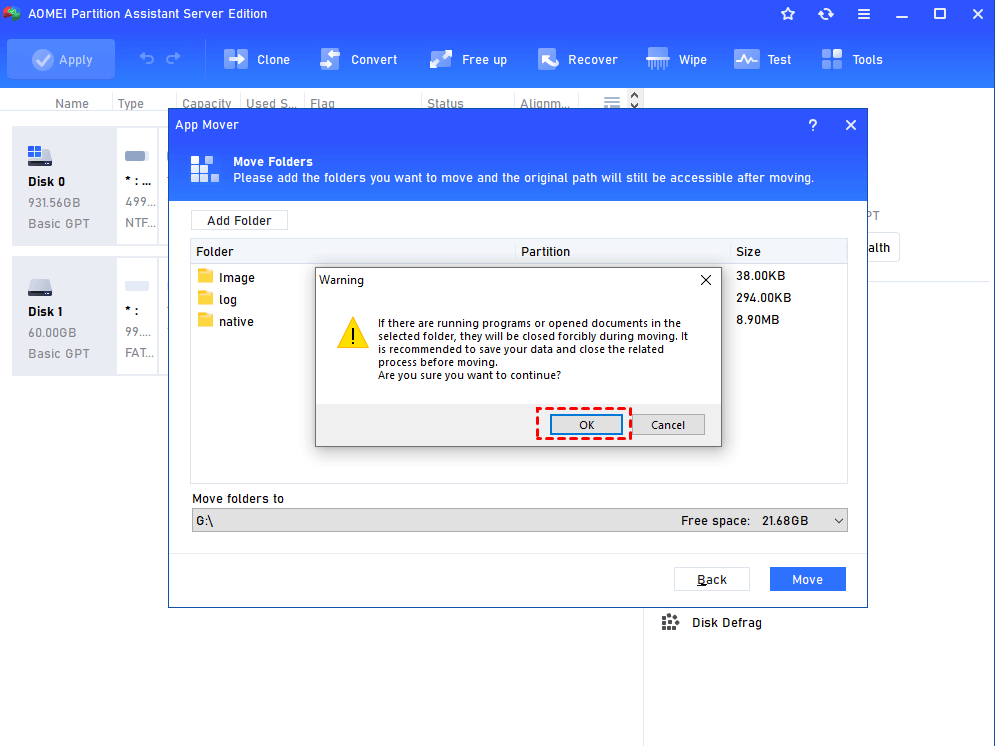
Step 4. Then you'll see a warning, click "OK".
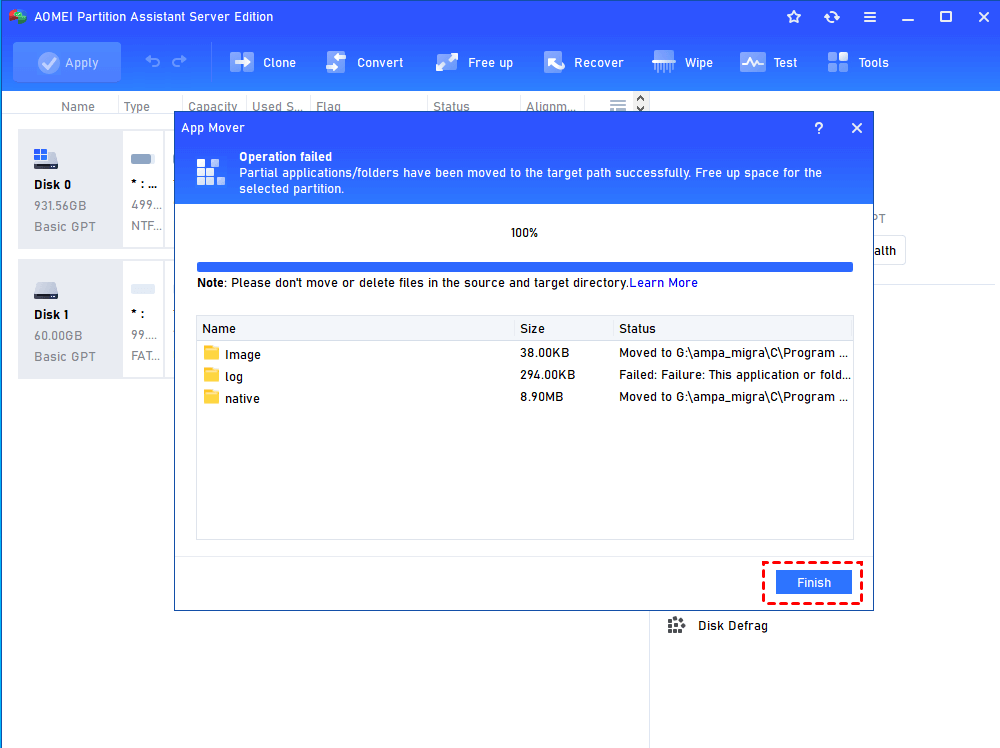
Step 5. Click "Finish" to end the task and close the window.
1. Make sure the target drive has sufficient free space to save all you move. If there’s a notice that tells you the space is insufficient, you can extend the partition at first.
2. To ensure the folders can be operated normally, please do not move or delete the files in the source and target directory.
The software will create a new folder on the target drive and copy the path then delete the source directory. You only need to wait for a while, all work will be done.
Ending
The 2 methods we show you about how to move a user profile to another drive in Windows Server 2019 are both available, so you can select the better one according to your situation.
AOMEI Partition Assistant is a professional disk manager for Windows systems. Windows PC OS and Server are all supported. And if you need, you can choose the Unlimited Edition and the Tech Edition for the enterprise environment.

