2 Free Ways to Burn or Copy ISO to USB in Windows 11/10/8/7
On this page, we aim to tell how to burn ISO to USB in Windows 11, 10, 8, 7 via 2 free methods. And then you can get a bootable USB drive.
By AOMEI / Updated on May 12, 2023
Why burn ISO files to USB drive?
ISO is a special file format being used on CD, DVD or Blu-ray disc. One of its popular usages is to archive operating systems like Windows or Linux. So if you burn ISO to USB Windows 10, then you can use it as a portable Windows, take the familiar work environment wherever you are.
2 Free methods to burn ISO to USB in Windows 10
Different from copying and pasting files, burning Windows 10 ISO to USB is more complicated since the USB drive needs to be bootable once you got the ISO images onto it. Fortunately, there are still two methods available to help you copy ISO to the USB drive in Windows 10.
▌Method 1. Copy ISO to USB via Windows native "Windows To Go"
To burn ISO files to USB in Windows 10, if you are mainly running Windows 10 Education/Enterprise/Pro, you can use its built-in "Windows To Go" feature, which allows you to create a Windows To Go workspace that can boot a computer from the certified USB drives. Here is how to perform it.
Step 1. Download ISO files from Microsoft official website and connect a certified USB drive (at least 32 GB) to your computer.
Warning: Burning an ISO image to a USB drive will delete all data on the drive. So please check that you plug in an empty USB drive or that you have backed up any files that you don’t want to lose before proceeding to the following steps.
Step 2. Open Control Panel on your computer, and search “Windows To go” in the window. Then click the “Windows To Go” feature.
Step 3. In the next window, it will automatically search for the inserted USB drive. After that, click the USB drive you plan to burn ISO onto and then “Next” to continue.
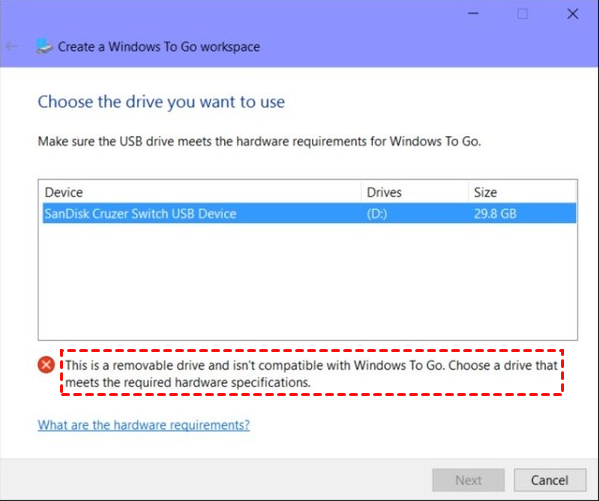
Note: Only when the USB drive meets the required hardware specifications of Microsoft, the “Next” button can be clickable. Or you will encounter the above error message.
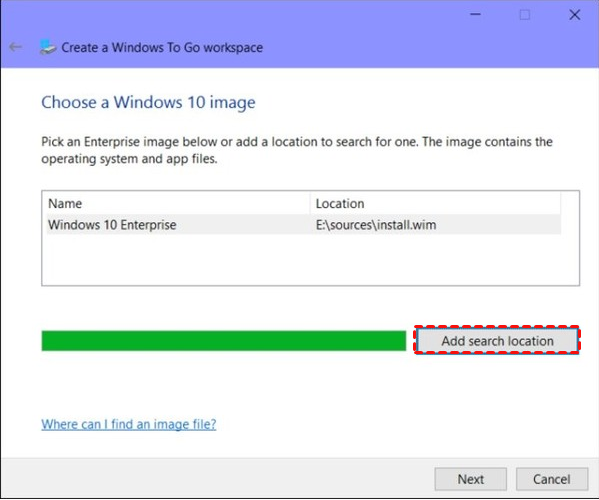
Step 4. Click “Add search location” to search for the Windows 10 installation ISO file and choose the mounted ISO file.
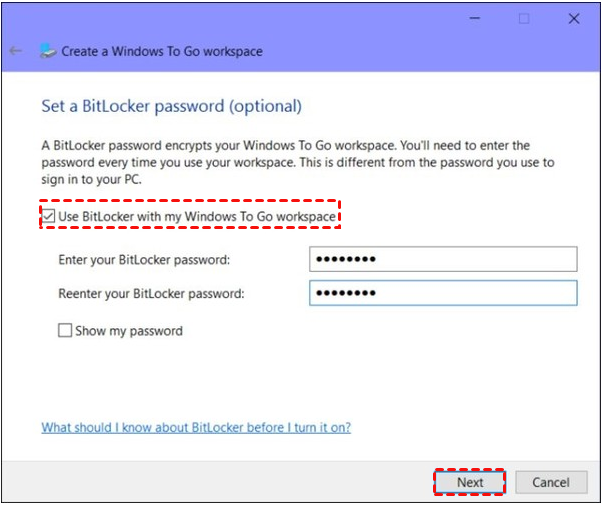
Step 5. In the subsequent window, you can enable BitLocker Drive Encryption on your Windows To Go workspace, which can protect valuable data on the USB drive.
Step 6. Finally, Windows 10 will actually move the Windows 10 ISO image to the USB drive.
▌Method 2. Burn ISO to USB via freeware
Windows To Go is a handy feature only for Windows 8/8.1 Enterprise and Windows 10 Education/Enterprise/Pro, and it is not available on Windows 7, Windows 8/8.1 Home/ Pro/Education as well as Windows 10 Home. Besides, only the qualified USB drive can be used, and its space size must be larger than 32 GB. To bypass all those limitations, it is better to use another 3rd party free partition manager: AOMEI Partition Assistant Standard.
This software allows you to burn ISO files to USB drive no matter which version of Windows 11/10/8/7 you are using. Moreover, it does not require a certified USB drive and 13 GB drive capacity is enough. Now you can download the freeware and check out the below guide
Step 1. Insert an empty USB drive (over 13 GB) to your Windows 10 computer via USB port. Install and run AOMEI Partition Assistant Pro to enter the main interface.
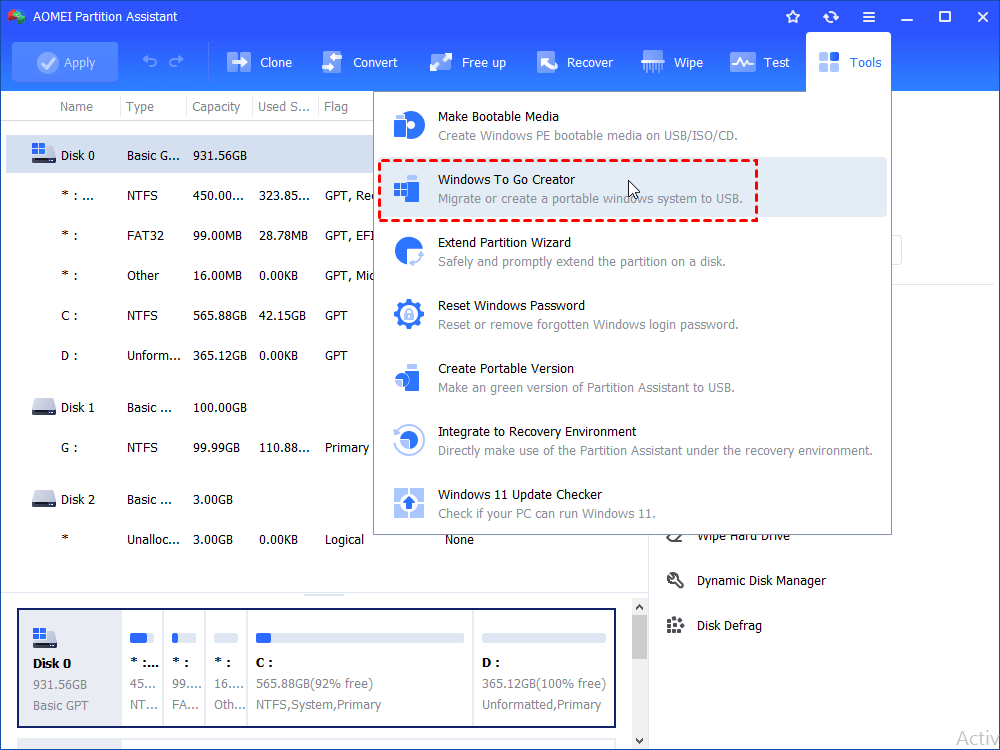
Step 2. Click on "Tools”-> “Windows To Go Creator” on the main interface.
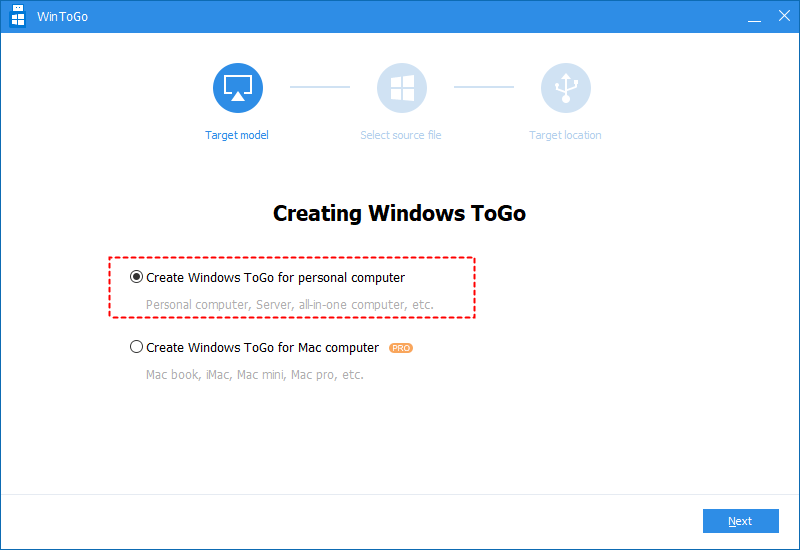
Step 3. Here, choose "Create Windows ToGo for personal computer". If you want to run Windows from USB on Mac, you can select the second option.
Step 4. Select Windows 10 installation file, then click “OK”.

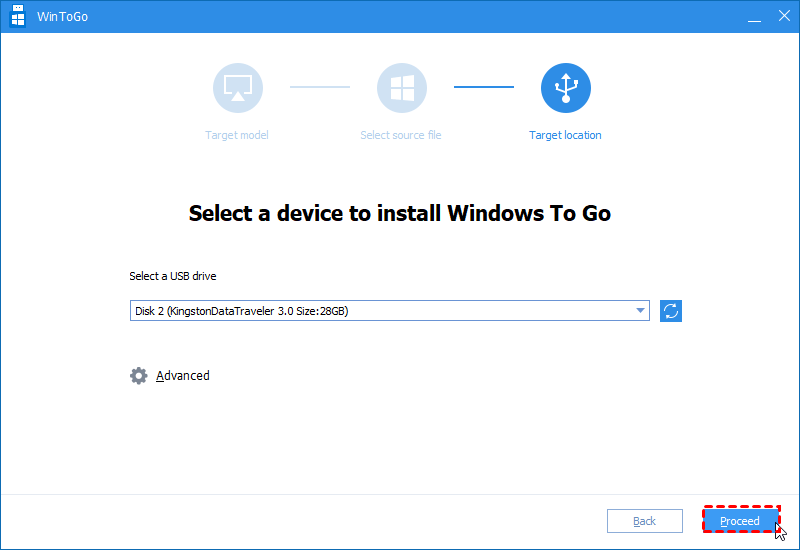
Step 5. Generally, your USB drive will be detected automatically. If not, refresh and try again. Then, click “Yes” if you have backed up everything on the USB drive.

Step 6. At last, click “Proceed” to start burning Windows 10 ISO files to USB drive.
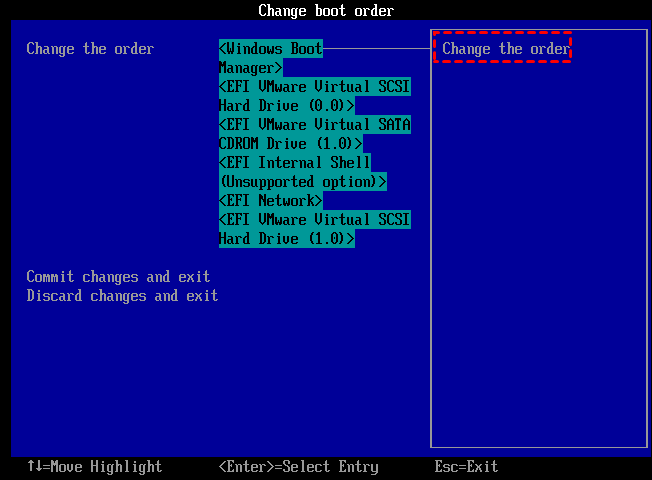
After everything is done, insert the USB drive into another computer, enter BIOS to change boot order and then you can boot computer from the destination disk.
Final verdict
Now, you can choose a proper tool to burn ISO to USB Windows 10. By comparison, AOMEI Partition Assistant Standard is easier to use and finish this task. If you want to create bootable USB drive with current system instead of preparing ISO files, you can upgrade to Professional edition. It has many other advanced features: transfer OS to SSD, allocate free space from one partition to another, split a large partition into two smaller partitions, convert MBR to GPT for Windows 11 etc.

