How to Move User Profile to Another Drive Windows 10/11/8/7?
How to move User Profile to another drive in Windows 11/10/8/7 to get more free space? If you are still puzzled and have no idea about how to do it, keep reading, and you will get two effective methods in this article.
By Hedy / Updated on May 12, 2023
About User Profile
When you run a new computer, you will be asked to add a new user account during initial setup, usually, Windows 10 creates a user profile folder in C:\Users by default, along with your username as the name of the profile.
But what is a User Profile? A User Profile is a record of user-specific data that defines the working environment of the user, including Desktop, Documents, display settings, application settings, network connections, and so on. In the User Profile, you can easily manage your own personal data.
Why move User Profile to another drive Windows 10?
As we described, the User Profile is automatically created and saved by Windows in C drive where the operating system is installed as well. As you use your computer, more and more User Profiles are generated day by day, constantly occupying the free space of C drive. Once the C drive is full, you will experience a worse computer environment like a longer boot time or Windows no response. In this case, you may find the necessity to move User Profile to another drive Windows 10.
What's more, there are many advantages if you change your User Profile to a new location like E drive, for example:
☞ You can release more free space on C drive. Since the User Profile is taking up the storage space of the C drive, moving it to another drive can free up disk space. It can also provide a better running environment for Windows operating system.
☞ You can keep your User Profile safe and sound. As we know, once you need to reinstall Windows due to some unexpected reasons like a virus attack or malware infection, all the data in the C drive will be erased. Therefore, changing the User Profile to a new location can protect your personal data from accidental loss when OS crashes.
How to move User Profile to another drive in Windows 10/11/8/7?
From what we have talked about, it's necessary to move User Profile to another drive to get more free space, but what's the easiest and safest way to change the User Profile default location? In the following contents, two effective methods will be presented in detail to show you how to make it in a secure way.
Notes:✎...
◉ No matter which method you will choose, please remember you can only change the folders or files stored in the User Profile rather than moving the whole User Profile.
◉ Method one requires you to manually set new folders with the same name as in the original User Profile while Method two will generate a new "User Profile" automatically during the movement.
Method 1: Move User Profile via Windows built-in feature
Windows built-in feature can assist you in migrating User Profile, follow the steps and try it on your own.
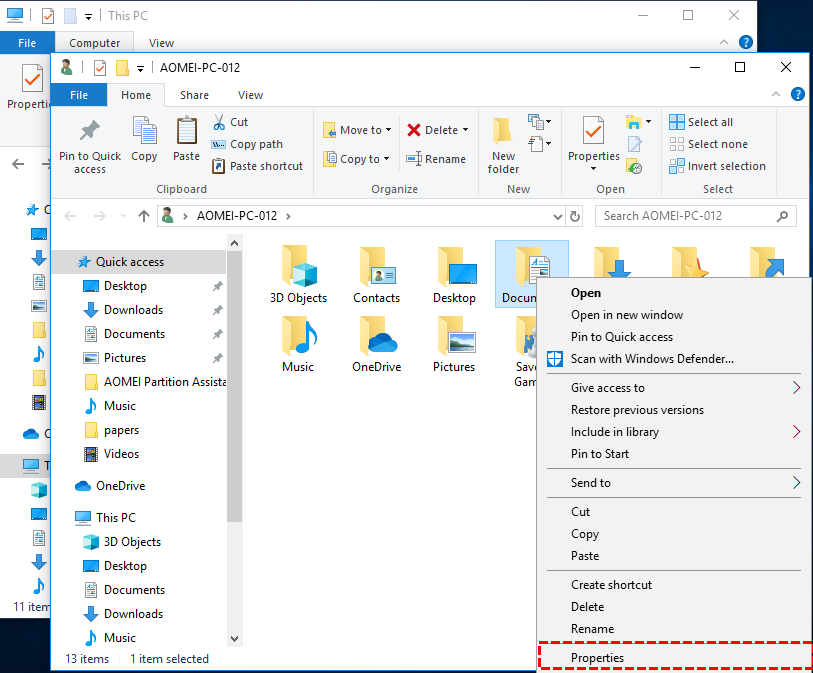
Step 1. Open File Explorer.
Step 2. Choose a new location like E drive under the "Devices and drivers".
Step 3. Create a new folder and rename it as Documents, Music, Pictures, or Video. (It depends on what you want to move. For example, if you want to move Documents, just rename the new folder as "Documents".)

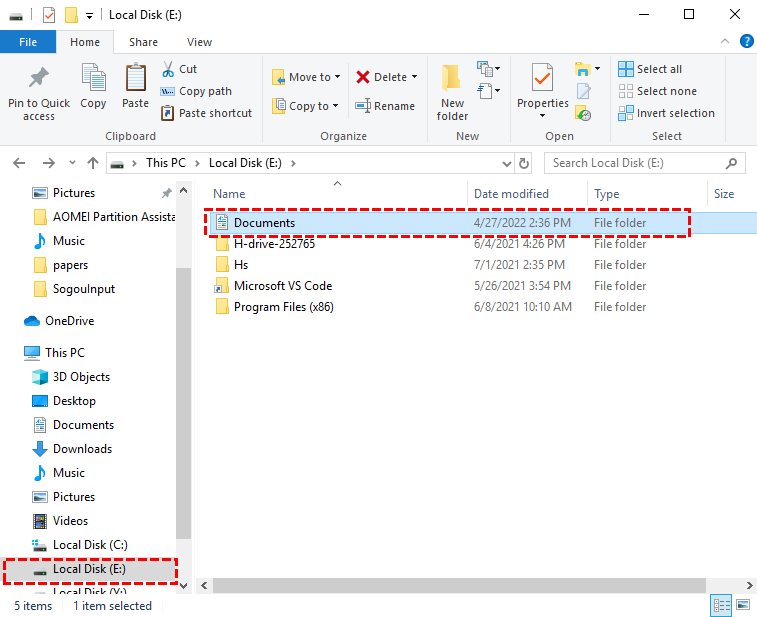
Step 4. Navigate to C drive.
Step 5. Right-click the folder you want to move and click the "Properties" button.
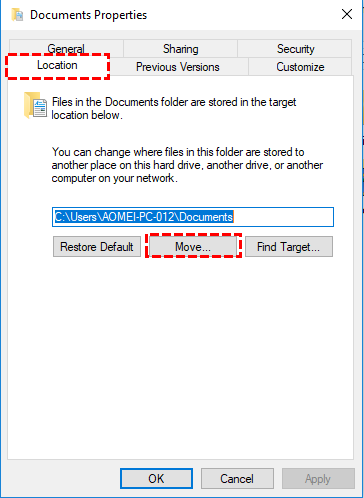
Step 6. In the new window, click the "Location" tab and select "Move".
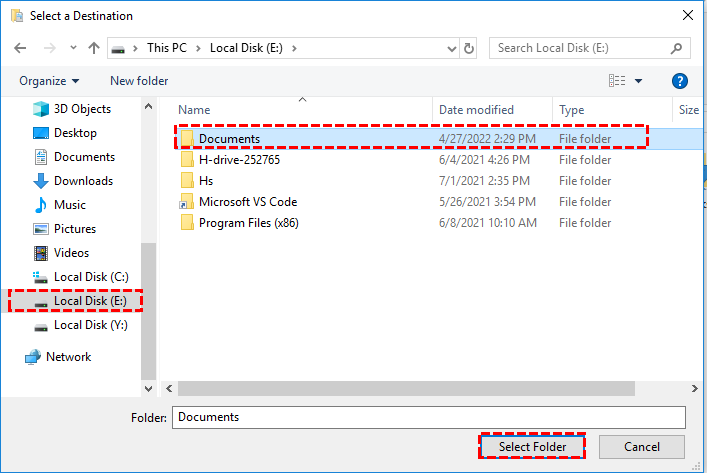
Step 7. Select the folder with the same name in the new location, and click the "Select Folder" button.
Step 8. Click "Apply" and confirm with the "Yes" button.
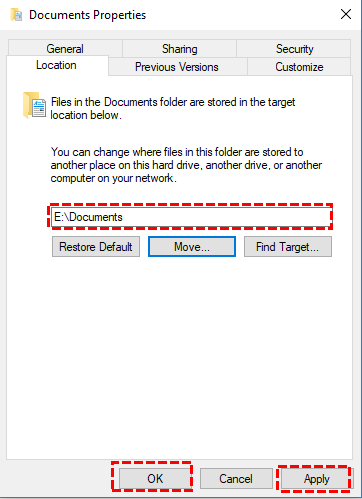
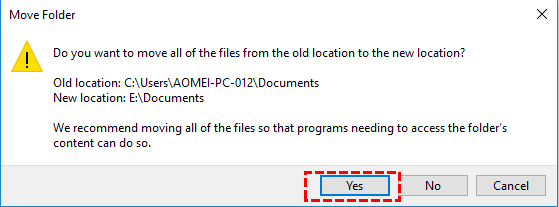
Till now, the folders in User Profile will be moved to the new place, and future files will be stored in this new location as well.
Method 2: Move User Profile via a professional tool
As we can see, moving User Profile with Windows built-in tool has so many steps that the source path can be set on the new location successfully, otherwise, the user data generated in the future will be found on the original location.
To avoid so many steps, a versatile partition manager named AOMEI Partition Assistant Professional can help a lot on how to move User Profile to another drive Windows 10. Its "App Mover" can move files, programs, applications, folders or any other you want to transfer to a new location and change the directory information, and you don't need to move it manually step by step. Moreover, whether you are using Windows 11, 10, 8, 7, Vista, or XP, this software is completely compatible.
To move User Profile to another drive Windows 10 successfully, please check the following things beforehand and make sure they are well prepared:
- Ensure the target drive has sufficient free space to save what you will migrate. If you are noticed that the space is insufficient, you can extend the partition in the first place.
- Make sure the folders are closed because the running folders will be forcibly shut down when moving, which may spoil the files.
- This function can only move folders on the NTFS drive to NTFS or FAT32 drive, if you want to migrate folders from the FAT32 drive, please convert to NTFS first.
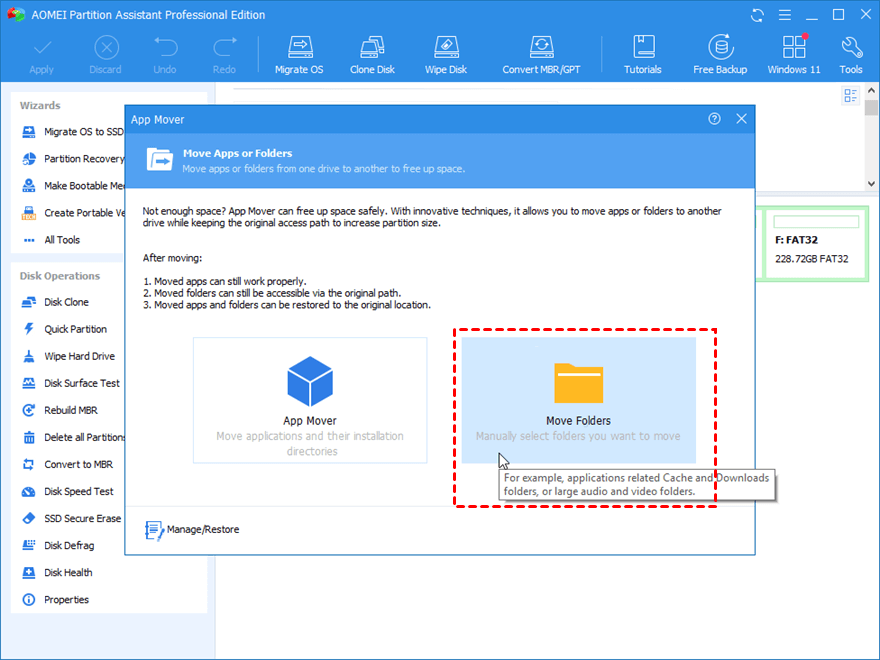
Step 1. Install and open AOMEI Partition Assistant Professional, click "Free Up" on the top toolbar and then choose "App Mover".

Step 2. In the "Move Apps or Folders" window, click "Move Folders".
Tip: If you want to safely move installed programs to another drive, please click "APP mover" in this step.
Step 3. If you want to move the entire Users folder, you will be warned that this operation is not supported, click "OK" to skip it.
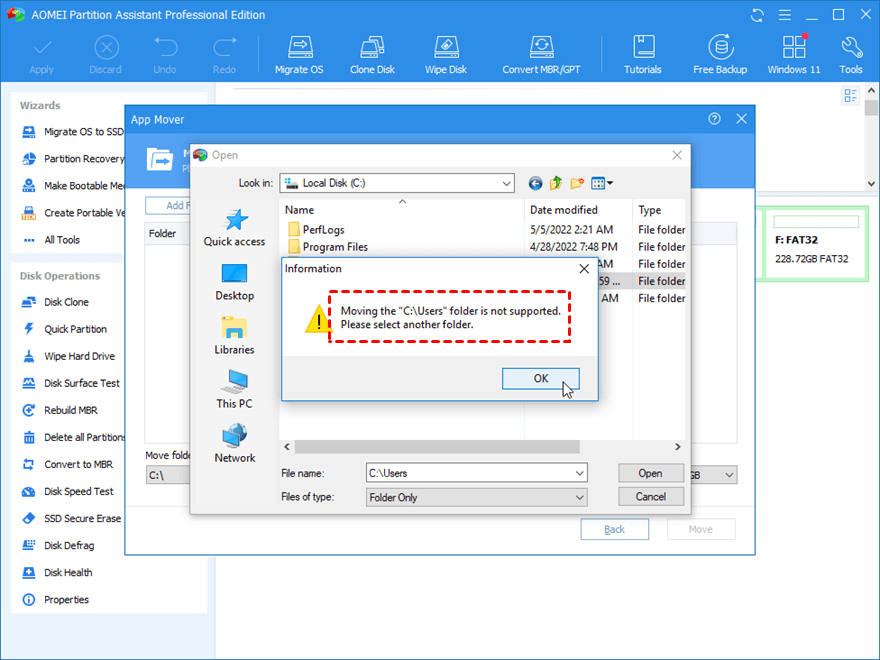
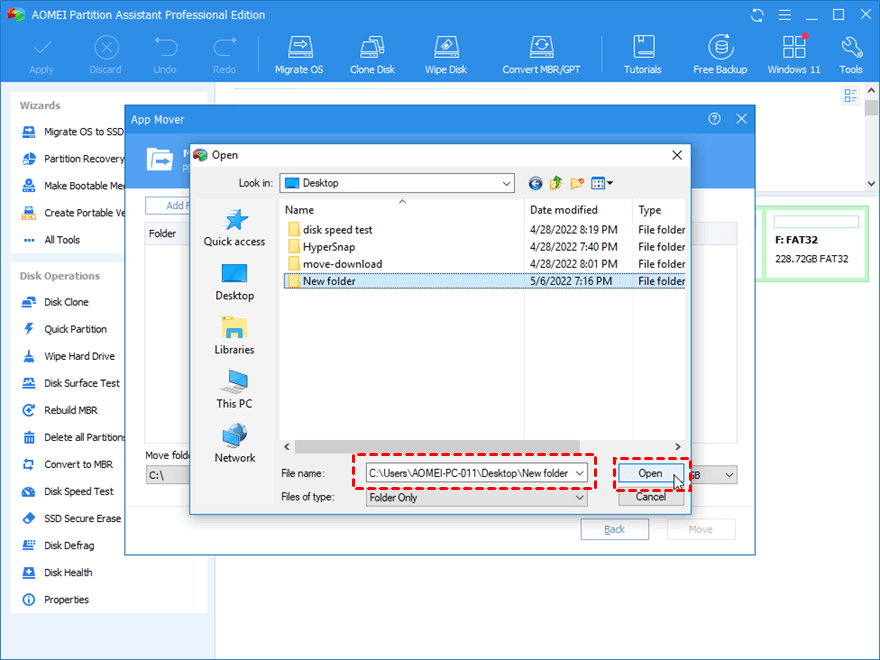
Step 4. Choose the specific folders in the User Profile, and click "Open", then you can see the folder is listed.
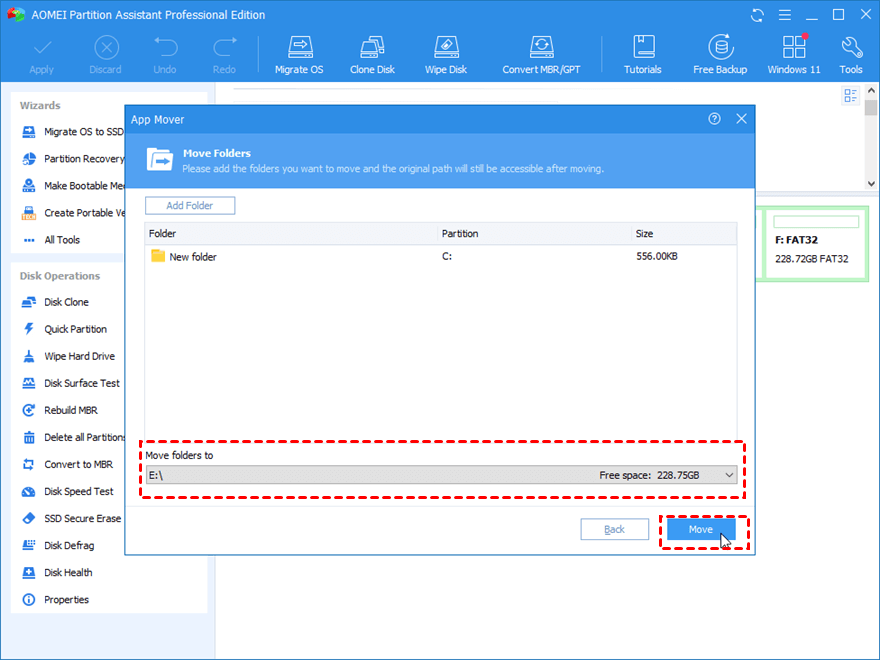
Step 5. Choose the new location drive under the window, and click "Move".
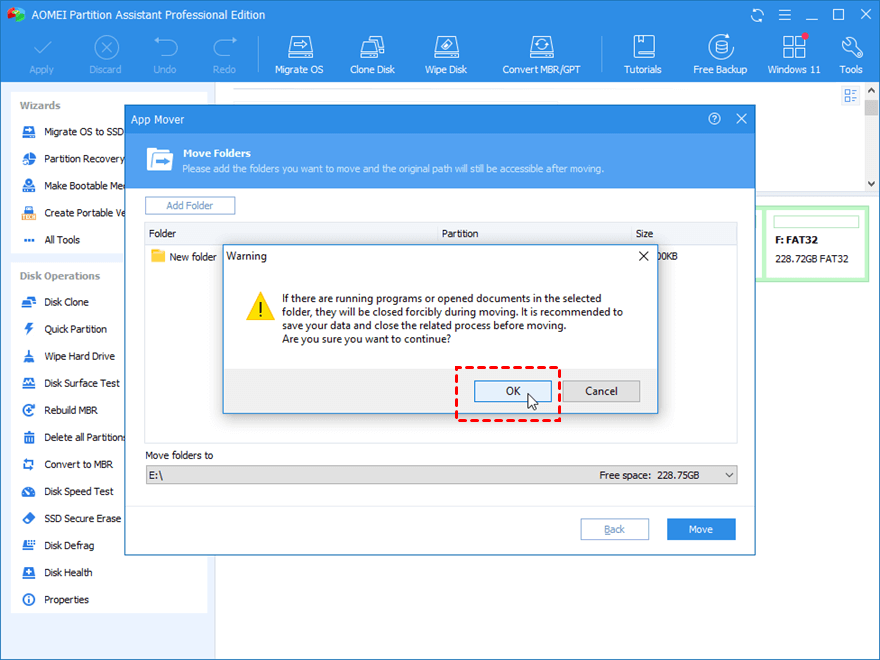
Step 6. You will receive a message to confirm forcibly closing running documents when moving starts. Click "OK".
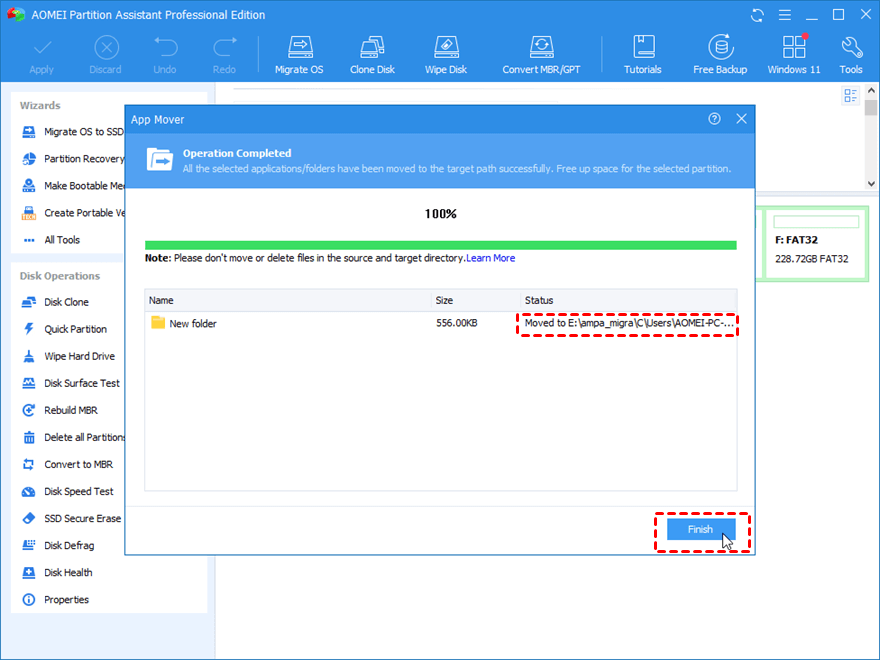
Step 7. Wait a moment, all selected folders will be moved safely. And you can see a new User Profile has been created automatically in the new location. Then click "Finish".
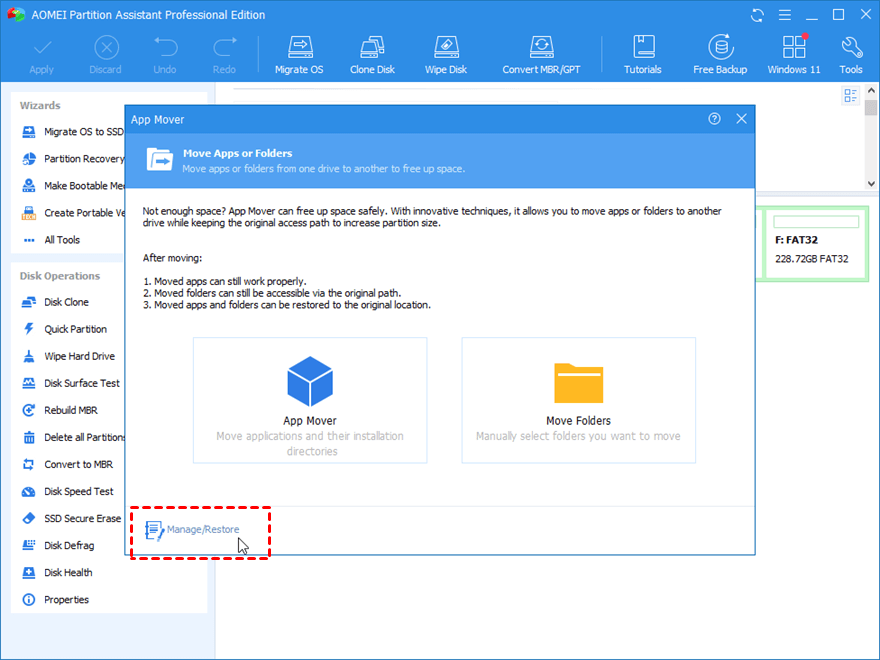
Furthermore, if you want to move it back, "Manage/Restore" can help you realize it in only three clicks.
Summary
If you are being disturbed by the User Profile occupying more and more space on the C drive, you can choose to move User Profile to another drive Windows 10 to release more storage space and keep the data safe by the way. Compared with File Explorer, AOMEI Partition Assistant Professional can get it done only in several clicks, which seems more easier and friendly for all users.
In addition, AOMEI software has other useful features that can help you experience a better computer such as migrating OS to SSD, deleting large files, wipe clean the hard drive. Besides, there is also the Server Edition for Windows Server users.

