How to Use Disk Management on Windows 11 to Initialize Disk
When you add an unused disk in Windows 11, you may want to know how to use Disk Management on Windows 11 to initialize the disk. You can find the answer in this post.
By AOMEI / Updated on May 12, 2023
Why should we initialize the disk?
After installing a new SSD in your computer, in order to successfully find it on the PC, you must first initialize the SSD. You can initialize the new hard drive to MBR or GPT, but you need to know some differences between them, and then choose according to your own situation.
MBR and GPT are two different partition styles. MBR (Master Boot Record) is the first sector to be read when the PC is powered on, it records the relevant information of the hard drive. GPT (GUID Partition Table) is the uniquely marked disk partition table format, it is used to replace the MBR partition table.
Here're some differences between them:
✔ GPT disk partition style can have up to 128 partitions, while MBR disk partition style has only 4 primary partitions, or three primary partitions, one extended partition and unlimited logical drives
✔ MBR cannot support hard drive larger than 2 TB, while GPT can support it.
✔ GPT is a newer partition style than MBR, which matches the UEFI boot mode; MBR matches the BIOS boot mode.
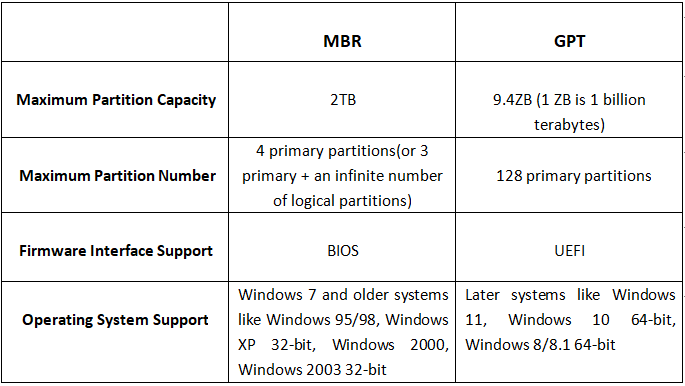
Note: Windows 11 only supports booting from UEFI, so the partition style of the initialized hard disk must be GPT. (If the hard drive is only used as a data disk, there is no partition style restriction.)
In the following content, we will talk about two methods to complete the initialization task of the new hard drive.
How to use Disk Management on Windows 11 to initialize a disk
Disk management is a practical utility on Windows OS, users can manage disks and partitions with it. It can work as the CMD: creating volumes, deleting volumes, converting MBR to GPT, etc. But it is more convenient and simpler, since there's a graphical interface. Here are the steps to initialize the disk.
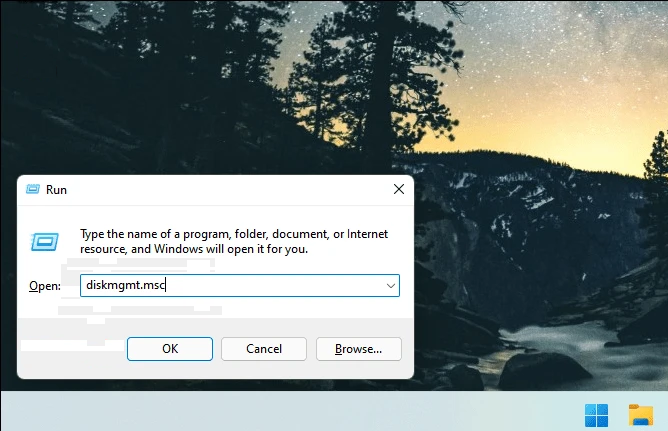
Step 1. Press "Windows +R" and type "diskmgmt.msc" with the Run program.
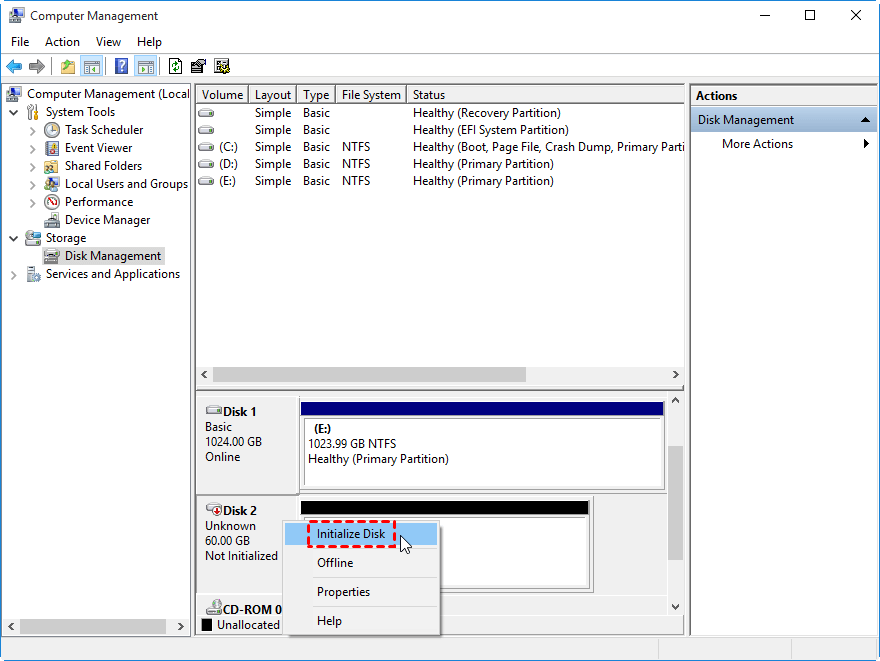
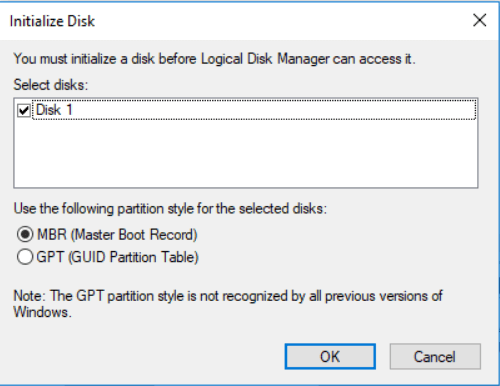
Step 2. In the main interface, right-click the target drive and click "Initialize Disk".
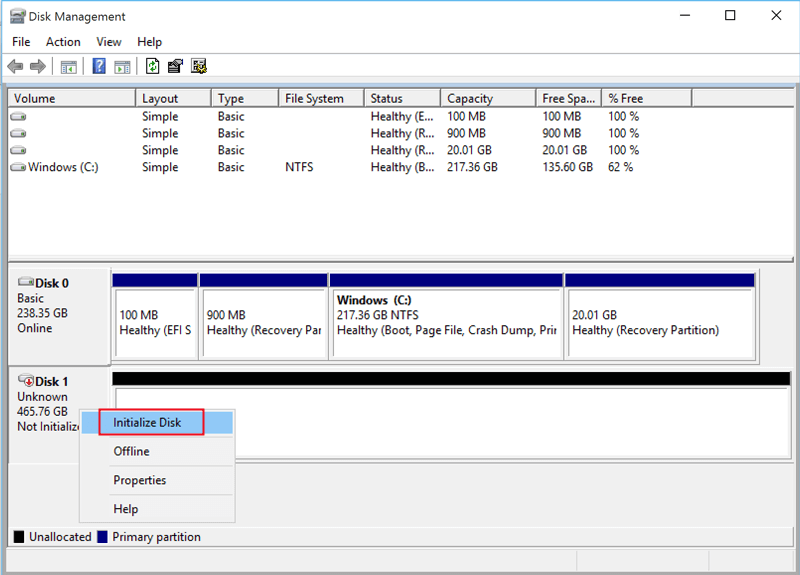
Step 3. In the new pop up window, choose MBR or GPT, then click "OK".
Step 4. When the drive is initialized smoothly, you can create new partitions by clicking "New Simple Volume".
An alternative to initialize the disk(hot)
Under normal circumstances, you can initialize a disk on Windows 11 via Disk Management. But sometimes you may encounter problems like "unable to initialize hard drive".
Is there a better tool to initialize disk on Windows 11 to MBR or GPT? Here, I highly recommend AOMEI Partition Assistant Standard to you. Through just a few clicks, this perfect disk management master helps you to initialize your disk without losing data.
After initializing the hard drive, users can also create new partitions in the new hard drive, managing the data more conveniently. Since it is an all-in-one software, it also has powerful functions such as Resize/Format/Delete partition, Convert MBR and GPT, etc.
Let's see how to initialize a SSD on Windows 11.
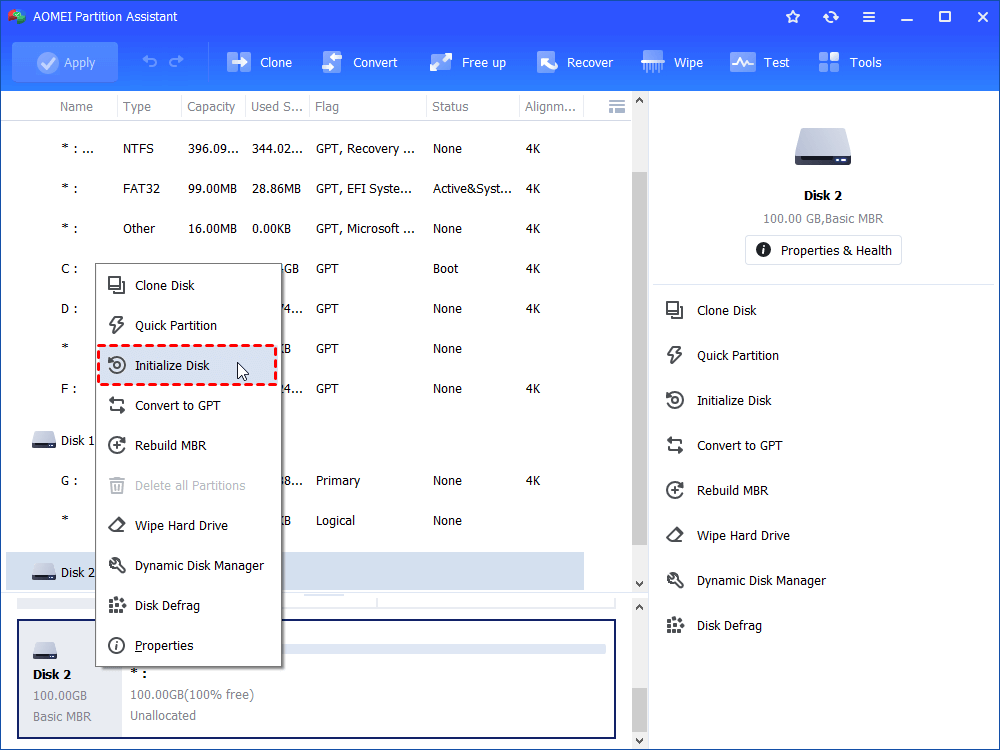
Step 1. Download and run AOMEI Partition Assistant Standard, right-click the new SSD and click "Initialize Disk".
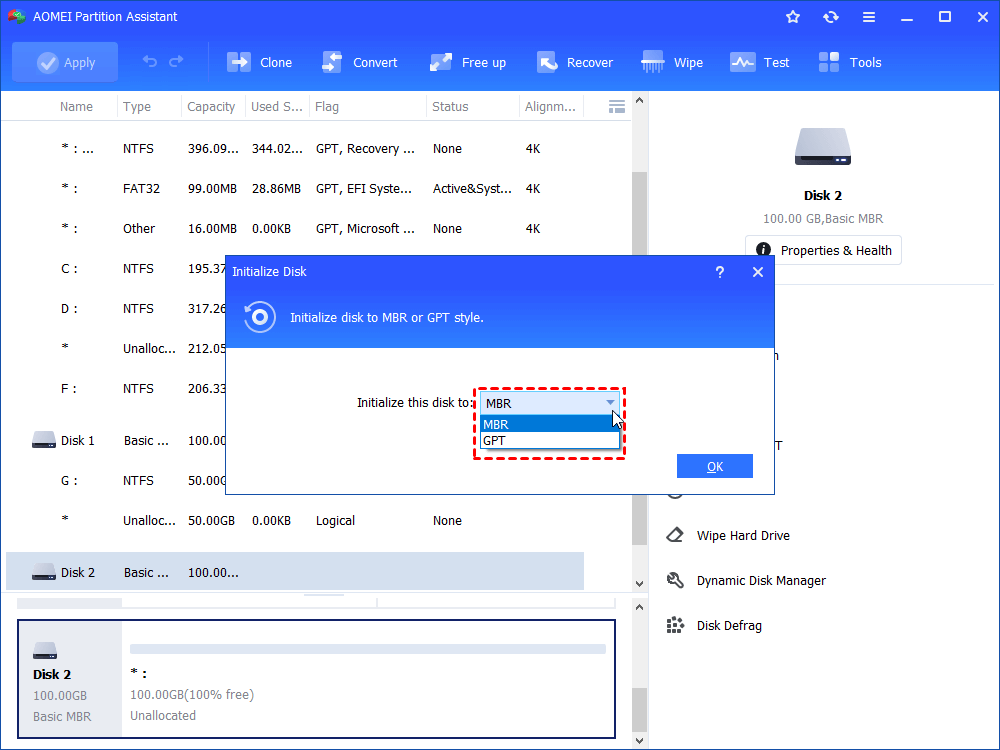
Step 2. Select "MBR" or "GPT", then click "OK" in the new window popped.
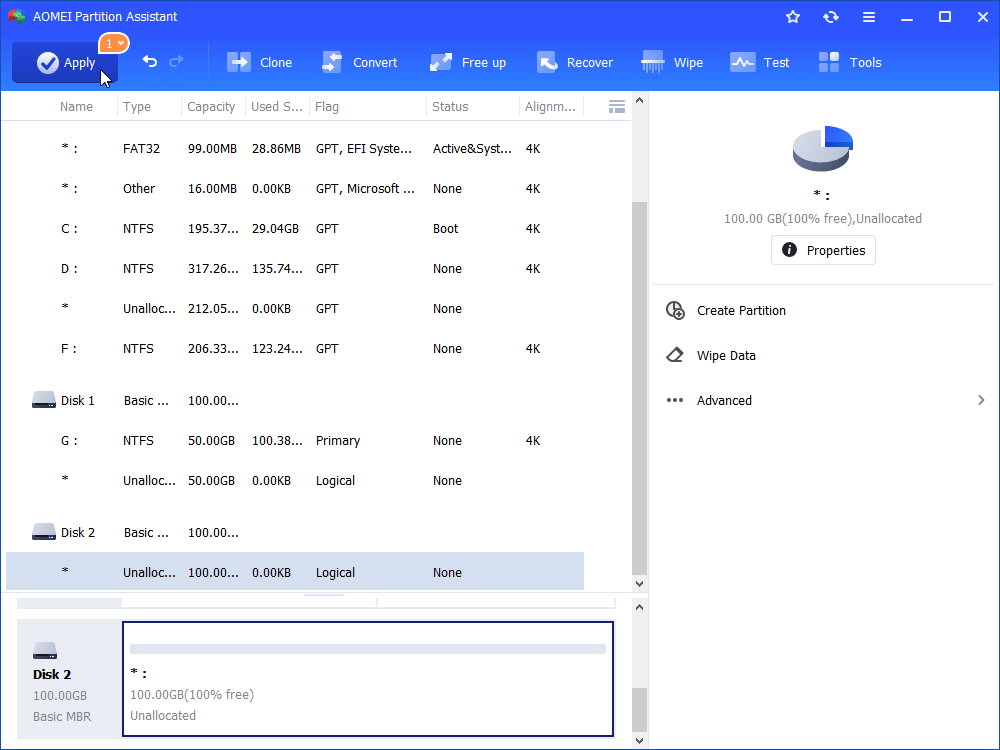
Step 3. Click "Apply" button marked on the following picture.
★ Further Tip: Create new partitions to manage your disk
After initializing your new hard drive, in order to avoid insufficient drive space caused by all data being automatically stored to the one drive, you'd better create new partitions to categorize the data in the computer.
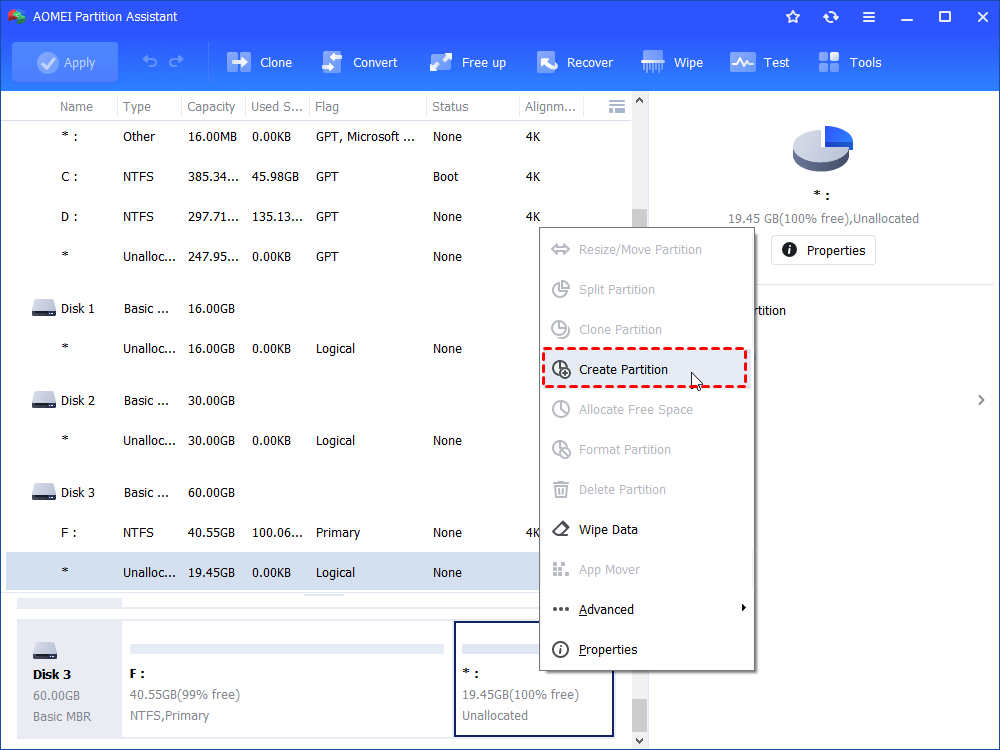
Step 1. Right-click the unallocated space on the new hard drive, then click "Create Partition".
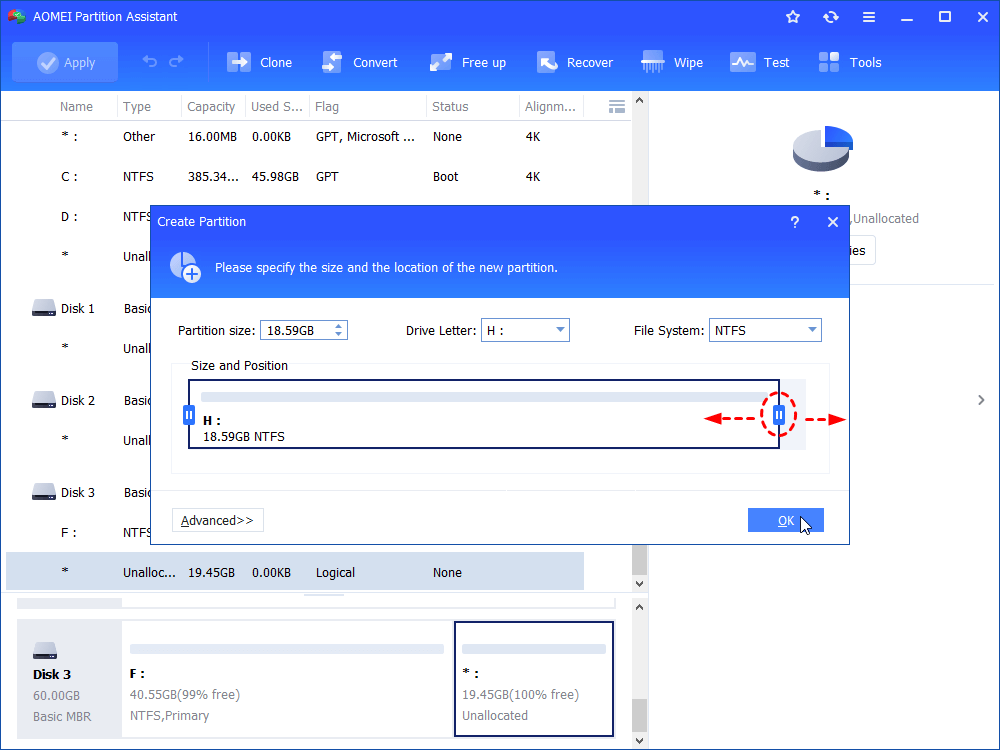
Step 2. Set the new partition size by dragging the slider or enter the amount of space, then click "OK". Besides, you can also click "Advanced" to see more options.
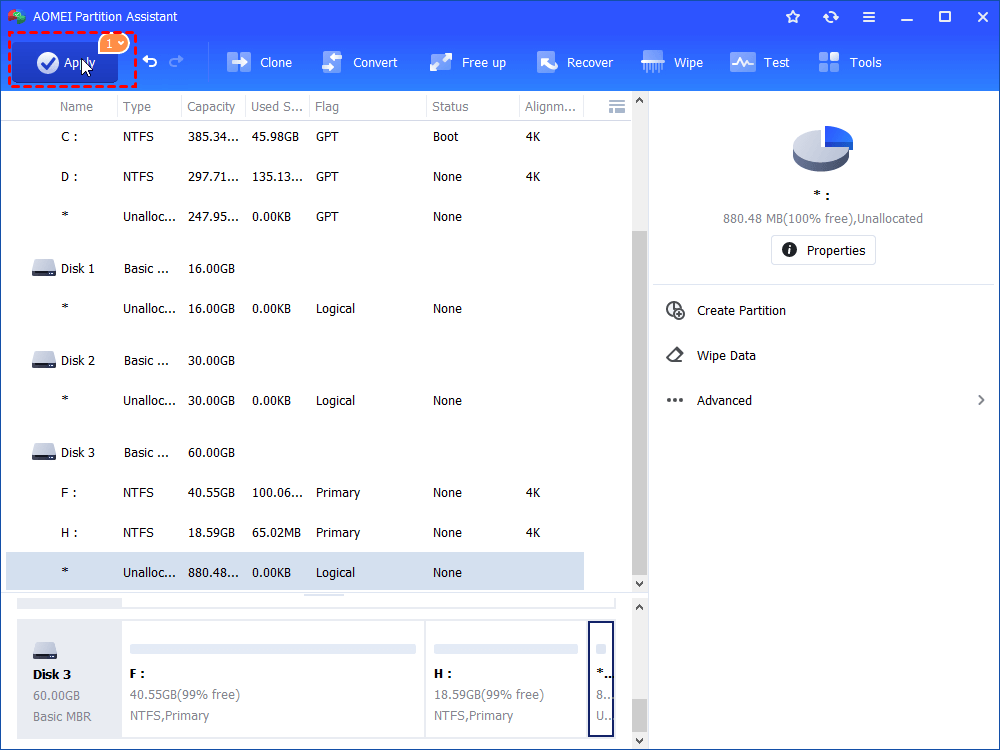
Step 3. Click "Apply" to realize the pending operations.
Verdict
To conclude, we have displayed how to use Disk Management on Windows 11 to initialize a disk. When it doesn't work, we also shared a powerful alternative for you.
It is worth mentioning that if you want to enjoy some advanced features, including Defrag disk, Allocate free space, Switch Windows to a different drive, etc., you can turn to the Professional Version.

