[Reasons & Solutions] Encrypt Contents to Secure Data Greyed Out in Windows 11
This post will introduce about Encrypt contents to secure data greyed out in Windows 11. With the possible reasons and solutions, you can effectively troubleshoot that and encrypt your important files.
By Irene / Updated on March 1, 2024
User case: Options “Encrypt contents to secure data” greyed out in Windows 11
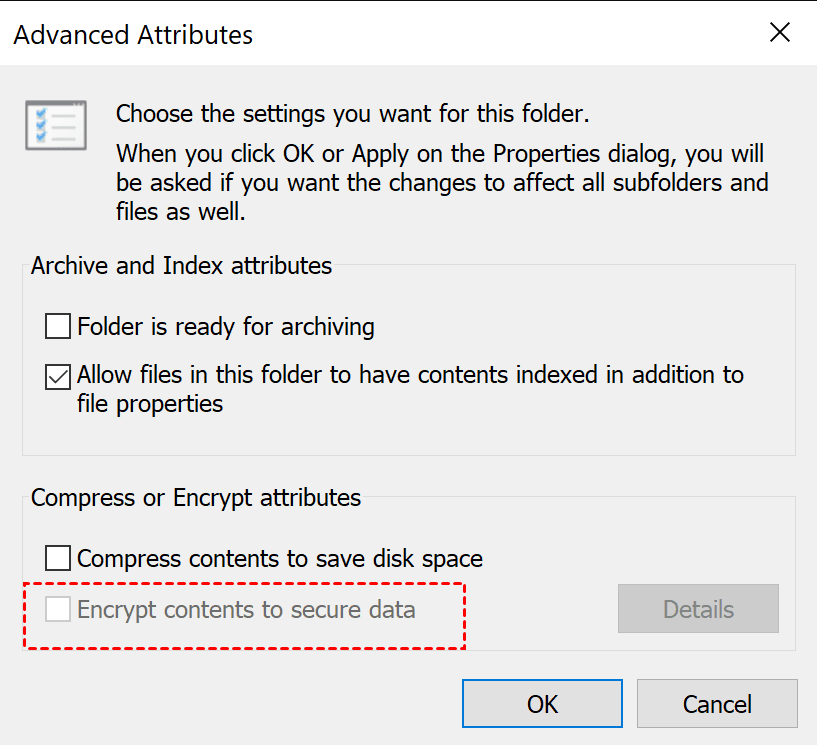
Hello all, I am trying to encrypt some files, but the option to do so is grayed out in the properties menu (see pic). Please help me, this is really starting to annoy me to no end. Thanks for any help received!
- Question from Microsoft Community
At times, it's necessary to secure the data on our computers using a built-in Windows feature called the Encrypted File System (EFS). This helps guard against prying eyes and unauthorized users attempting to access or pilfer your information, whether you're transferring it or storing it on your PC.
Data encryption ensures the privacy of your information. However, there are instances when you might encounter a situation where the option Encrypt contents to secure data is greyed out in Windows 11. This article provides you with straightforward solutions to resolve this problem without any complications.
Why is the option "Encrypt contents to secure data" greyed out?
Some known reasons for the "Encrypt contents to secure data" option being greyed out include:
- The reasons of the option "Encrypt contents to secure data" greyed out in Windows 11
- Corrupted system files: If important system files, especially those related to EFS, are missing or damaged, the built-in Windows encryption won't work. This leads to the inability to encrypt files.
- EFS disabled by default: Sometimes, the encryption file system is turned off by default, causing the encryption option to appear greyed out. Users need to manually enable it through the Windows registry, as explained later in the article.
- Wrong file system: Check if your system drive is set to FAT32. To use the EFS feature, it needs to be in NTFS mode. If it's not, convert it to NTFS to activate EFS.
- Windows 11 update Issue: The problem may stem from vulnerabilities in Windows 11 updates, especially affecting the early versions of Windows 11.
- Windows version limitation: Certain Windows versions, like Windows 11 Home, don't support content encryption. This limitation can result in the encryption option being greyed out. In simple terms, if you're using Windows 11 Home, you can't encrypt files using the usual method.
Once you've addressed the potential issues mentioned above, we can proceed to solve the "Windows 11 encrypt folder greyed out" problem together.
How to fix Windows 11 “Encrypt contents to secure data” greyed out?
According to the reasons, you can try the following fixes to solve the problem that the "Encrypt contents to secure data" option greyed out in Windows 11.
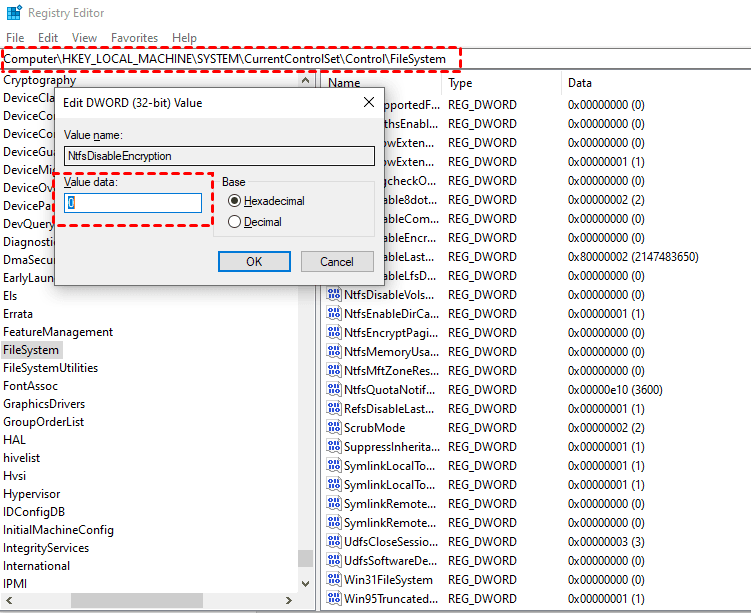
Fix 1. Run Windows Registry to turn on EFS
Due to the disabled EFS may lead to “ Encrypt contents to secure data” greyed out in Windows 11, you can follow the steps to turn on it with Windows Registry.
Step 1. Press Windows + R to open the Run dialog box, type "regedit," and click OK.
Step 2. Once the Registry Editor window opens, navigate to the following location:
HKEY_LOCAL_MACHINE\SYSTEM\CurrentControlSet\Control\FileSystem
Step 3. On the right-side menu, locate NtfsDisableEncryption and double-click on it.
Step 4. In the Edit DWORD (32-BIT) Value window, set the value to 1 and press Enter. Afterward, click the OK button.
Fix 2. Convert the file system to NTFS
If your system drive is currently using FAT32 file system, EFS will be disabled, and you won't be able to turn on it until you convert it to NTFS. Therefore, it's necessary to perform the conversion first.
For a smooth conversion process, it is advisable to use a professional tool like AOMEI Partition Assistant Professional, known for solving computer issues effectively. Without such a tool, you might encounter an error message like "Conversion from FAT32 to NTFS is not available" or similar.
The AOMEI software provides the "NTFS to FAT32 Converter" program, allowing you to convert FAT32 to NTFS without formatting and losing data, and vice versa. It enables you to quickly convert between FAT32 and NTFS without losing data. What's more, it can decompress NTFS files and decrypt encrypted ones. Feel free to download this converter and give it a try.
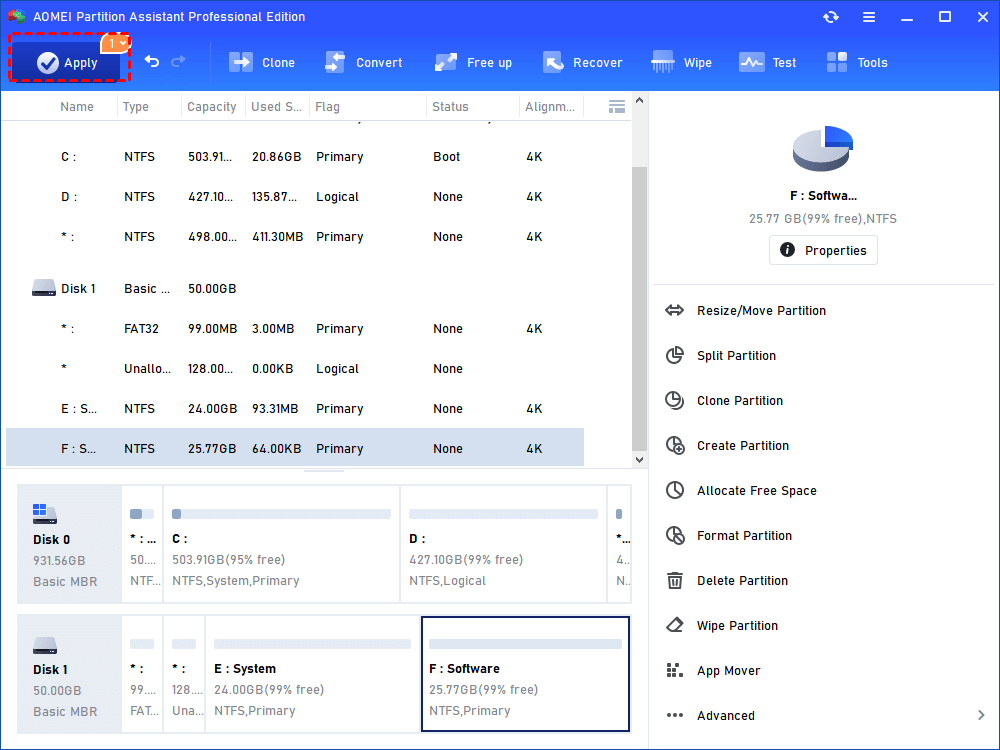
Step 1. Install and open AOMEI Partition Assistant Professional. Click on the drive you want to change. Choose "Advanced" then "Convert to NTFS".
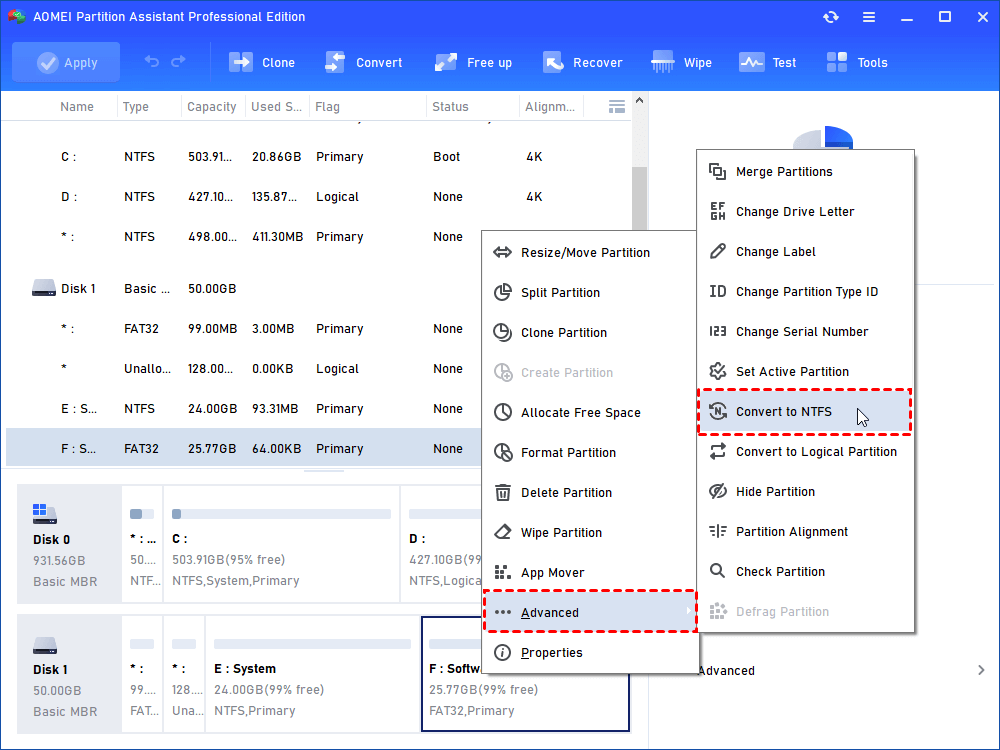
Step 2. NTFS should be already chosen in the window that appears. Press "OK".
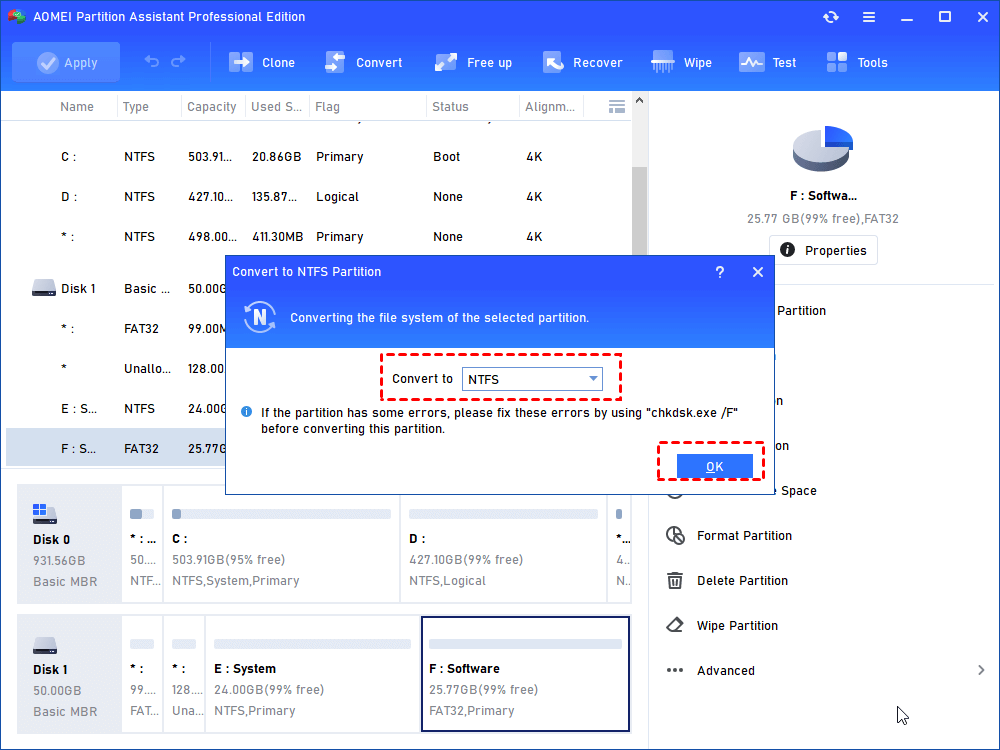
Step 3. The file system is now using the NTFS file system. Click "Apply" to make the change happen.
Fix 3. Perform SFC and DISM scan
To check whether there are corrupted system files that cause Windows 11 Encrypt contents to secure data greyed out, you can perform SFC and DISM scan
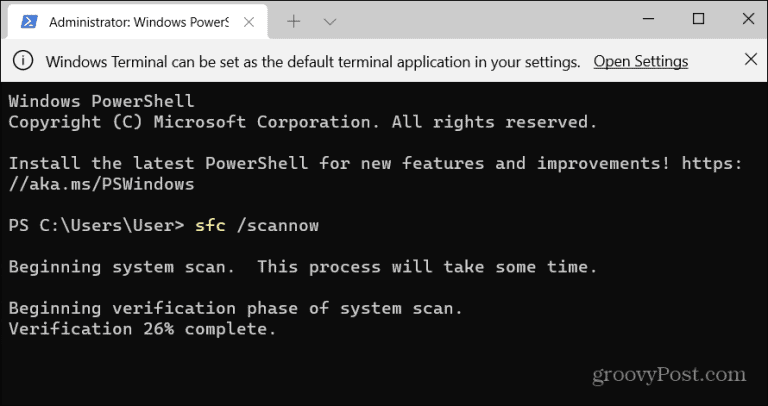
Step 1. Open the Power User menu by pressing Win + X, select Terminal (Admin), and confirm by clicking Yes on the User Account Control (UAC) prompt.
Step 2. In the console, enter the command SFC /scannow and press Enter.
Step 3. After the SFC scan finishes, run the following commands one by one, pressing Enter after each:
• DISM /Online /Cleanup-Image /ScanHealth
• DISM /Online /Cleanup-Image /RestoreHealth

Step 4. Allow the DISM scan to complete, then restart your PC. Try reopening your apps afterward.
Fix 4. Run AOMEI Partition Assistant to encrypt files
Certain Windows versions, such as Windows 11 Home, have the "Encrypt contents to secure data" option greyed out because they don't support content encryption. However, AOMEI Partition Assistant Professional offers you the BitLocker function as an alternative for encryption.
If you're using other versions such as Pro or Enterprise, using it to effectively manage the BitLocker utility is also a good idea. You can use it to back up the recovery key, change the password, lock the drive, and turn off BitLocker.
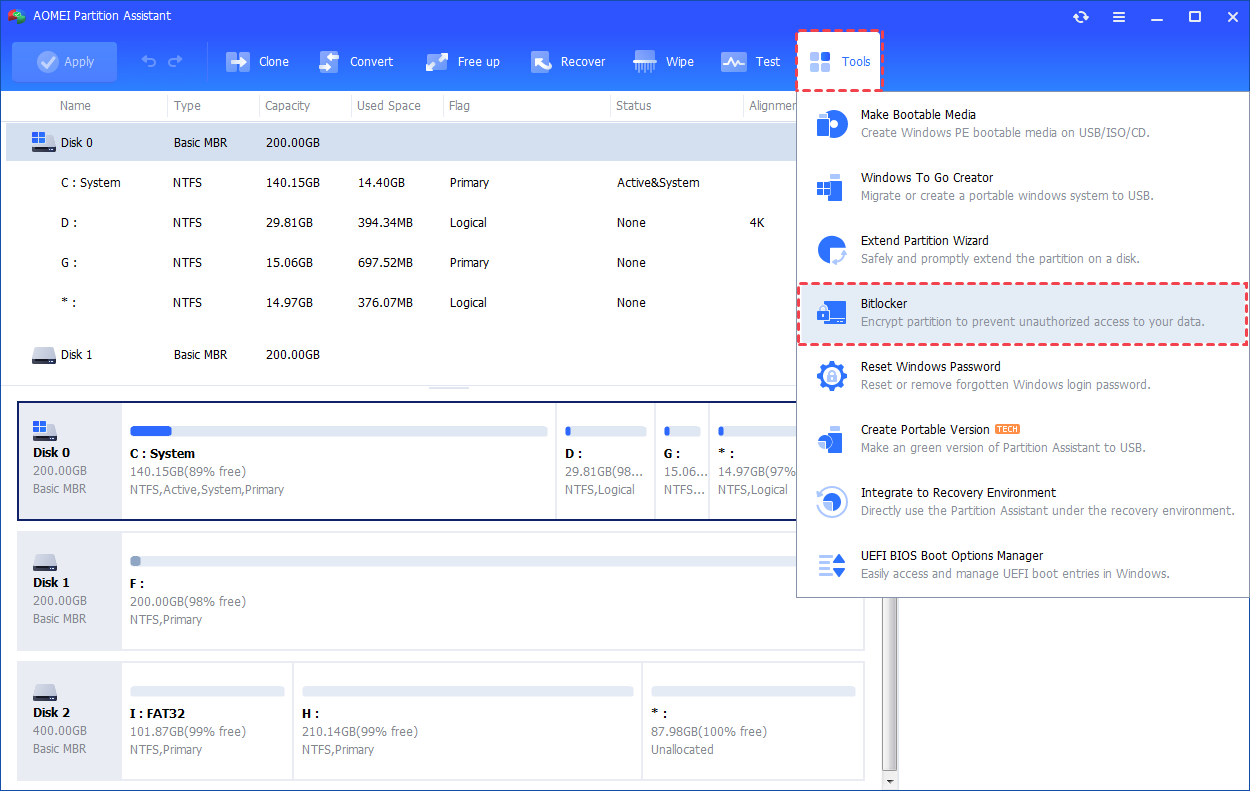
Step 1. Install and open AOMEI Partition Assistant Professional. Go to the "Tools" tab and choose "BitLocker".
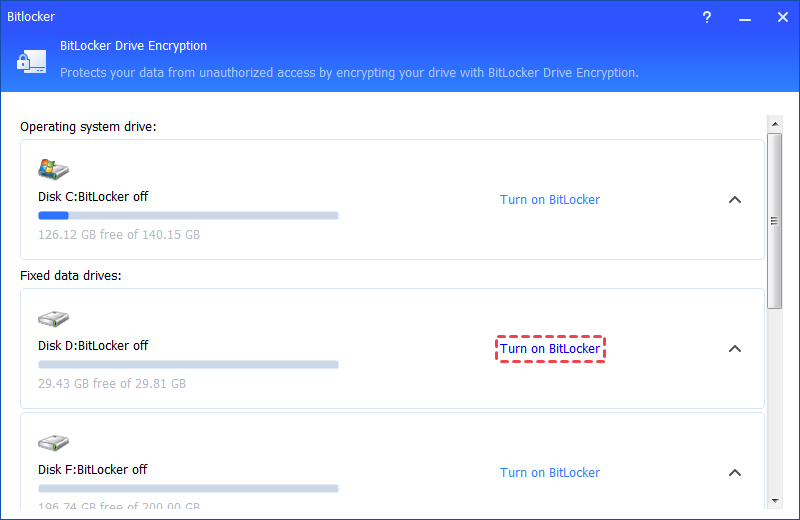
Step 2. You'll see a list of all drives on your system, including the operating system, fixed data, and removable drives. Locate the partition you want to encrypt with BitLocker and select "Turn on BitLocker". (For example, let's use drive D:).
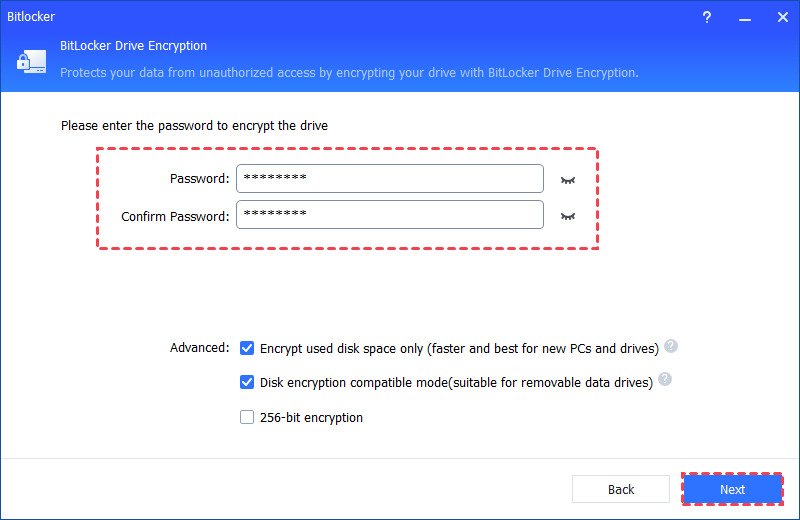
Step 3. Set and confirm a password for encrypting the drive, then click "Next".
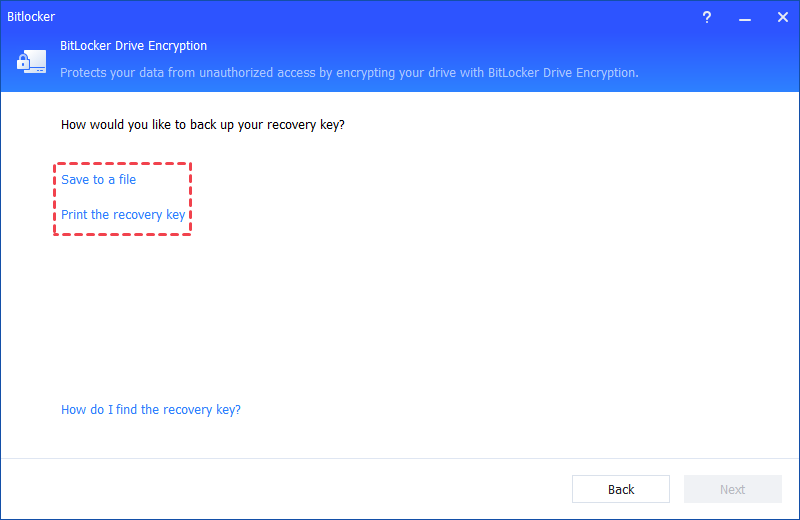
Step 4. Choose how to back up your recovery key. You can save it to a file or print it out. If you select "Save to a file", pick a location on your computer to store the recovery key.
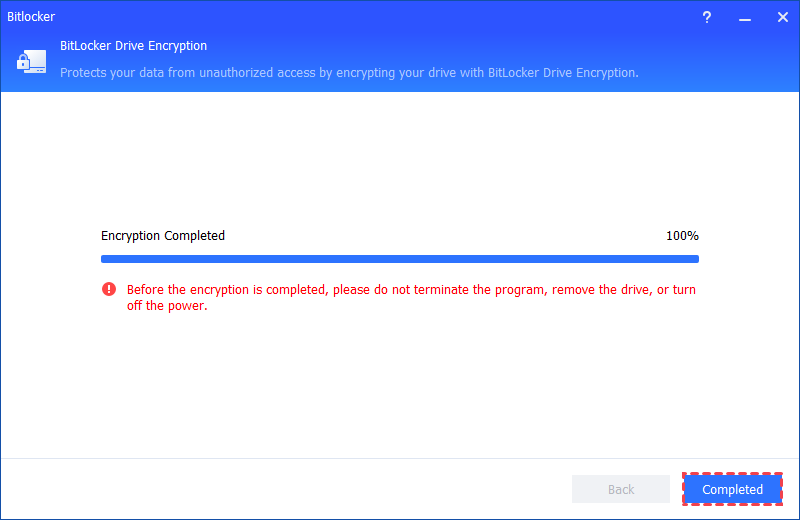
Step 5. The encryption process may take some time. Don't close the program, remove the drive, or shut down the computer until encryption is complete. Once done, click "Completed". Your drive is now BitLocker encrypted.
Conclusion
With these solutions, you can now fix the "Encrypt contents to secure data” greyed out in Windows 11. This article explains why the encryption option might appear greyed out and offers different ways to solve it.
If you have chosen AOMEI Partition Assistant to successfully solve the problem, you can also explore more functions to effectively manage your Windows 11 PC. For example, you can use it to expand the drive space, upgrade a disk, or remove junk files. For Windows Server users, this software provides the AOMEI Partition Assistant Server edition.

