2 Easy Methods on How to Check CPU Temp for Windows 11
If your computer stuck in slow performance, to know how to check CPU temp Windows 11 is one of the useful methods. There are other 3 practical ways to help you improve computer performance.
By Irene / Updated on July 27, 2023
Why do you need to check CPU temperature for Windows 11?
The CPU is a very important part of a computer. It does a lot of calculations and processes that are needed for the computer to work. When the CPU does these tasks, it gets hot, and if it gets too hot, it can cause problems like the computer crashing, showing a black screen of death, or suddenly turning off.
It's important to check the CPU temperature to make sure the computer works well and doesn't have any issues. This is especially important when doing things that make the CPU work really hard, like playing games or editing videos, because it can make the CPU even hotter.
To check the CPU temperature in Windows 11, you have two options: you can use the tools that come with Windows, or you can use third-party programs. You can choose the one that suits you most.
What is the normal CPU temperature value?
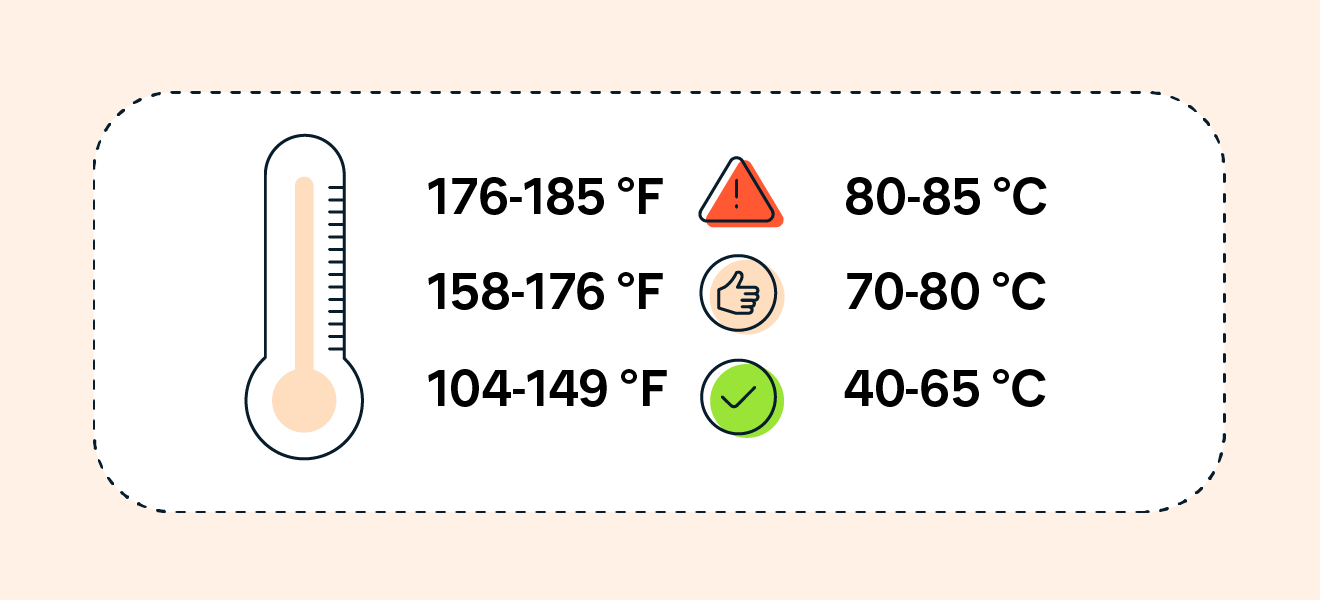
The normal CPU temperature varies based on the CPU model. Generally, a safe temperature range for normal usage is between 40–65°C (104–149°F).
For non-gaming scenarios, the ideal temperature is about 45-60°C (113–140°F), while more demanding tasks, such as running resource-intensive apps or games can push it to 70–80°C (158–176°F). Temperatures exceeding 80-85°C (176–185°F) indicate potential issues.
Your CPU performs numerous operations each second, generating significant heat. Meanwhile, the following causes may also lead to CPU overheat.
• Inadequate cooling and poor ventilation
• Dust accumulation
• Outdated hardware
• Thermal paste deterioration
• Low-quality or insufficient power supply
If the CPU overheats frequently, better cooling methods should be considered to prevent permanent damage. PC cleaner software can also help by reducing CPU usage caused by malware or old programs.
How to check CPU temp on Windows 11
With the methods to check CPU temp for Windows 11, users can then take measures like cleaning dust from cooling components, improving airflow, or using better cooling solutions to maintain optimal CPU temperature and overall system health.
Method 1. Check CPU temperature on Windows 11 with BIOS
BIOS (basic input/output system) is a type of software built into the computer's motherboard that can help you monitor your CPU's temperature. Here we take the ASUS laptop as an example to learn how to check CPU temp Windows 11.
Step 1: To turn off your PC, either press and hold the Power key or click on the Windows > Desktop icon and select "Shut down" from the menu that appears.
Step 2: Once your PC is off, turn it back on by pressing the Power key, and before it fully boots up, continuously press the F2 key to access the BIOS.
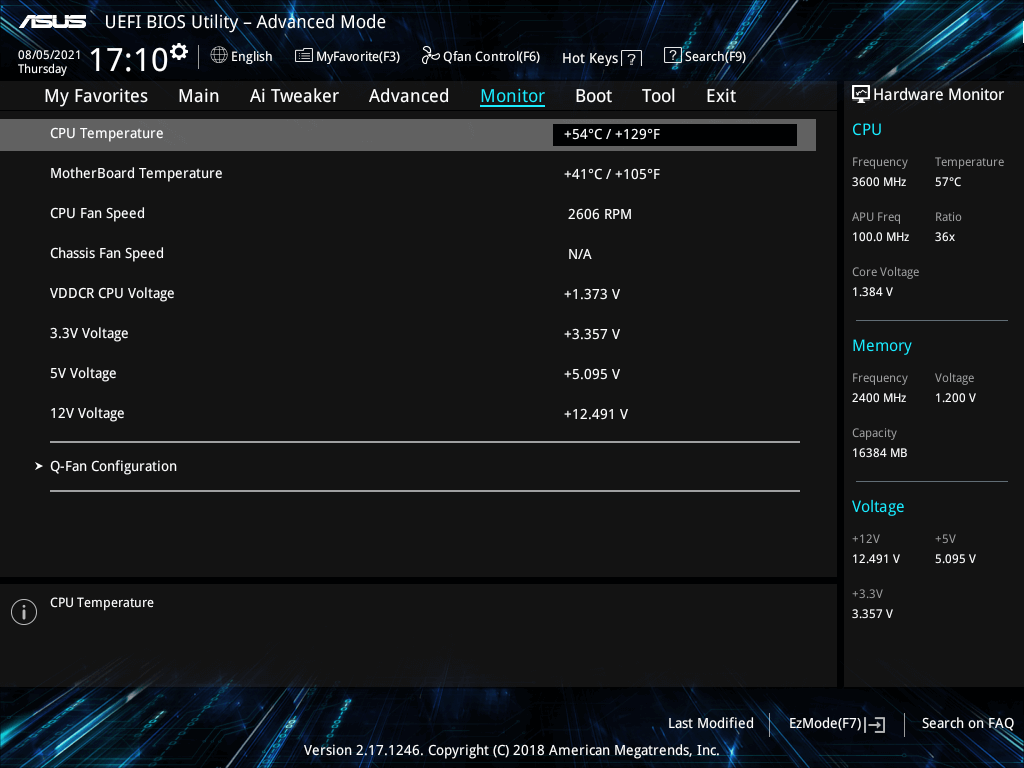
Step 3: Inside the BIOS, you will find the CPU temperature displayed. For more detailed information, navigate to the Monitor tab by using the right-forward arrow key. In this section, you can view the CPU frequency/temperature, motherboard temperature, CPU fan speed, and other relevant details about your PC, as shown in the picture below.
Method 2. Use Speccy to check CPU temperature for Windows 11
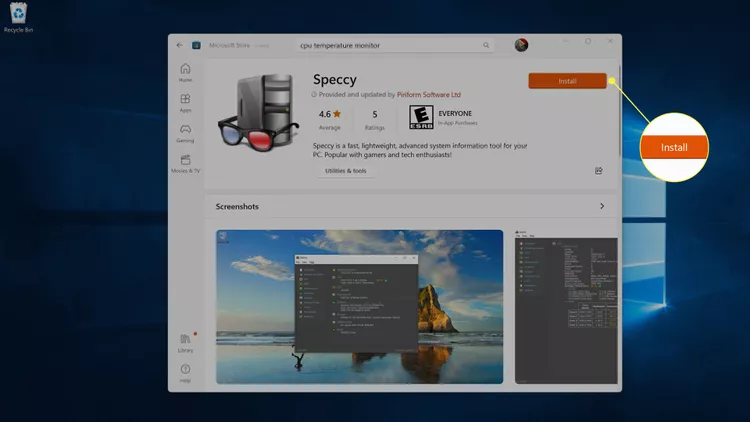
Speccy is a third-party tool accessible directly through the Microsoft Store. It allows you to obtain comprehensive information about your PC components, including details about the motherboard, CPU, graphics card, RAM, and more. Moreover, you have the option to save the results in various formats like XML, text files, or snapshots for further reference or analysis.
Step 1. Download Speccy from the Microsoft Store.
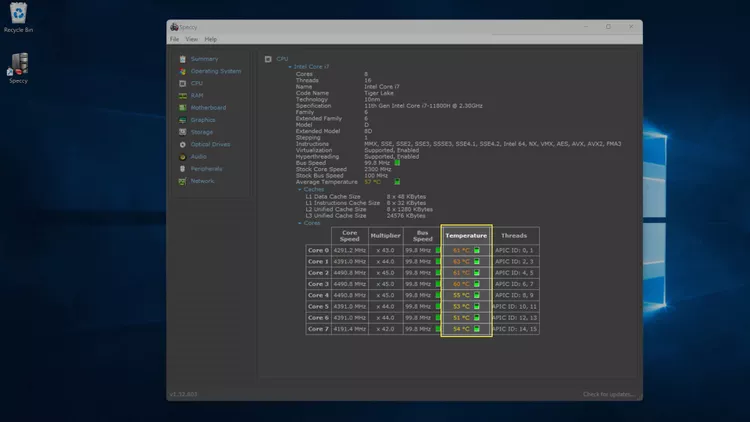
Step 2. Launch it and choose “CPU” on the left.

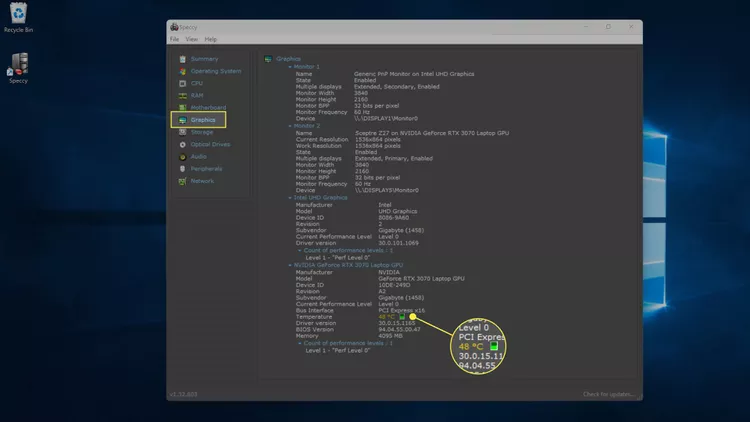
Step 3. In the CPU interface, you can see the temperature of each individual core of your CPU.
Step 4. You can also click the Graphics tab to see the temperature of your GPU.
Further reading: 3 ways to improve computer performance apart from Windows 11 CPU temperature checking
If you search for information about how to check CPU temp Windows 11 due to crashing, black screen or slow response in editing videos and gaming, it is time to adopt extra measures apart from verifying Windows 11 CPU temperature.
AOMEI Partition Assistant Professional boasts many practical functions that can help you easily improve computer performance. It is designed to solve various partition problems and supports almost all Windows versions. Given many reasons may cause slow performance, here we will provide different solutions with this powerful tool to help you solve the problem.
Way 1. Allocate free space
Having sufficient storage space on the system drive is necessary. When the C drive becomes full, it can cause the computer to slow down, and gaming performance can suffer as well. In such a situation, the most effective solution is to allocate additional free space to the system drive (usually C drive).
Step 1. Open AOMEI Partition Assistant Professional. Right-click the D: drive, and select "Allocated Free Space".

Step 2. Then, it will pop up the window where you can allocate free space from D: drive to C: drive. After setting up, click "OK".

Step 3. Finally, click "Apply" and "Proceed" to execute the progress.

Way 2. Clear junk files with PC Cleaner
During regular computer usage, the system tends to create numerous junk files and file fragments. Over time, these accumulated files can consume the free space on your drive. Especially if the C drive becomes cluttered with excessive junk files, it can lead to a noticeable slowdown of your computer's performance, and in severe cases, result in frequent system crashes and encounter other common PC errors. So, it is important to clear them regularly.
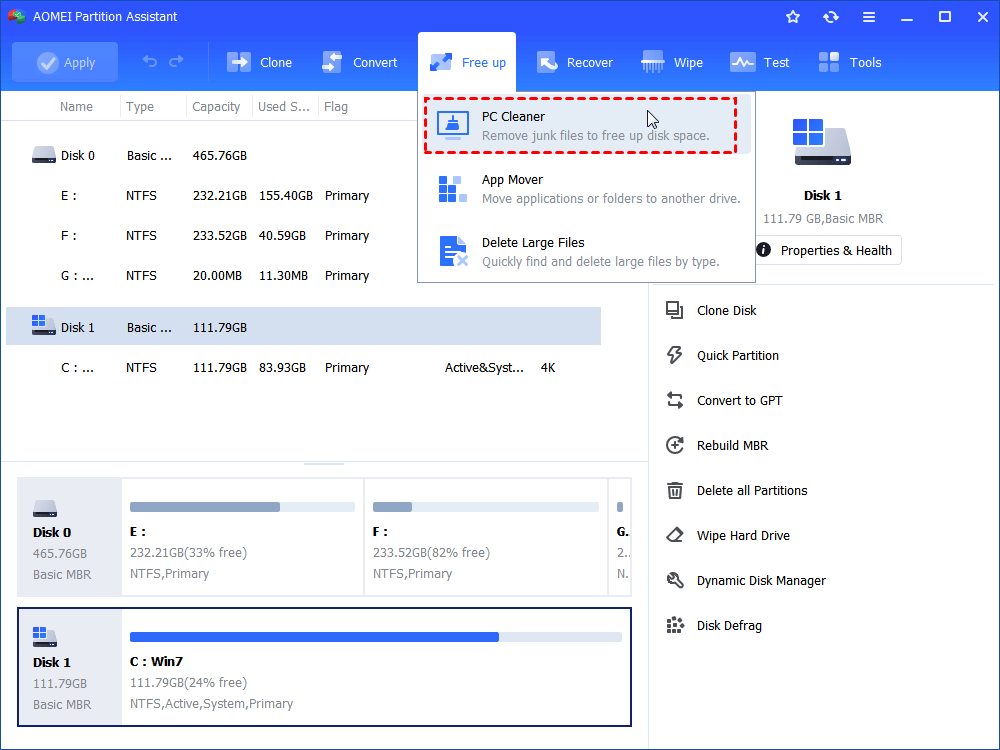
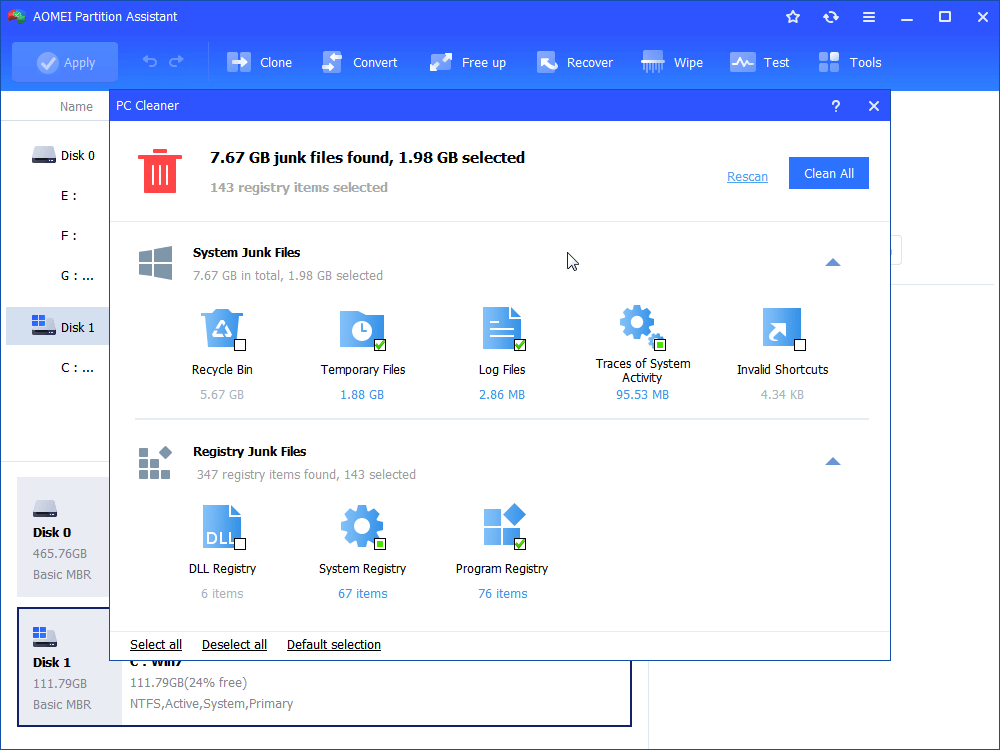
Step 1. Run this tool, and click "Free up" and "PC Cleaner" in order.
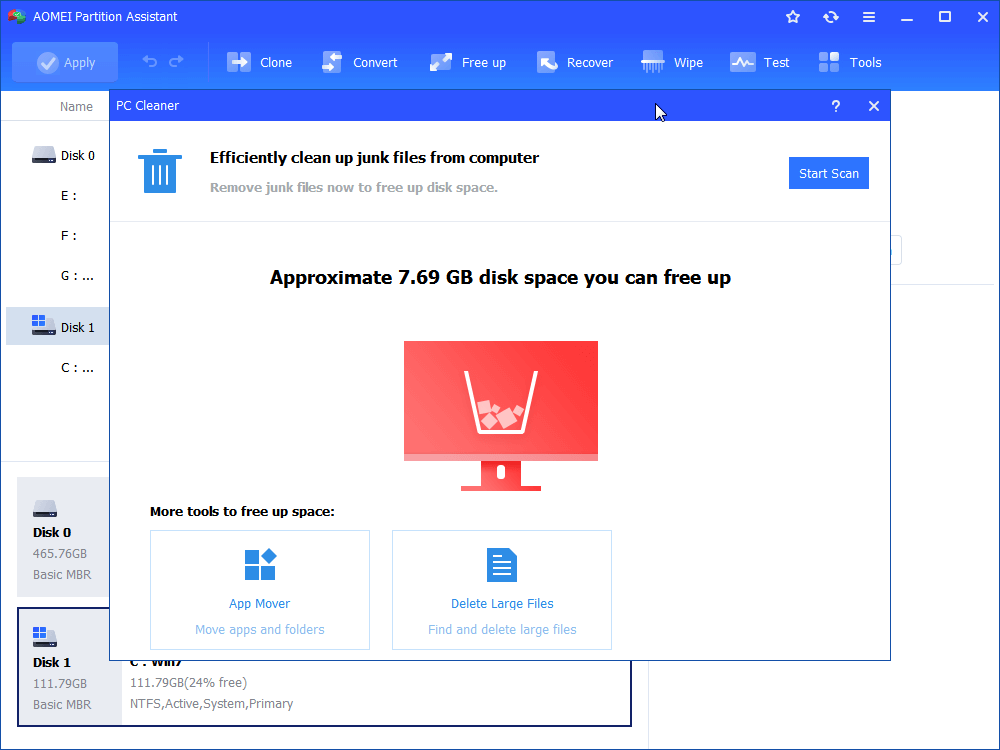
Step 2. The approximate space you can get will be shown, click "Start Scan" to scan the PC for junk files.
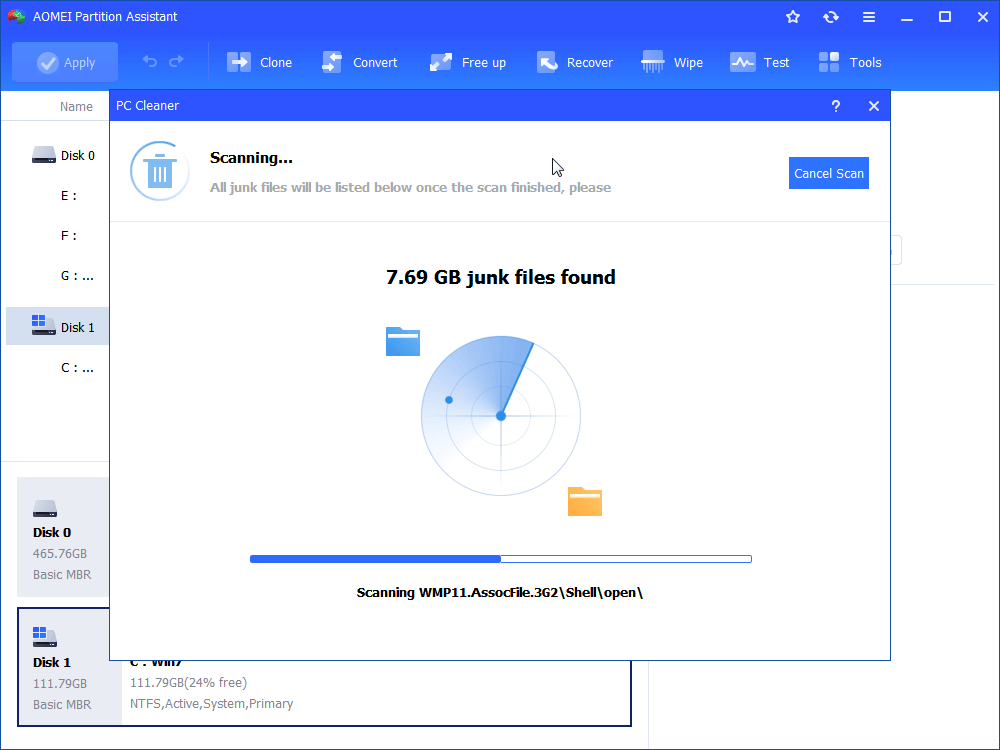
Step 3. Wait patiently, all junk files will be listed once the scanning is finished.
Step 4. Select the junk files you want to delete and click "Clean All".
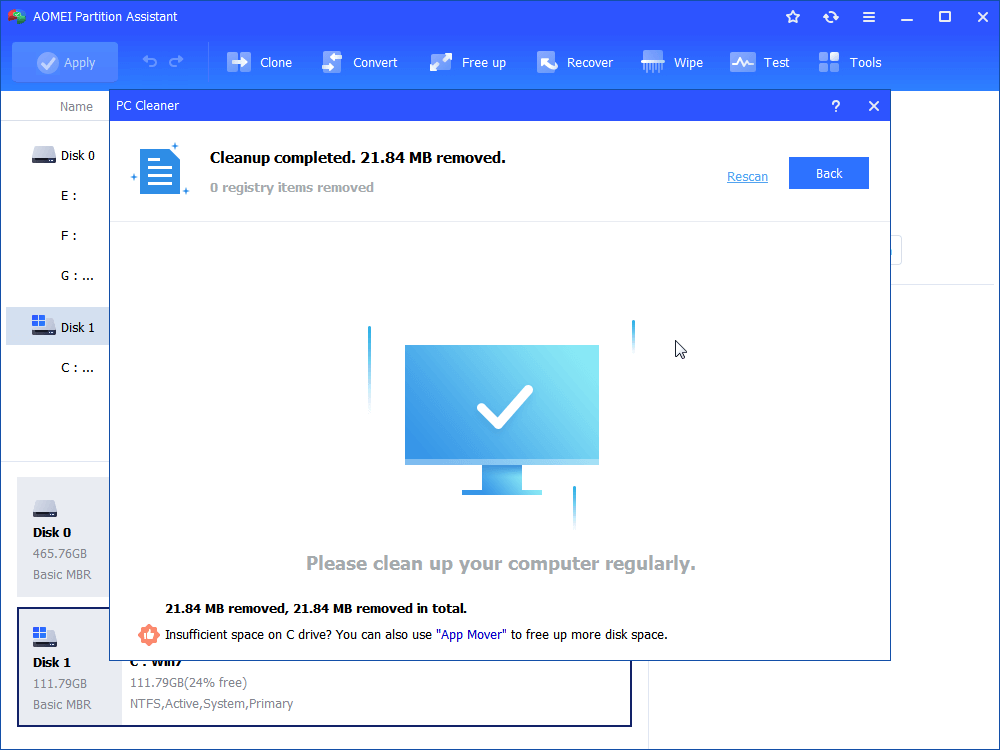
Step 5. Click "Back" when you successfully clean up the chosen junk files.
Way 3. Run PC defragment
Defragmentation involves reorganizing the scattered and disordered files that accumulate over time on the disk, resulting in an improvement in the overall performance and operating speed of the computer.
Tips:
✍If your file system is different, please make sure to convert it to NTFS.
✍ To shorten the time of the PC defragmentation process. It is advisable to use "PC Cleaner" and "Delete Large Files" first.
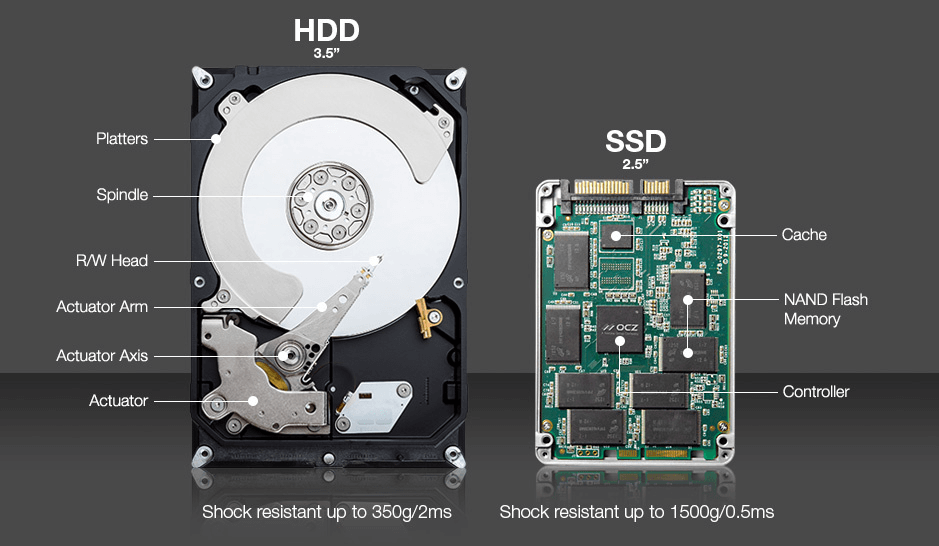
✍ Given the difference between HDD and SSD, you cannot defrag SSD in this way. If you need to do so, please read this section for reference.
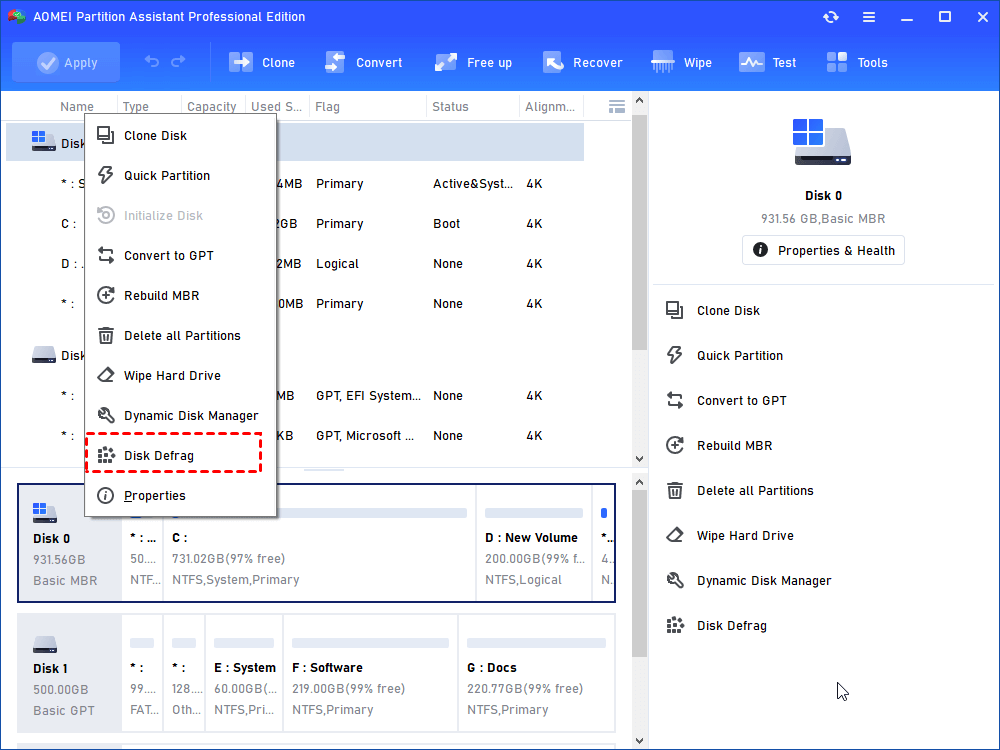
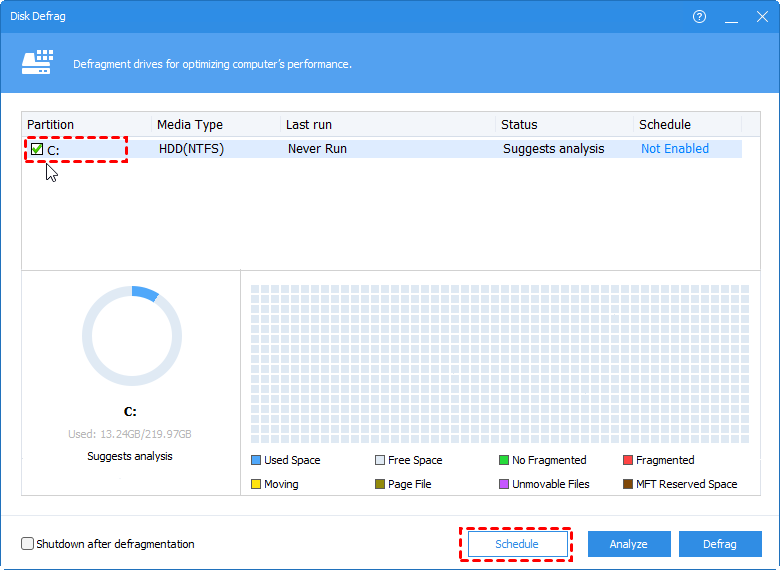
Step 1. Download and run this powerful tool, right-click the target drive, and select "Disk Defrag".
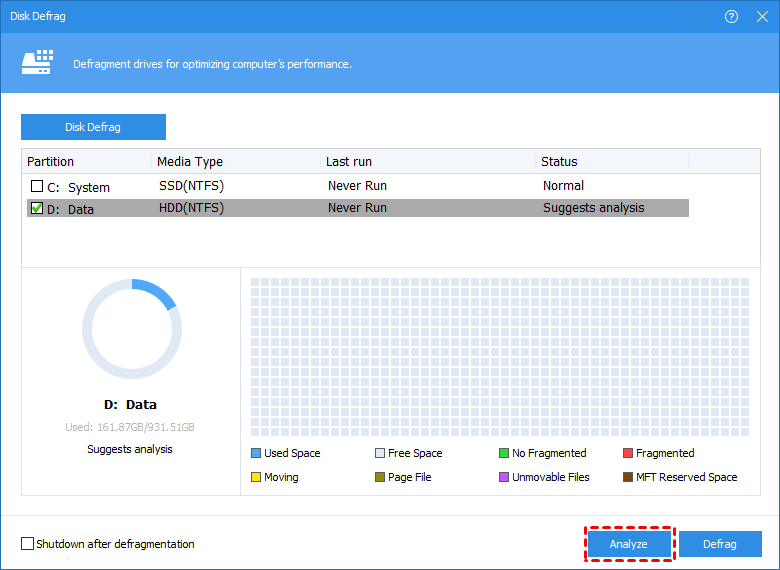
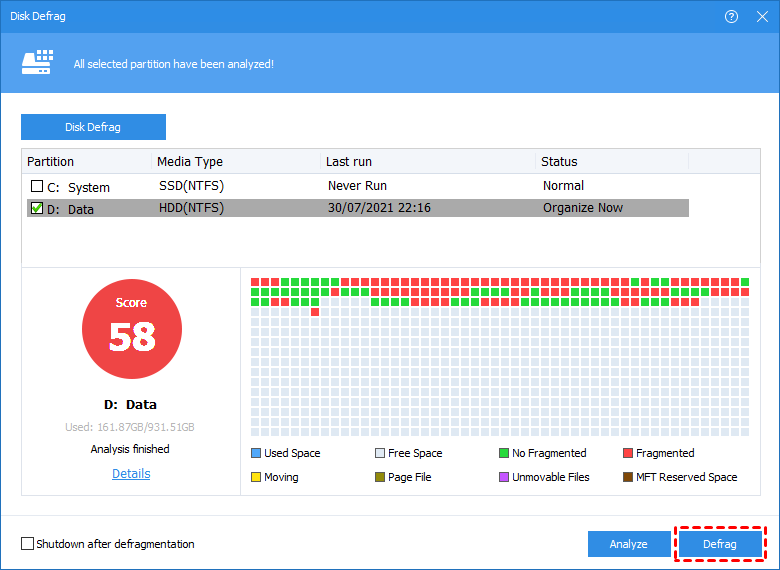
Step 2. In the new window, choose the drive need to defrag and click "Analyze".
Step 3. If you want to defrag the target drive regularly, click "Schedule".
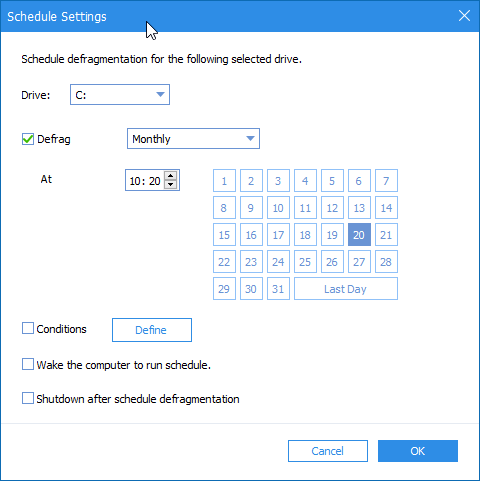
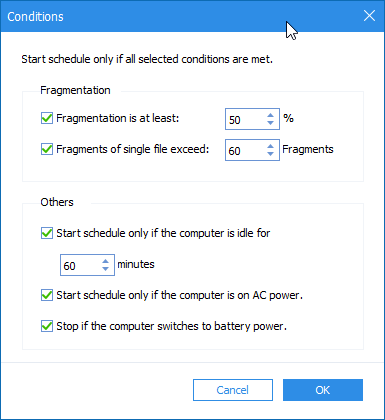
Step 4. In the new popped window, choose the drive you want to defrag, set the special time to defrag it, and click "OK". Then click "Conditions" to set the degree of the defragment operation.
Step 5. Set other options according to your needs, then click "OK".
Step 6. Finally, click "Defrag" to start it.
▌Safely optimize your SSD performance
Due to the different construction of HDD and SSD, forcibly defragging SSD will not optimize it. Instead, you will damage your SSD and even shorten its lifespan. If you want to improve SSD performance, you can try the "4K alignment" function.
Here're the detailed steps to improve the performance of your SSD:
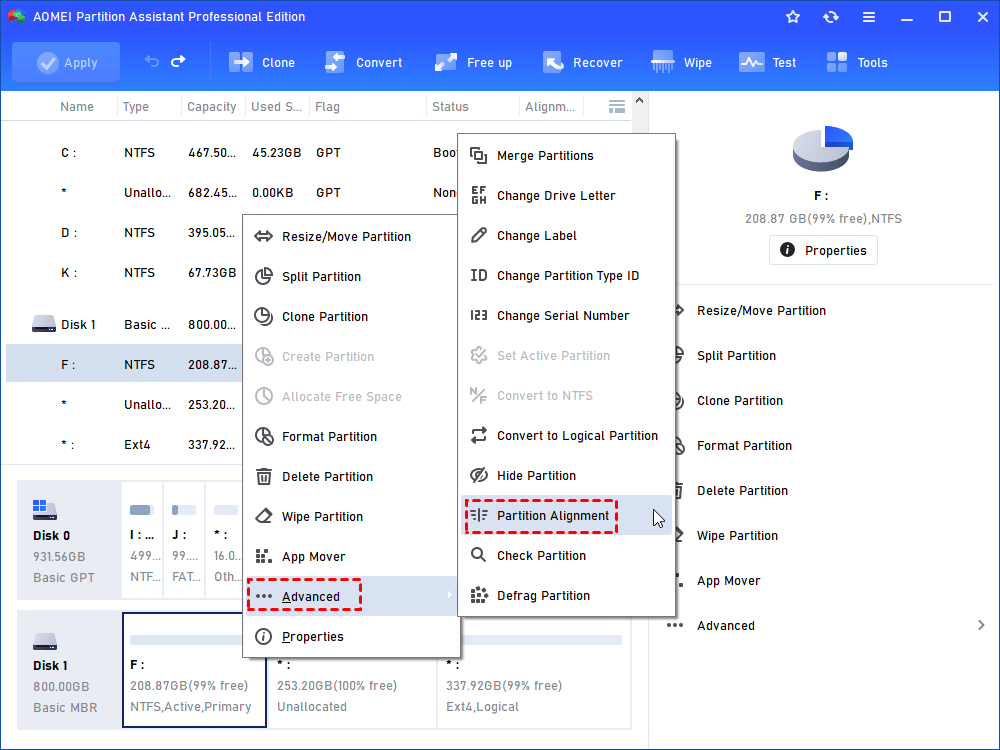
Step 1. Right-click a partition from the SSD, click "Advanced" and "Partition Alignment".
Step 2. In the new popped window, select "4096 Sectors" and click "OK".
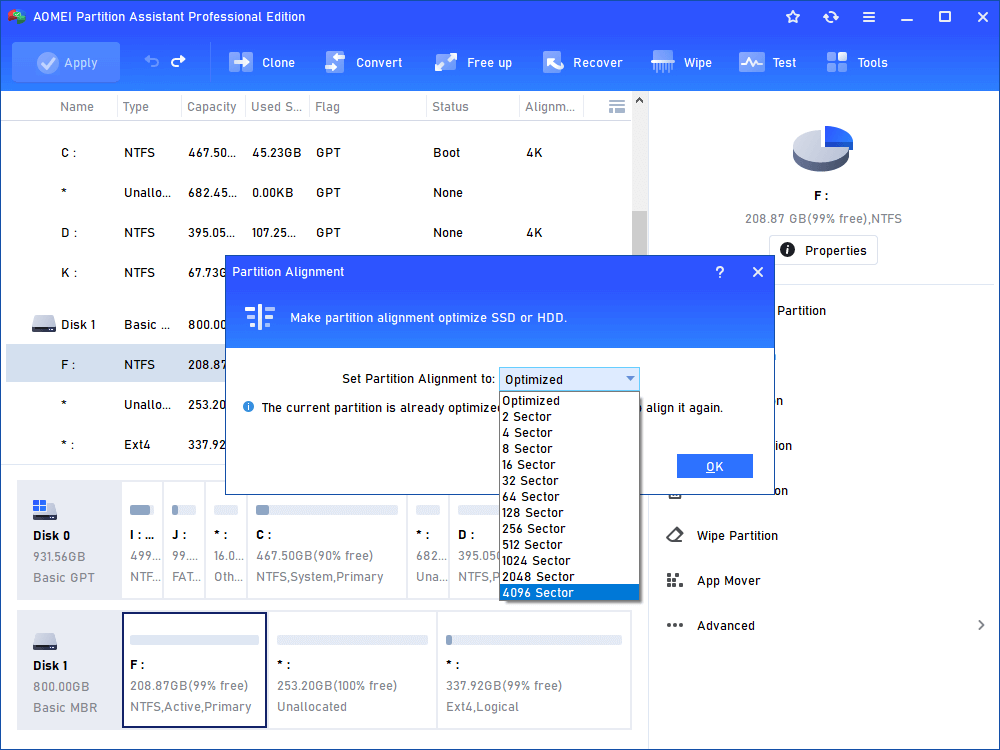
Step 3. Click "OK" and "Apply" to align the partitions on SSD. You need to repeat the operation to align all partitions on the SSD.

Verdict
In this passage, we learn how to check CPU temp Windows 11. If you want to improve your computer performance, we also share 3 effective methods for you.
When you encounter other computer problems, AOMEI Partition Assistant can also play a part. You can use it to migrate OS to a better SSD for higher performance, clone disks to back up all data, and convert system disk between MBR/GPT for compatibility. If you are a Windows Server user, there is also the Server Edition for you to choose from.

