How to Install Windows 11 on Windows 7 without Losing Data
How to install Windows 11 on Windows 7? In this post, you will know the conditions for upgrading from Windows 7 to Windows 11 and how to achieve the upgrade.
By AOMEI / Updated on May 12, 2023
Overview of Windows 11
Microsoft officially released Windows 11 on October 5, 2021. Windows 11 brings a new UI interface to users and also provides many innovative features designed to support the current mixed working environment, focusing on improving user work efficiency in a new flexible experience.
Can I upgrade from Windows 7 to Windows 11? It depends on your PC. Since the installation requirements of Windows 11 are different from the previous Windows OS, please use the Windows 11 requirement check tool to check if your PC can be installed on Windows 11.
In addition, what you should know is Microsoft has stopped the service for Windows 7. Therefore, Windows 7 cannot be directly upgraded to Windows 11 from Windows Update. You can only freshly install Windows 11. Next, I will show you how to install Windows 11 on Windows 7.
How to install Windows 11 on Windows 7 step by step
Here are 2 steps to install Windows 11 on Windows 7 PC, you can refer to the following contents:
Note: Clean installation of Windows 11 means that all data on the original Windows 7 will be erased, so if you have important data, please make a backup in advance.
│Step 1. Create a Windows 11 installation media
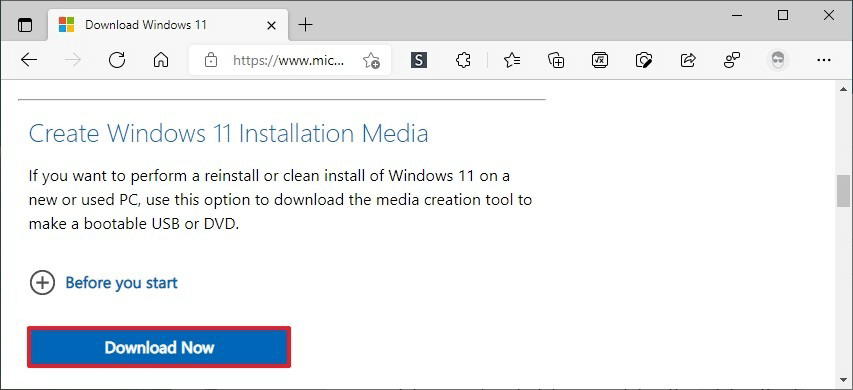
To clean install Windows 11, you need a USB drive to create a Windows 11 bootable media (at least larger than 8 GB).
1. Connect the USB you prepared with the PC. Download the Windows 11 media creation tool.
2. Open it. Then, select the correct language and edition of Windows 11 and click Next.

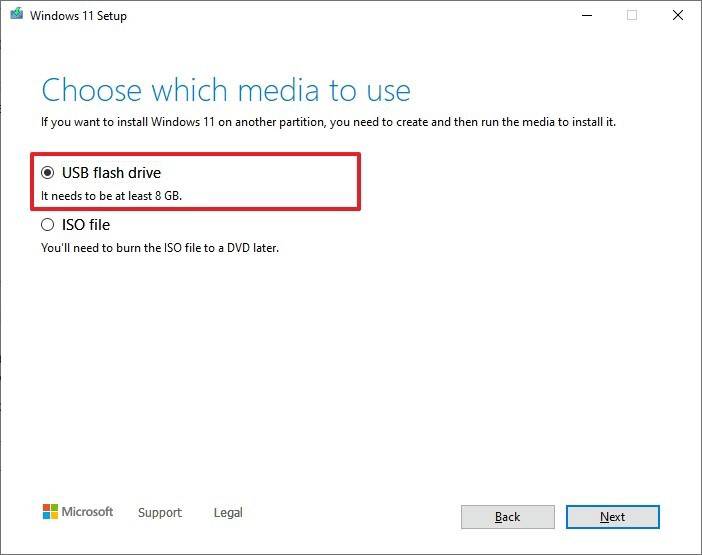
3. Select the USB flash drive option and select Next.
4. Install the media to the USB.
│Step 2. Clean install Windows 11 on the PC
Now, we need to clean install Windows 11 on the PC using the created Windows 11 installation media.
1. You should change the boot drive to boot from Windows 11 installation media.
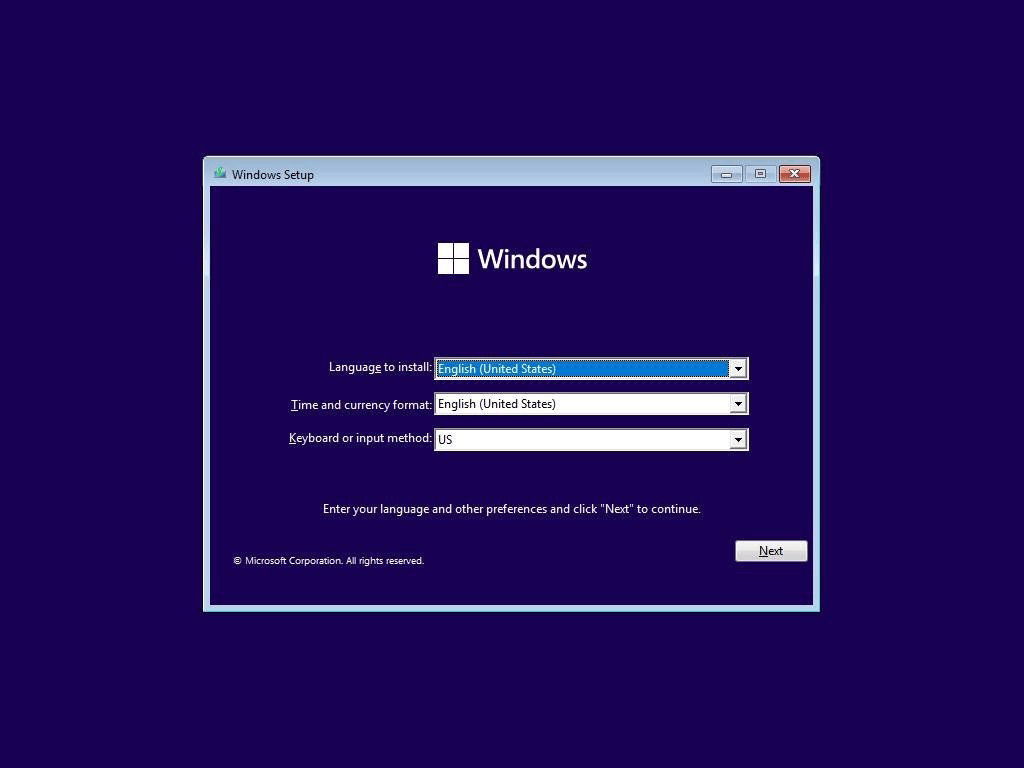
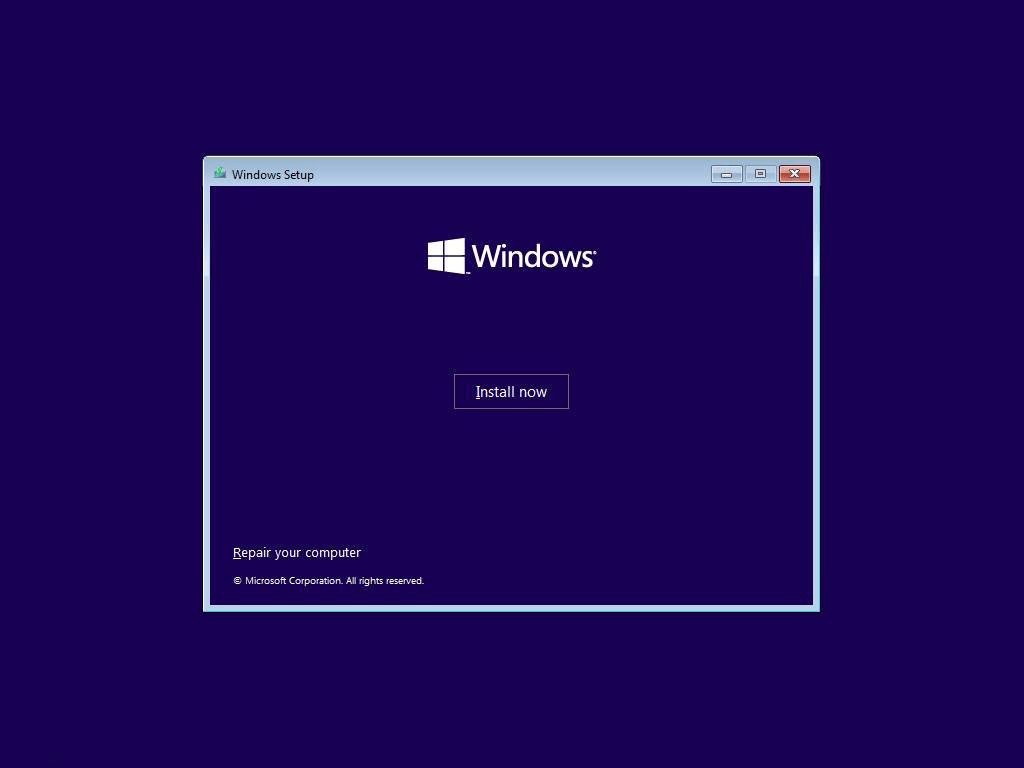
2. After booting from it, you will see the Windows 11 installation interface.
3. Click the “Install now” button.
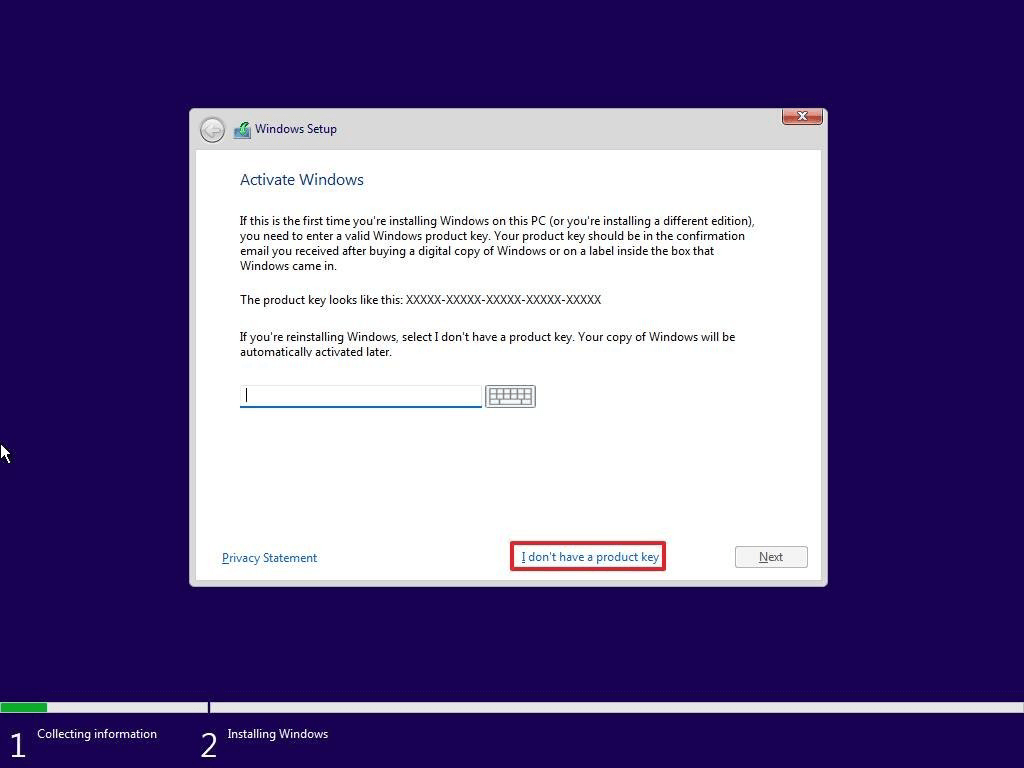
4. Now, please enter the product key. If not, please click “I don’t have a product key”. But this will prevent you from using some functions.
5. Next, please select the version of Windows 11 you want to install, and then follow the prompts to partition. After completing all the steps, please enjoy the Windows 11 OS.
This is how to install Windows 11 on Windows 7 PC. Have you learned it? It’s not difficult, but a fresh install will make you lose all data. Want to know how to upgrade to Windows 11 without damaging data? I will introduce another method.
How to install Windows 11 on Windows 7 without losing data
Since Microsoft has stopped providing upgrade services for Windows 7, it is not possible to upgrade directly from Check for updates. But it still supports upgrading from Windows 10 to Windows 11. So we need to upgrade Windows 7 to Windows 10 first, and then upgrade Windows 10 to Windows 11.
Here is how to upgrade from Windows 7 to Windows 10:
To ensure safety, you’d better back up your data. Due to the differences between Windows 10 and Windows 7, not all applications will be retained.
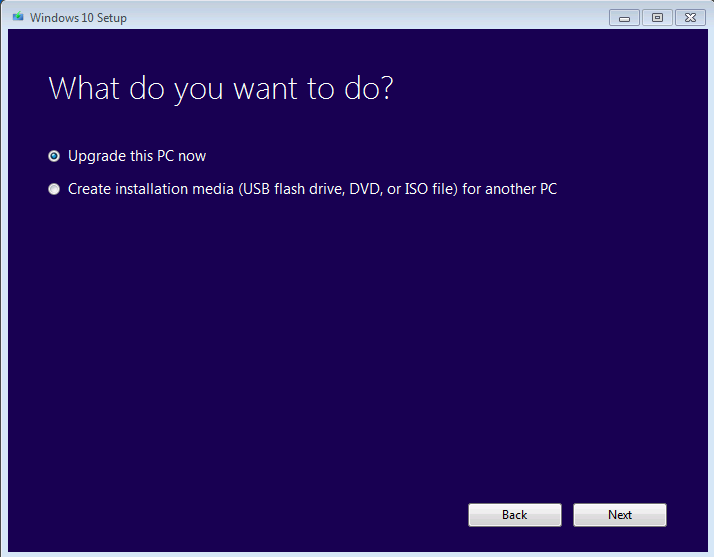
● Create Windows 10 installation media from Microsoft, and launch it.
● Choose “Upgrade this PC now”.
● Once the upgrade is complete, you should receive a digital license for Windows 10, which can be found under Settings > Update & Security > Activation.
Before upgrading to Windows 11, your PC should meet the system requirement for Windows 11. Of these, most notably, Windows 11 needs to be booted in UEFI boot mode, which means that our system disk must be a GPT disk. If your system disk is an MBR disk, you must convert MBR to GPT, and then change the boot mode from the BIOS to UEFI.
│Step 1. Convert MBR disk to GPT disk without data loss
I recommend using AOMEI Partition Assistant Professional to convert MBR to GPT, because it will not lose any data. Whether you are using Windows 10/8.1/8/7/Vista or Windows XP, it is compatible. Now, please download the demo version to see how to convert system disk from MBR to GPT.
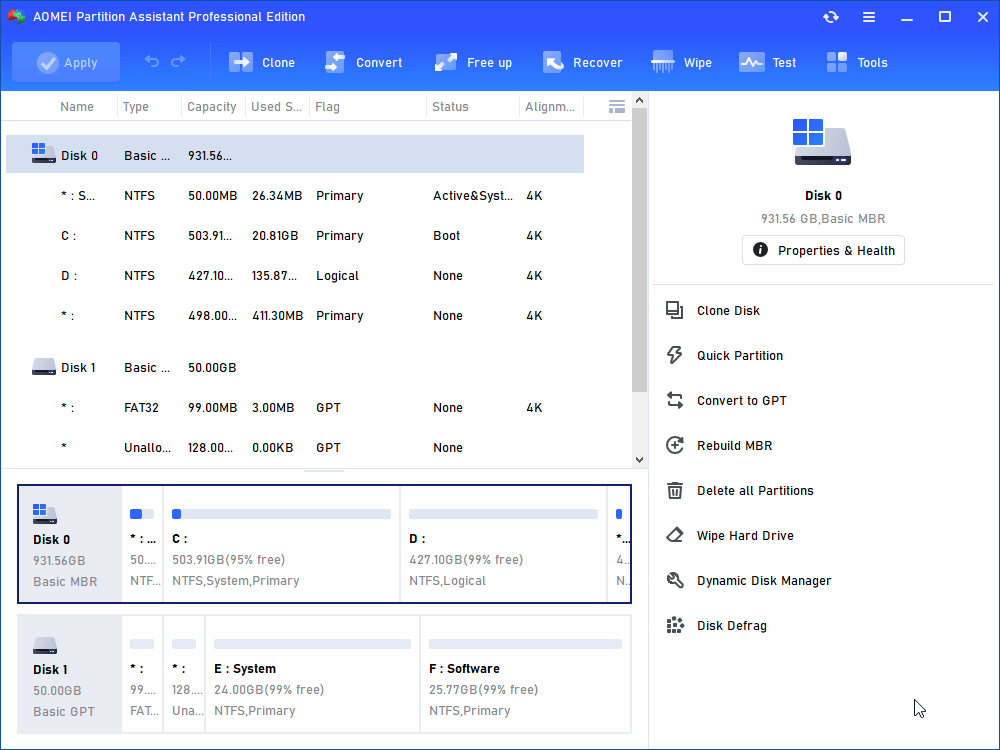
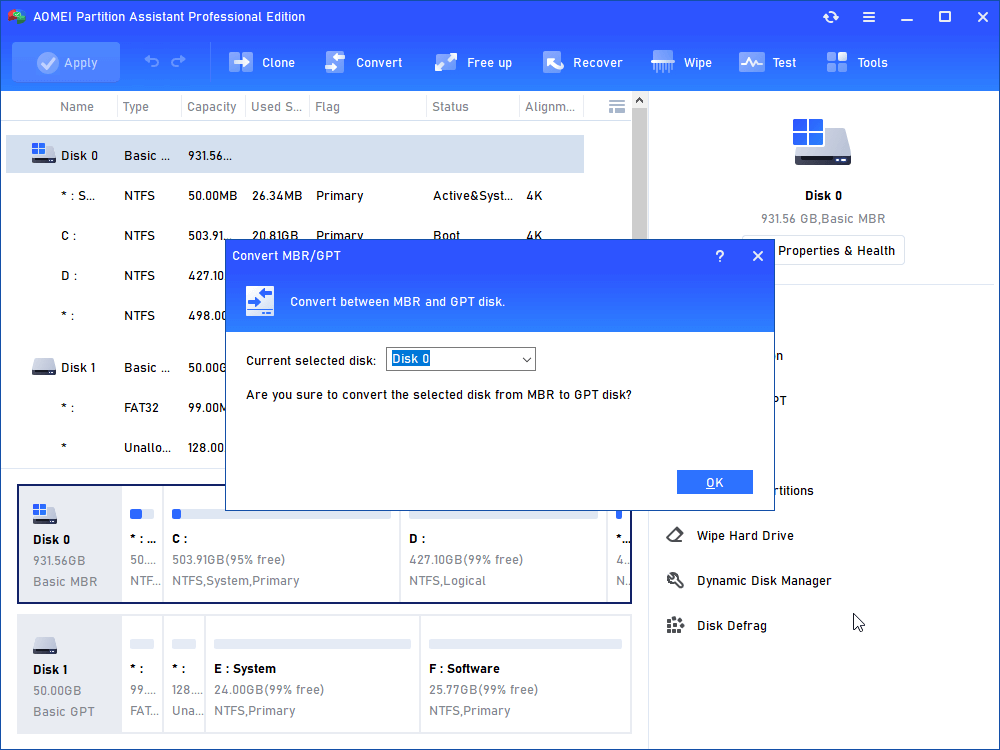
1. Install and run AOMEI Partition Assistant Professional. Right-click the disk (take the system disk as an example) and choose “Convert to GPT”.
2. Click “OK” to confirm your operation.
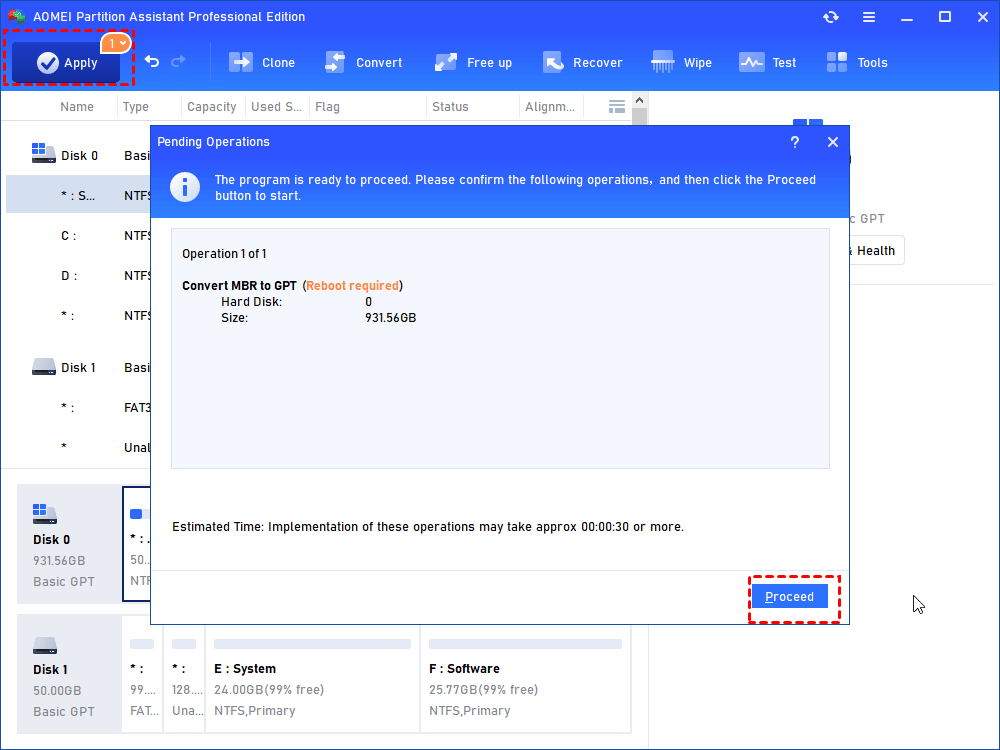
3. Click “Apply” to commit the pending operation.
│Step 2. Change BIOS to UEFI
Now, you need to change BIOS to UEFI:
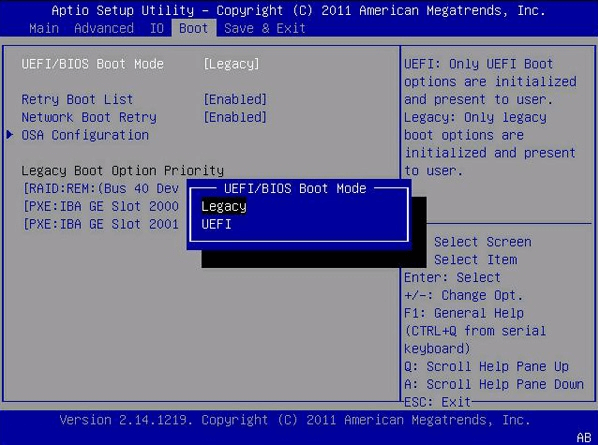
1. After restarting the computer, When a picture appears on the computer screen, enter the BIOS according to the key prompted at the bottom of the screen (keys vary from PC to PC).
2. Use the arrow keys to select UEFI/BIOS Boot Mode in the Boot column, and then change Legacy to UEFI. Then saving and exit.
After completing these operations, restart the computer. Now your Windows 10 has been booted from UEFI, and the system disk is also a GPT disk.
│Step 3. Upgrade from Windows 10 to Windows 11
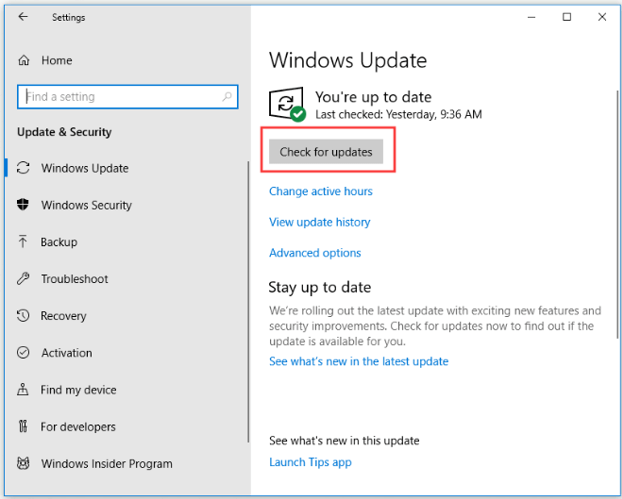
Finally, you just need to go to Settings> Update and Security> Check for updates. If available, you will see Windows 11 feature updates. Click Download and Install to complete.
Conclusion
This is the whole process of how to install Windows 11 on Windows 7. If you don’t want to perform a clean install, you can also upgrade from Windows 7 to Windows 10 first, and then upgrade to Windows 11. With the help of AOMEI Partition Assistant Professional, converting MBR to GPT will no longer be a problem.

