How to Create A Windows 11 Bootable USB to Install Windows 11
If you need a Windows 11 bootable USB for clean installation, you can read this passage for reference. We will also guide you to make a Windows 11 to go bootable USB to run Windows 11 on any qualified device.
By Irene / Updated on August 28, 2023
Discussions about installing Windows 11 have been widespread since its release, especially with the coming Windows 11 22H2. The clear outcome includes enticing new features like Voice Access, Live Captions Accessibility, touch gestures, and optimized App folders. These attract both Windows and Mac users.
However, installing Windows 11 requires meeting specific system requirements, including CPU, graphics, memory, storage, and more. Mismatched components can lead to compatibility and stability issues, especially preventing upgrades for older devices.
Consequently, creating a Windows 11 bootable USB becomes an ideal choice to explore its new functions. This method lets you enjoy Windows 11 anytime, anywhere, without worrying about the limited device performance.
How to make a Windows 11 bootable USB
There are 2 ways to create a Windows 11 bootable USB. If you have used CMD to install other versions of Windows OS before, the first method will be familiar to you. However, if you are not comfortable with command lines and prefer a simpler process, the second method can help you install Windows 11 from USB effortlessly and quickly.
Method 1. Create Windows 11 bootable USB via CMD
To install Windows 11 from USB with command lines, we should experience 3 parts. Kindly please notice that this method will be time-consuming and complex, if you want to save time and energy, you can click here to go directly to the second method.
At the beginning of creation, you should make sure that the prepared USB is more than 8GB, and erase all data on it. Please back up important data in advance.
▌Part 1. Download Windows 11 ISO files
You can download Windows 11 ISO from Microsoft web.

▌Part 2. Use CMD to create Windows 11 bootable USB
Select “Start” after downloading. Then search “Command Prompt” and choose “Run as Administrator” to perform the program.
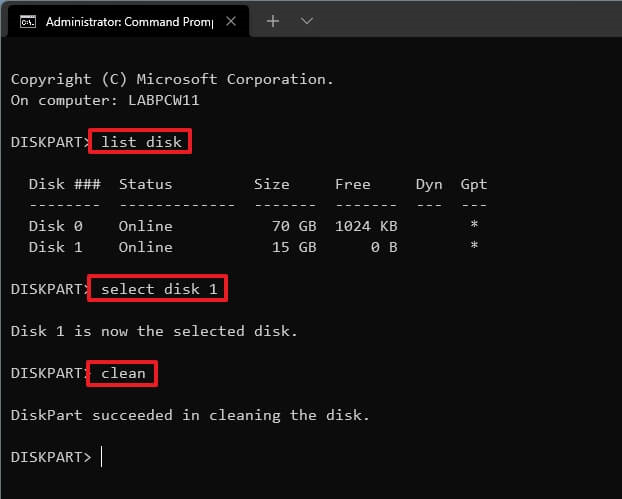
Step 1. Delete the USB data
Input the commands in turn with pressing the "Enter" key each step.
• list disk
• select disk 1 (Please replace "1" to your own USB number)
• clean
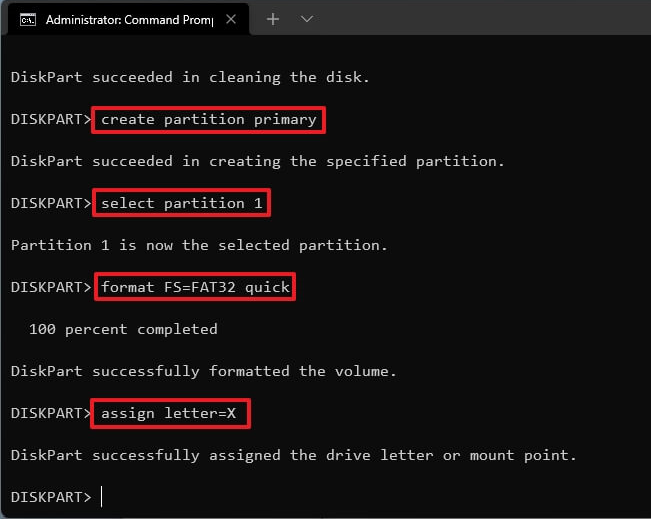
Step 2. Create a primary partition
Close to the operations above, you need to type the below order and hit the "Enter" key for each.
• select partition 1
• format FS=FAT32 quick
• assign letter=X (X is the letter of the partition, change it to the letter you wish to use)
• exit
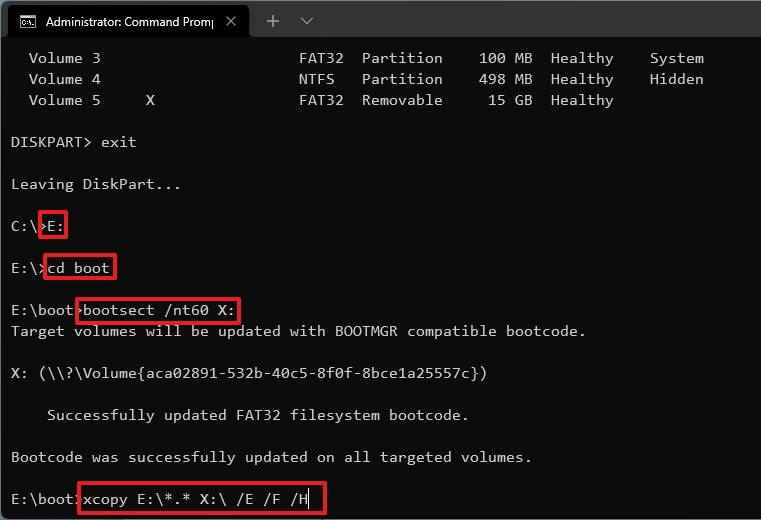
Step 3. Move ISO files to USB
Similar steps again. Type the commands with the "Enter" key after each step is finished.
• diskpart
• list volume
• exit
• E:
• cd boot
• bootsect /nt60 X:
• xcopy E:\*.* X:\ /E /F /H (Replace E and X to the drives with Windows 11 ISO image and your USB).
We have prepared the USB well and can move to the installation now.
▌Part 3. Install Windows 11 from bootable USB
Here we are going to use the Windows 11 bootable USB to install the system. Please make sure that the target computer is UEFI boot mode.
Step 1. Plug the prepared USB into the PC and start it. Then enter BIOS and change the USB as the first boot order. Save the change and reboot the computer.
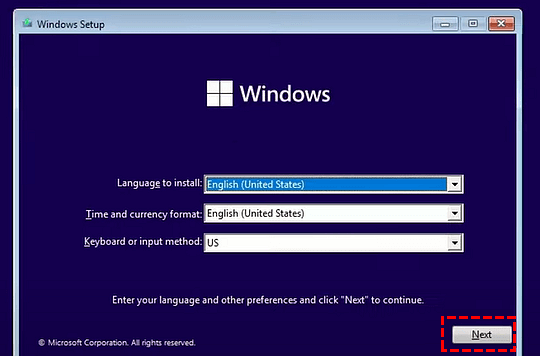
Step 2. Follow the instruction to finish settings after the Windows Setup window shows up.
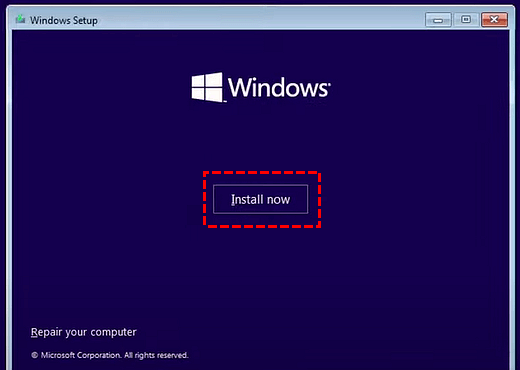
Step 3. Click the “Install now” button.
Step 4. Select the “I don’t have a product key” option.
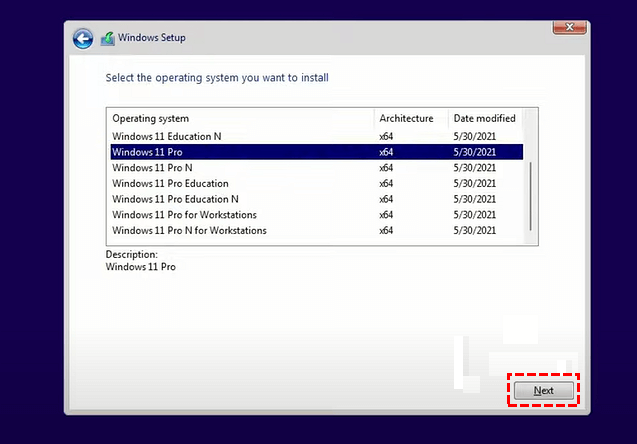
Step 5. Choose an OS edition you want to install and click “Next”.
Step 6. Accept the License Term and click “Next”, and then choose “Custom: Install Windows only (advanced)” in the next window.

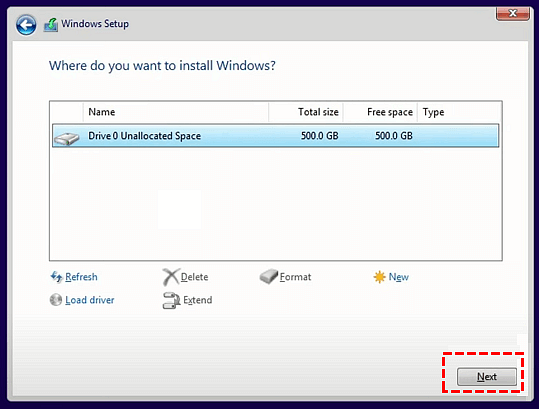
Step 7. Select the target disk to install Windows 11 OS with clicking “Next”.
Step 8. Wait for the process to finish. Then the computer will reboot.
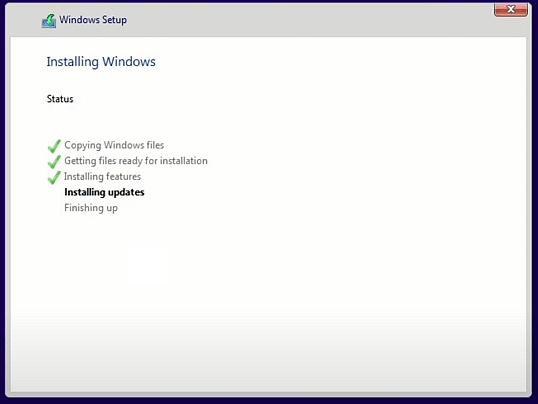
After the boot completes, you can experience Windows 11 OS now.
Method 2. Create a Windows To Go bootable USB
Patience and familiarity with command lines are important for creating a Windows 11 bootable USB with CMD. Once you type the wrong commands, you may suffer data loss or even system crashes.
If you are not familiar enough with the above method, creating Windows To Go for Windows 11 installation will be much easier. As Microsoft canceled its official Win To Go service for Win 11, here we recommend a better alternative tool, AOMEI Partition Assistant Professional.
This tool is designed to solve various computer issues conveniently. One standout feature is the "Windows To Go Creator," enabling users to set up a Windows environment on a USB and bypass the need for system upgrades. In other words, using this USB, you can have access to a new system wherever and whenever you want, while still retaining your original OS on your device. By the way, it also supports creating a Windows OS bootable USB on Mac computers.
Before beginning, there is something important that we should pay attention to:
- The USB should be larger than 13GB.
- Please make a backup of your important data on your USB. The data on it will be wiped in the process of creation.
- You probably need to download Windows ISO files if you need a new Windows 11.
Step 1. Plug the USB into the computer and wait for it to be detected by your device. If it failed, you can refer to the solutions.
Step 2. Launch the installed AOMEI Partition Assistant Professional. Select a disk, and click “Tools" > “Windows To Go Creator” at the top menu.

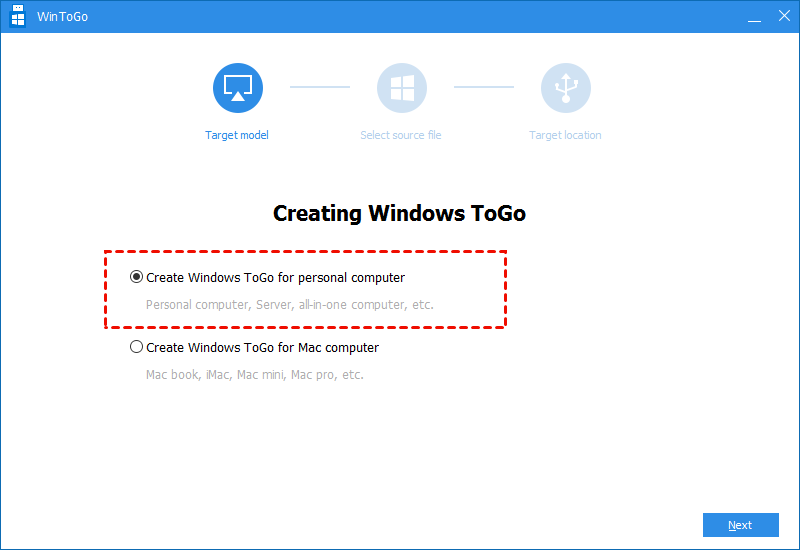
Step 3. Click “Create Windows To Go for personal computer” and choose “Next”.
Note: If you are a Mac computer user, you can choose the second option “Create Windows To Go for Mac computer”.
Step 4. Select “Create Windows To Go with system disc/ISO”. Usually, the Windows 11 ISO file will be detected automatically, if not, you can click the folder icon to select the target file manually. Then click “Next”.

Note: If you hope to create Windows To GO with the current system, you can refer to the Tip part.
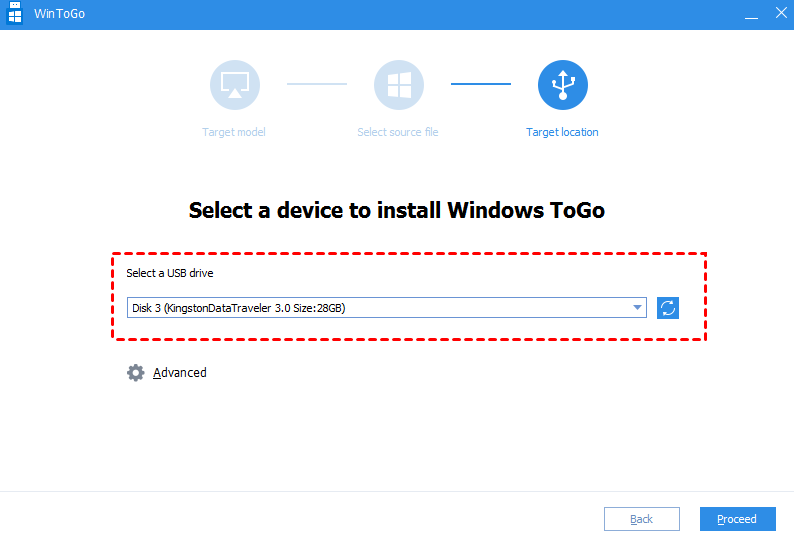
Step 5. Choose the USB drive as the target and select “Proceed” to continue.
Step 6. You will be noticed that all data on the USB will be wiped. Choose “Yes”. Then you can unplug the USB and try to boot it on another computer. If you do not know how to boot, you can continue following the steps below.
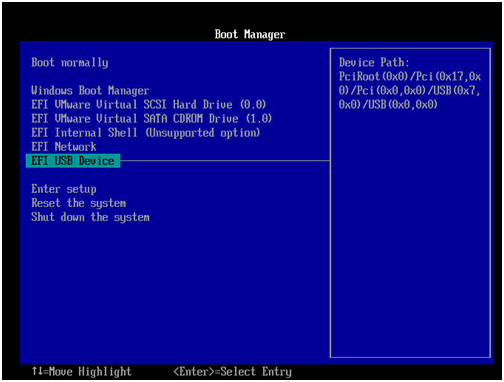
Step 7. Insert the Windows 11 To Go USB drive into your computer. Boot the device and press a specific key to enter BIOS/UEFI.
Note: The pressing key to enter BIOS/UEFI differs from computer brands. You can search for relevant information on its official website.
Step 8. Choose USB Device and press “Enter” key to boot from the Windows 11 bootable USB.
※ Tip: Create Windows To Go with current system
Step 1 and Step 2 are the same as the above method. Open AOMEI Partition Assistant and click “Tools” > “Windows To Go Creator” > “Create Windows To Go for personal computer” > “Next”.
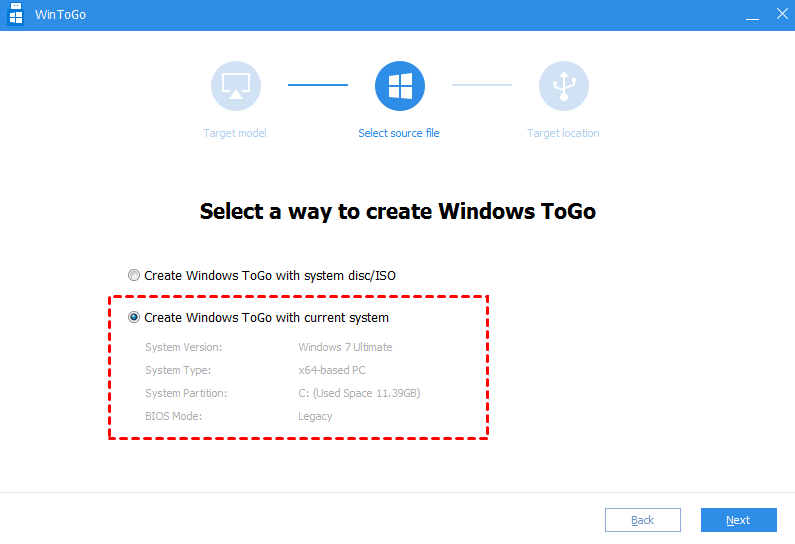
Step 3. Select “Create Windows To Go with current system ”. You can see the detailed information on the current OS and click “Next”.
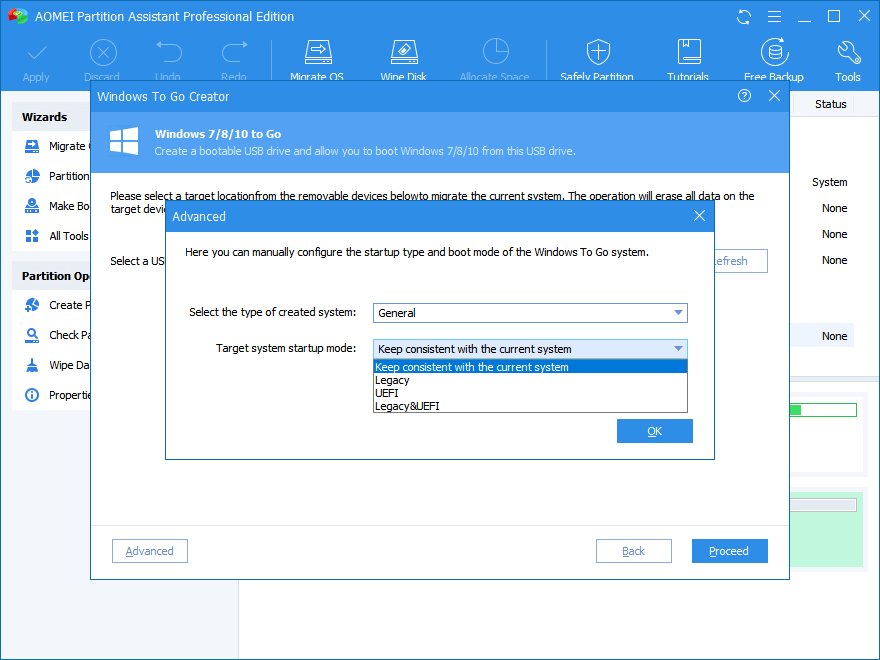
Step 4. Follow the instructions to select a USB drive or adjust the corresponding settings in the Advanced interface. Then click “Proceed” to move on.
When it is finished, you can insert the USB into the target computer to install Windows 11.
To sum up
In short, today, we discussed how to make a Windows 11 bootable USB and install Windows 11 from it. Using CMD to achieve that can work out, but it is a little bit complex for some users. So, utilizing AOMEI Partition Assistant to create a Windows to Go Windows 11 will be much more convenient and user-friendly.
This versatile software boasts many practical and useful functions in computer use. It can convert system disk from MBR/GPT without data loss, move the installed apps to another disk, create a bootable USB to repair your computer, secure erase your SSD, migrate OS to another disk, and so on, which is compatible with almost all versions. Furthermore, if you are a Windows Server user, there is the Server Edition to actively manage your device, which supports 2019/2016/2012R2/2008R2/SBS 2003, 2008, 2011.

