[Tutorial] How to Install Windows 11 without Secure Boot and TPM
Although you fail to install Windows 11 on devices that don’t enable Secure Boot or TPM 2.0, you can still find some workarounds to get it done. This article will show you the detailed steps to install Windows 11 without Secure Boot/TPM and a way to work Windows 11 on any unsupported PC.
By Hedy / Updated on July 1, 2024
Is Secure Boot/TPM required for Windows 11 installation?
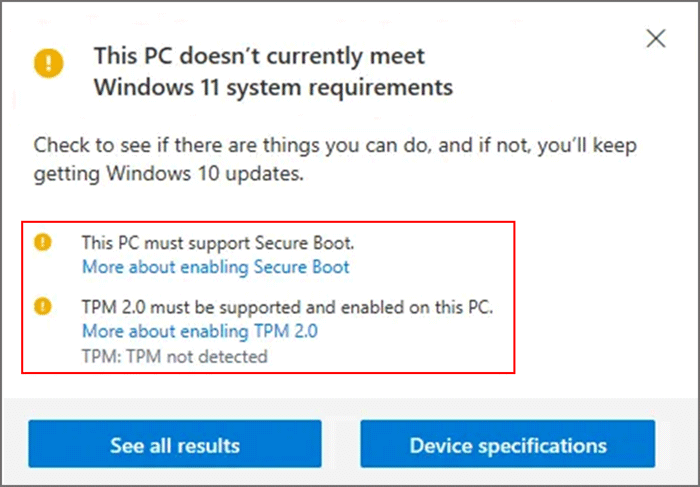
Windows 11 is the latest Windows operating system released by Microsoft. Many users switch to Win 11 because it can be free upgraded from Windows 10. However, most of them find that they can't install or upgrade to Windows 11 when they receive the "This PC must support Secure Boot" or "TPM 2.0 must be supported and enabled on this PC" message.
They are unfamiliar with this level of concept, so, they are considering the possibility to install Windows 11 without Secure Boot or TPM.
According to the Windows 11 minimum system requirements stated by official Microsoft, the Win 11 OS only works on the device that at least meets the basic requirements:
| 🔰CPU | 64-bit Processor |
| 💠RAM | 4GB or higher |
| 🚩Storage | 64GB or larger |
| 🧩System firmware | UEFI and Secure Boot |
| 🎈TPM | TPM version 2.0 |
| 🔔Graphic card | DirectX + WDDM2 |
We can see that Secure Boot and TPM 2.0 are on the list. Secure boot is a feature on your UEFI motherboard that only allows approved operating system and hardware driver to boot up and a TPM (Trusted Platform Module) is used by services like BitLocker drive encryption to confirm the OS and firmware are what they’re supposed to be. In other words, Secure boot and TPM are necessary tools that improve the security of your PC.
Although Microsoft doesn't allow you to install Win 11 without Secure Boot or TPM 2.0, you can still find a solution. One of the easiest ways is to install Windows 11 from a bootable USB. The below content will show you how to complete it in detail.
How to install Windows 11 without Secure Boot and TPM 2.0
In order to help you upgrade to Windows 11 without enabling Secure Boot or TPM 2.0, we'll walk you through the specific tutorial on how to install Windows 11 without Secure Boot. It contains four stages:
Stage 1. Bypass Secure Boot and TPM checks
Step 1. Press "Windows + R" keys simultaneously to open the Run box.
Step 2. Input "regedit" or "regedit.exe" and click "OK" to run the Registry Editor window.

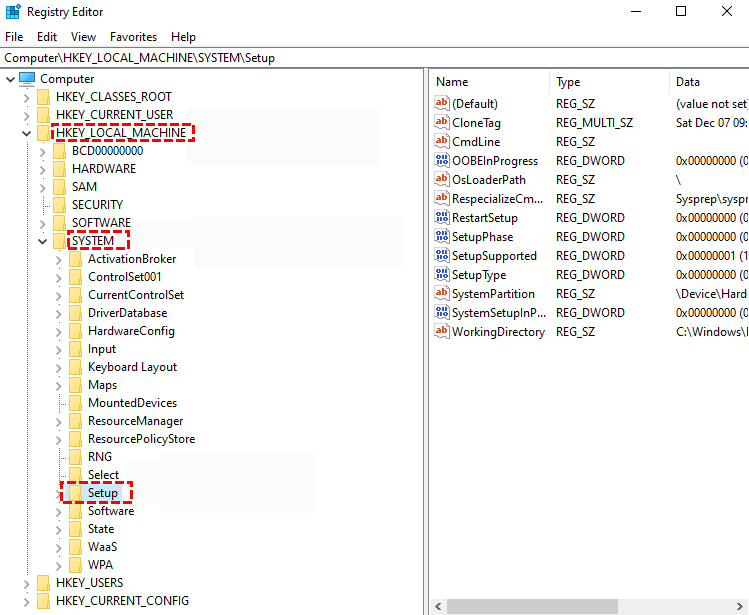
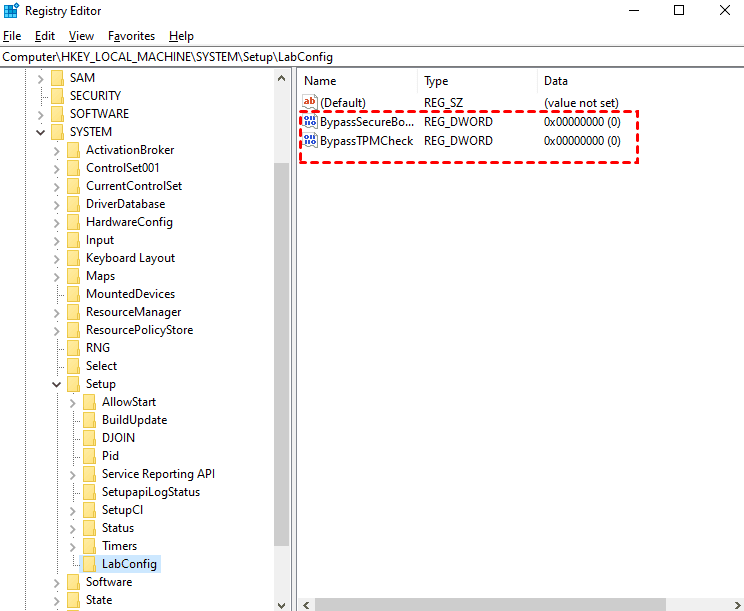
Step 3. Navigate to "HKEY_LOCAL_MACHINE\SYSTEM\Setup".
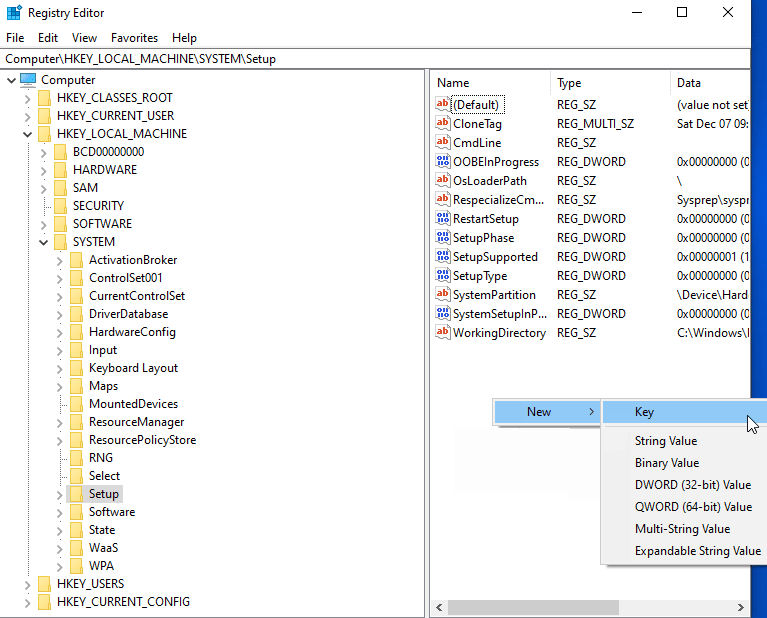
Step 2. Right-click the blank, and select "New" > "Key" to add a new registry key on the left side of the editor. Make sure you name it “LabConfig”.
Step 3. Under the "LabConfig" folder, right-click the blank again to create two "DWORD (32-bit) Value” options to create new DWORD value.
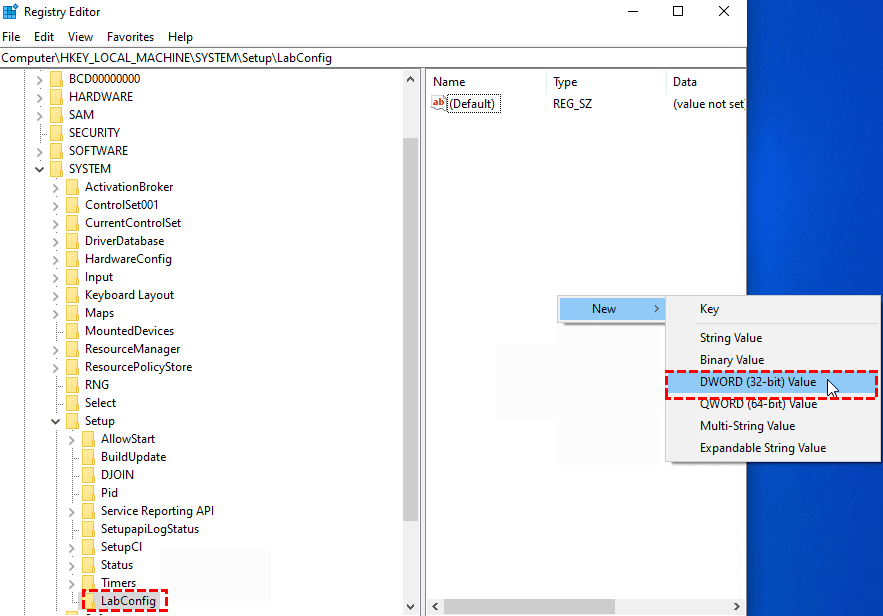
Step 5. Name them "BypassTPMCheck" and "BypassSecureBootCheck" respectively.
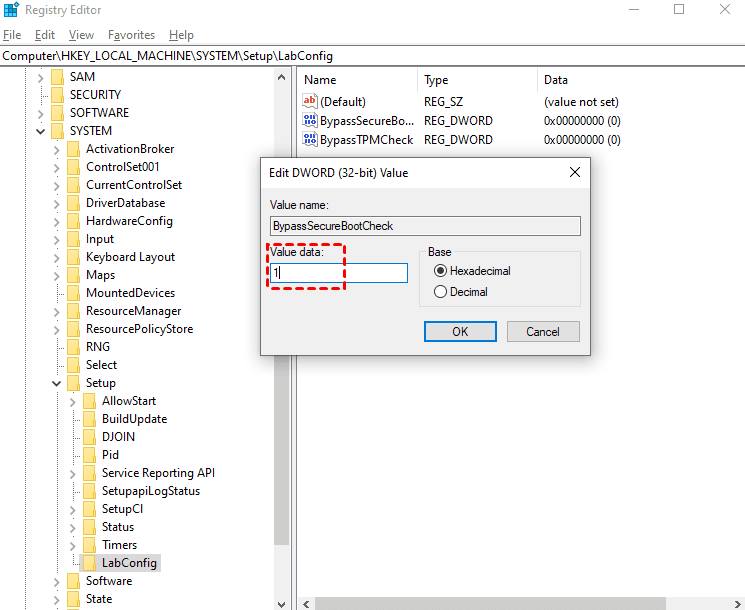
Step 6. Then double-click the two DWORD and change the "Value data' from "0" to "1".
Stage 2. Create a Windows 11 bootable USB
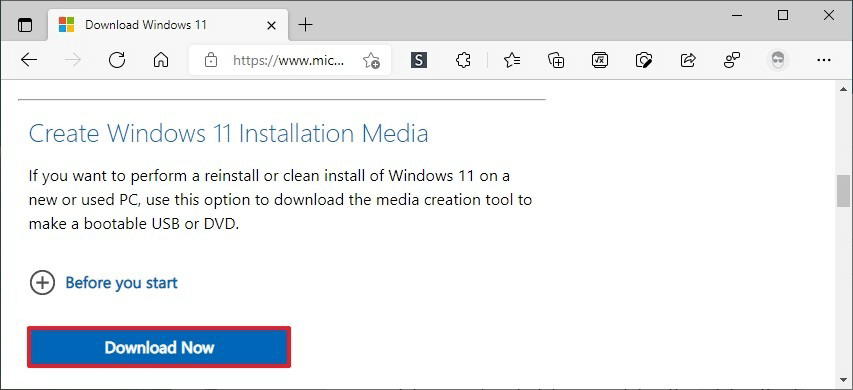
Step 1. Prepare a USB and connect it to a running computer. Download the Windows 11 Installation Media from the official website.
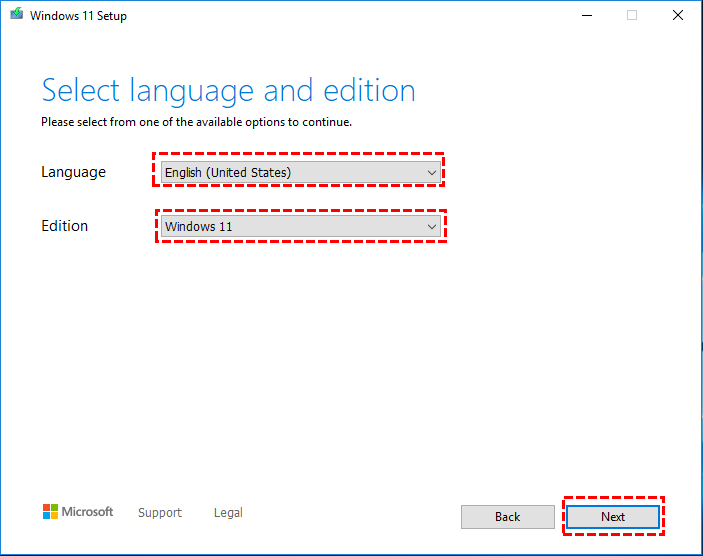
Step 2. Then, launch the tool, select the language and Windows 11 edition in the "Windows 11 Setup" window, and click "Next".
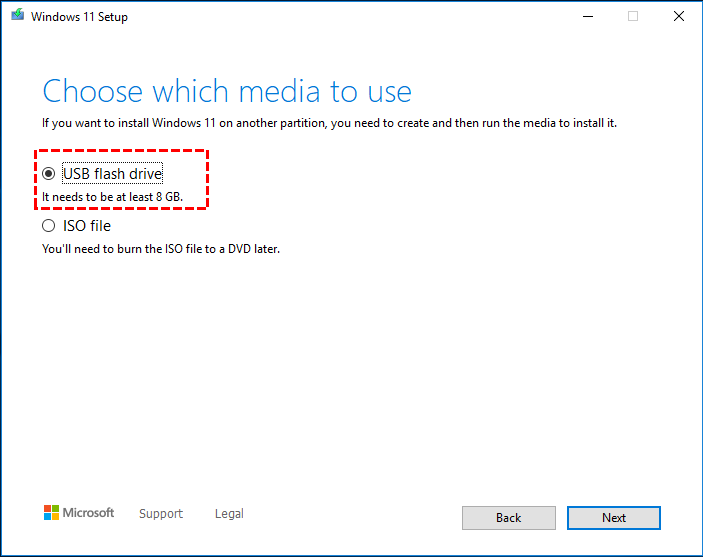
Step 3. Choose the "USB flash drive" option and select "Next".
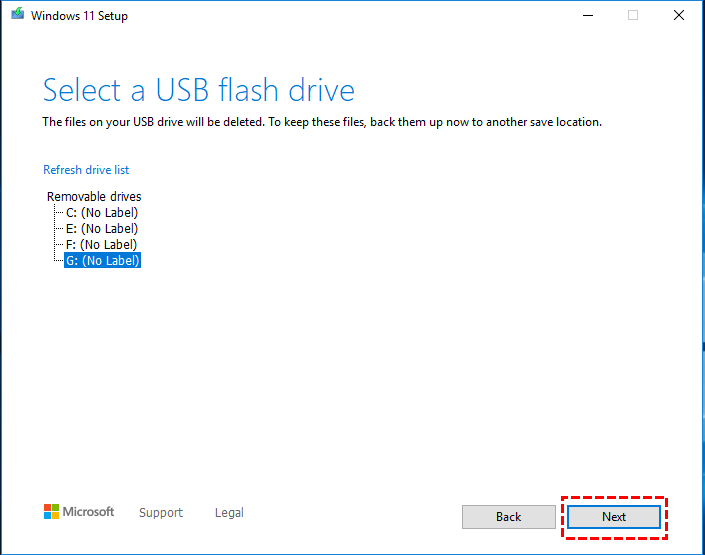
Step 4. Select the target USB flash drive and click "Next" to start the creation process. When it finishes, you will get a Windows 11 bootable USB.
Till now, the preparation for installing Windows 11 without Secure Boot and TPM 2.0 is done. Now, you can follow the next two stages to begin the Windows 11 installation.
Stage 3. Boot your PC from the Windows 11 USB
Step 1. Insert the bootable USB to your computer that you want to install Win 11 without Secure Boot.
Step 2. Restart your PC, press and hold F1, F2, F10, ESC, or DEL keys (depending on your computer brand and motherboard) to enter the BIOS Settings. Then, set the USB as the boot drive.
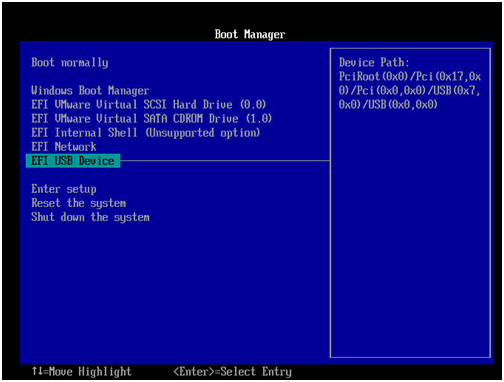
Step 3. Restart the computer again, and it will boot from the USB drive. Then go ahead to the next stage to see how to install Windows 11 without Secure Boot and TPM step by step.
Stage 4. Install Windows 11 without Secure Boot and TPM
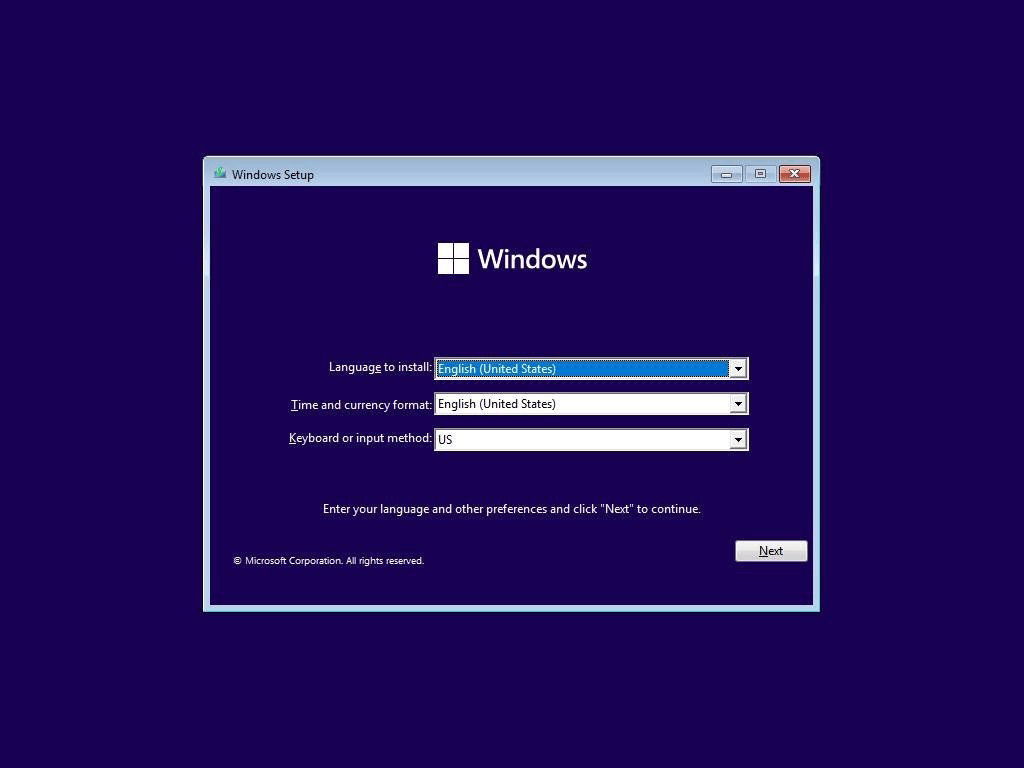
Step 1. When you see the Windows 11 Setup interface, set the parameters according to your needs and click "Next".
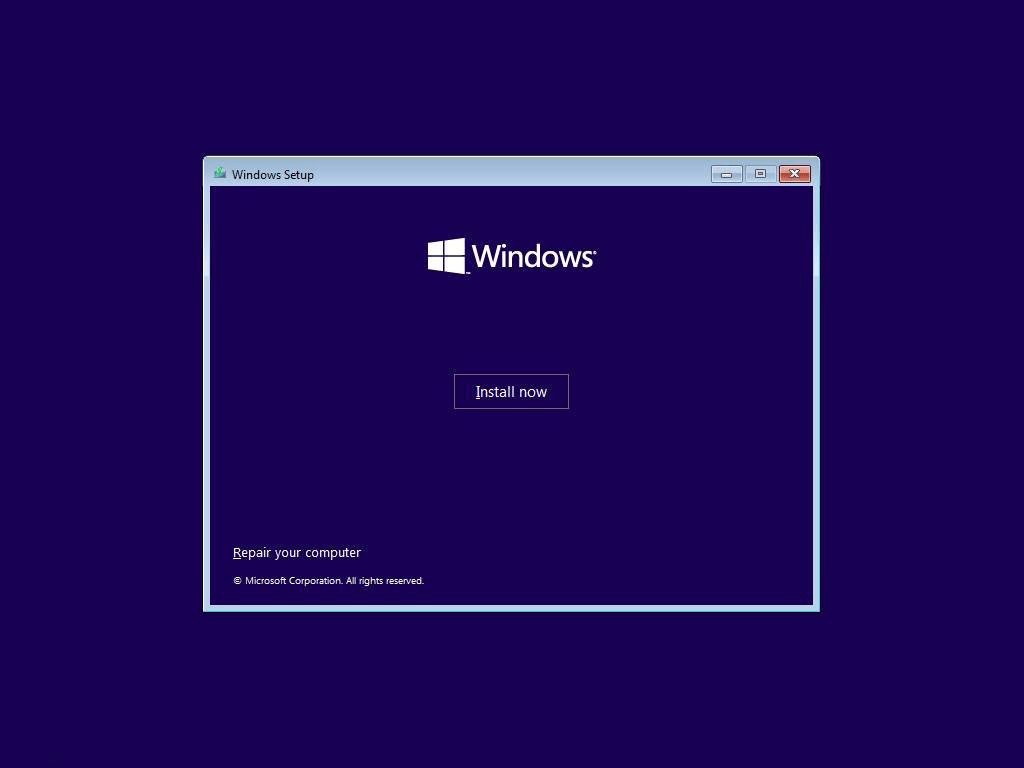
Step 2. Click the "Install now" option to move on.
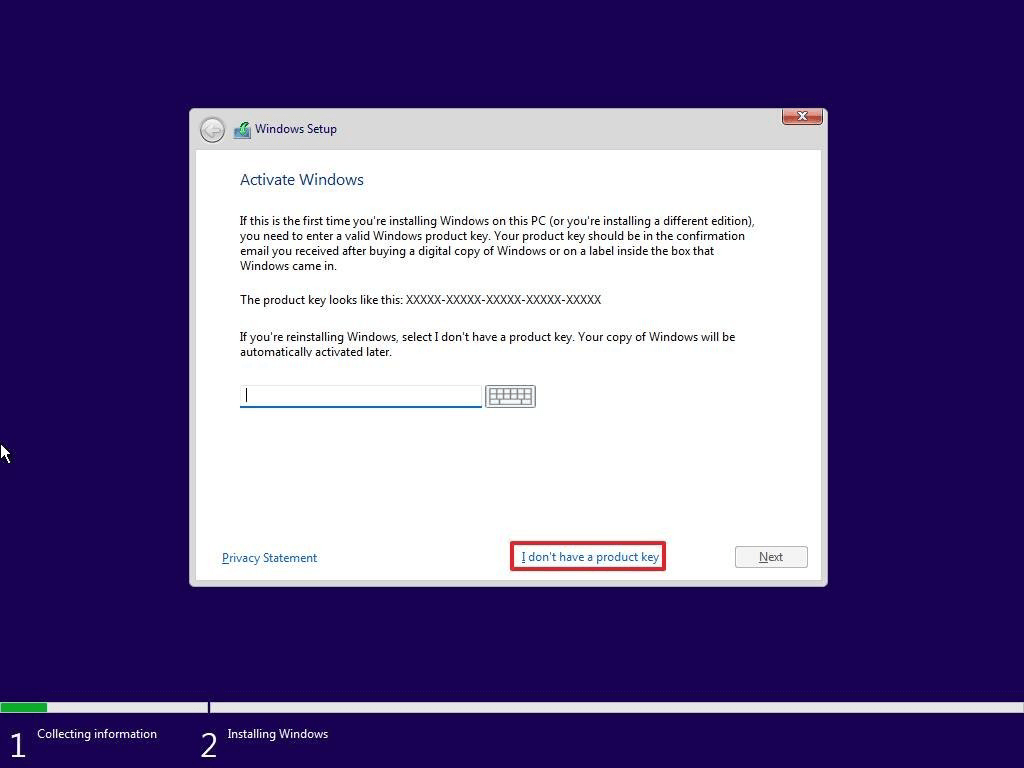
Step 3. Then enter your product key or click "I don't have a product key" to skip it.
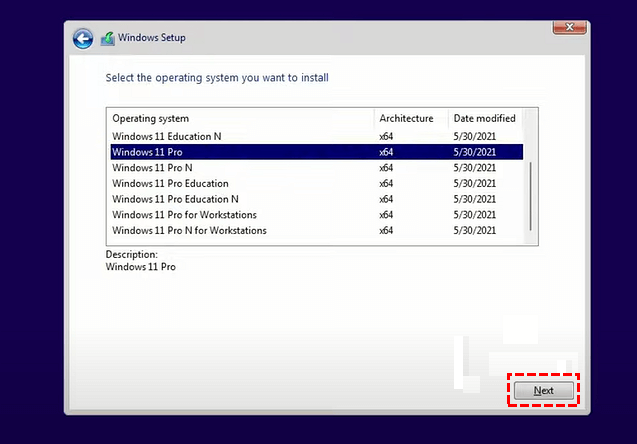
Step 4. Select an edition you plan to install and hit "Next".
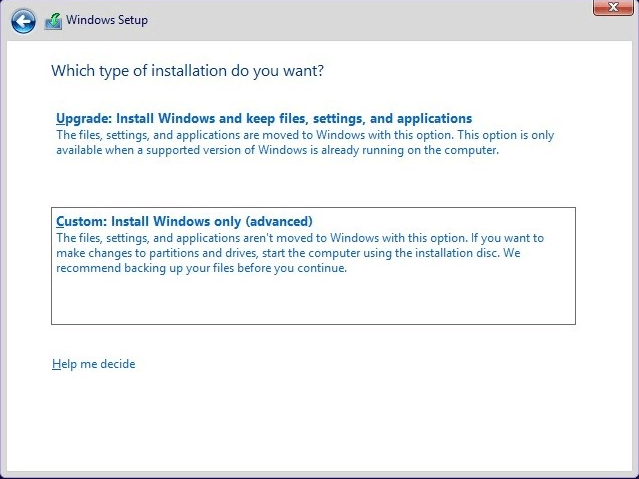
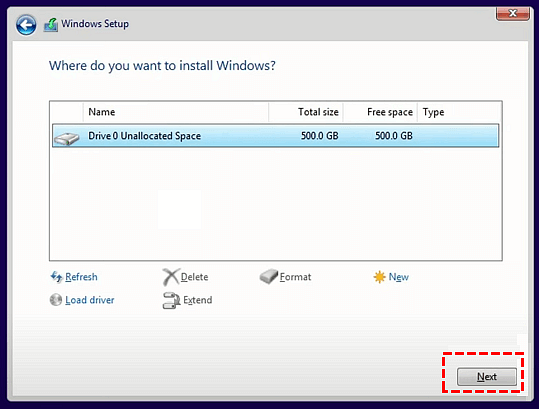
Step 5. When you're asked which type of installation you want, select "Custom: Install Windows only(advanced)".
Step 6. Then, select the destination drive where you want to put Windows 11, hit "Next", and follow the prompts to finish the Win 11 installation without Secure Boot enabled.
That's the full steps to install Windows 11 without Secure Boot or TPM. If you are successful and have no other problems, you can begin to enjoy Windows 11 computer and remove Windows installation media from USB drive to restore the USB for other use.
Further Reading: Run Windows 11 on unsupported PC
Apart from bypassing the Secure Boot and TPM checks to install Windows 11, this part will show you another way to work Win 11 on a PC that doesn't the minimum system requirements for Windows 11. That is to create a Win 11 to Go USB and run this OS on any device without installation.
A reliable and powerful disk manager called AOMEI Partition Assistant Professional can help you with this task. Its "Windows To Go Creator" feature is designed for users who need a Windows 11 environment but don't have an eligible device. What's more, it allows you to create a portable USB not only for Windows PC but also for Mac computer.
Step 1. Connect a USB drive larger than 13GB and download Windows 11 ISO file on your current computer.
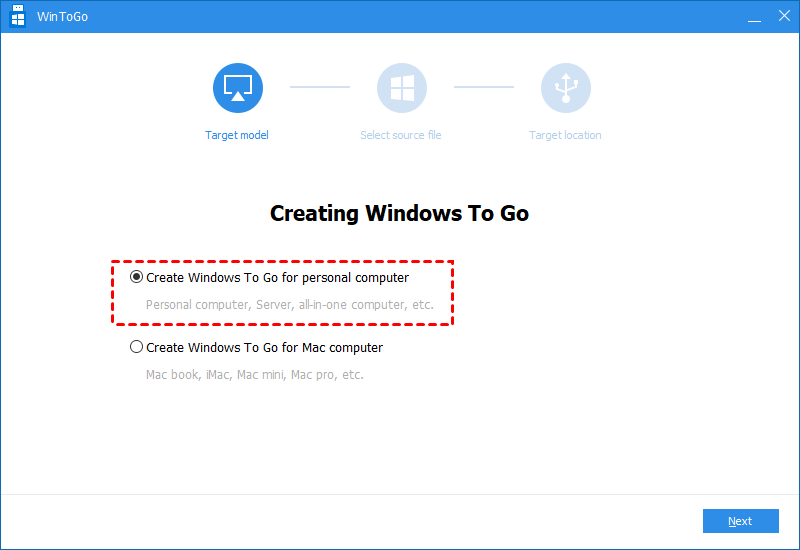
Step 2. Install and launch AOMEI Partition Assistant Professional. Then click "Tools" > "Windows To Go Creator" on the top interface.

Step 3. Choose "Create Windows To Go for personal computer" and click "Next". If you want to boot Windows from USB on Mac, just tick the second option.
Step 4. Choose the first option and click the folder icon to select Windows 11 ISO file you downloaded before manually. After that, click "Next" to continue.

Step 5. Select the prepared USB drive as your target drive and click "Proceed".
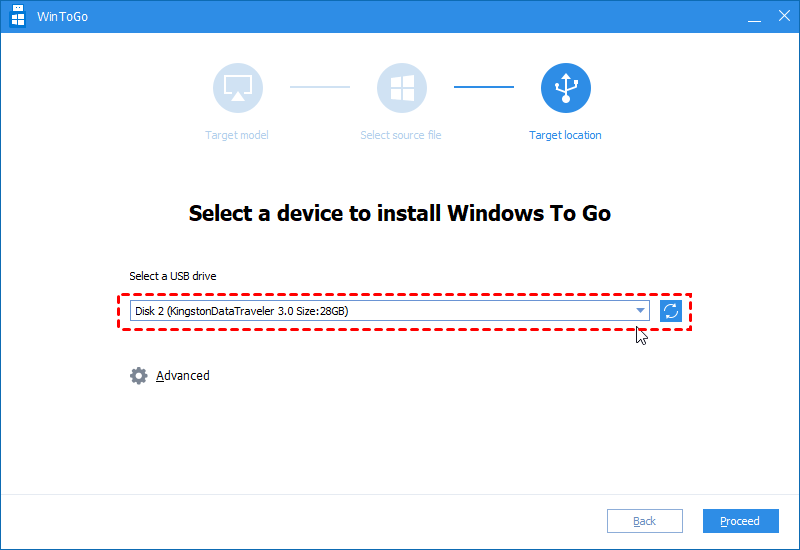
Step 6. Read the warning about all data will be erased carefully, and then click "Yes" to start creating.

After that, any time when you need to use Windows 11, you can boot the computer from this Windows 11 To Go device.
Conclusion
Although you can install Windows 11 without Secure Boot or TPM 2.0 and learn from this passage about how to do it, we still suggest you update the incompatible configuration to meet the Windows 11 basic system requirements like converting MBR to GPT, extending C drive, enabling Secure Boot/TPM 2.0, etc. Or you can try the last method provided by AOMEI Partition Assistant to create a Windows 11 to Go USB.
FAQs
Can I still install Windows 11 without Secure Boot?
Yes, you can install Windows 11 without Secure Boot by using a few workarounds. For example, you can create new DWORD values, modify the installation media, and apply a third-party tool to bypass the requirements.
How do I enable TPM 2.0 without BIOS in Windows 11?
Without having to access the BIOS, users can enable TPM 2.0 in Windows 11 by editing the registry or by utilizing script-based tools. Moreover, the Microsoft management interface or the device's troubleshooter can be used to activate this capability.
What happens if I install Windows 11 on unsupported processor?
Your machine will no longer be eligible for updates or support if you install Windows 11 on an unsupported processor. The guarantee provided by the manufacturer will not cover any harm brought on by incompatibility.

