Fixed: Windows 11 Disk Management does not Show Drives
Find Windows 11 Disk Management does not show drives but don’t know how to deal with it? Don’t worry, this article aims to tell you how to fix hard drives not showing up in Disk Management issues with six reliable ways.
By Hedy / Updated on November 28, 2024
Scenario: Windows 11 Disk Management does not show drives
"After installing Window 11, I can't find my hard drive in Disk Management. I tried many ways but nothing works. The drive contains some of my essential documents and it works smoothly before installing Window 11. Anyone can help me solve Windows 11 Disk Management does not show drives issue? Thanks a million."
Although Windows 11 is welcomed by many users, it has brought various problems to them such as error code 0x80070070, Windows 11 won't shut down, Windows 11 slow SSD performance, etc. Therefore, it's not strange to encounter Disk Management does not show drives error.
Disk Management is a built-in Windows application that allows you to manage hard disks and other external storage devices. It's terrible when you plug in the HDD or SSD but find the hard drive not showing up in Disk Management. It means you cannot make any operations to your hard drives and sometimes it may delay your working process especially when you are in a hurry to use your drives.
Why is my drive not showing up in Disk Management?
No matter you are using an internal or external hard drive, it both has the possibility to find they are missing in Disk Management. There are a number of reasons behind this issue. The most common causes may include:
▣ A recent update to Windows 11.
▣ Connection problem.
▣ Out-dated disk driver.
▣ Corrupted file system.
▣ Bad sectors on the disk.
▣ Virus or malware infection.
How to fix Windows 11 Disk Management does not show drives?
In this part, we provide several methods to help you get rid of the error hard drive not showing up in Disk Management. You can try them one by one until the problem is fixed successfully.
✎ Fix 1. Check the hard drive connection
A good connection is necessary for the computer to recognize and detect the hard drive. If there is anything with a SATA cable or port, it's easy to make the hard drive not recognized, thus not showing up in Disk Management. In such a case, you can try:
☞ Remove and reconnect the hard drive with your PC.
☞ Connect the hard drive to a healthy PC to operate.
Tip: If the drive is a USB flash drive, please refer to this post to get more professional help: USB flash drive not showing up in Windows 11/10/8/7.
✎ Fix 2. Update or reinstall the hard drive drivers
If the SATA driver is not installed or incompatible with your current Windows version, Windows 11 Disk Management does not show drives error is likely to appear. At this post, you can try updating or reinstalling the hard drive drivers.
Step 1. Type "Device Manager" in the search box, and select it from the list of results.
Step 2. Double-click to expand the Disk driver and right-click the disk driver.
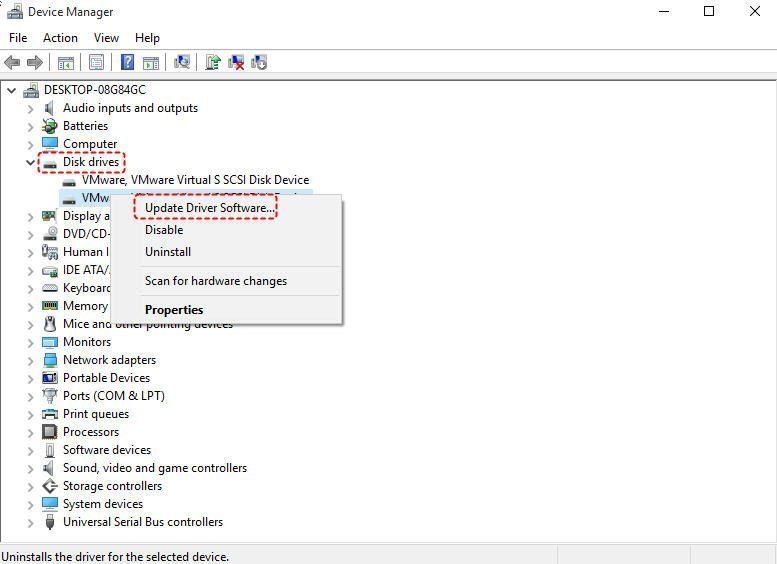
Update the disk drivers
Step 3.1. In the extended menu, choose "Update Driver Software".
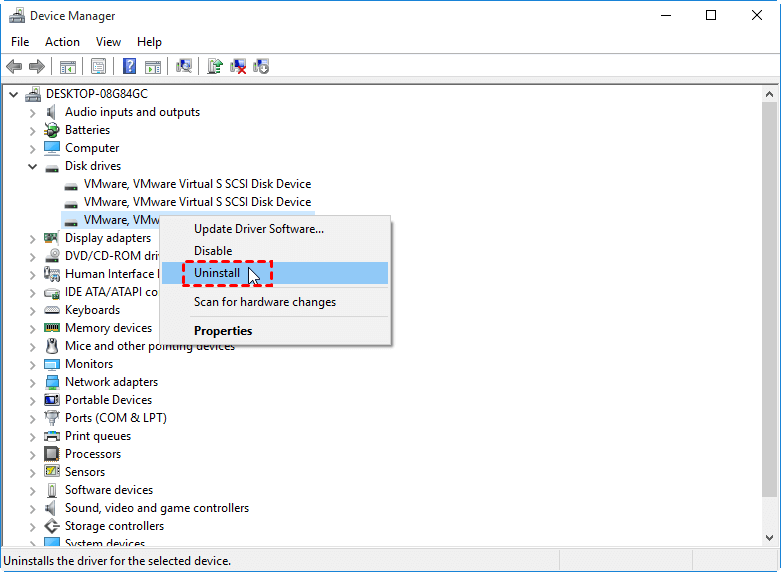
Reinstall the disk drivers
Step 3.2. If updating the driver doesn't work, you can try reinstalling the drive the fix the problem. Just click "Uninstall" in the extended menu and select "OK". Restart your PC, and Windows will reinstall the driver automatically.
✎ Fix 3. Use hardware and device troubleshooter
Troubleshooter is an effective way to fix various system problems like Windows 11 white screen of death. Thus, using the built-in hardware and device troubleshooter is a potential fix for Windows 11 Disk Management does not show drives.
Step 1. Type "control" in the Run box and press the "Enter" key to open Control Panel.
Step 2. In the search box, type "troubleshooting" and hit "Enter".
Step 3. Click "View all" on the left pane. Click "Hardware and Devices" to run the troubleshooter.
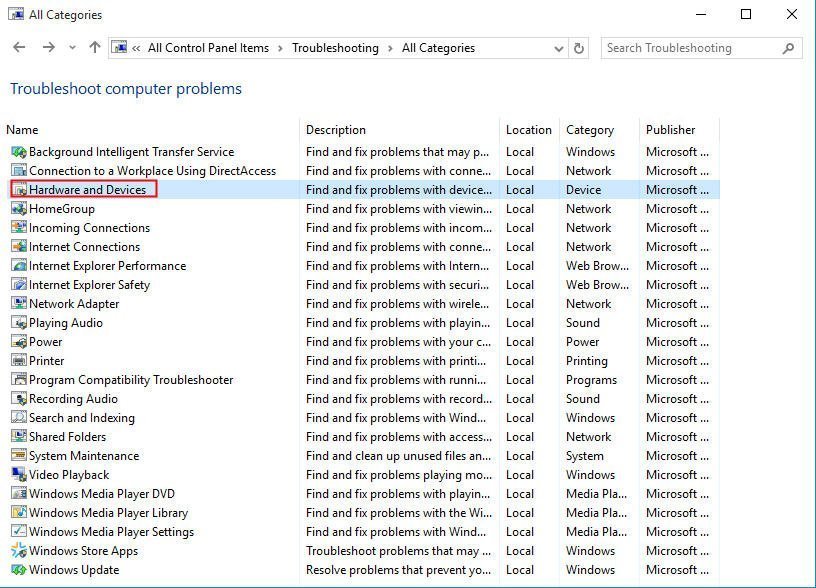
Step 4. Then, follow the on-screen instructions to fix the problem.
✎ Fix 4. Remove the hard drive from Storage Spaces
The Windows feature Storage Spaces is conceptually comparable to RAID but is implemented in software. It allows you to organize three or more disks into a storage pool. If you've previously set up storage space in Disk Management, removing the invisible disk from the storage pool may remedy the issue.
Step 1. To open the "Quick Access" menu, press "Windows+X", then find and click on "Control Panel".
Step 2. Click "System and Security", then "Storage Spaces".
Step 3. Expand the Storage pool and select the "Delete" option for the storage area that includes your drive.
Step 4. Click "Yes" to confirm, and then restart your computer to examine the drive.
✎ Fix 5. Check the bad sectors on the hard drive
Sometimes, the issue that Windows 11 Disk Management does not show drives in Disk Management may be caused by the bad sectors on the hard drive. Thus, you can run CHKDSK.exe tool to check and fix them.
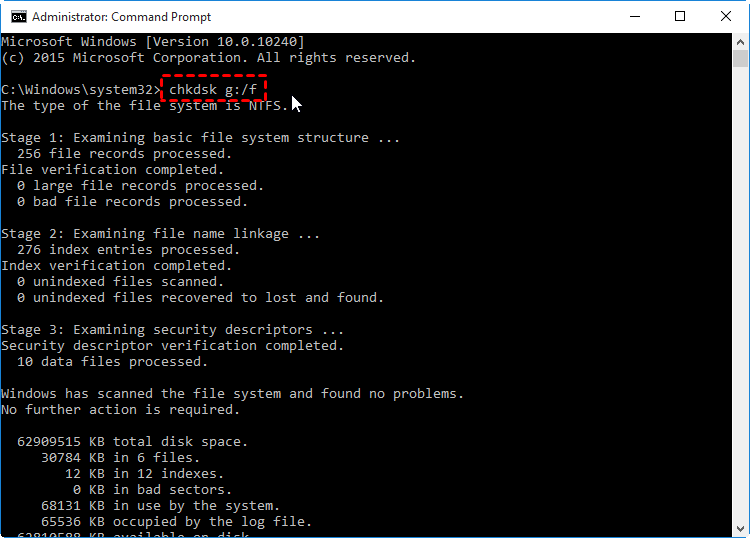
Step 1. Input "cmd" in the search bar, right-click the Command Prompt icon, and select "Run as administrator".
Step 2. In the Command Prompt window, input "chkdsk g: /f" and press "Enter" to check and fix found bad sectors on the target drive.
Note: Remember to replace "g" with your hard drive letter.
If you think it's difficult to use the command line, you can try a third-party tool with a graphic interface. AOMEI Partition Assistant Standard is a free disk manager that can satisfy your needs. With it, you can check the disk comprehensively and choose to fix it with the built-in program. Download the freeware first and follow the guide to have a try.
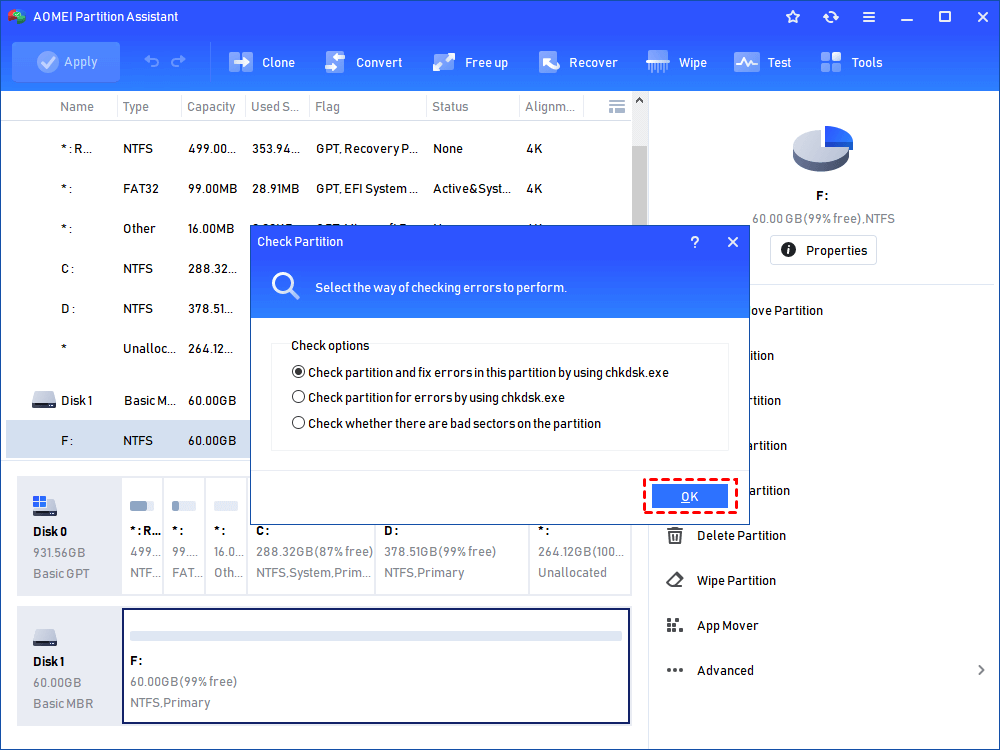
Step 1. Install and run the freeware. Right-click the drive partition and choose "Advanced" > "Check partition".

Step 2. Choose a way of checking disk error, the first one is always chosen by default.
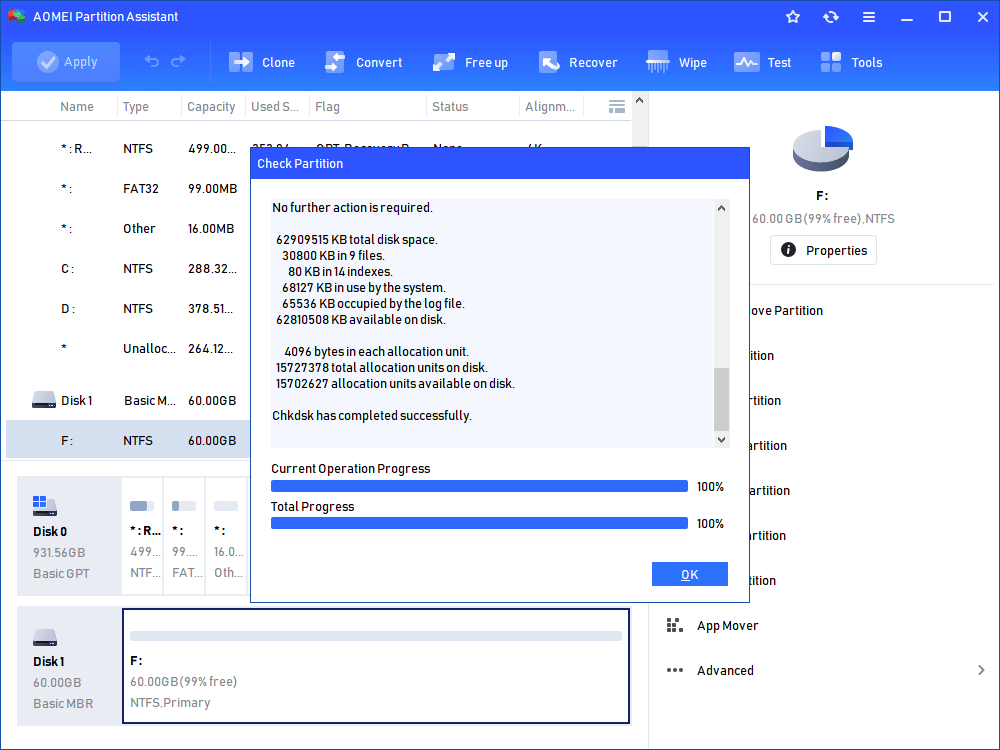
Step 3. Wait for a while, the check process will be done.
✎ Fix 6. Format the hard drive
If you have tried all four solutions above but nothing happened, the final way you can try is to format the hard drive for reuse. It's known to all that formatting a partition is a forcible way to erase disk errors, viruses, or malware, so your hard drive may show up after being formatted.
But the only problem is how can you use Disk Management to format a partition that is not showing up in Disk Management. Relax, AOMEI Partition Assistant Standard is also a disk formatting tool. It can help you format both the data drive and system drive in only three clicks. Read on the next steps to get inspired.
Note: Formatting the hard drive will erase all data on it. Make sure you have a backup of important files. If not, please use some data recovery software to get back data and move them to a safe location.
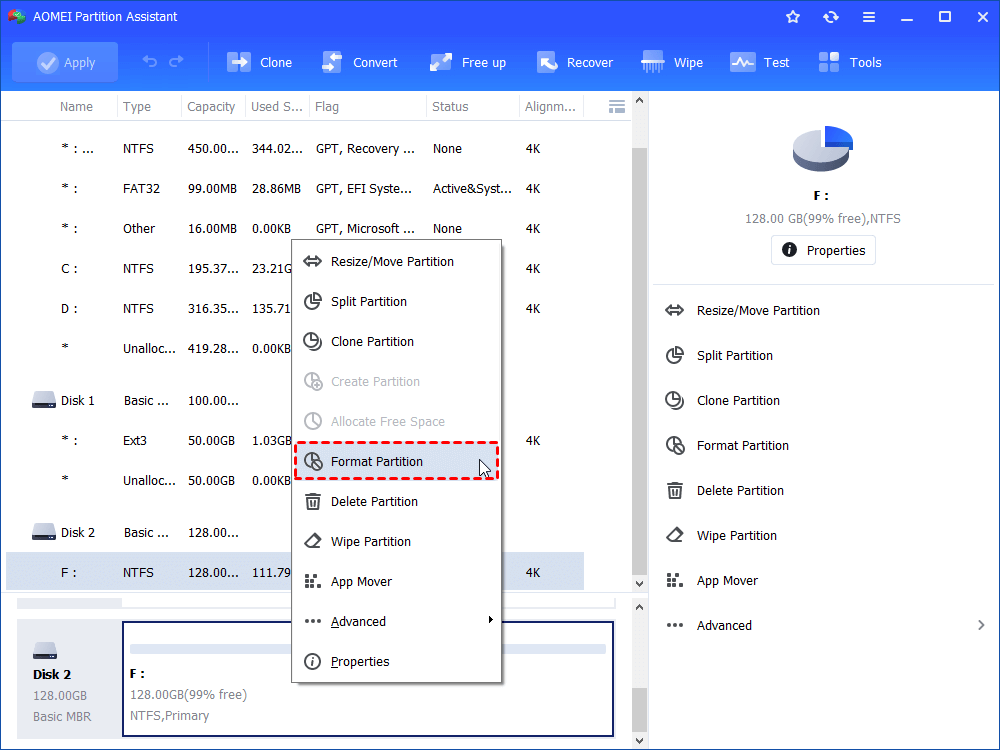
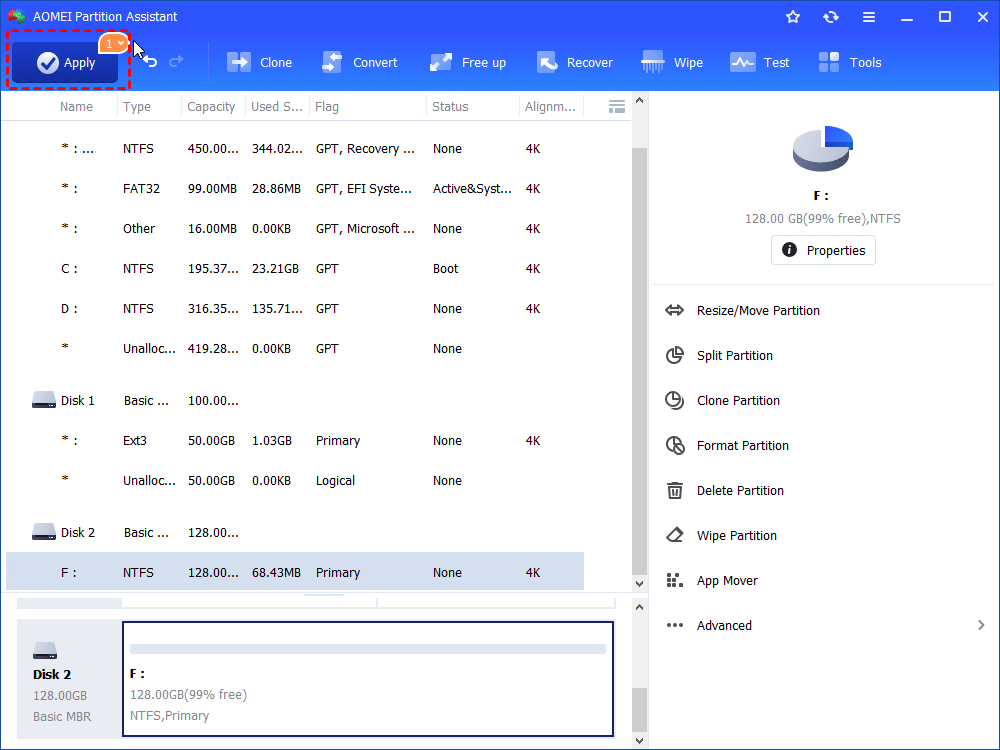
Step 1. Open the software. Right-click the partition and select "Format Partition" from the menu.
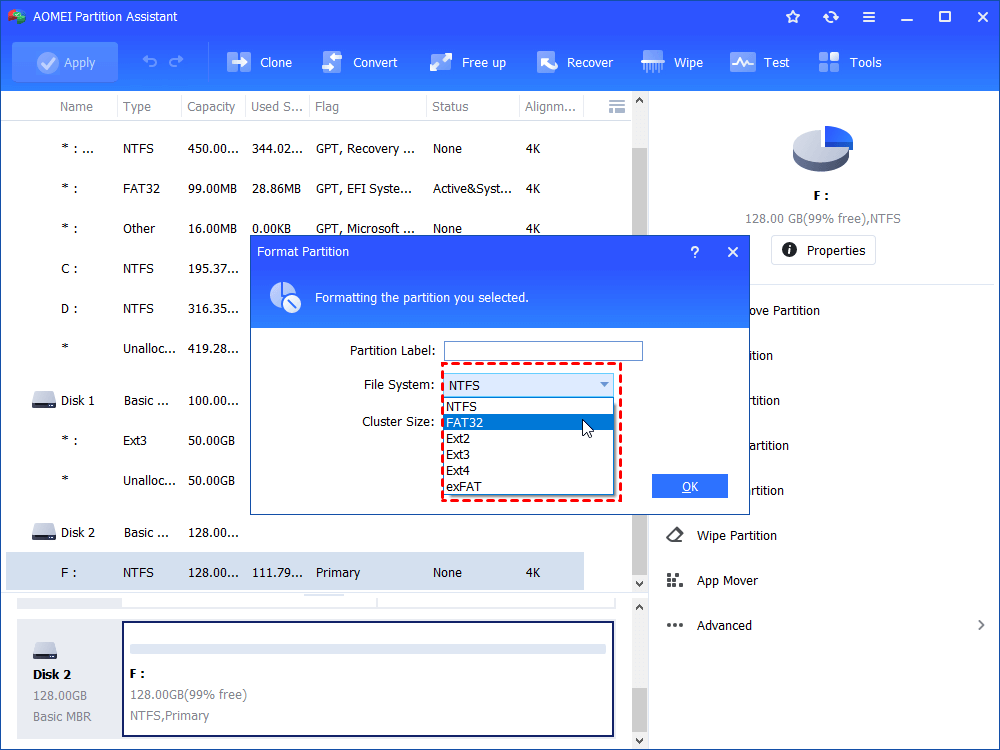
Step 2. Choose a file system and click "OK".
Step 3. Hit on "Apply" to commit the operation.
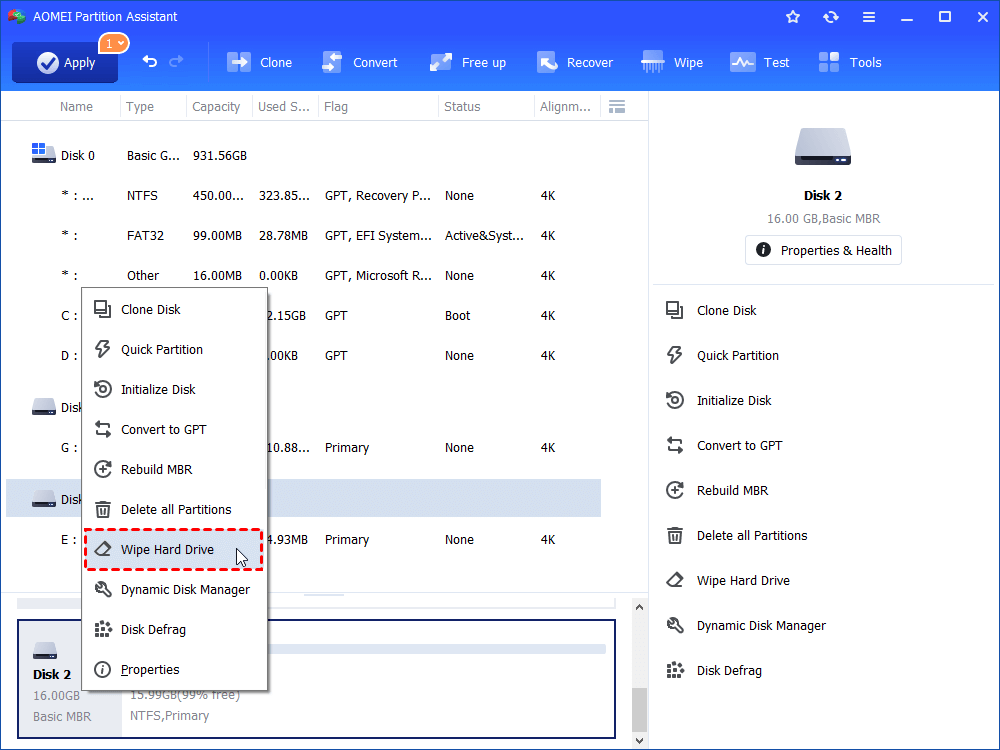
Besides, you can also wipe Windows 11 hard drive clean completely to clear the possible errors.
After formatting or wiping the hard drive, the drive will show as unallocated. You can use it to create partitions or extend other small partitions. Then, you can see it in your Windows 11 Disk Management and use it as before.
Conclusion
What should you do if you meet Windows 11 Disk Management does not show drives issue while using the computer? After reading this passage, you may have known the reasons and learned five different ways to fix them. Hope at least one of them can help you.
If AOMEI software makes a difference to deal with hard drive not showing up issues, you can also use it to solve other disk problems such as Samsung Migration Software corrupted for unknown reasons, SSD not showing up, cloned hard drive or SSD won't boot, and so on.

