[Tutorial] How to put Windows 11 ISO to USB for booting
You can put Windows 11 ISO to USB to create a portable bootable USB after reading this detailed tutorial, which allows you to enjoy Windows 11 wherever you are.
By Irene / Updated on June 20, 2023
The release of the Windows 11 operating system has presented numerous fresh updates. The major changes are a new Start menu and taskbar, original design and interface, enhancements in image showing, practical Snap Layouts and multitasking, and so on. These innovative improvements are attractive enough so that many users expect to experience the new system.
However, innovations in the technology field are often accompanied with better hardware requirements, indicating old devices may encounter obstacles in upgrading to Windows 11.
For the newer computer users, they may have other concerns. For instance, Windows 10 users may doubt that “Is Windows 11 better than Windows 10? What can I do if I don’t like the new system after updating?”
If you are also curious about these questions, you probably get to know the corresponding solutions beforehand. The most popular fix—putting Windows 11 ISO to USB, we believe you do not miss it. But many users have no idea about the method for burning it.
So today, if you are the one who wants to experience Windows 11 system without worries, you can continue to read. After reading this passage, you can learn how to make Windows 11 ISO bootable USB for a fresh experience.
The advantages of putting Windows 11 ISO to USB
Windows 11 ISO usually refers to installation files for users who want to reinstall or to do a fresh installation of the operating system. With the ISO files, people can make a bootable installation media such as a USB flash drive or DVD to install Windows 11 system. If you put an ISO to a USB, you can get a portable bootable USB, which allows you to enjoy these benefits:
1. Create an easily carried bootable Windows USB and use it to boot any computer in any place.
2. Save the computer when it gets stuck in serious boot problems.
3. Make it easy to install Windows 11 than using the Windows installation CD.
4. Avoid directly upgrading to Windows 11 on your local computer. Escape from the situation where you regret upgrading and hope to roll back to Windows 10.
How to burn Windows 11 ISO to USB
Burning Windows 11 ISO to USB is not simply copying and pasting the files into the drive. This operation will make it invalid or create a faulty one. To successfully put the Windows 11 ISO to USB, the files need to be written into it. In this part, we will provide a precise tutorial for you to follow if you do not know how to burn ISO into USB.
Section 1. Download Windows 11 ISO files
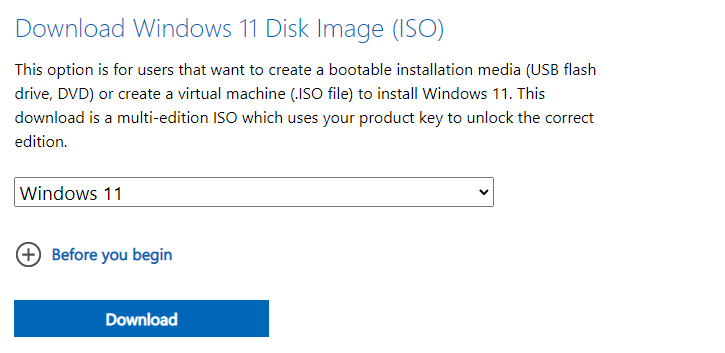
Step 1. Download the Windows 11 ISO files from the Microsoft official website when you enter the website. Choose “Download Windows 11 Disk Image (ISO)” > “Windows 11 (multi-edition ISO)” in the drop-down menu.
Step 2. Hit the “Download” button and configure the settings according to your needs for the Windows 11 installation. Then select “Confirm” to begin to download.
Section 2. Burn Windows 11 ISO to USB in an easy way
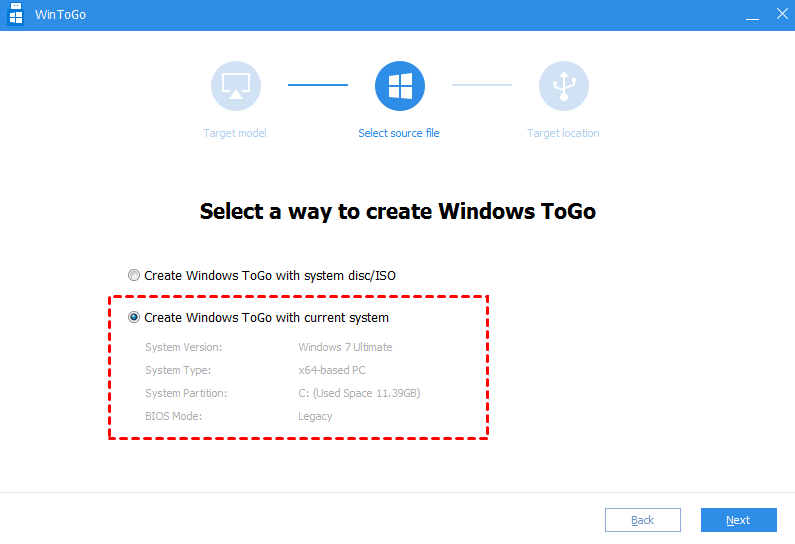
Although Microsoft has launched its own Windows To Go function previously, yet it has been canceled in Windows 11. Fortunately, there is another handy tool that is more practical and user-friendly.
AOMEI Partition Assistant Professional boasts a strong presence in computer management. It can be compatible with all versions of Windows 11/10/8/8.1/7/Vista/XP to easily burn Windows 11 ISO to USB.
You just need to prepare a USB larger than 13GB and back up your important data in advance. Then follow the guidance to learn how to make Windows 11 ISO bootable USB.
Step 1. Connect the USB to the computer. Wait for it to be detected. If it failed, you can read the solutions for reference.
Step 2. Launch the software. Click “All tools” > “Windows To Go Creator” in turn.

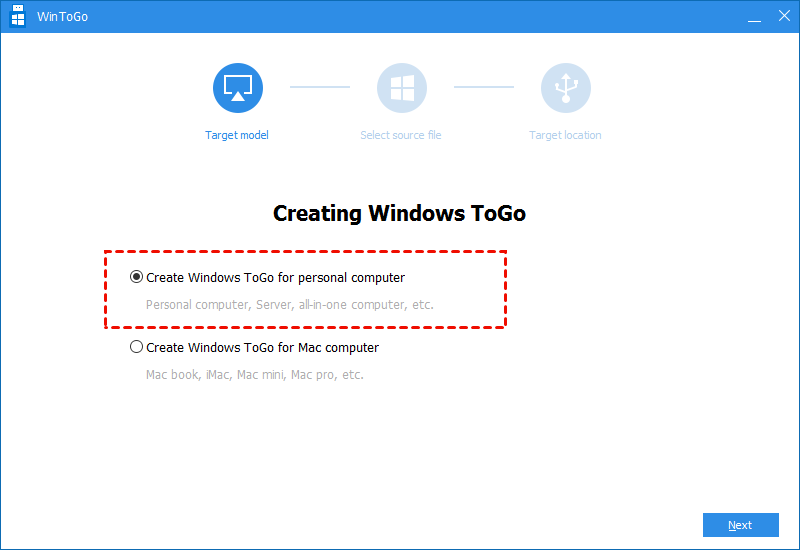
Step 3. Click “Create Windows To Go for personal computer” > "Next”. You can click the second option “Create Windows To Go for Mac computer” if you are a Mac user.
Step 4. Hit “Create Windows To Go with system disc/ISO”. The Windows 11 ISO file will be detected automatically. If not, please select the folder icon to manually click the target file with pressing “Next”.

- Note:
- If you need to create Windows To GO with the current system, please move on to the Tip part.
Step 5. Select the USB drive as the target and click “Proceed”.
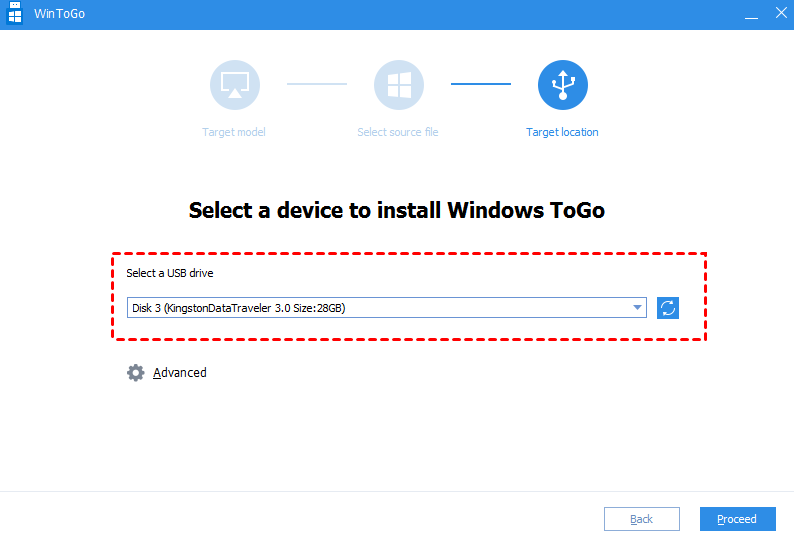
Step 6. There will be a notification that all data on the USB will be erased. Select “Yes” and unplug the US. Try to boot it on another computer.
▌Tips: Create Windows To Go with the current system
The feature of “Create Windows To Go for with current system” broads the channel to users whose devices cannot meet the Windows 11 upgrading system requirements. It makes it possible for them to experience the new operating OS even on an unqualified computer.
In addition, with this function, they can have a try with Windows 11 on the USB instead of doing a fresh installation on their devices. If they don’t like it, users can still keep using the original system.
Step 1 and Step 2 are the same as the above method. Open the software > “All tools” > “Windows To Go Creator” > “Create Windows To Go for personal computer” > “Next”.
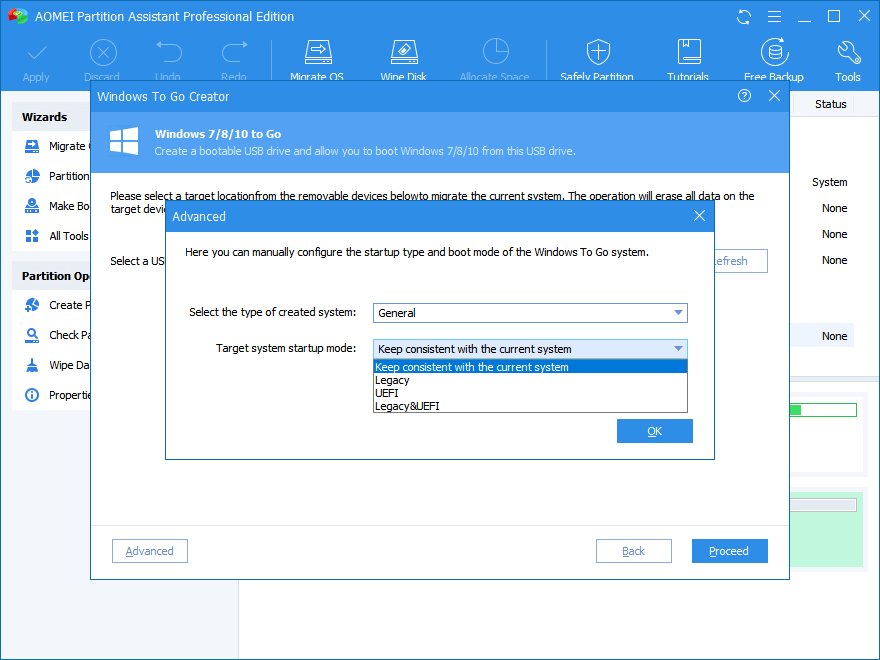
Step 3. Click the "Create Windows To Go with current system” option. You can see the current OS details. Then hit “Next”.
Step 4. Follow the instructions in the Advanced interface. Press the "Proceed” button to continue.
When all the processes are finished, please plug the USB into the target computer to install Windows 11.
How to boot from the bootable Windows 11 USB
Step 1. Insert the Windows 11 To Go USB drive into your computer. Boot the device and hit a specific key to enter BIOS to change the boot order.
- Note:
- The pressing key to enter BIOS/UEFI differs from computer brands. Please search for relevant information on the brands' official websites.
Step 2. Choose USB Device and press the "Enter” key to boot from the Windows 11 bootable USB.

To sum up
After reading this post, you can put Windows 11 ISO to USB and enjoy the benefits now. With AOMEI Partition Assistant Professional, you can quickly and easily create a portable bootable USB. This versatile software can also be used for migrating OS to SSD, converting GPT/MBR, cloning disk, and so on. Windows 2022/2019/2016/2012(R2)/2008(R2)/2003 users can turn to the Server Edition to effectively manage their devices.

