How Do I Enable BitLocker for VHD in Windows 11?
This article explains how to turn on BitLocker for VHD and VHDX files in Windows 11, including creating, mounting, and encrypting virtual drives for better data security.
By Irene / Updated on October 27, 2025
Can I enable BitLocker for VHD in Windows 11?
In Windows 11, BitLocker can be used to encrypt a VHD or VHDX file to protect data from unauthorized access. This built-in feature works not only with physical drives but also with virtual hard disks. Once a VHD or VHDX file is encrypted, it functions as a secure container that requires a BitLocker password to open when mounted. While the drive is unlocked, files can be viewed, edited, or moved as usual. After use, locking or unmounting the VHD keeps the data protected. The encrypted file remains secure even if it is copied to another Windows computer, as the password is still required to access it. Administrator privileges are needed to mount and encrypt a VHD or VHDX file using BitLocker.
How to enable BitLocker for VHD in Windows 11?
Enabling BitLocker for a VHD or VHDX in Windows 11 requires the virtual disk to be attached first, so Windows can recognize it as a real drive. Once mounted, the VHD behaves like a normal drive, allowing encryption tools to access its file system and data. While Windows includes BitLocker, third-party software like AOMEI Partition Assistant provides a more flexible option, especially for Home editions. Its “Turn on BitLocker” feature lets users easily encrypt virtual disks, physical drives, or external devices, while offering options to securely back up the encryption key for future access. Here are the specific steps:
The Best Windows Disk Partition Manager and PC Optimizer
Stage 1. Attach VHD
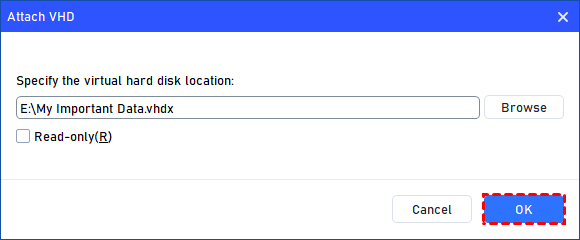
Step 1. Select the "Attach VHD" option after clicking the"Virtual Disk" tab.

Step 2. Click "Browse" to locate the location where the .vhd or .vhdx file is saved. Select the .vhd or .vhdx file you want to attach and click "Open" to attach it.

Step 3. Once the virtual file is selected, you can click "OK" to start attaching the VHD.
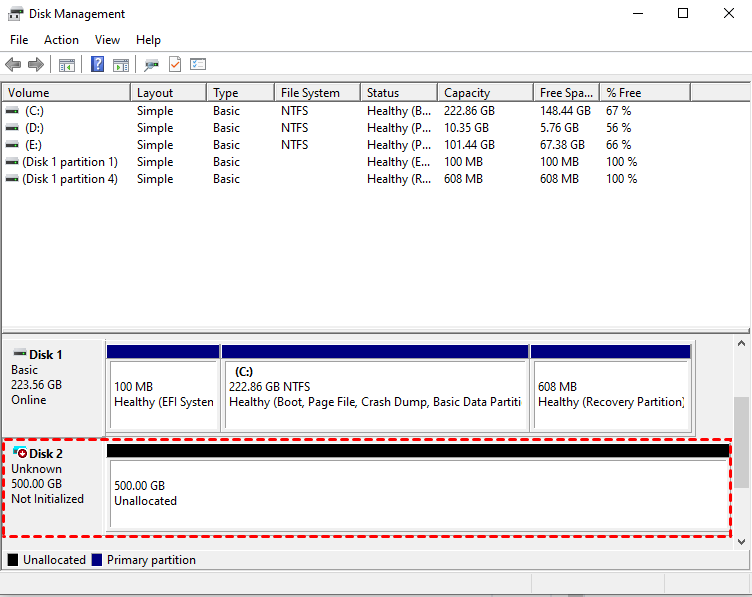
Step 4. Once the process is finished, you will see that the VHD is attached successfully.
Stage 2. Enable BitLocker for VHD
After attaching a VHD in Windows 11, enabling BitLocker is a straightforward process. Once the virtual hard disk is mounted, it functions as a regular drive, allowing you to apply BitLocker encryption to secure its contents. This method is particularly useful for creating portable, encrypted storage containers. While Windows 11 Pro users can utilize the built-in BitLocker feature, those using Windows 11 Home can achieve the same result with third-party tools like AOMEI Partition Assistant. This software provides a user-friendly interface to enable BitLocker encryption on virtual drives, even on Windows Home editions.
The Best Windows Disk Partition Manager and PC Optimizer
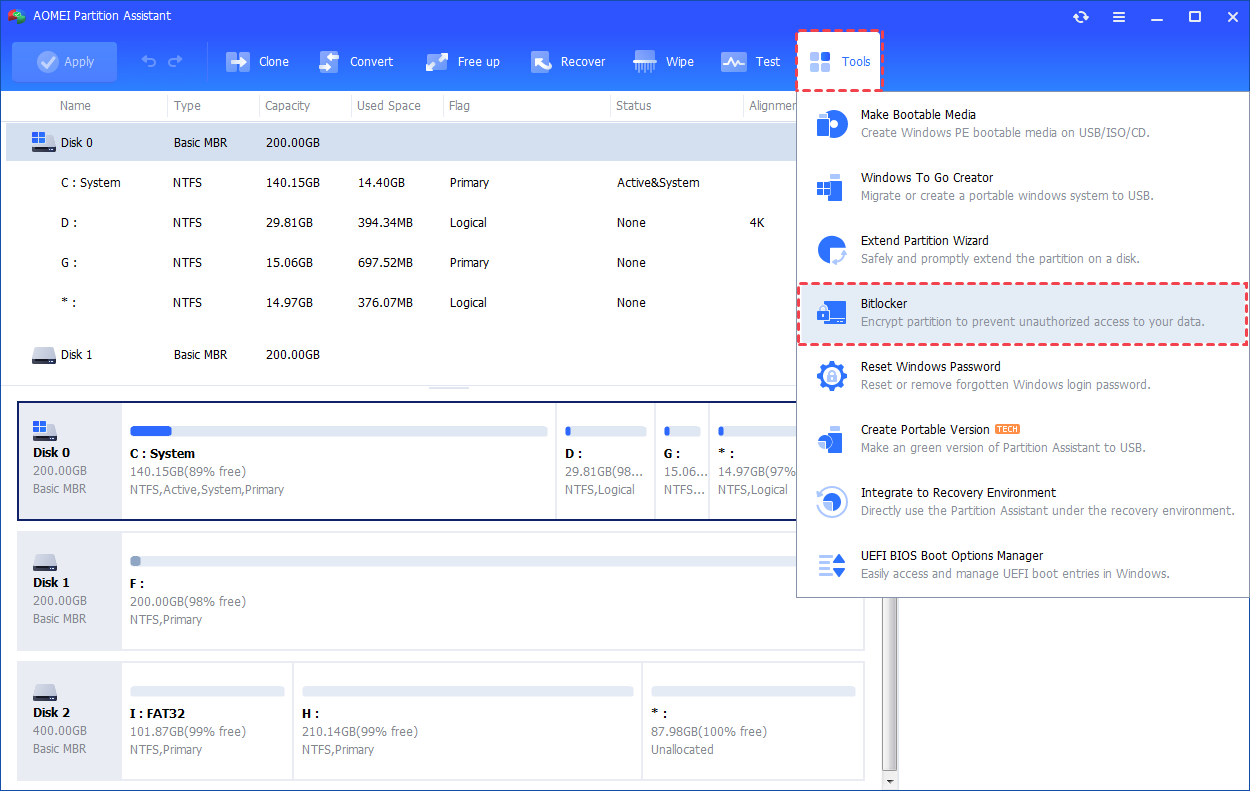
Step 1. Install and launch AOMEI Partition Assistant. Click the "Tools" main tab and select "BitLocker". Or, right-click the partition you want to encrypt and click the "BitLocker"->"Turn on BitLocker" option in the Context Menu.
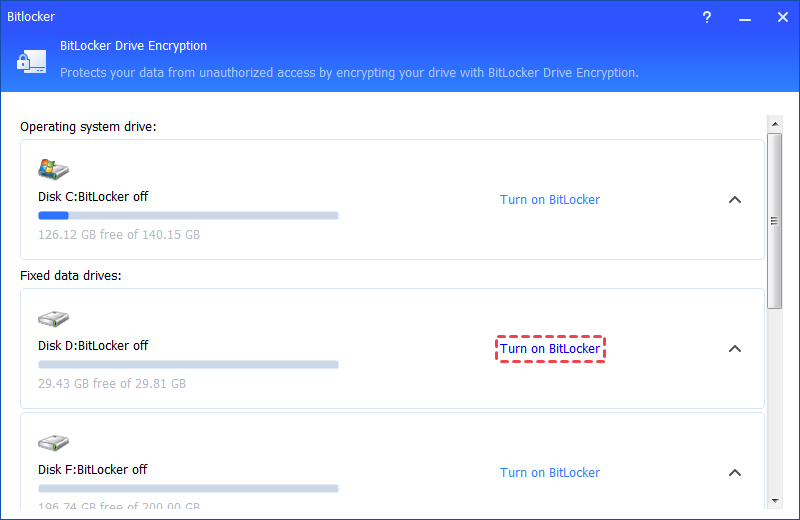
Step 2. All drives on the system will be displayed, including operating system drives, fixed data drives, and removable drives. Please find the partition you would like to encrypt BitLocker and click the "Turn on BitLocker" option. (Here, we take the drive D: as an example.)
Step 3. Please set and confirm a password to encrypt the drive and click "Next".

1. Encrypt used disk space only (faster and best for new PCs and Drives): If you are setting up BitLocker on a new PC or a new drive, you only need to encrypt the part of the drive that is currently being used. And, BitLocker will automatically encrypt the newly-added data.
2. Disk encryption compatible mode (suitable for removable data drives): Windows 10 (version 1511) introduces a new disk encryption mode (XTS-AES). This mode provides heavy integrity support but is not compatible with earlier versions of Windows.
If this is a removable drive to be used on an earlier version of Windows, you should select Compatible mode. If this is a fixed drive, or if this drive will only be used on devices running at least Windows 10 (version 1511) or later, select the new encryption mode.
Step 4. Select a way to back up your recovery key. You can either select "Save to a file" or "Print the recovery key".
If you select "Save to a file", please choose a location on your PC to save the recovery key.
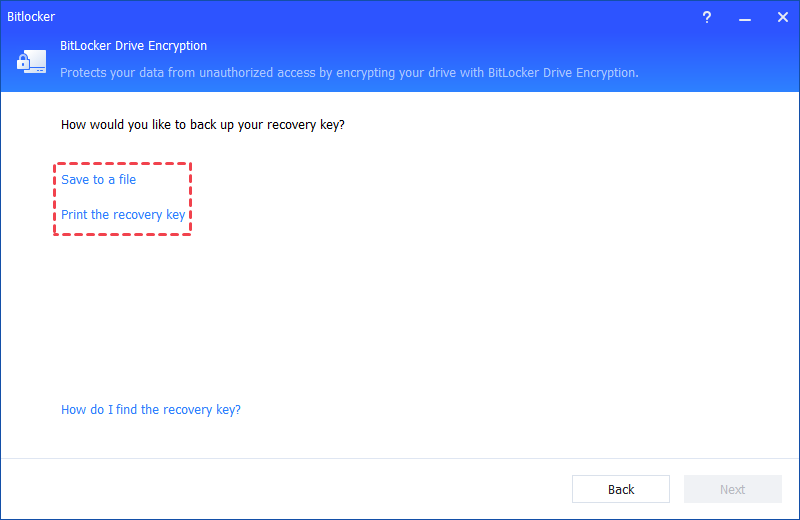
It will generate a TXT file with the name: Bitlocker Recovery Key + 45-bit Key. The recovery file will be saved in the TXT file. You can open the file to view the recovery key. Please keep the file. Then, please click the "Next" button to start the encryption process.
If you would like to encrypt your current system drive, you will be asked to restart your PC into Windows PE mode to execute the operation because it is the current system drive. The program will first create Windows PE and then boot the PC into Windows PE mode to encrypt the drive. After the encryption is finished, you can restart your PC.
Step 5. The encryption process might take time to encrypt the drive. Before the process is finished, please do not terminate the program, remove the drive, or turn off the power.
Once the encryption process is finished, please click "Completed". Finally, the drive is BitLocker encrypted.
Conclusion
Enabling BitLocker for a VHD or VHDX in Windows 11 is an effective way to protect your virtual hard disk from unauthorized access. Whether you use the built-in BitLocker feature or AOMEI Partition Assistant, the process is simple and reliable. Once encrypted, your VHD becomes a secure container that keeps data safe even when transferred to another device. For Windows Home users, AOMEI Partition Assistant offers the easiest solution to enable BitLocker for VHD and VHDX files and manage virtual drive encryption effortlessly.
The Best Windows Disk Partition Manager and PC Optimizer

